 Tweet
Tweet
Hi All,
So as requested I have prepared this DIY on how to change the HID bulbs on an R36. I assume that this will be mostly the same for any B6 (can anyone confirm?).
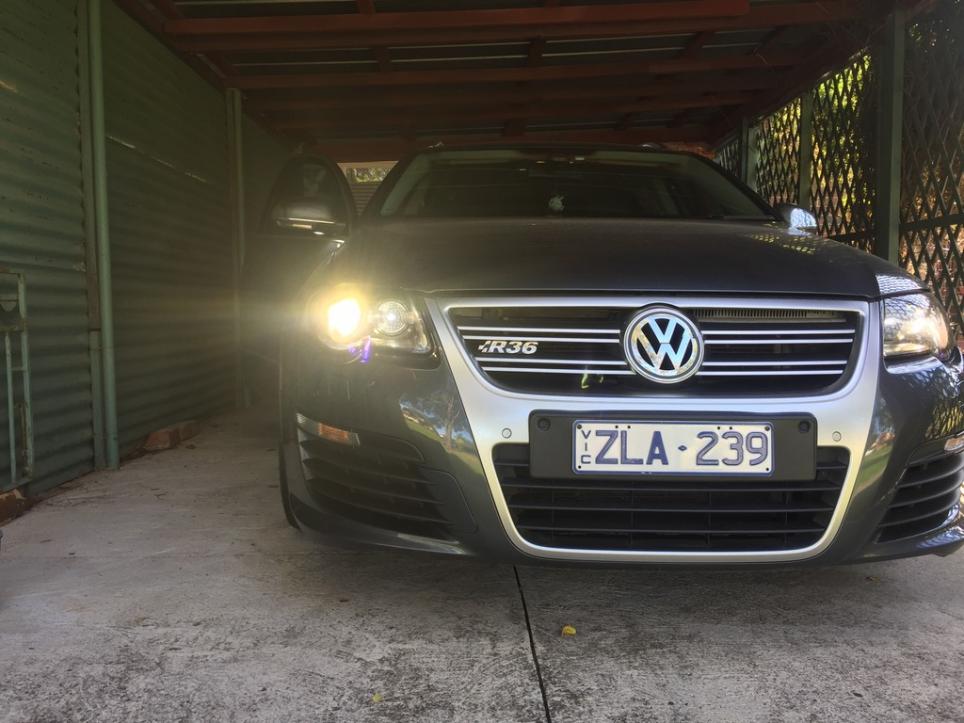
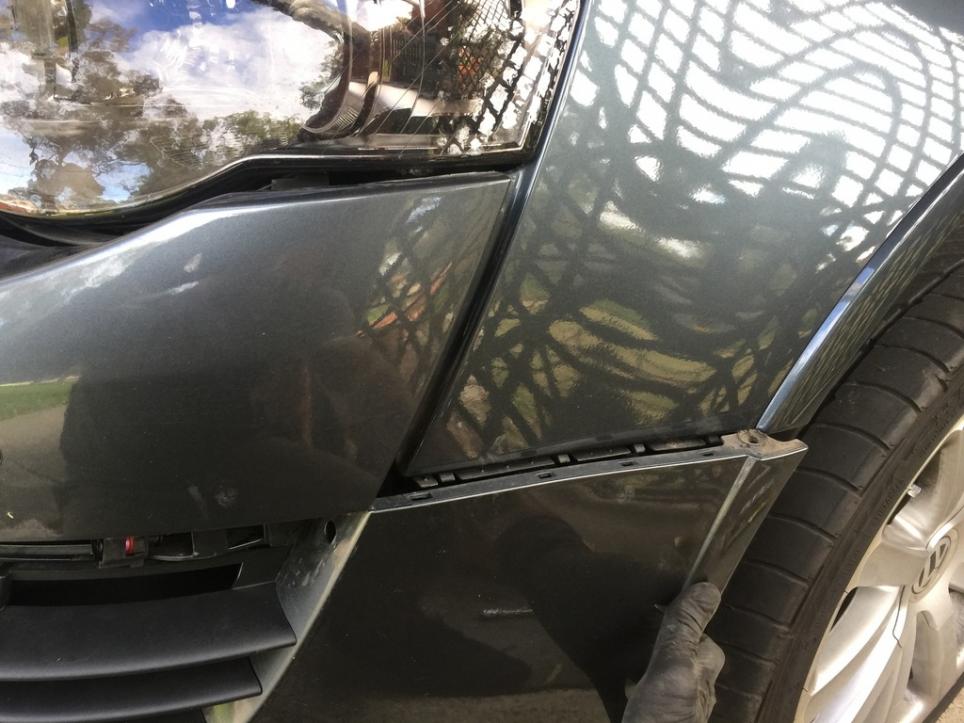
Before pic
I would have got this out sooner but something went wrong with my 1st attempt. I got logged out during posting and then it all was lost
For this attempt it took me about 4 hours...ish to take everything apart change the bulbs and put it all back again. If I was to do it again I recon I could get that down to 2.5 hours. Either way you will need to block out pretty much a whole morning/afternoon.
Required tools
T25 torx
T30 torx
Philips screwdriver
Small flat screwdriver
11mm socket (I think - can't remember the exact size now)
Ratchet spanner
Long extension
Rubber gloves (for when you are handling the bulbs)
Trim removal tools
Jack
Some music (I had some Jedi Mind Tricks going for this job)
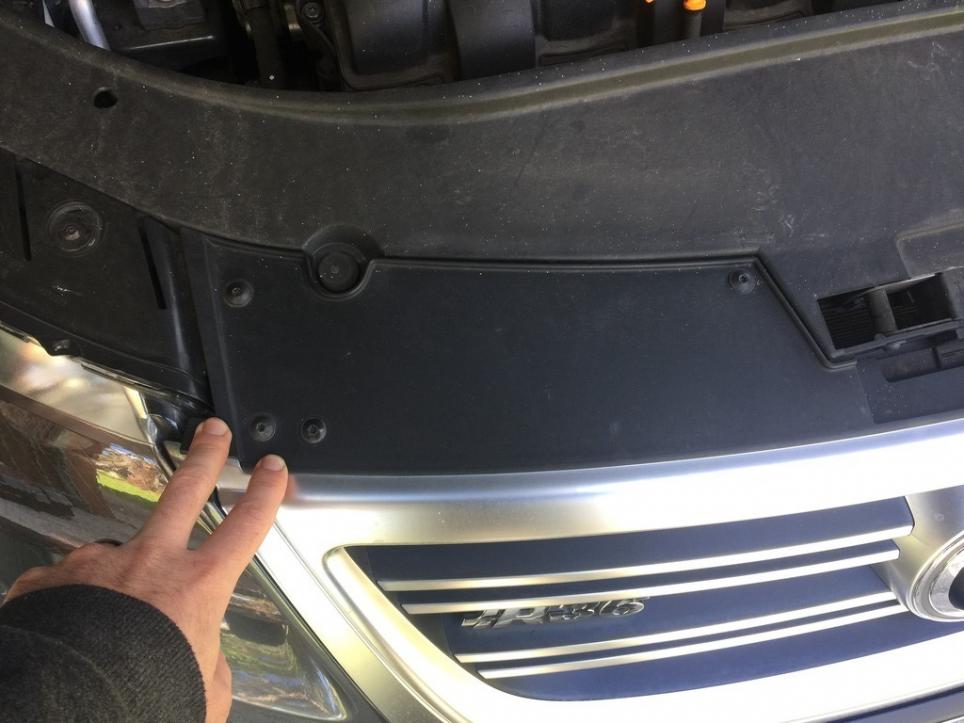
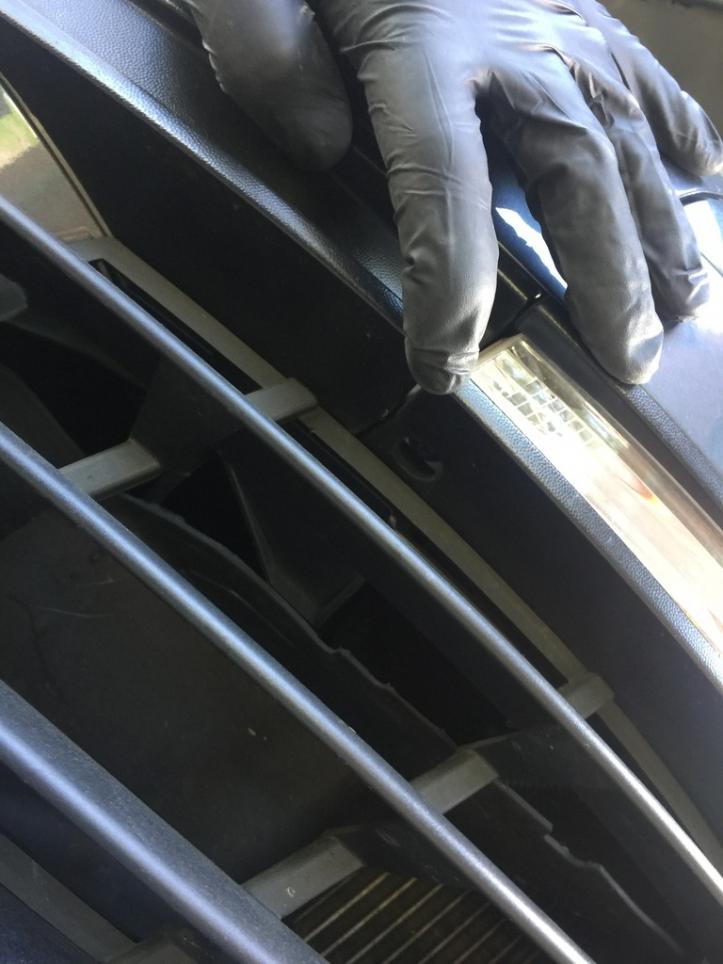
Step 1 - Remove grill
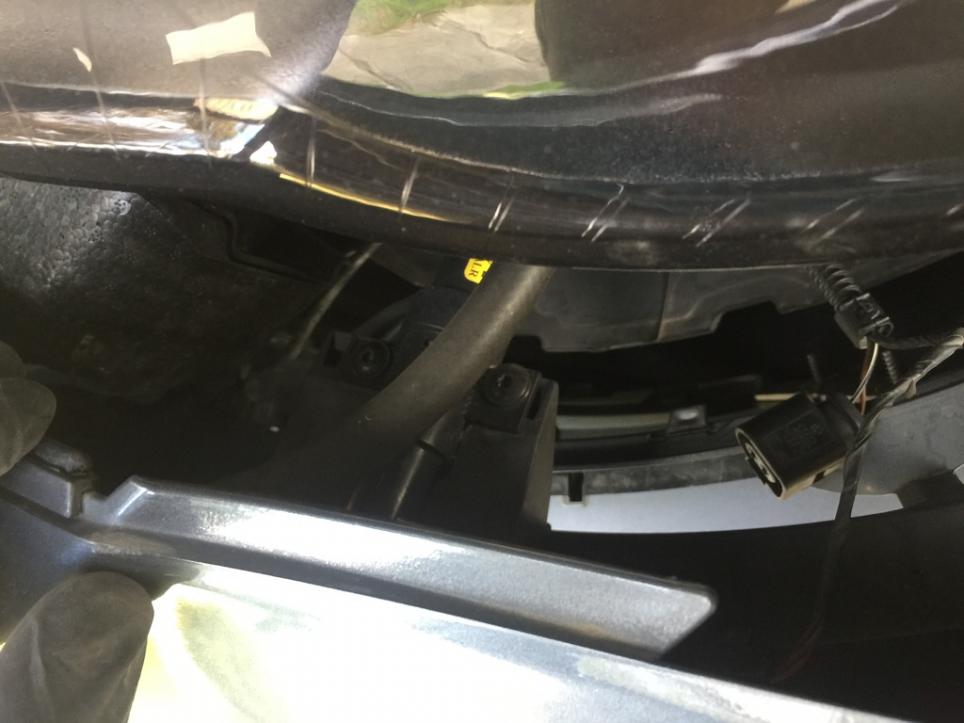
Pop the hood and there will be 8 x T25's along the top to remove. There are also 2 in the front of the grill below the number plate. Once these are undone start pulling the grill away. Before you pull it all the way you will have to reach in behind the grill and unclip the 2 parking sensors. Once those are out you can continue pulling the grill all the way off. You may need to use trim removal tools to help unclip the grill especially along the bottom.

Step 2 - Remove indicators
This is a very easy one. There is 1 philips screw holding the light in place. You can get at it from below. Once this is undone pull the light forward. To unplug the light use a small flat screwdriver to pull the clip backwards and give them a little jiggle. Try not to break these clips because it will make this really hard next time.
Step 3 - Remove brake duct and wheel well liner
To remove the brake duct there are 4 (I think) x T25's under the car and 3 in the wheel well. I found it was easiest if one side of the car is lifted. Gives more clearance in both wheel wells. If you are ever going to get completely under a car please please use stands. You don't want the car falling on you. I never put more than my arm under the car for this job and left all the wheels on.
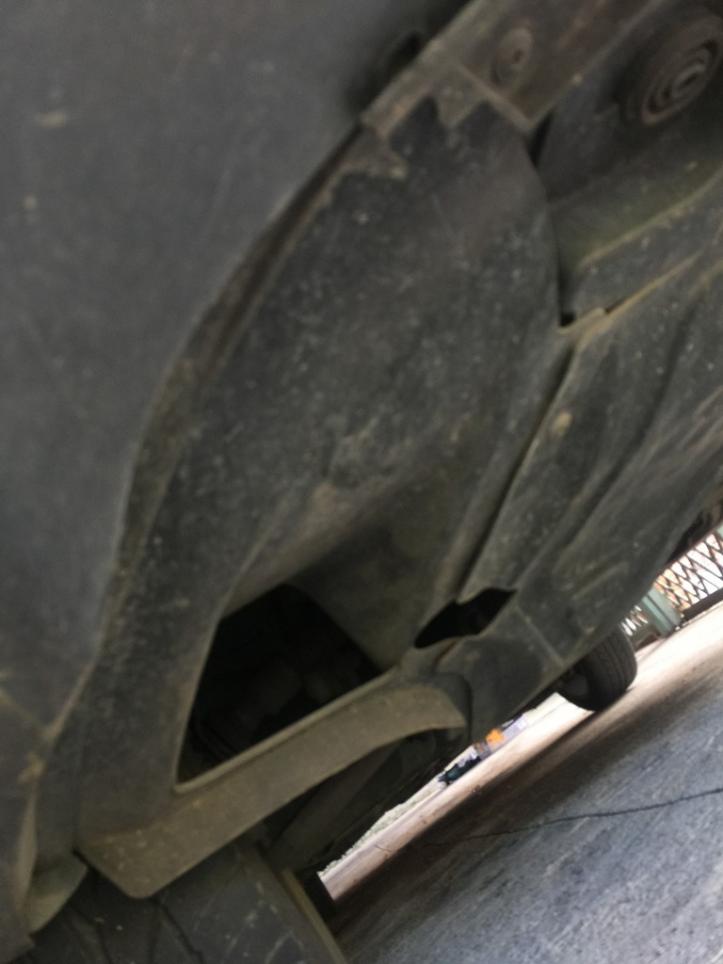
Don't completely remove the wheel well liner. It can be a real bitch to put back in. Just undo the front few T25's so that you can pull the liner back and get your hand in behind the front bumper.
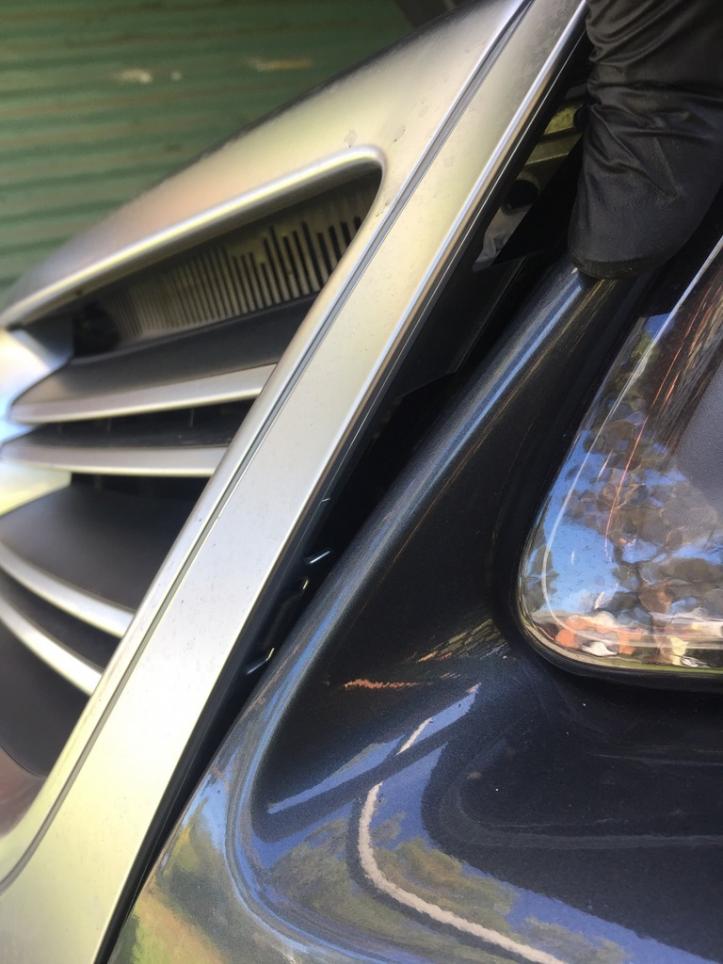
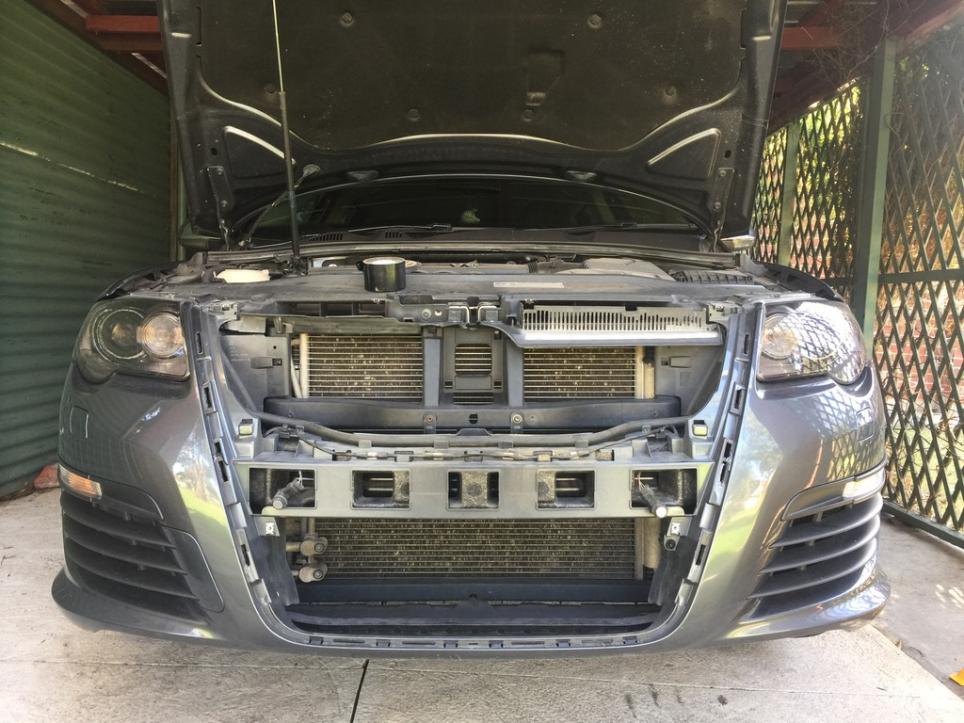
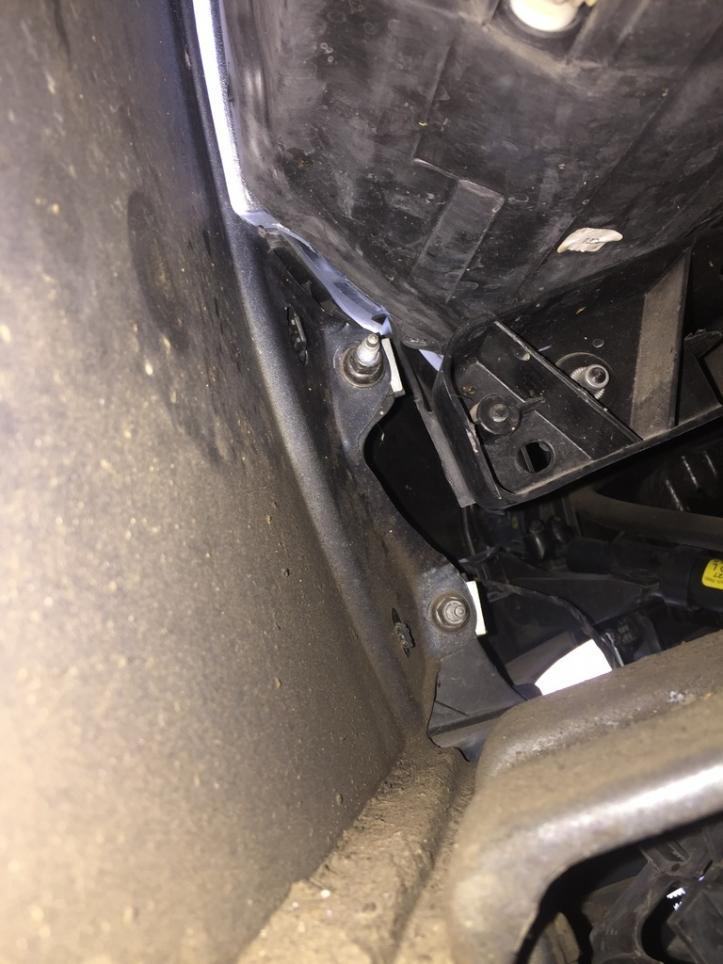
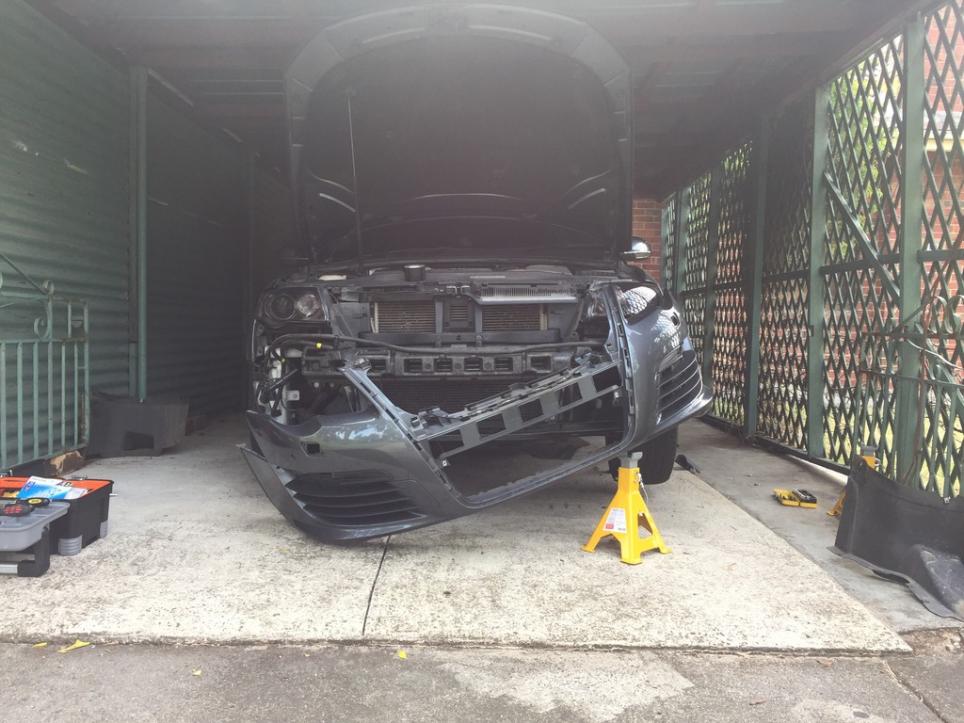
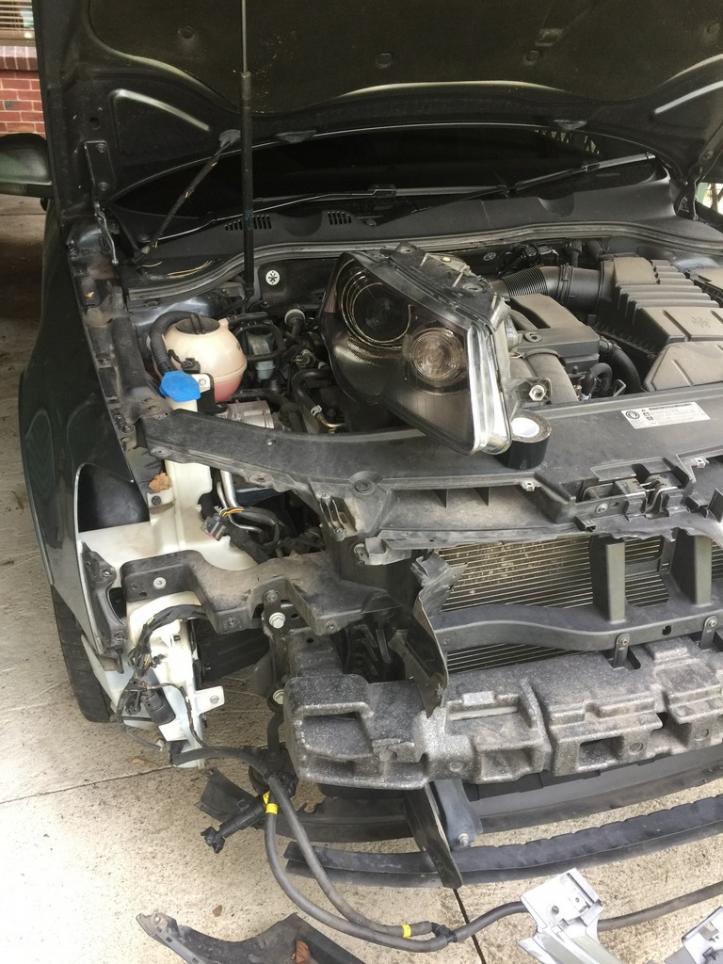
Step 4 - Remove bumper
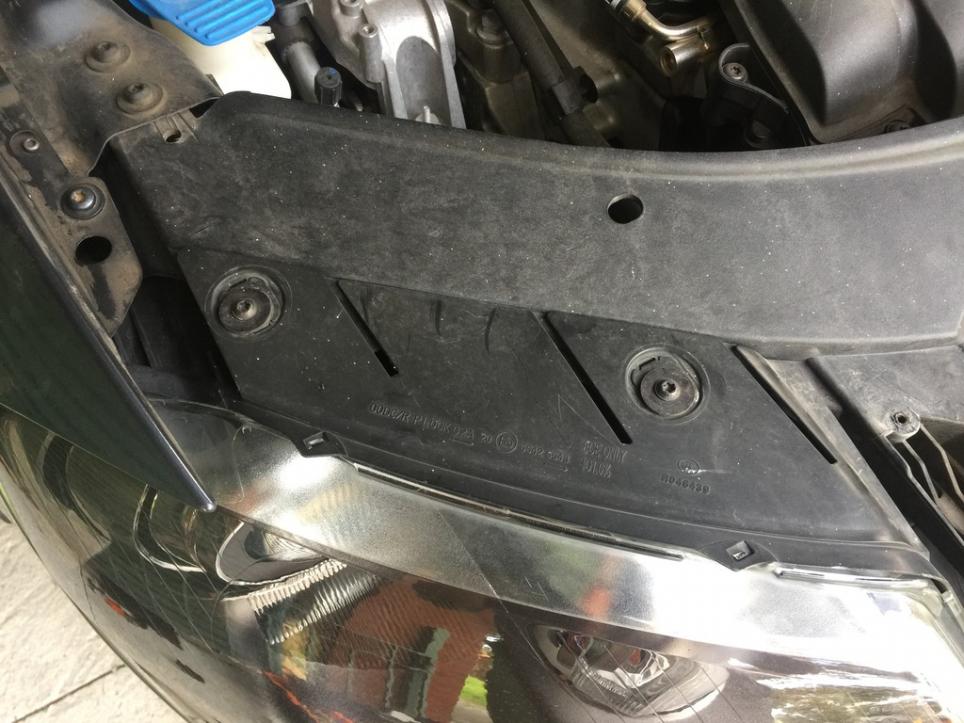
1st off there is 1 x T25 that holds the bumper up onto the quarter panel.

Next there are 2 nuts just below the head light inside the bumper. I think they are 11mm but cant remember exactly. you will need to use a ratchet and long extension to reach them (I used a 3/8" drive set).
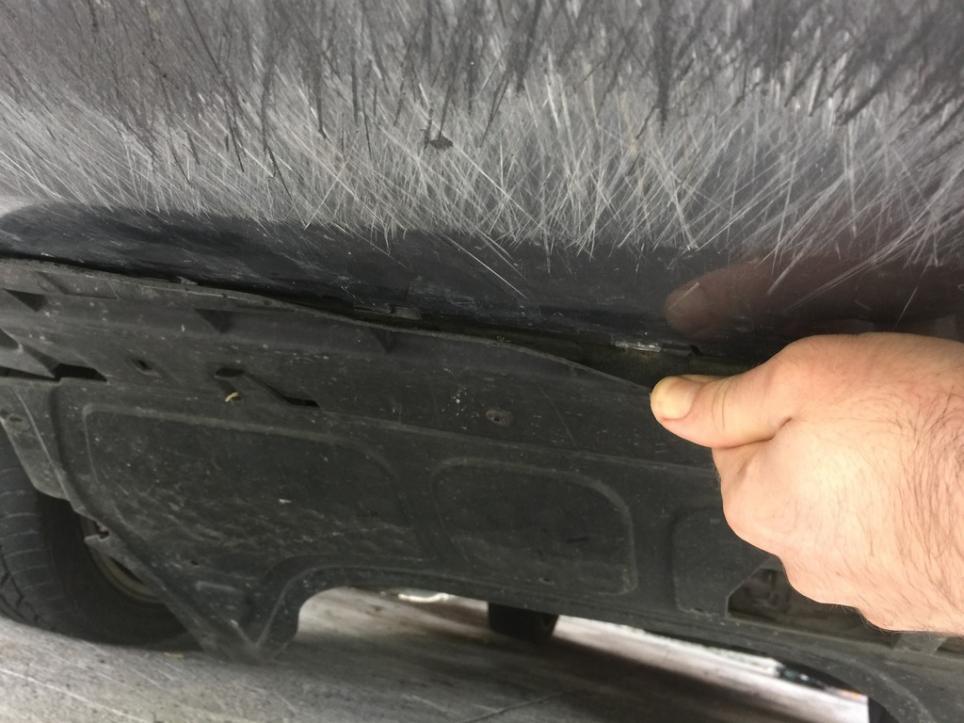
Then there are a bunch of clips along the length of the underside of the bumper. Just use your finger to unclip them. You should also unclip the washer hose from the front part of the bumper. (please ignore the all the scratches under the bumper - those were from the previous owners )
Now you can start pulling the bumper off. Grab the back edge in front of the wheel and pull forward, but stop before pulling it all the way as you still need to undo the headlight washers and the rest of the parking sensors.
Once there is enough space to get your hands in behind the bumper there are 2 x T25's for each head light washer. Undo these and push the washer forward through the bumper. Then remove the front panel and pull them back through the bumper. The parking sensors are easy enough.
You can now pull the bumper the rest of the way. Well almost because the wiring loom for all the parking sensors is still attached. I left this attached as it was too much effort to take it all off (read I couldn't work out how the hell to undo the clips with out cutting the zip ties).
Step 5 - remove head lights
1st off there is the bumper clip that is fitted below the light. These have 3 x T25's each.
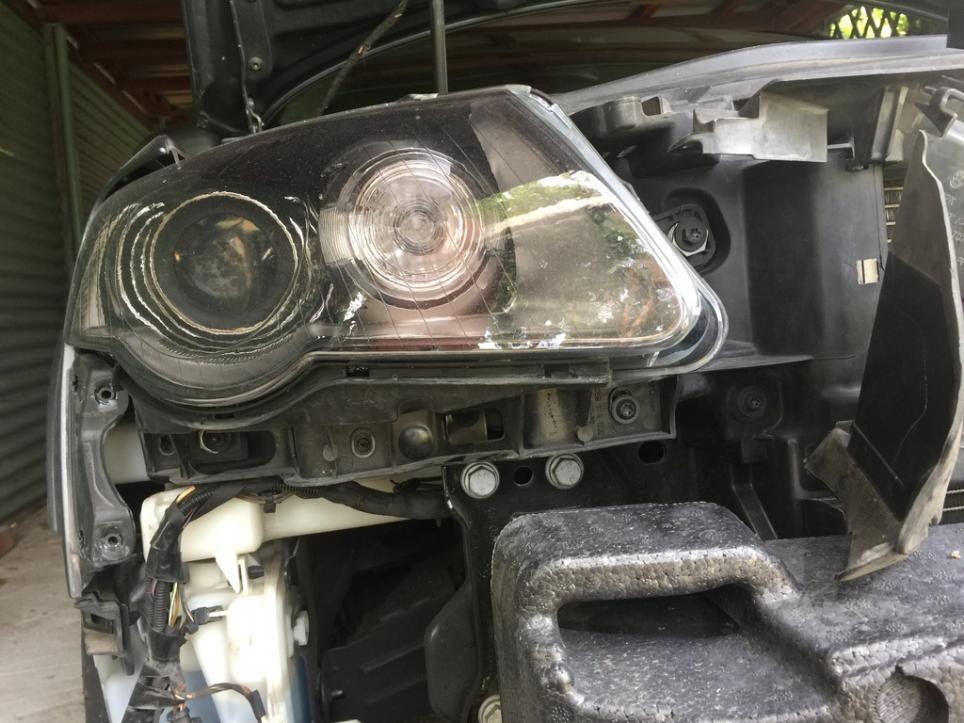
Next you should unplug the lights. Same as the connector for the indicators only bigger. Once again try not to break the clip.
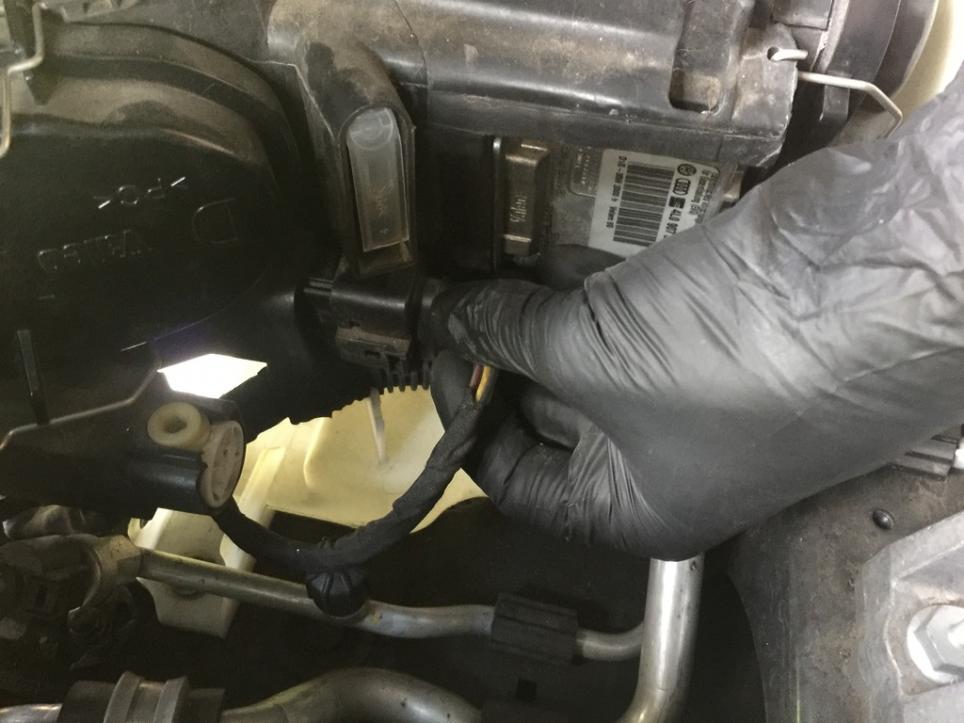
After that is off the light is held on with 2 x T25's on top and 2 x T30's on the front. Take note of the orientation of these now before removing them to make it easier to realign the headlight when you put everything back together. There may be some witness marks to help with this.
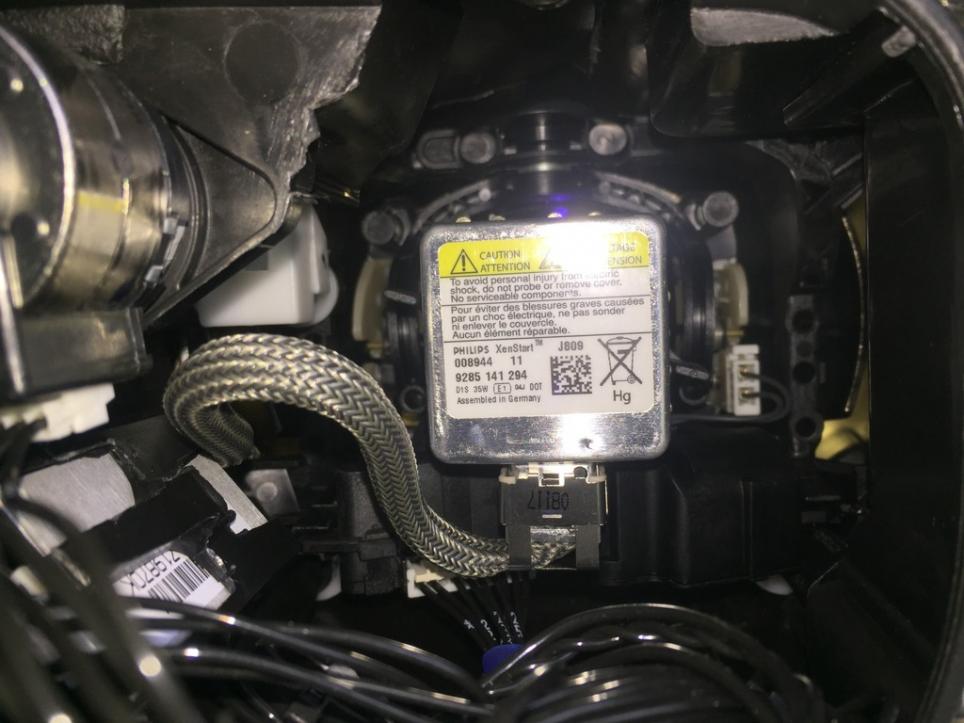
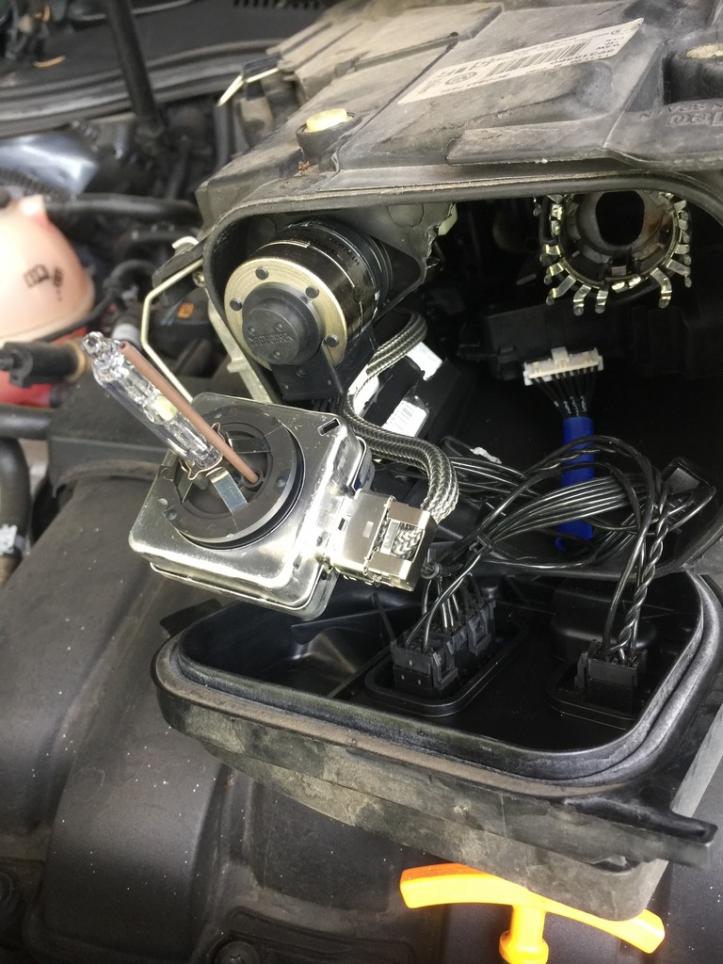
Step 6 - Changing the bulbs
Once you have pulled the head light out you can remove the back cover.
Now is when you want to put some fresh gloves on. If you get any dirt or oil from your skin or dirty gloves onto the bulb it can cause it to overheat and reduce the lifespan. The last thing you want is to have to redo all of this again in 12 months. There are 2 tabs at about "10 and 4". Turn these anticlockwise to unlock the bulb. Now grab on the square at the back of the bulb and gently pull it out. Then unplug the cable by giving it a jiggle. Now you can swap in the new bulb and reassemble the head light.
Step 7 - Test and reassemble
Once the headlight is back together plug it back in and test the lights to make sure everything works. If all is good then you can proceed to putting everything back together in reverse order to the steps above.
So as requested I have prepared this DIY on how to change the HID bulbs on an R36. I assume that this will be mostly the same for any B6 (can anyone confirm?).
Before pic

I would have got this out sooner but something went wrong with my 1st attempt. I got logged out during posting and then it all was lost
For this attempt it took me about 4 hours...ish to take everything apart change the bulbs and put it all back again. If I was to do it again I recon I could get that down to 2.5 hours. Either way you will need to block out pretty much a whole morning/afternoon.
Required tools
T25 torx
T30 torx
Philips screwdriver
Small flat screwdriver
11mm socket (I think - can't remember the exact size now)
Ratchet spanner
Long extension
Rubber gloves (for when you are handling the bulbs)
Trim removal tools
Jack
Some music (I had some Jedi Mind Tricks going for this job)
Step 1 - Remove grill
Pop the hood and there will be 8 x T25's along the top to remove. There are also 2 in the front of the grill below the number plate. Once these are undone start pulling the grill away. Before you pull it all the way you will have to reach in behind the grill and unclip the 2 parking sensors. Once those are out you can continue pulling the grill all the way off. You may need to use trim removal tools to help unclip the grill especially along the bottom.


Step 2 - Remove indicators
This is a very easy one. There is 1 philips screw holding the light in place. You can get at it from below. Once this is undone pull the light forward. To unplug the light use a small flat screwdriver to pull the clip backwards and give them a little jiggle. Try not to break these clips because it will make this really hard next time.

Step 3 - Remove brake duct and wheel well liner
To remove the brake duct there are 4 (I think) x T25's under the car and 3 in the wheel well. I found it was easiest if one side of the car is lifted. Gives more clearance in both wheel wells. If you are ever going to get completely under a car please please use stands. You don't want the car falling on you. I never put more than my arm under the car for this job and left all the wheels on.

Don't completely remove the wheel well liner. It can be a real bitch to put back in. Just undo the front few T25's so that you can pull the liner back and get your hand in behind the front bumper.
Step 4 - Remove bumper
1st off there is 1 x T25 that holds the bumper up onto the quarter panel.

Next there are 2 nuts just below the head light inside the bumper. I think they are 11mm but cant remember exactly. you will need to use a ratchet and long extension to reach them (I used a 3/8" drive set).

Then there are a bunch of clips along the length of the underside of the bumper. Just use your finger to unclip them. You should also unclip the washer hose from the front part of the bumper. (please ignore the all the scratches under the bumper - those were from the previous owners )

Now you can start pulling the bumper off. Grab the back edge in front of the wheel and pull forward, but stop before pulling it all the way as you still need to undo the headlight washers and the rest of the parking sensors.

Once there is enough space to get your hands in behind the bumper there are 2 x T25's for each head light washer. Undo these and push the washer forward through the bumper. Then remove the front panel and pull them back through the bumper. The parking sensors are easy enough.

You can now pull the bumper the rest of the way. Well almost because the wiring loom for all the parking sensors is still attached. I left this attached as it was too much effort to take it all off (read I couldn't work out how the hell to undo the clips with out cutting the zip ties).

Step 5 - remove head lights
1st off there is the bumper clip that is fitted below the light. These have 3 x T25's each.

Next you should unplug the lights. Same as the connector for the indicators only bigger. Once again try not to break the clip.

After that is off the light is held on with 2 x T25's on top and 2 x T30's on the front. Take note of the orientation of these now before removing them to make it easier to realign the headlight when you put everything back together. There may be some witness marks to help with this.

Step 6 - Changing the bulbs
Once you have pulled the head light out you can remove the back cover.

Now is when you want to put some fresh gloves on. If you get any dirt or oil from your skin or dirty gloves onto the bulb it can cause it to overheat and reduce the lifespan. The last thing you want is to have to redo all of this again in 12 months. There are 2 tabs at about "10 and 4". Turn these anticlockwise to unlock the bulb. Now grab on the square at the back of the bulb and gently pull it out. Then unplug the cable by giving it a jiggle. Now you can swap in the new bulb and reassemble the head light.


Step 7 - Test and reassemble
Once the headlight is back together plug it back in and test the lights to make sure everything works. If all is good then you can proceed to putting everything back together in reverse order to the steps above.

Comment