Above Forum Ad

Collapse

Announcement

Collapse
No announcement yet.

Bagged Bunny

Collapse
X
 
  • Filter
  • Time
  • Show
Clear All
new posts

  • So i finally got back into the golf, a buddy of mine was selling some tools and i picked up a great strong welder for practically quarter price! Now i really have no reason to *itch and moan about having a crappy welder - work has to be done! I made a frame with trolley wheels to be able to move the golf around, didnt take a pic unfortunately. Practised my welding, and the frame came up great!

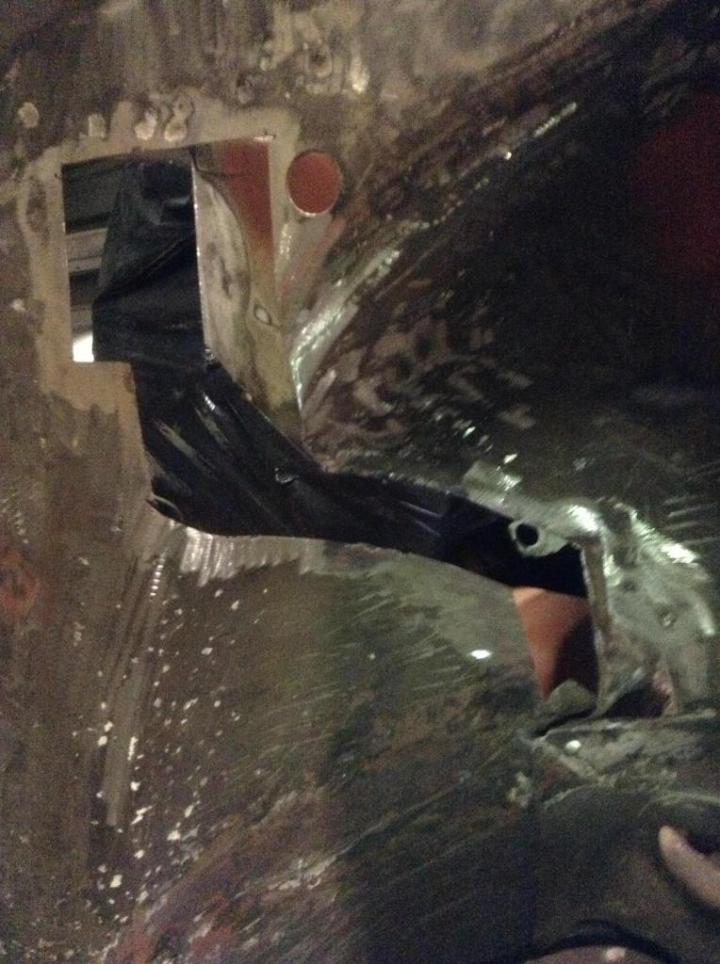
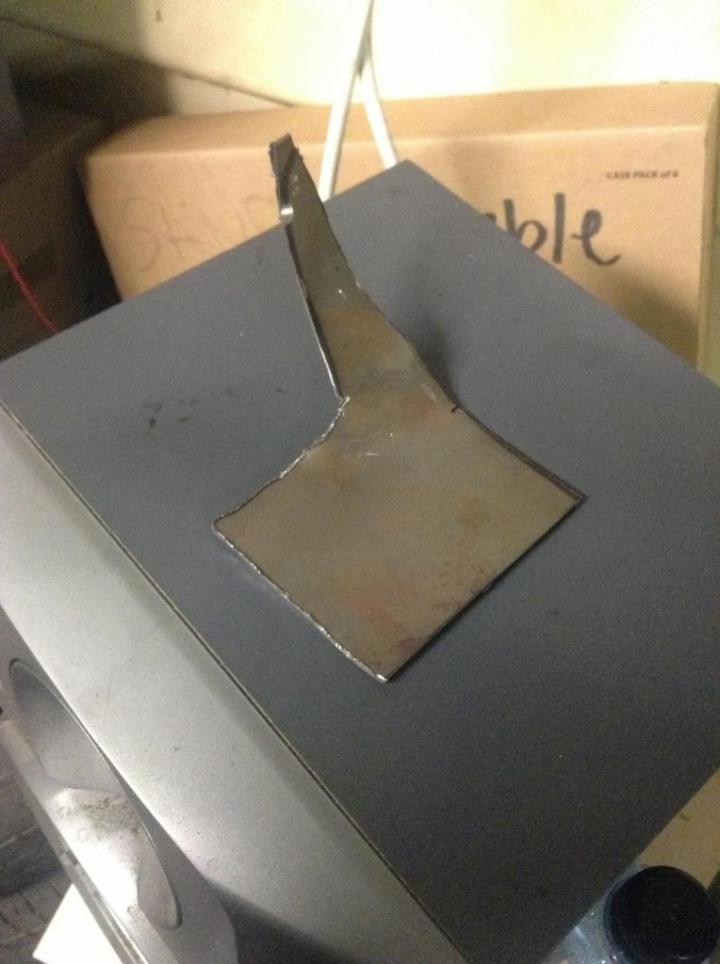
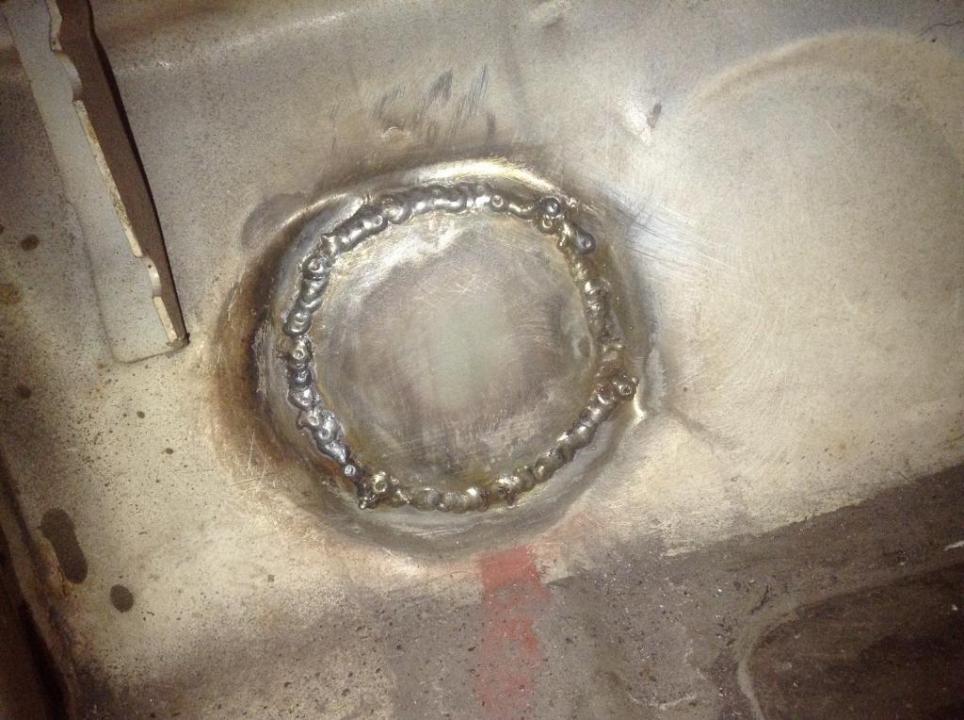
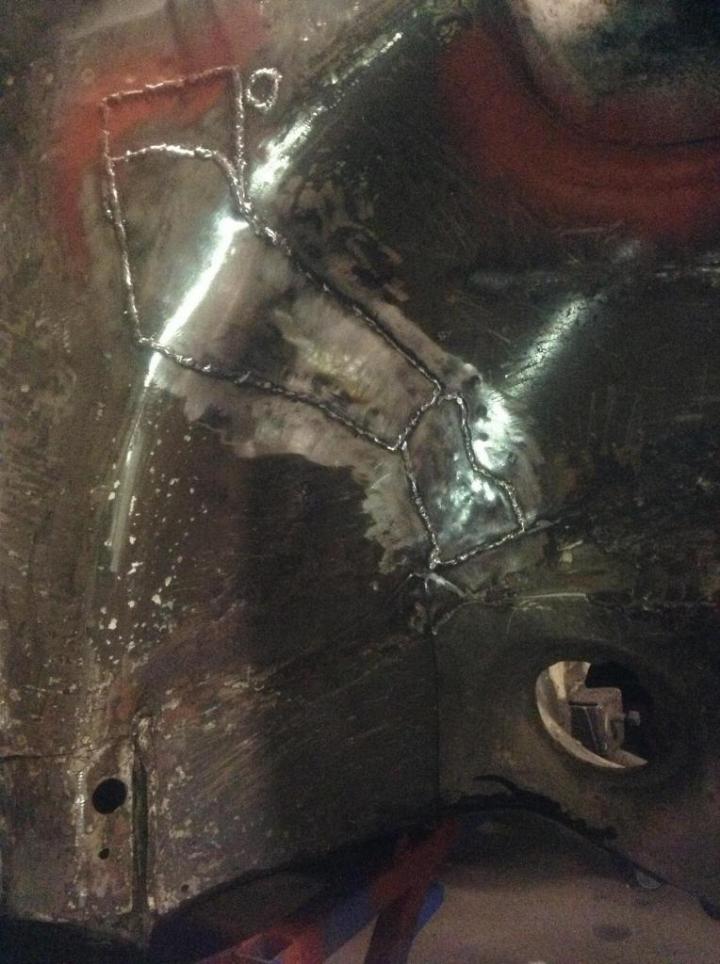
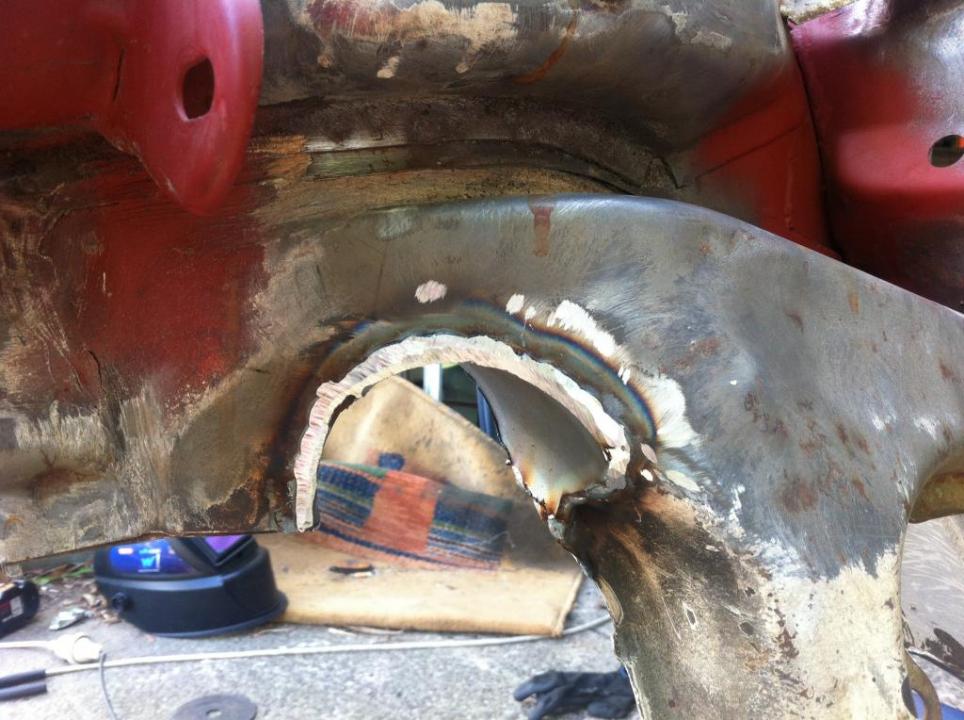
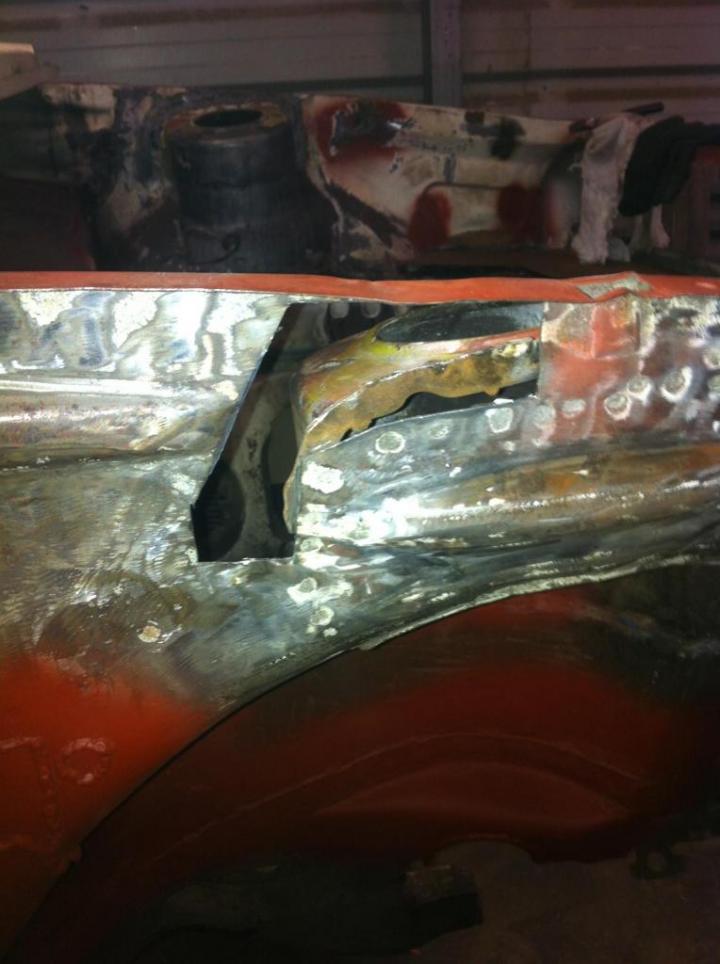
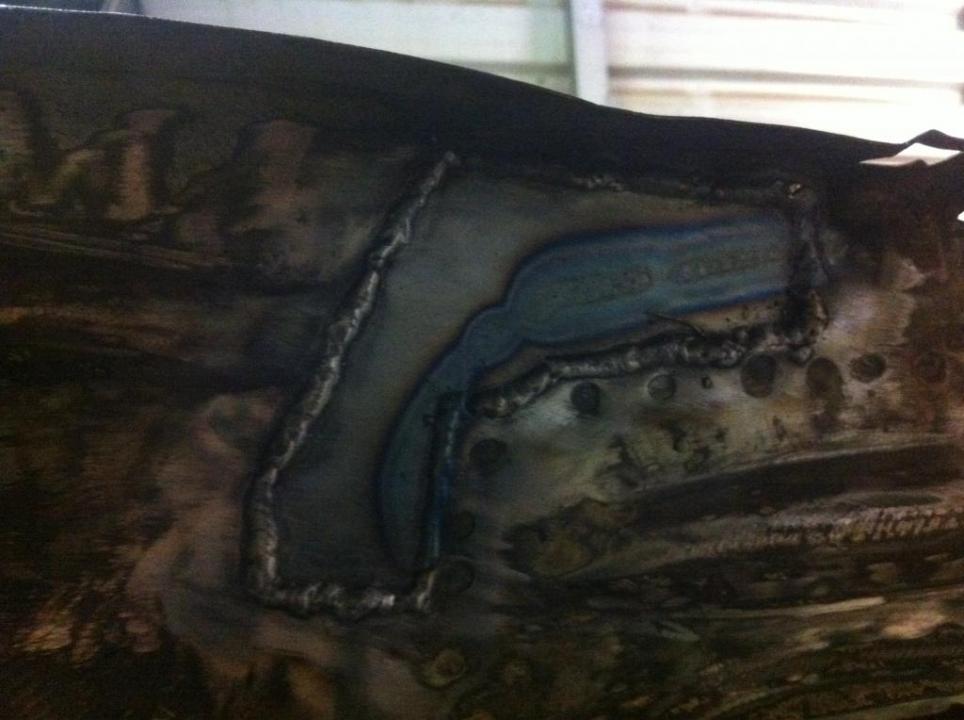
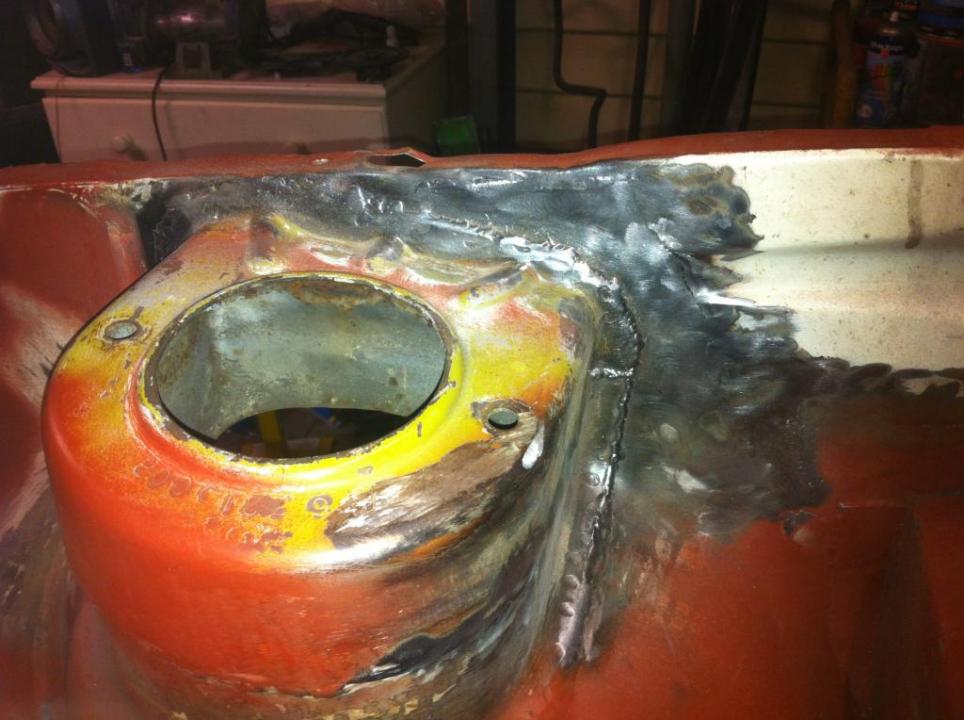
    Been looking into ways to shave the crumple zone mo halk thing, and just decided to go for it! At first, it would completely burn away, so i lowered the amps and just did plenty of blobs... after it packed up some metal, i hit it with high amp and it worked a treat! Sorry for the crappy photos.


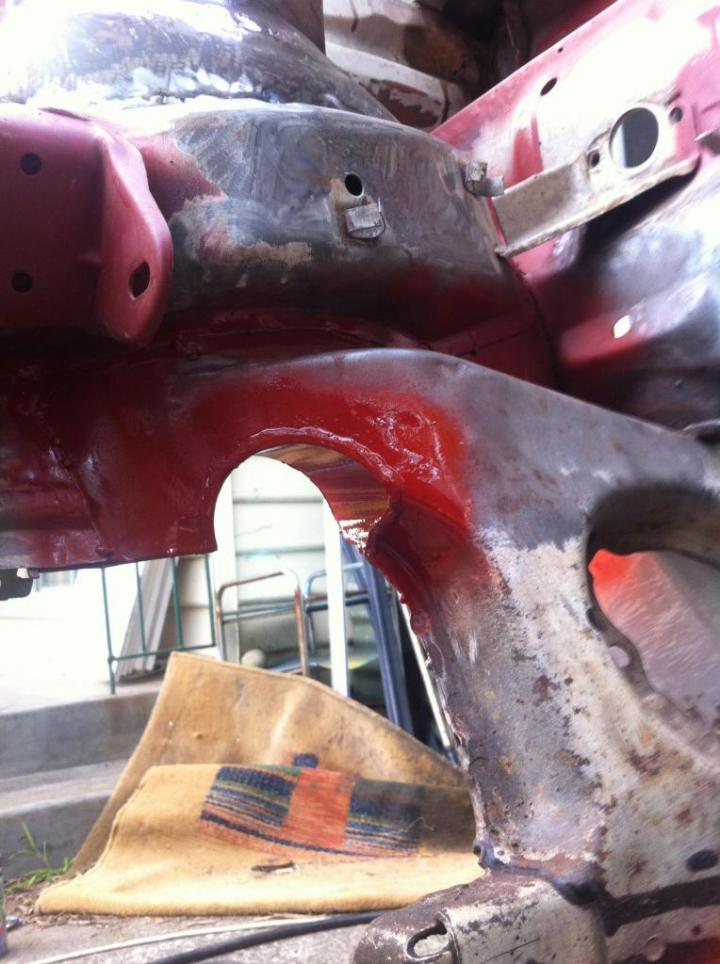
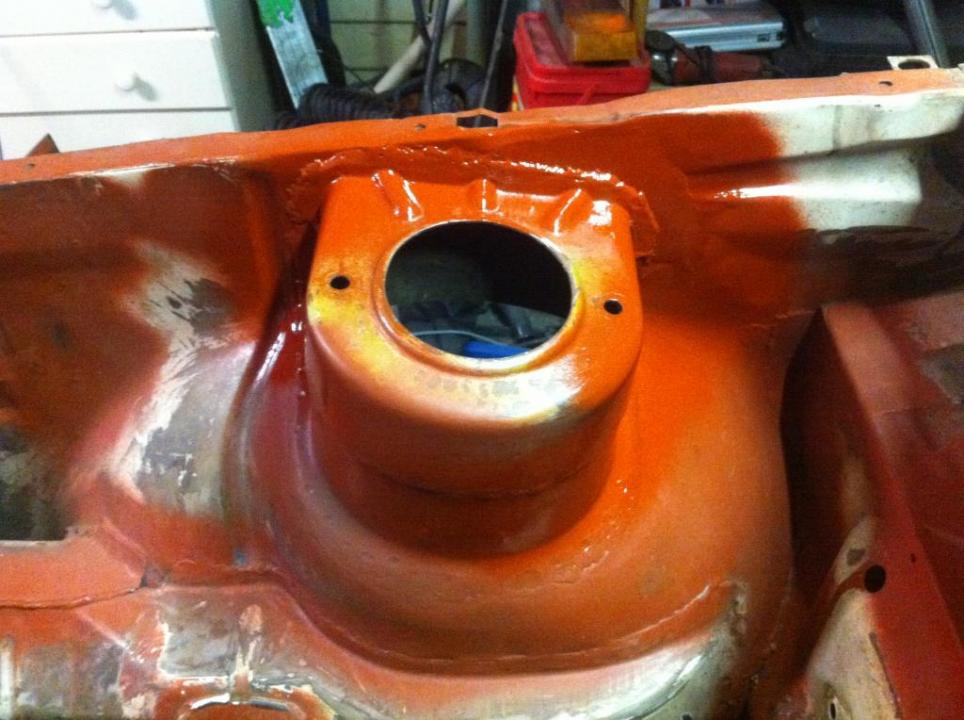
    Finished product on one side


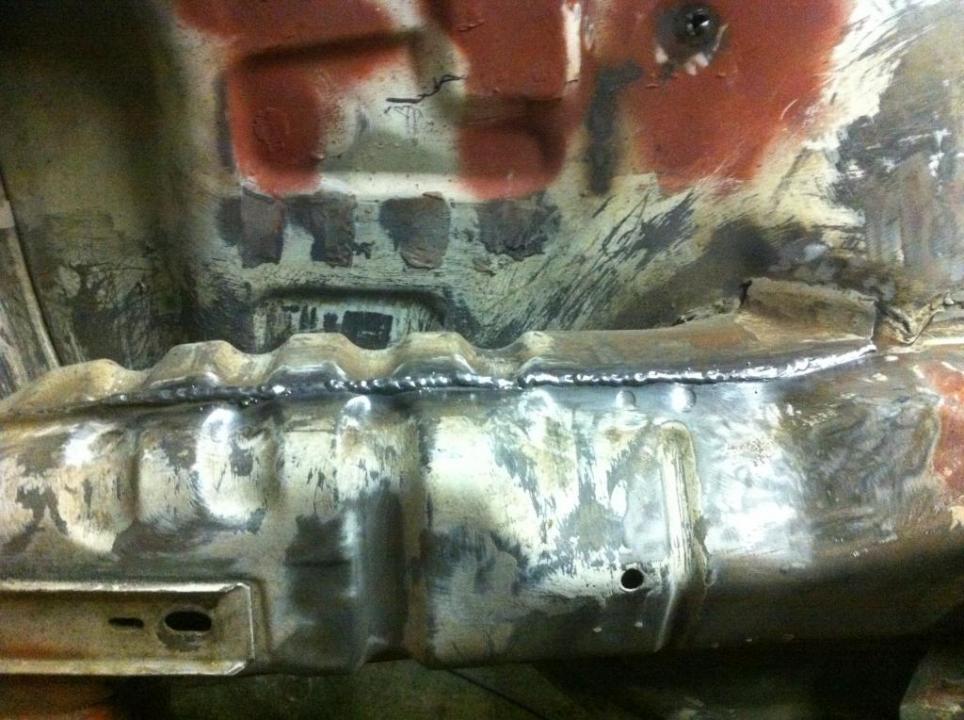
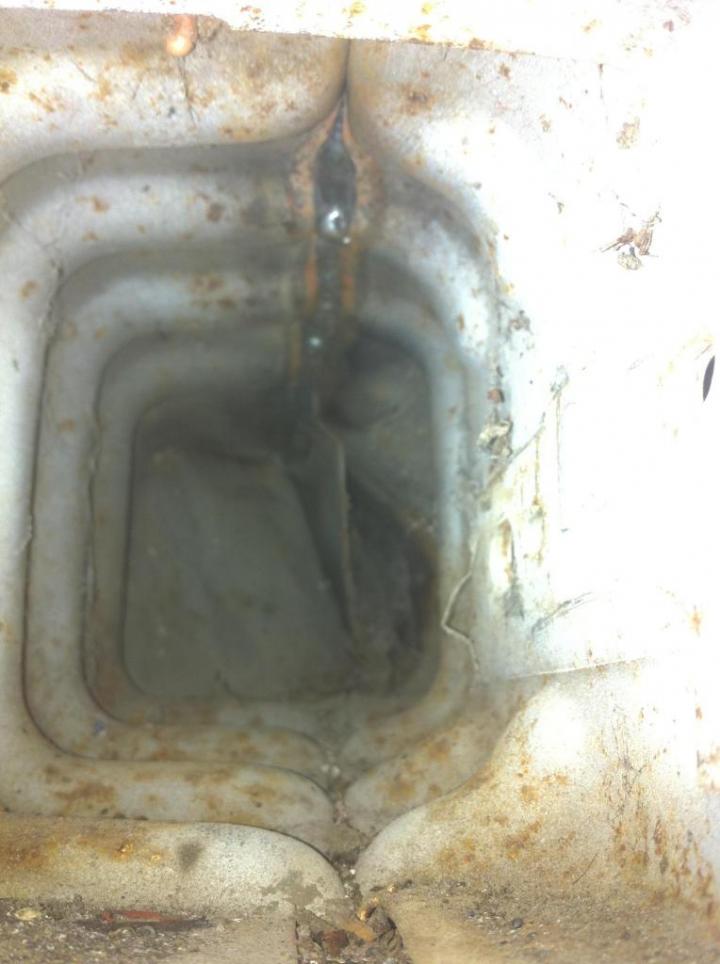
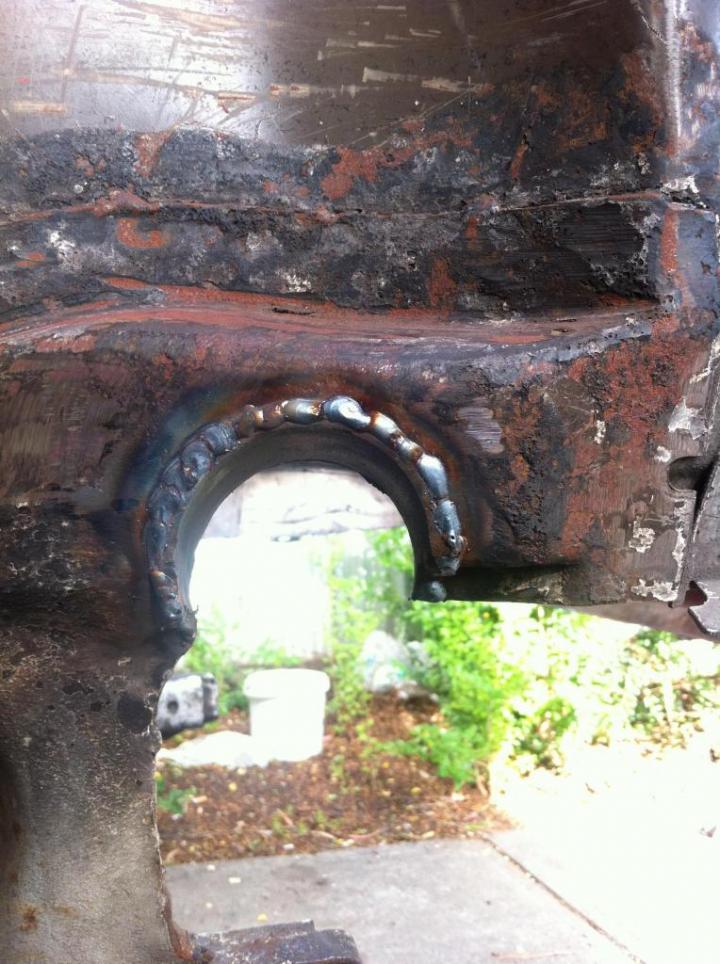
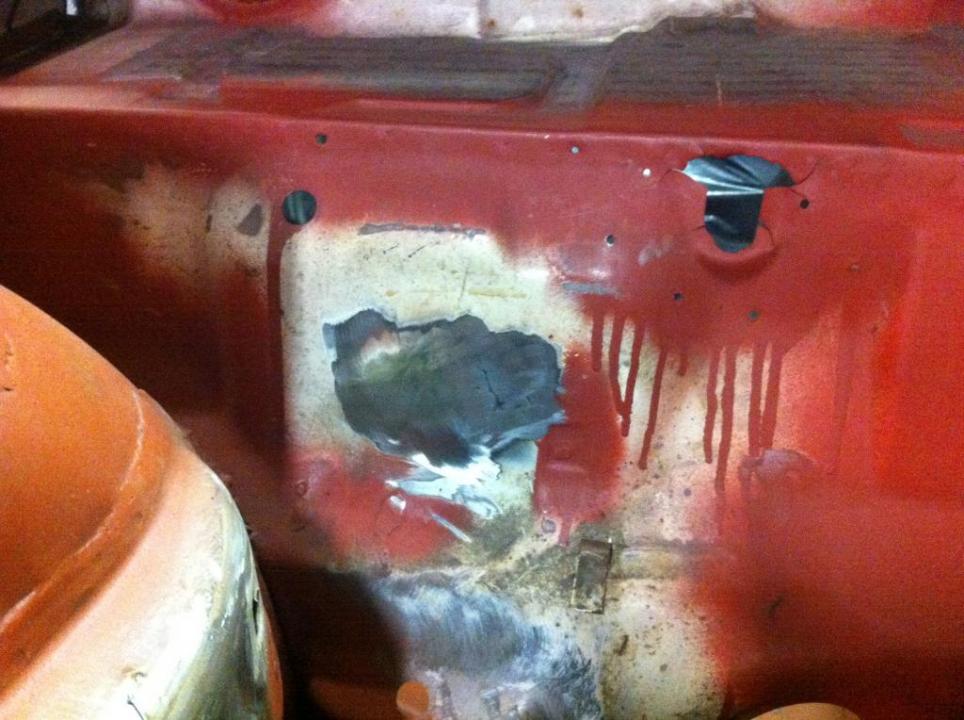
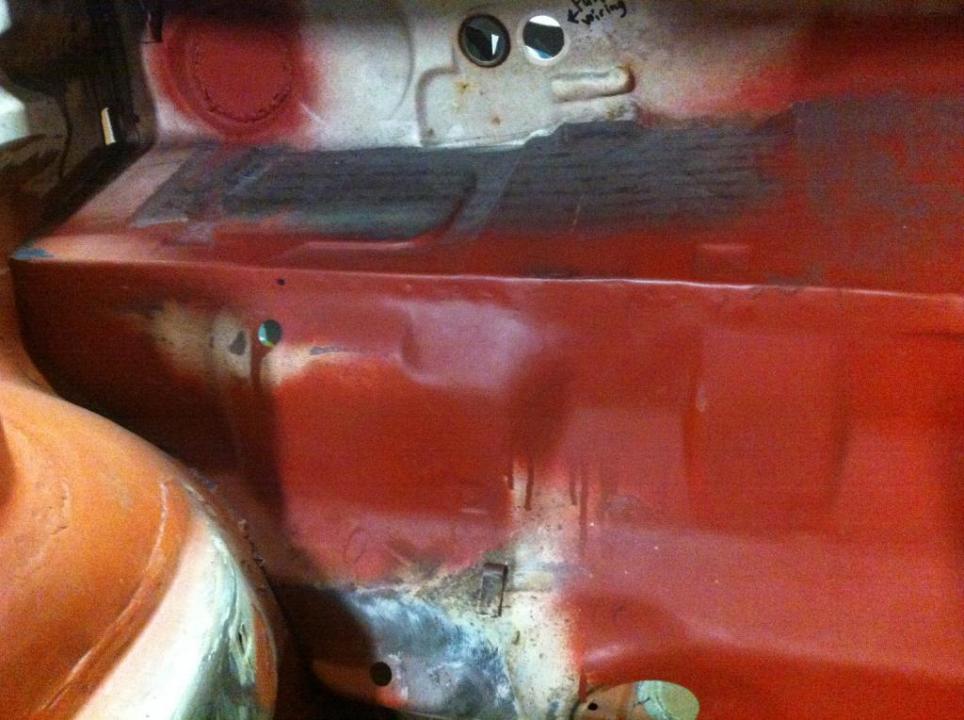
    Also it seems to have gone through the underside nice a chunky, which i'm quite satisfied with in terms of strength. Anyone have any idea how i can clear and spray inside the crumple zone to prevent rust? Cant seem to get anything in there ..


    The civic has been put on the back burner, and i'm back better than ever Hoping to get some good work done this summer! Stay tuned
    Attached Files
    Last edited by GeorgeMK1; 16-10-2013, 08:51 PM.
    - Orange Golf mk1 LS, 1.8 5speed, 32/36 - sold
    - Golf mk1 Swallowtail rebuild, completely stripped
    - Brown U.S import 81 cabby
    - 88 Honda crx b18cr

    Comment


    • Nice!! Good to see your back on this again

      Try sticking a straw on the end of a rattle can, or a brush on the end of a stick..

      '76 Golf LS Swallowtail 4dr
      '76 Golf Swallowtail 2dr
      '89 Golf GTI 16V 2dr

      Comment


      • The mk1 has some rust issues in tricky places that I've always been to scared to do. I read build threads like Pete Jones' and he makes it look like child's play. Anyway with my new welder, and a big confidence boost - I thought I'd just go for it. I only had time to do one small section, bit will finish it the rest up after work. Really happy with the outcome, the welds penetrated well!


        Also welded up my vent hole properly, came up quite nice I think, just have to going it down.


        And I managed to upload a pic of my home made shopping trolley to carry around the golf, it makes life soooo easy!

        - Orange Golf mk1 LS, 1.8 5speed, 32/36 - sold
        - Golf mk1 Swallowtail rebuild, completely stripped
        - Brown U.S import 81 cabby
        - 88 Honda crx b18cr

        Comment


        • GO GEORGE!!

          Comment


          • Being nice weather an all, I've pulled the golf outside on the drive way. Working in daylight is surreal! Updates later, finished off the rusted section, and started on the C notch already. Pics later on
            - Orange Golf mk1 LS, 1.8 5speed, 32/36 - sold
            - Golf mk1 Swallowtail rebuild, completely stripped
            - Brown U.S import 81 cabby
            - 88 Honda crx b18cr

            Comment


            • Finished the rest on one side. Also pretty proud of the way the C notch came up, really clean and tidy. Will shave it down completely on the visible side at a later stage.

              Ive had the biggest issue so far that when i have the bay bare metal in the places i am working on, the other bits keep gathering surface rust in the mean time. Im a little worried that it may grip harder in the humid weather now and it will come back at a later stage. Do i have to keep putting a coat of paint everytime, or is there something i can do to wipe the surface rust away?


              - Orange Golf mk1 LS, 1.8 5speed, 32/36 - sold
              - Golf mk1 Swallowtail rebuild, completely stripped
              - Brown U.S import 81 cabby
              - 88 Honda crx b18cr

              Comment


              • nice work george!

                '76 Golf LS Swallowtail 4dr
                '76 Golf Swallowtail 2dr
                '89 Golf GTI 16V 2dr

                Comment


                • Get some Lanolin. It's the stuff that comes from sheep and works really well in keeping rust away.

                  A panelbeater down the coast had a beetle that he sandblasted several years ago. He didn't do anything except rub a coat of lanolin on it and several years later when he finally got round to painting it there was no rust!

                  It doesn't convert rust so you have to get rid of it first or you could try something like Kilrust which will react with the rust to give a hard surface.

                  Nice welding, wish I could do as good a job.
                  1978 MK1 2.0 16v http://www.vwwatercooled.com.au/foru...-46488-70.html
                  1991 MK2 GTI 2.0 8v, white (RIP) and it's red replacement http://www.vwwatercooled.com.au/foru...gti-42078.html
                  1997 MK3 CL http://www.vwwatercooled.com.au/foru...ml#post1292061
                  2001 & 2002 Bora 4motion. http://www.vwwatercooled.com.au/foru...st-123823.html

                  Comment


                  • Thanks for that mate, i'll look into it. The issue is that i work on one part of the bay today as i have the certain tools out, and the next day i do another side etc. and that leaves surface rust trails here and there. So for me to apply that coat and remove it each day is a bit too much. I tried rubbing vinegar on the surface rust and after a scrub it comes off, but still has a slight left.

                    So today i had a few hours after work, and thought i would finally try and finish off the driver side turret/strut tower. Where the rain tray was, there has been water gathering for years and slowly the rust has bit quite hard. So i just attacked it with the grinder and cut it out.


                    Heres the culprit, you can see the buildup of rust.


                    Mimicked the shape and welded in a new bit. Gave it a clean and ground it down, seams to have come up ok but un even at some points. Nothing filler cant fix. I've completed this side, having ground all the welds down, all i'll do when the time comes is apply the filler to smooth over everything. My biggest issue is having slight rust patches build up until it comes to paint, so i've hit it with a coat of primer hoping it will slow/stop it until it comes time to paint - in which case i will pretty much POR 15 the whole car.


                    - Orange Golf mk1 LS, 1.8 5speed, 32/36 - sold
                    - Golf mk1 Swallowtail rebuild, completely stripped
                    - Brown U.S import 81 cabby
                    - 88 Honda crx b18cr

                    Comment


                    • You don't have to rub the lanolin off until you've finished and are ready to paint, then it just washes off.

                      Epic job you are doing. Keep the pictures coming.

                      Cheers

                      Paul
                      1978 MK1 2.0 16v http://www.vwwatercooled.com.au/foru...-46488-70.html
                      1991 MK2 GTI 2.0 8v, white (RIP) and it's red replacement http://www.vwwatercooled.com.au/foru...gti-42078.html
                      1997 MK3 CL http://www.vwwatercooled.com.au/foru...ml#post1292061
                      2001 & 2002 Bora 4motion. http://www.vwwatercooled.com.au/foru...st-123823.html

                      Comment


                      • Lanolin, or Lanox, is just sheeps fat. It's good stuff to coat the inside of your panels with and your electrical connections too. Smells like **** though.

                        Doing some great work on this George, looks sweet.

                        Comment


                        • I have to have a look into it guys, any ideas where to actually get some lanolin?

                          Finished up some more in the garage, plugged up the brake booster hole, and plugged up the clutch cable hole too. Shaped it and it turned out pretty damn good, i surprise myself some times.

                          I have a lot more rust repair and plugging to do. Anyway this weekend is a public holiday in Vic, so i'll be doing a bit more work - so i thought i would treat the golfie with a pedal box Will be looking into some ways to hold it up firmly.


                          - Orange Golf mk1 LS, 1.8 5speed, 32/36 - sold
                          - Golf mk1 Swallowtail rebuild, completely stripped
                          - Brown U.S import 81 cabby
                          - 88 Honda crx b18cr

                          Comment


                          • Those wilwood pedals are so nice.

                            They sell lanox at Supercheap pal! EDIT: At supercheap it's Lanotech

                            Comment


                            • Hey guys, just a question for those who have ever gone a custom brake setup. How do I know what size m/c's ill need? I'd like to get them so I can make sure it all fits under the dash before I make the brackets, but unsure on how to work out what kind of m/c I'd need front and back
                              - Orange Golf mk1 LS, 1.8 5speed, 32/36 - sold
                              - Golf mk1 Swallowtail rebuild, completely stripped
                              - Brown U.S import 81 cabby
                              - 88 Honda crx b18cr

                              Comment


                              • Just fitting the same pedals to my MK1 rocco.I'm using 3/4 master cylinders but am using 4 pot boxster fronts and G4 rears.There is not much room and you will have to clearance the steering shaft mount and modify the m/c's to fit and mount the resovoirs remotely.
                                Widebody Cayman S Turbo, 83 ur Quattro
                                2000 996 C4 cab,12 Scirocco R OEM+ STG2+
                                72 914 (3.2S boxster pwr), 92 G60 Corrado
                                76 Scirocco(TFSI and DSG) 2018 Tiguan,Eureka,81 924.

                                Comment

                                Working...
                                X