Above Forum Ad

Collapse

Announcement

Collapse
No announcement yet.

Harold - the T25 van (1.8T content)

Collapse
X
 
  • Filter
  • Time
  • Show
Clear All
new posts

  • #91
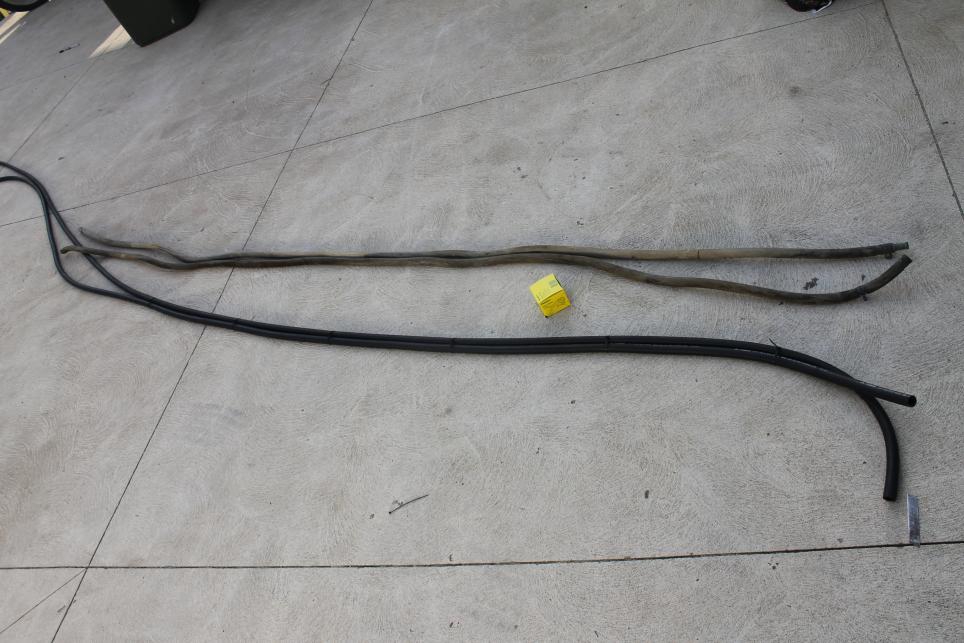
    Managed to finish most of the exhaust yesterday, well as much as I could without the actual muffler.
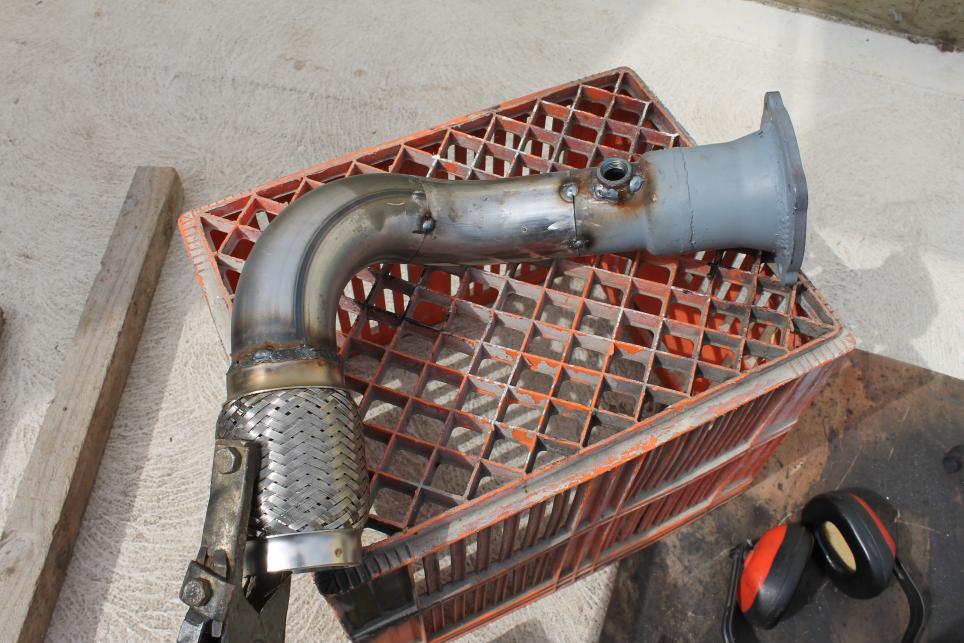
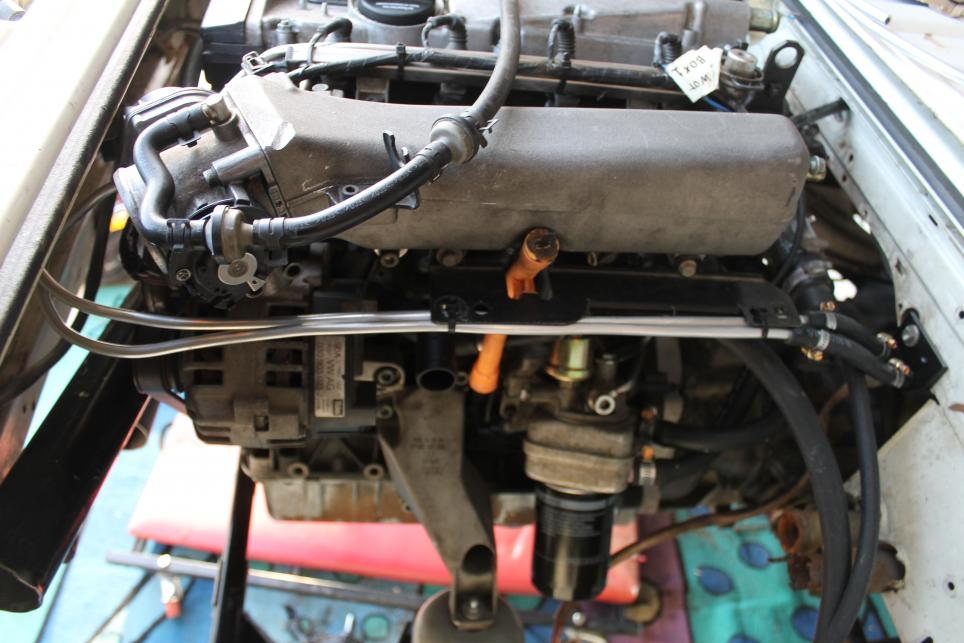
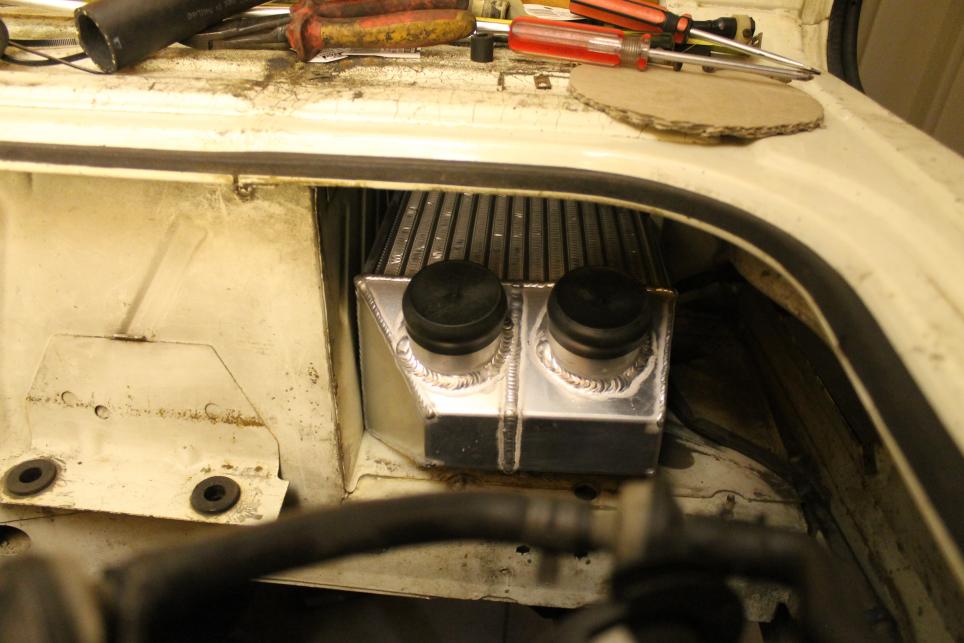
    I tried to measure the OEM placing of the o2 bung, and drill accordingly to that.


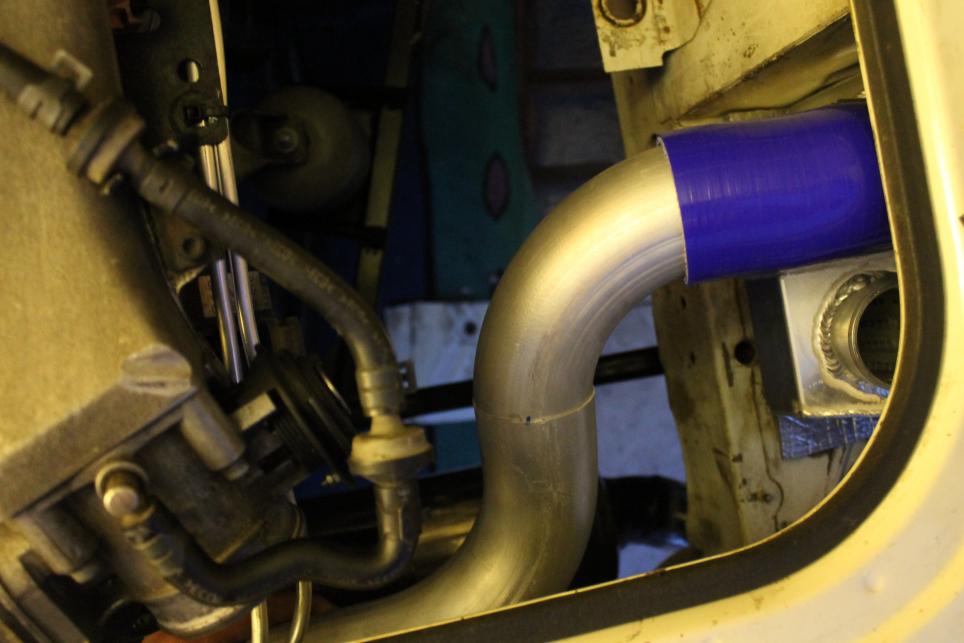
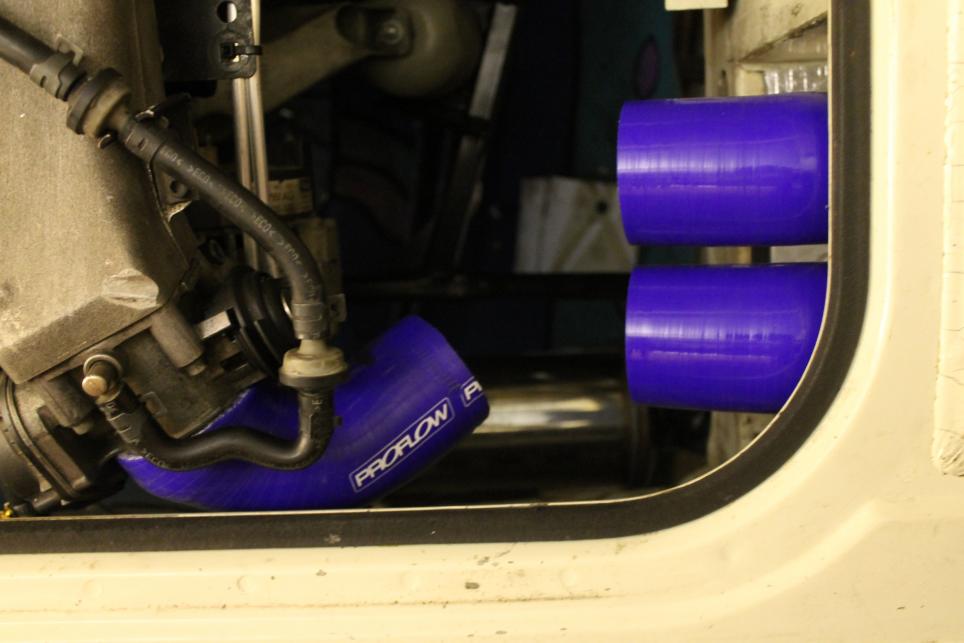
    Once that was welded up, I started measuring up where to start the piping. It all consisted of 45deg and 90deg piping.
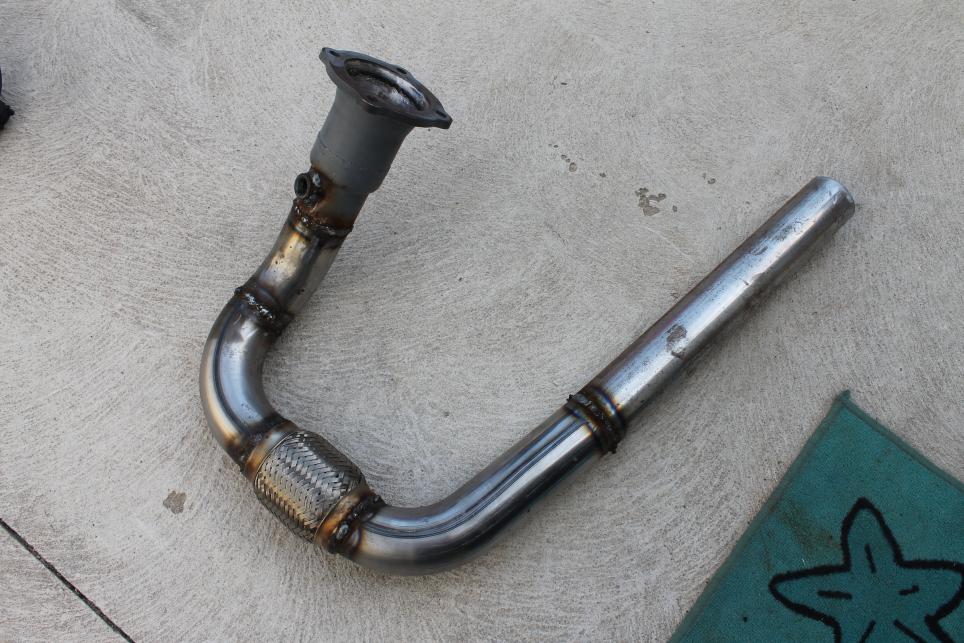
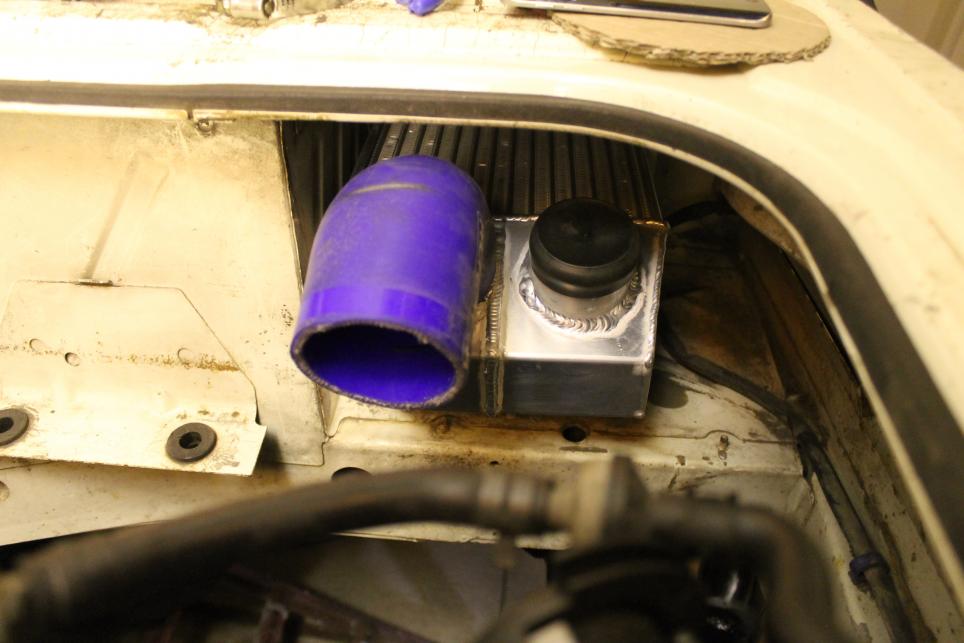
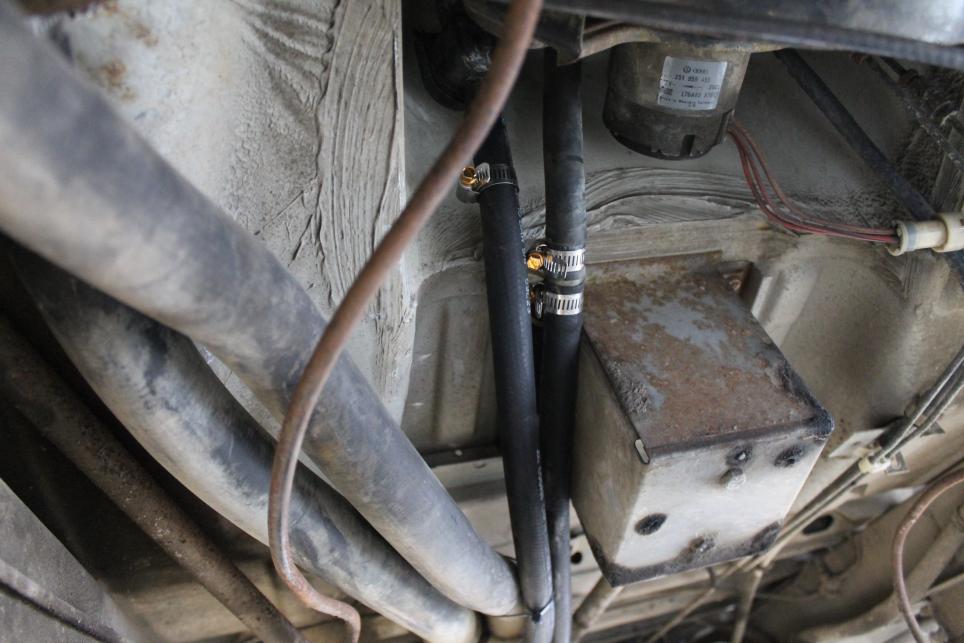
    Here I used the 90deg and welded on the flex pipe.


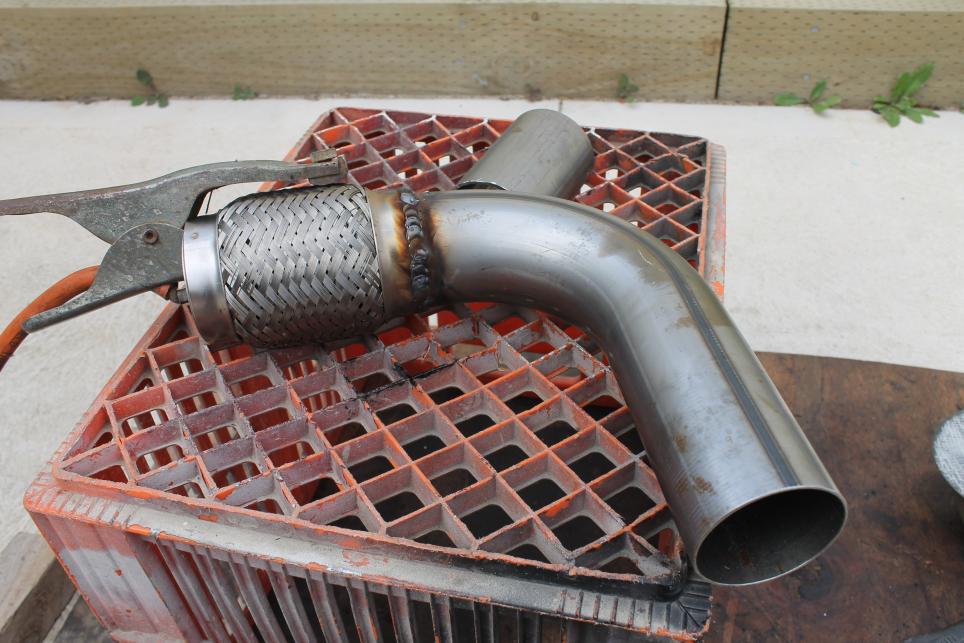
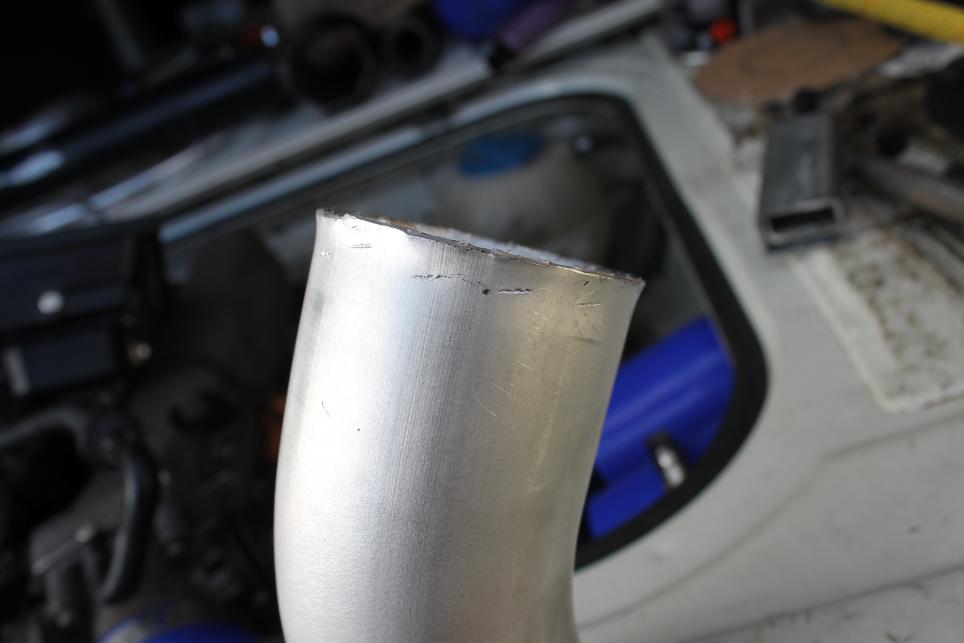
    Then a 45deg added to that.


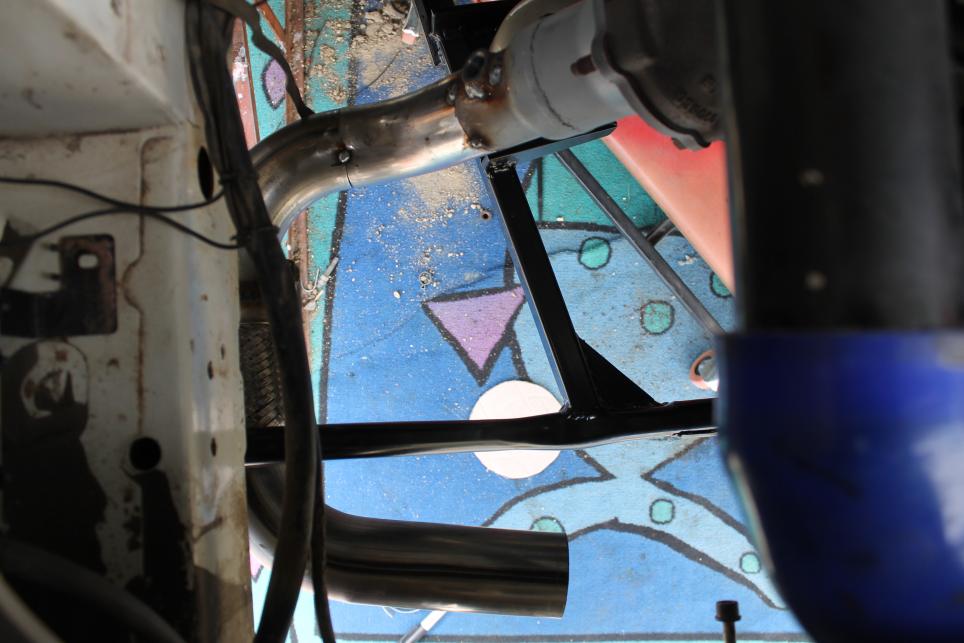
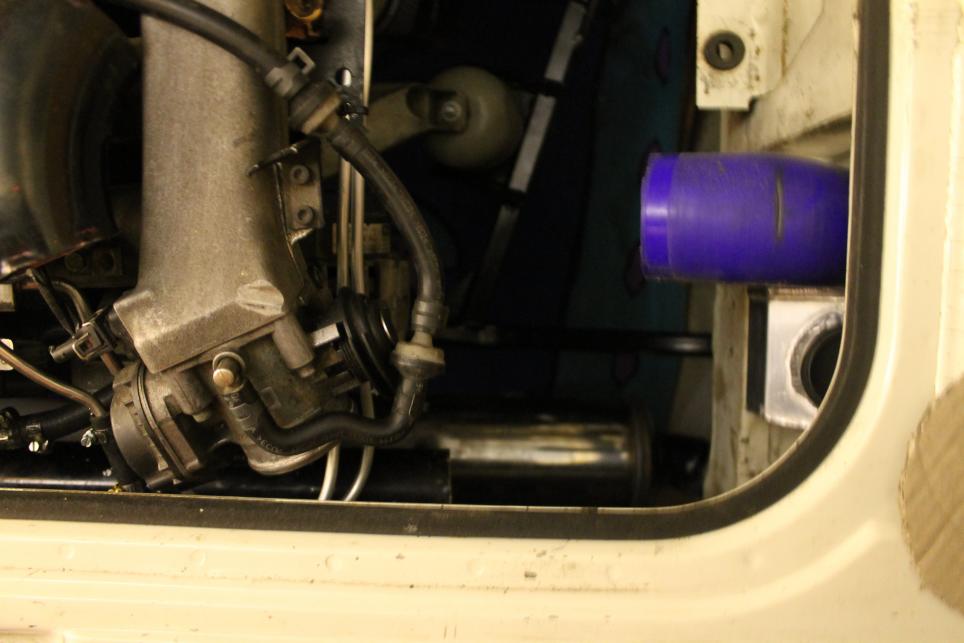
    Now all together taking shape.


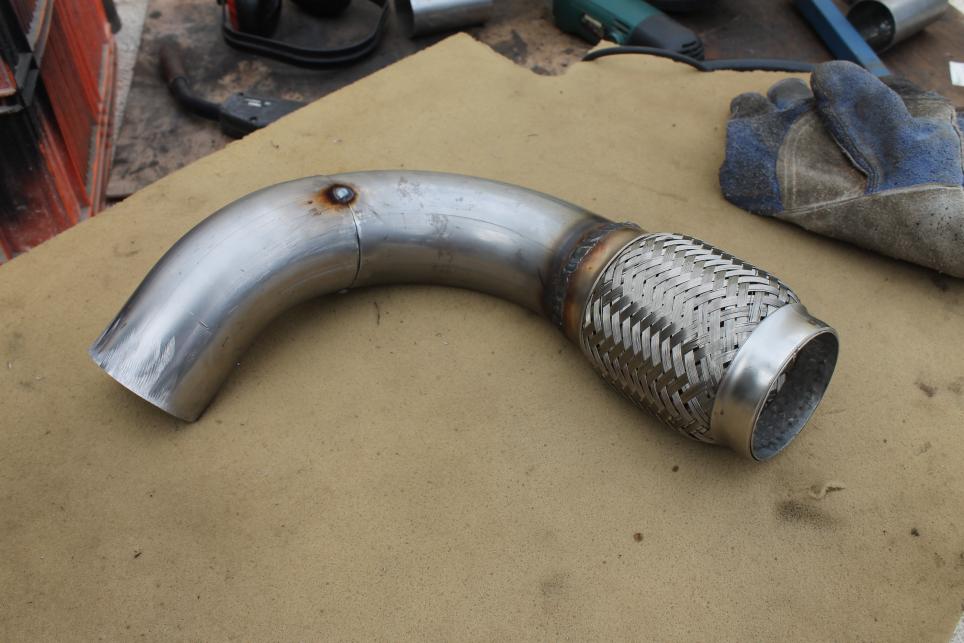
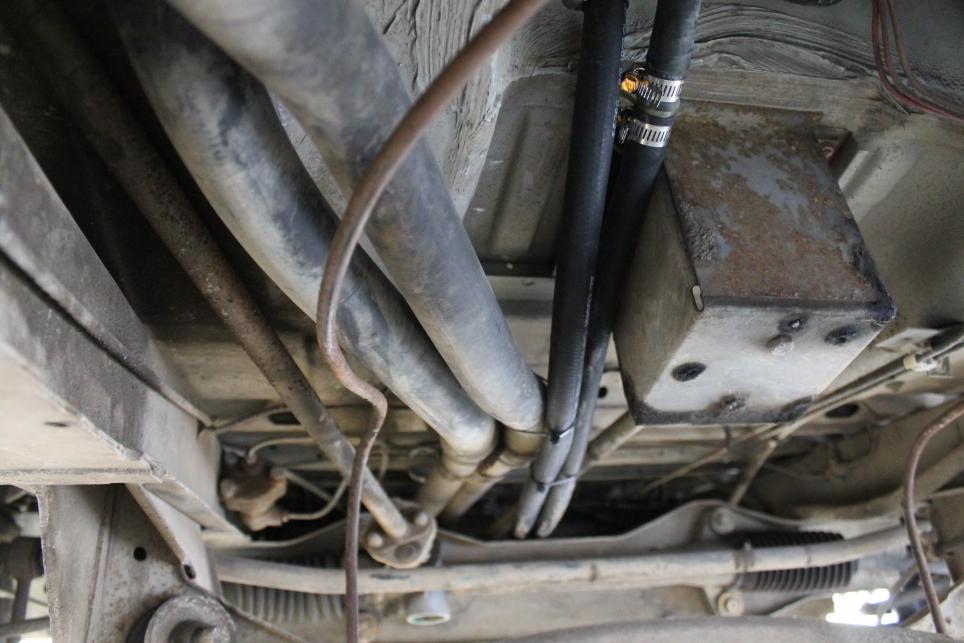
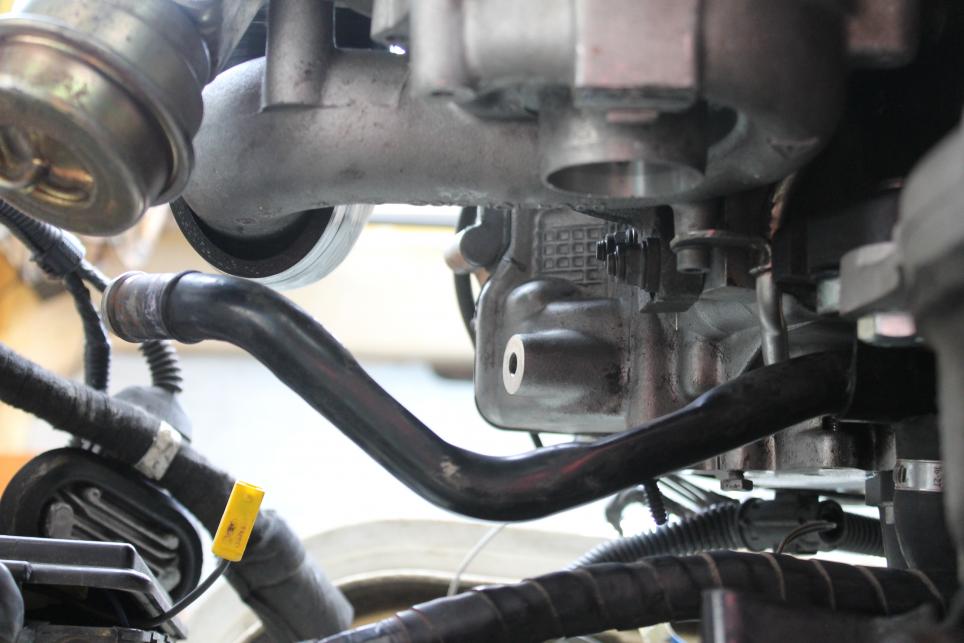
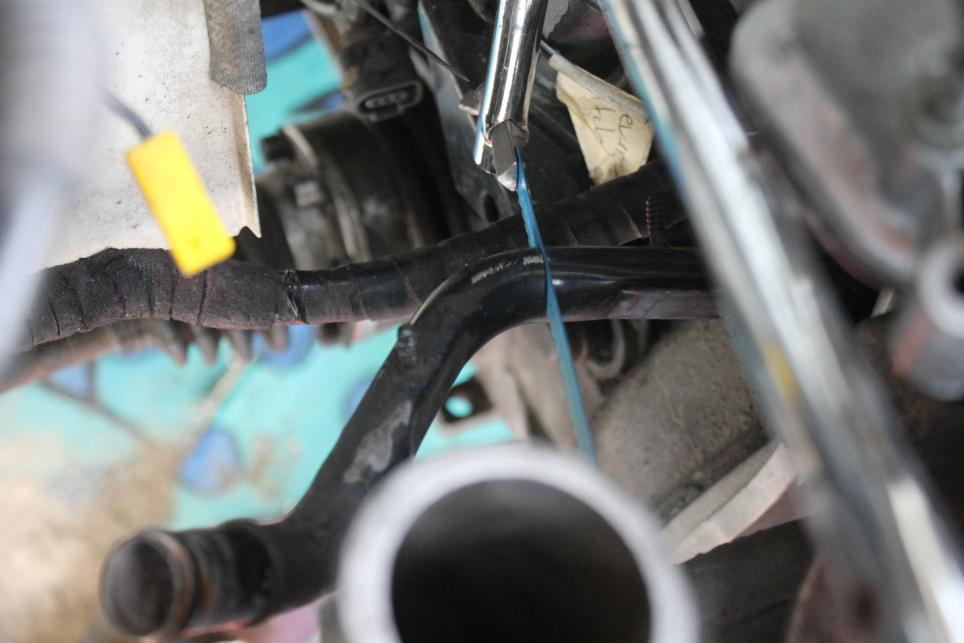
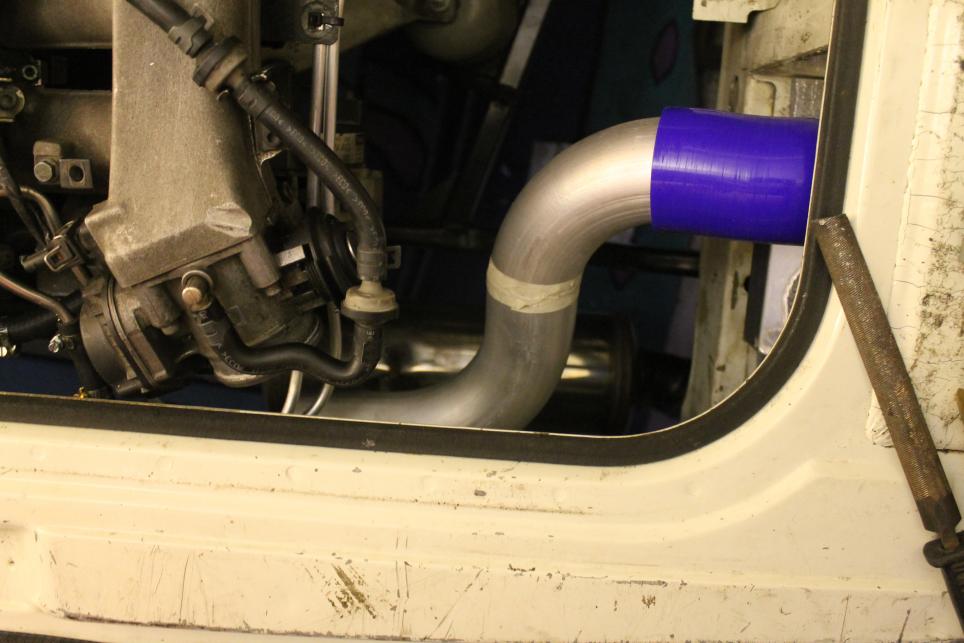
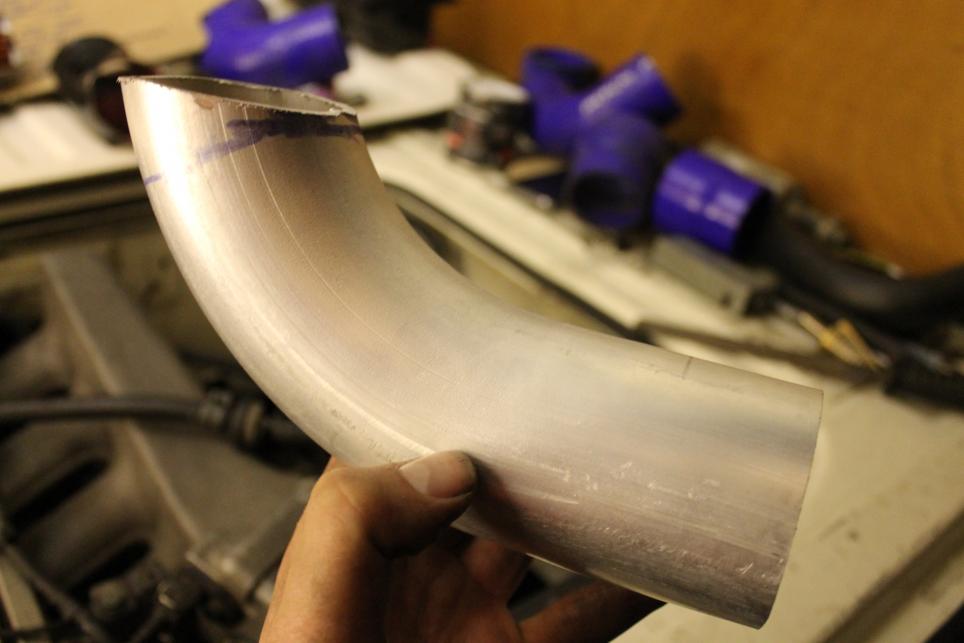
    Added another 90deg pipe. This is the shape it will be. A rather straight forward and simple design bending around the engine brace.


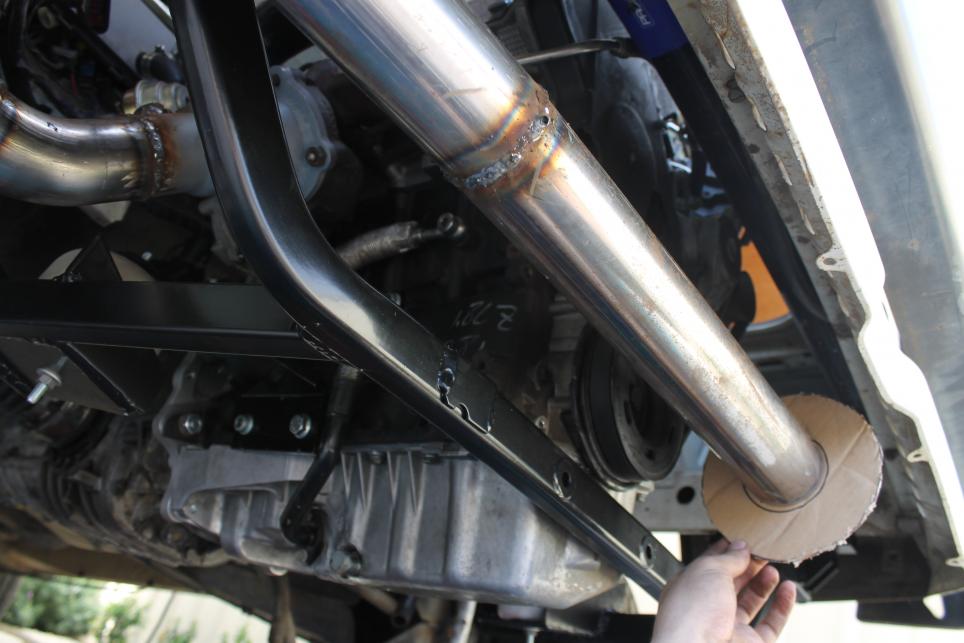
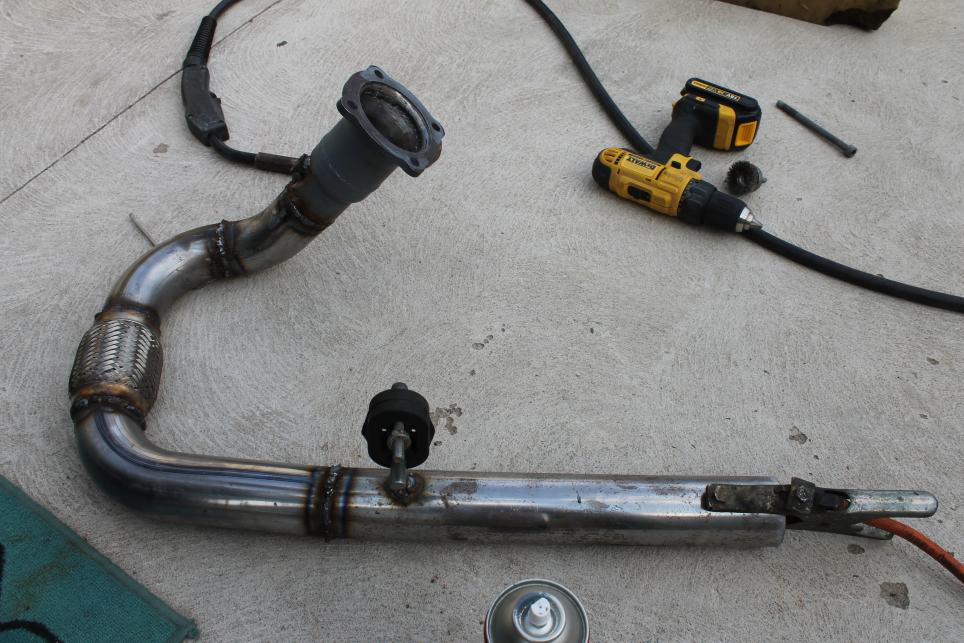
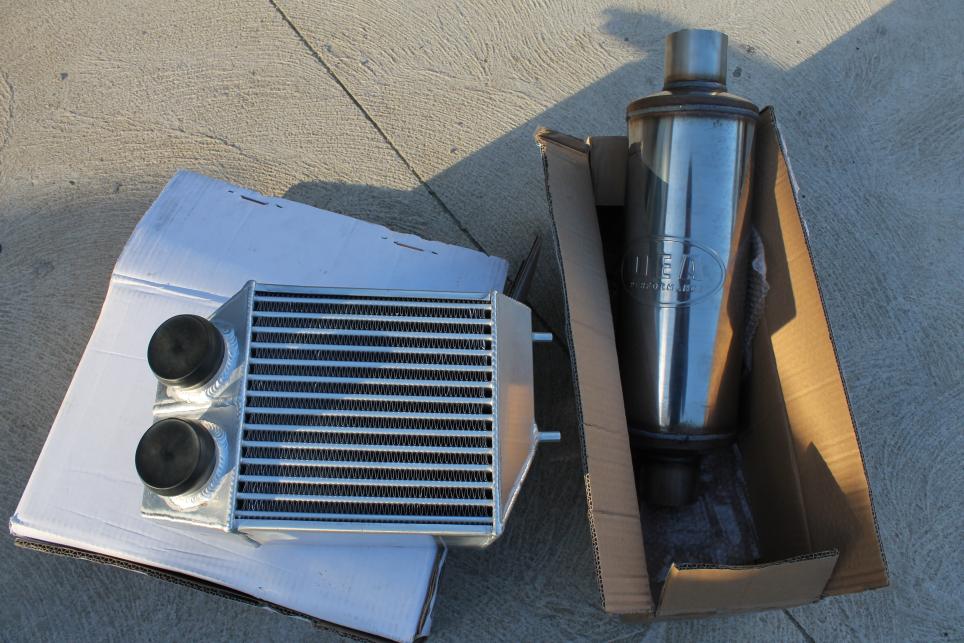
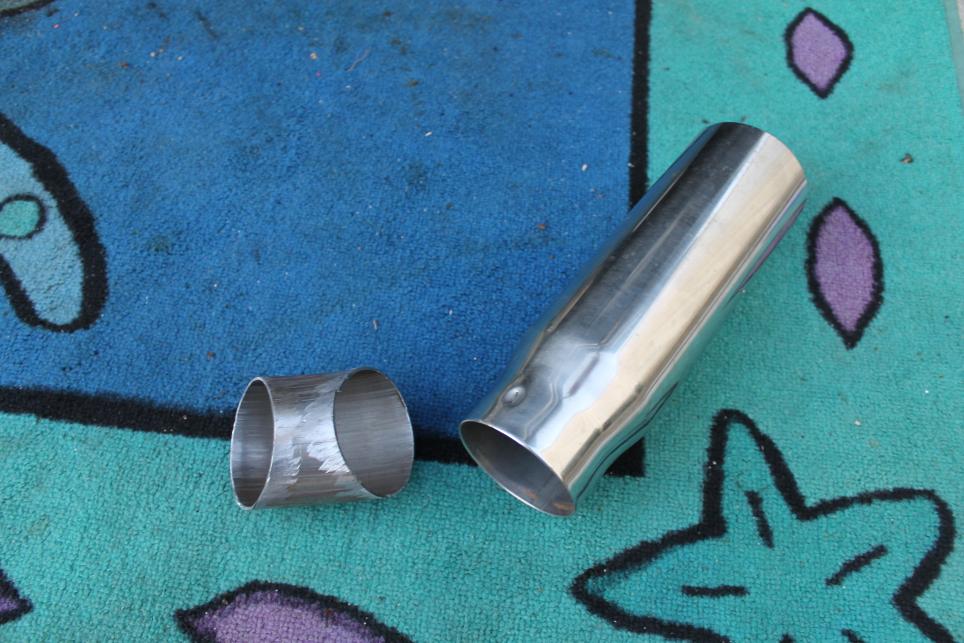
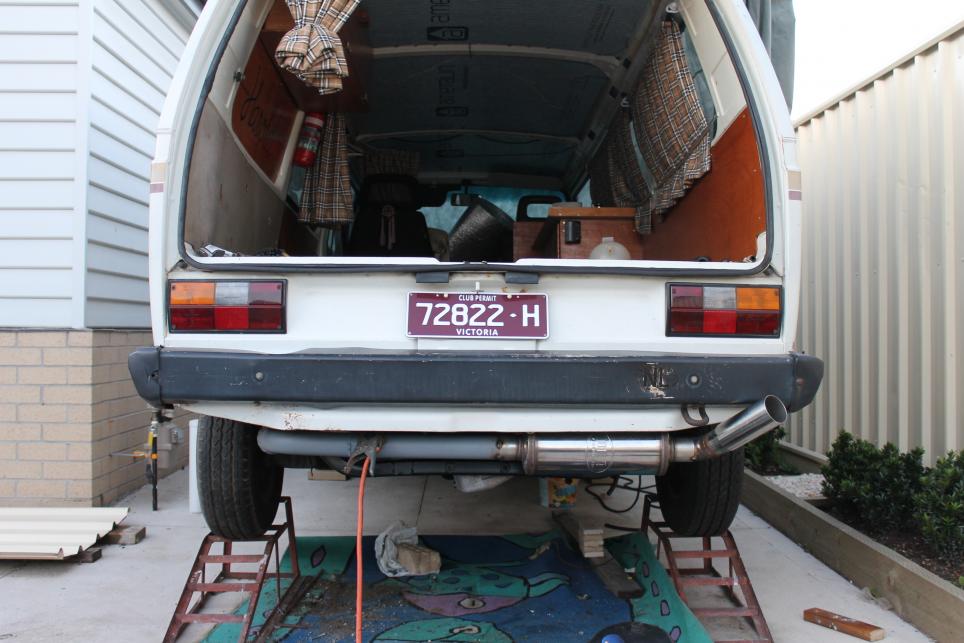
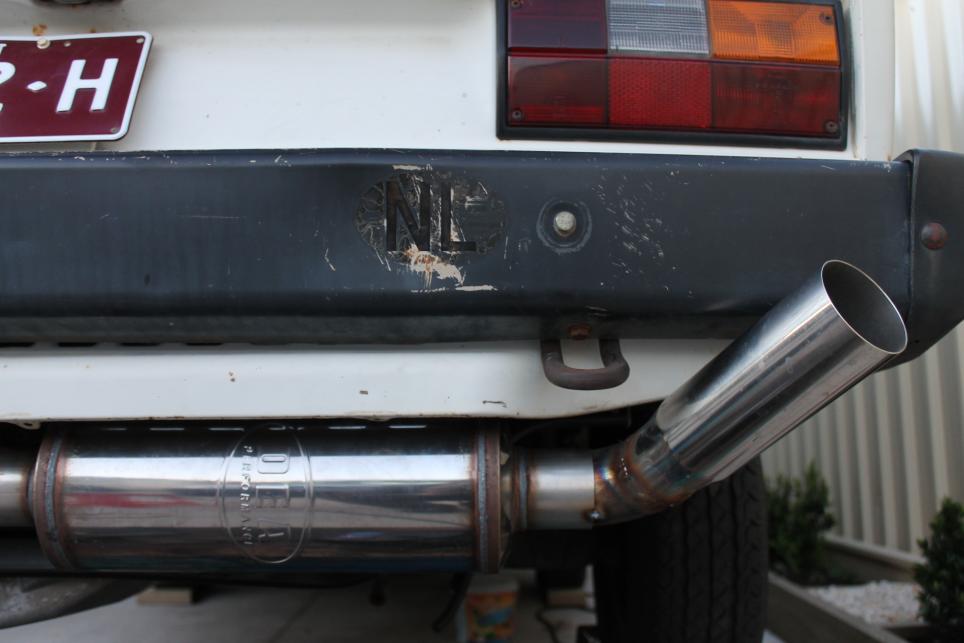
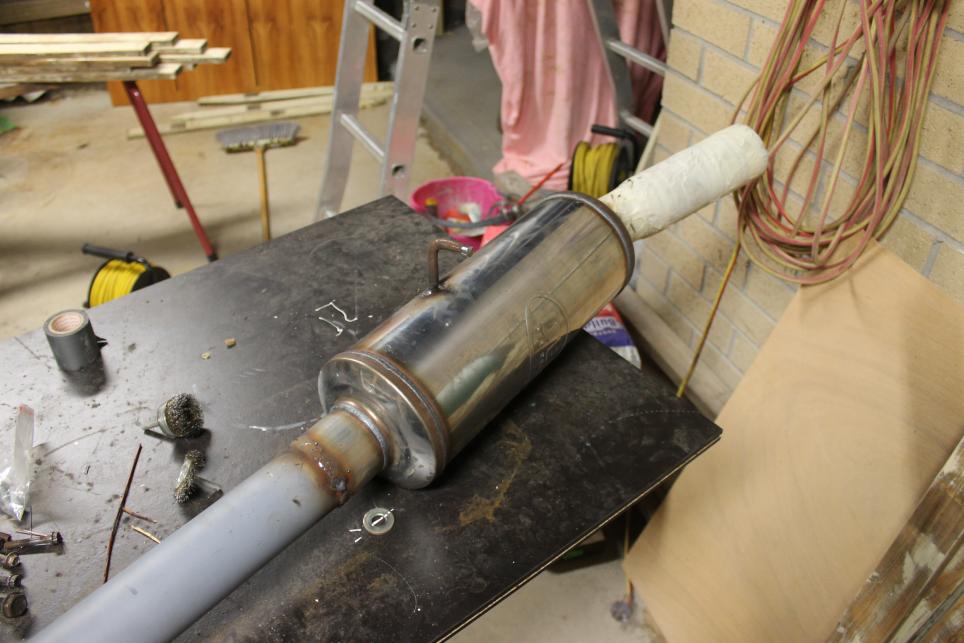
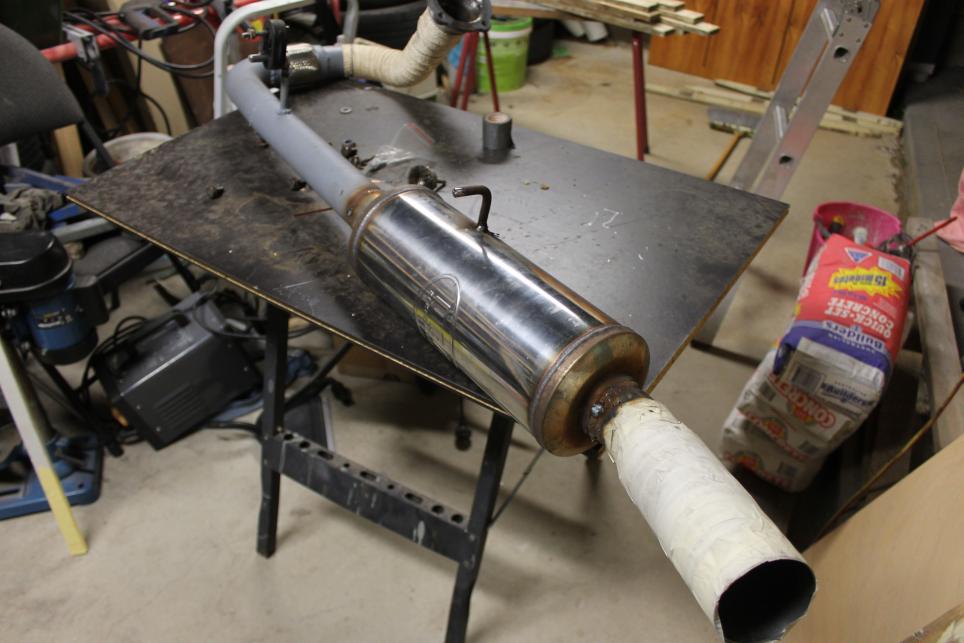
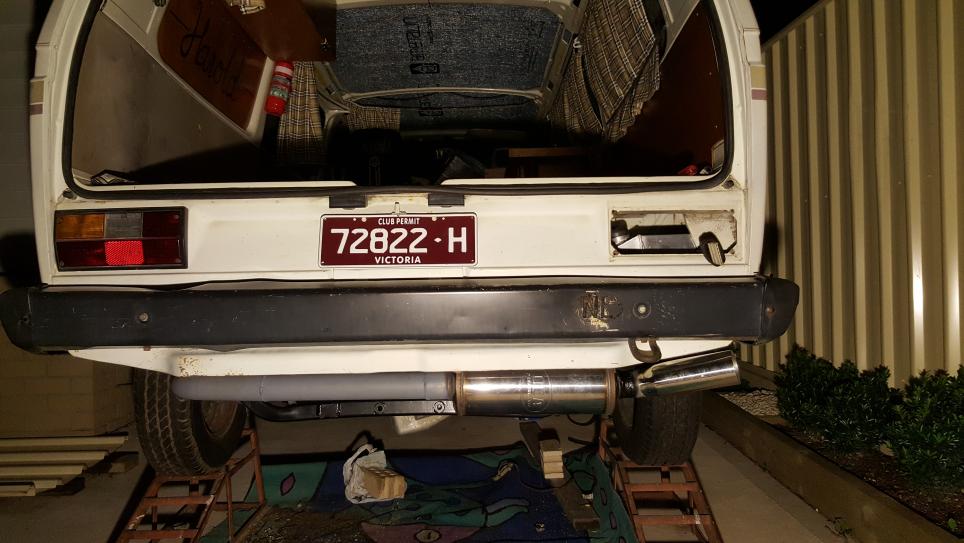
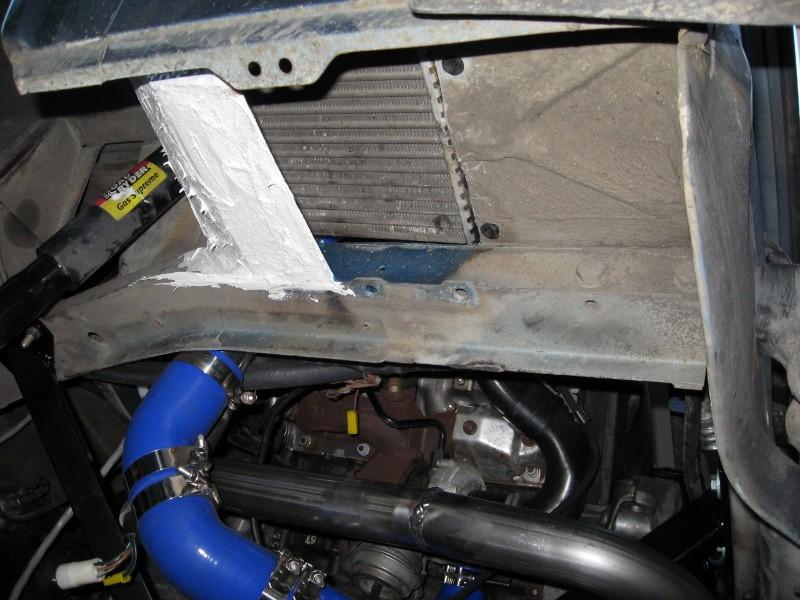
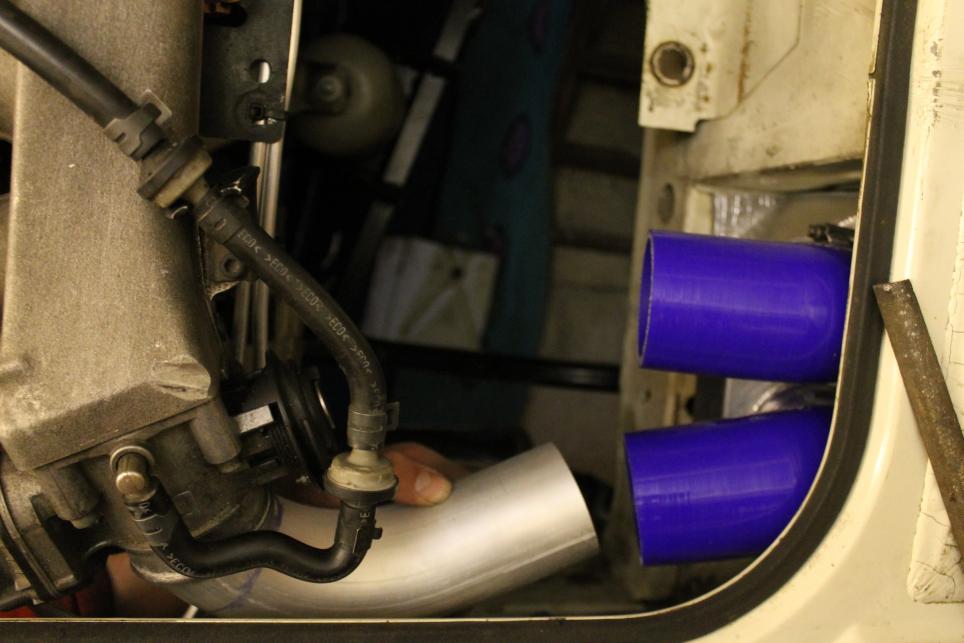
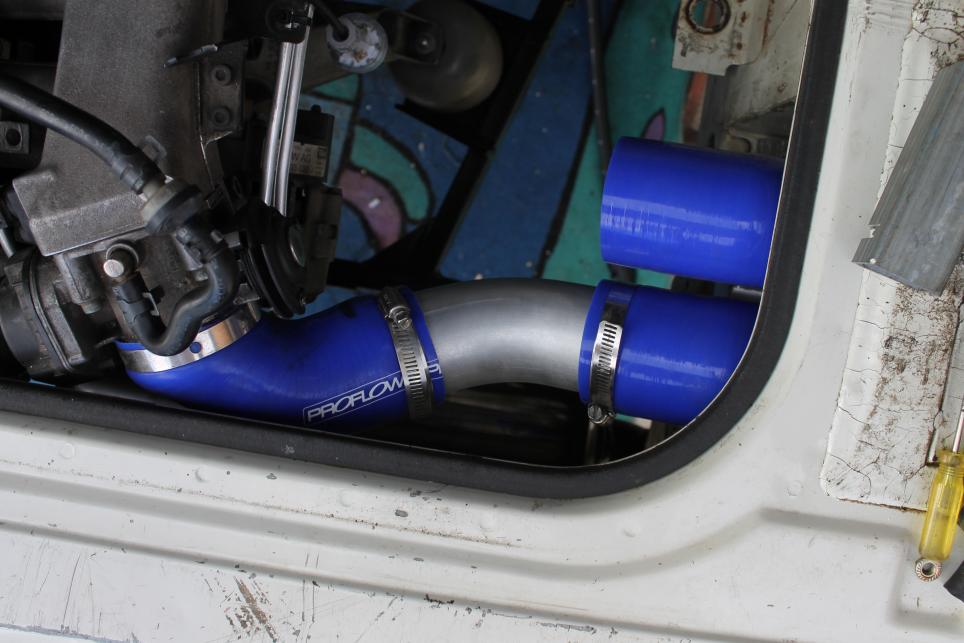
    Then I measured and added another straight pipe. The muffler will be welded to the end of this pipe and a nice 3" tip out the side. You can see how the muffler will be sitting in with the template placed at the end.
    All welded up nicely and starting to look like an actual exhaust.


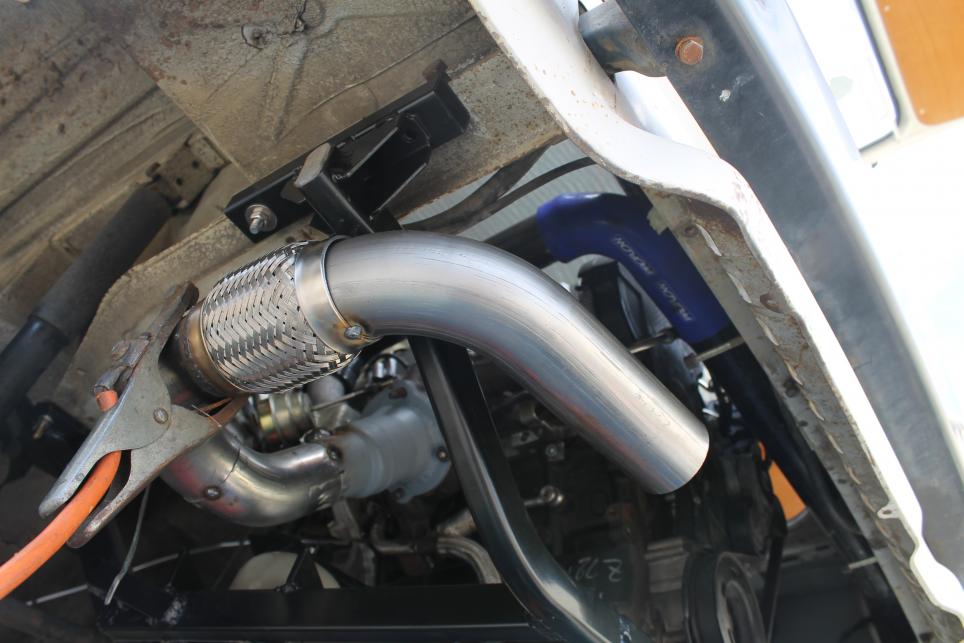
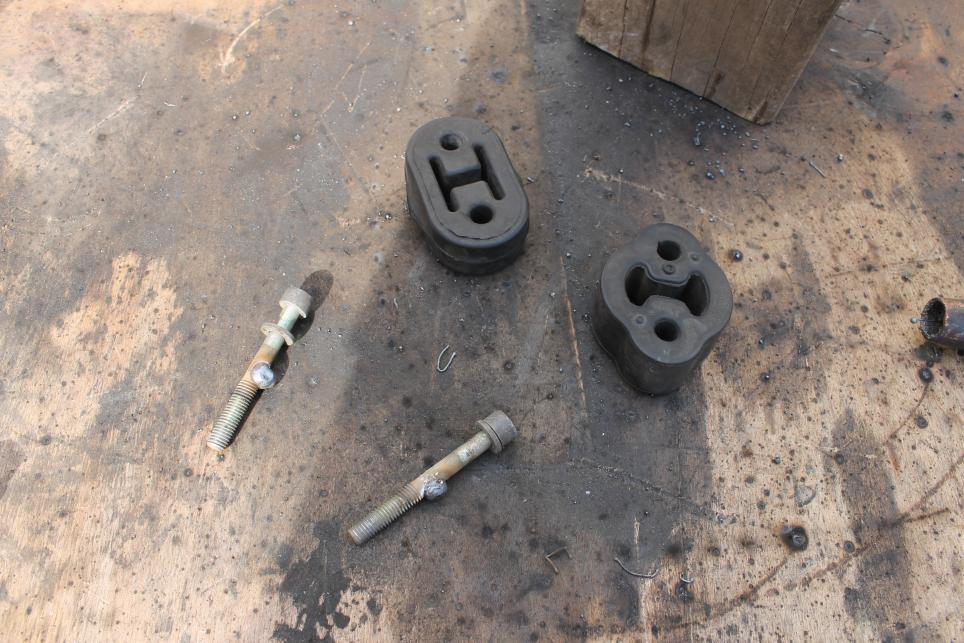
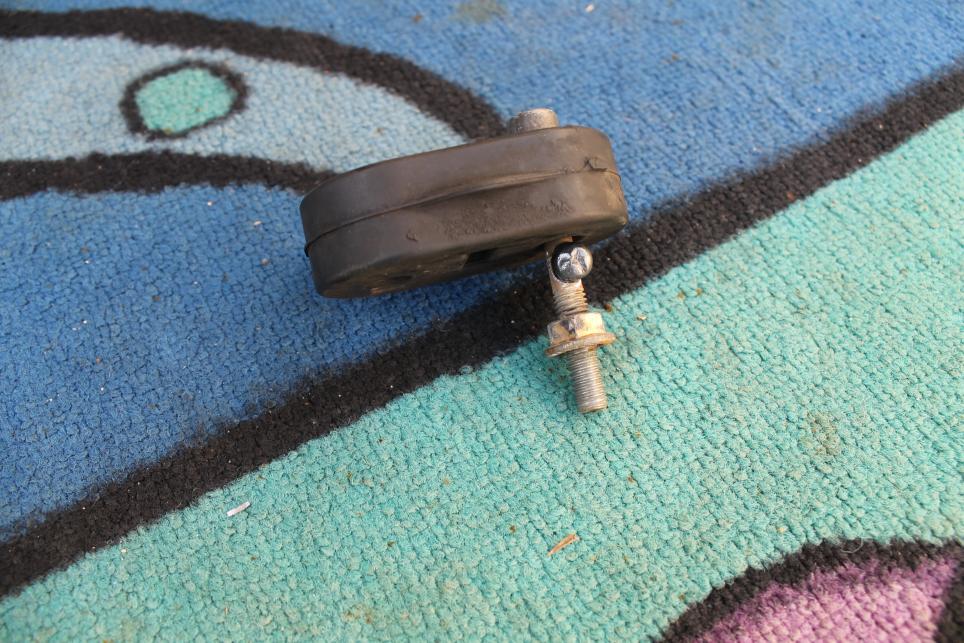
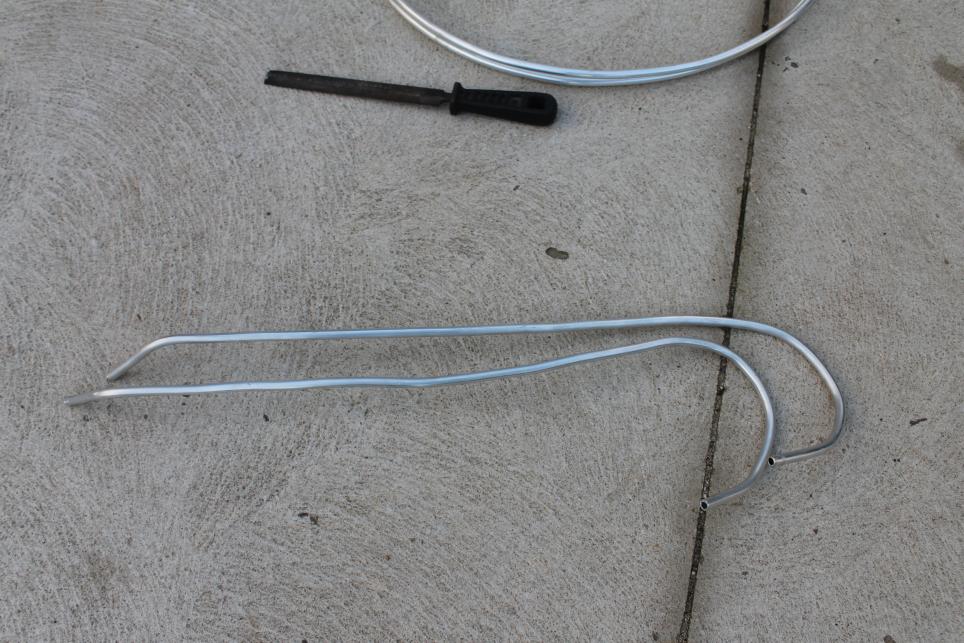
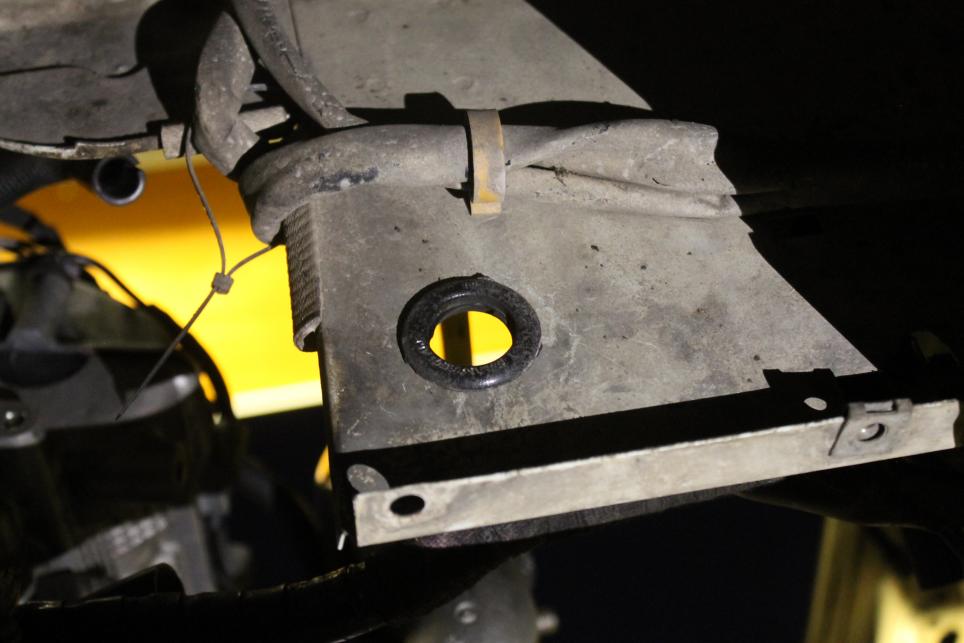
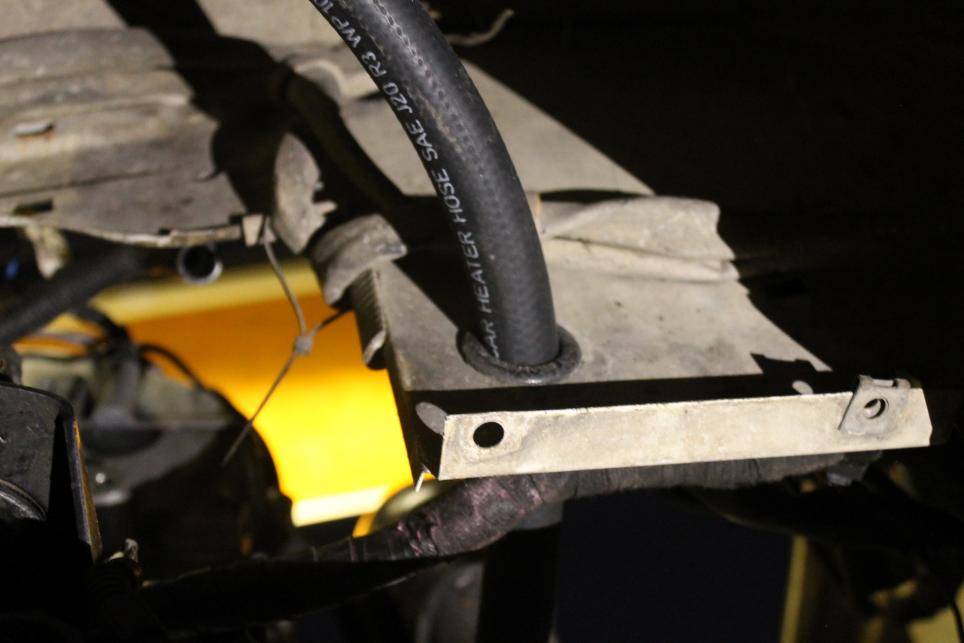
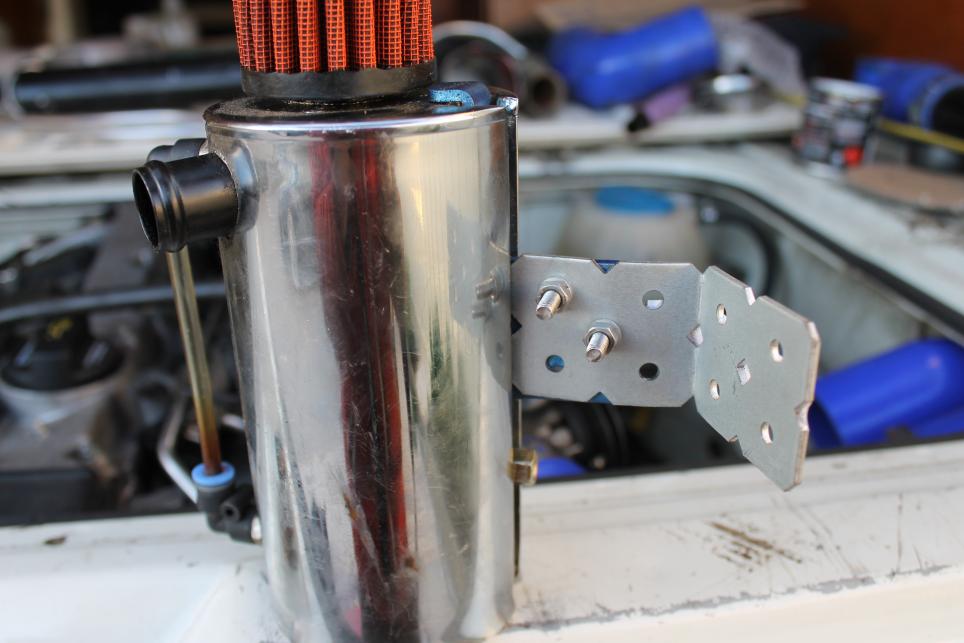
    For exhaust hangers, I didn't want to have to weld to the body and make more work to clean/paint it. So after a bit of looking around I found some original bolt holes and came up with a solution.

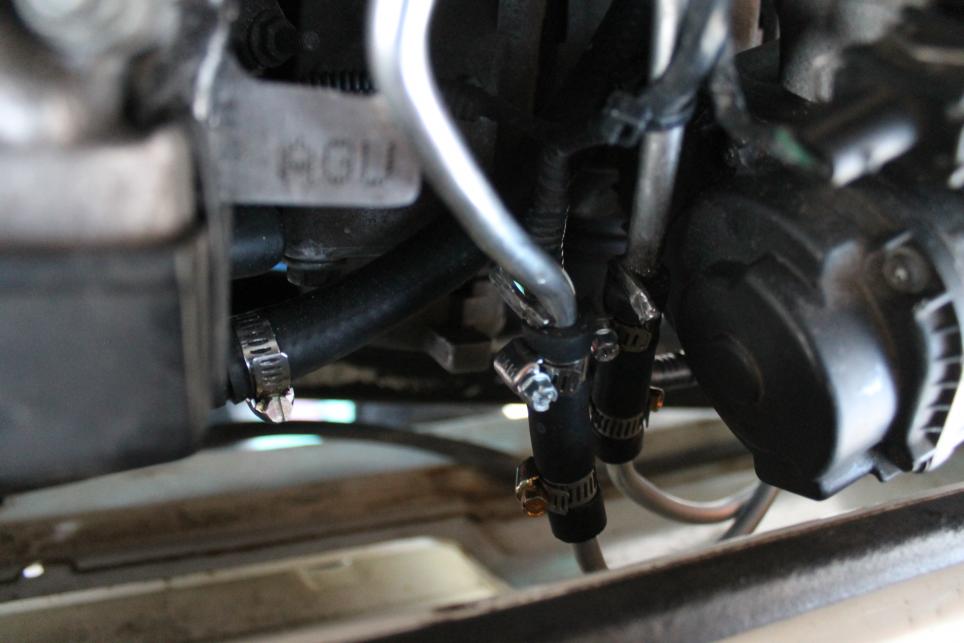
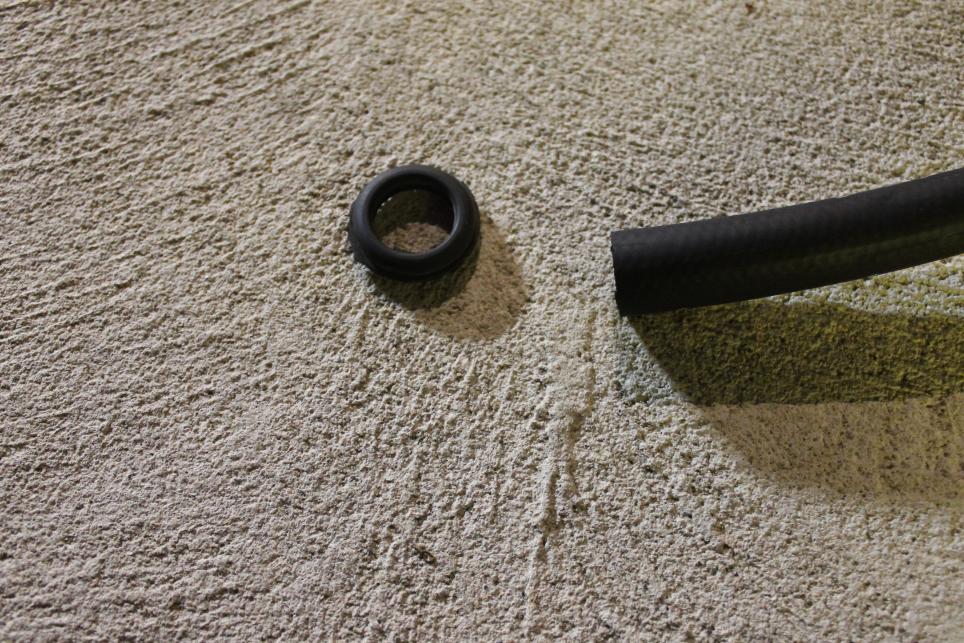
    Found the correct thread and pitched sized bolts, and added a blob of weld to stop the hanger coming off. I went to my buddies workshop and raided his shed for some spare rubber hangers!


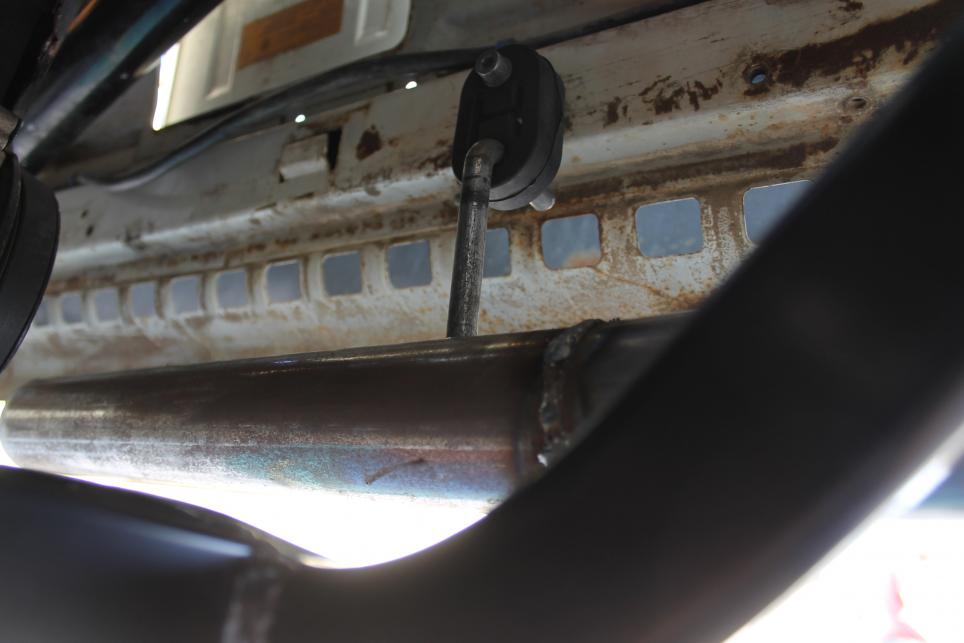
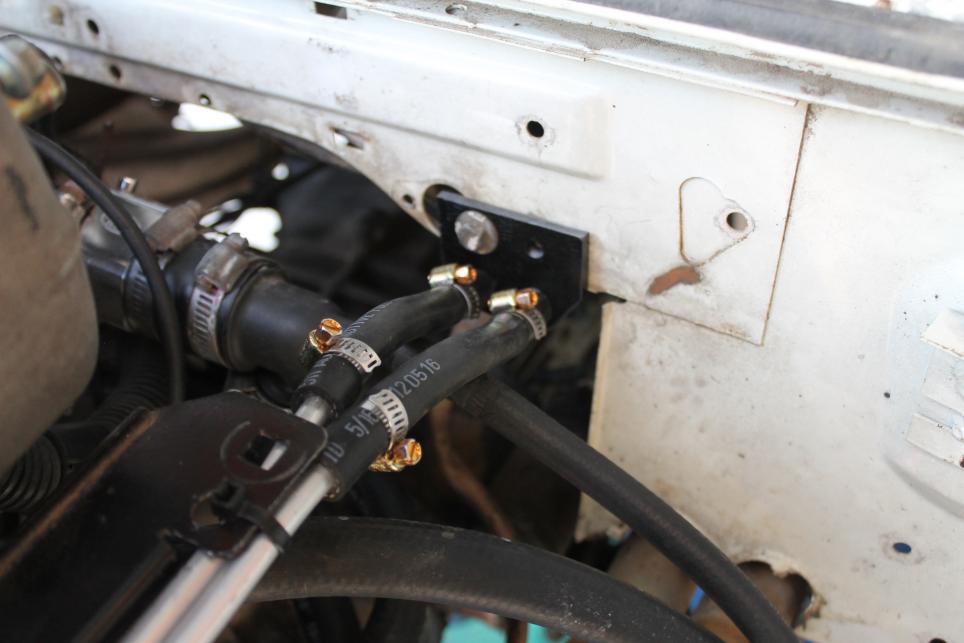
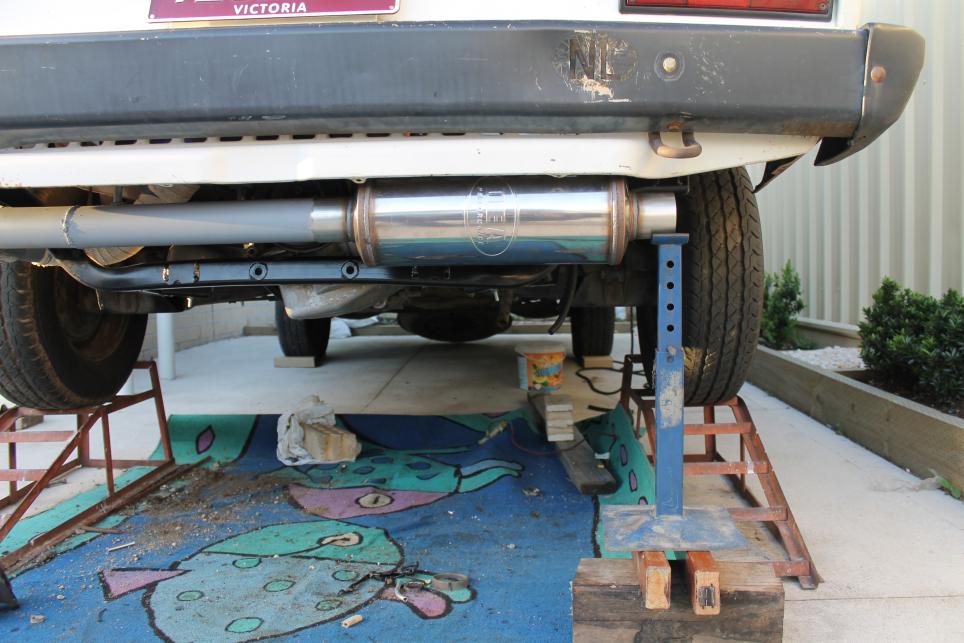
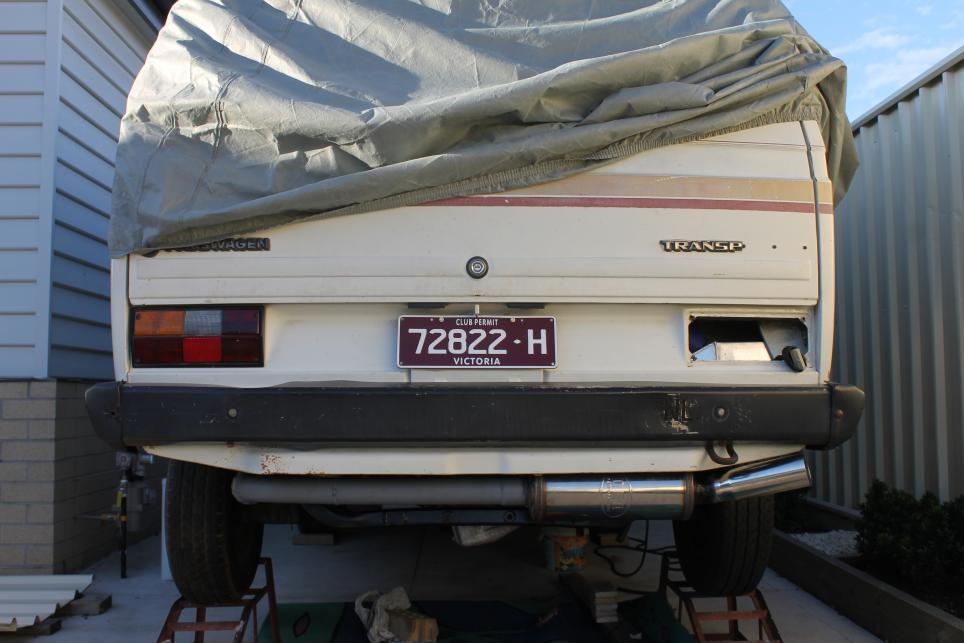
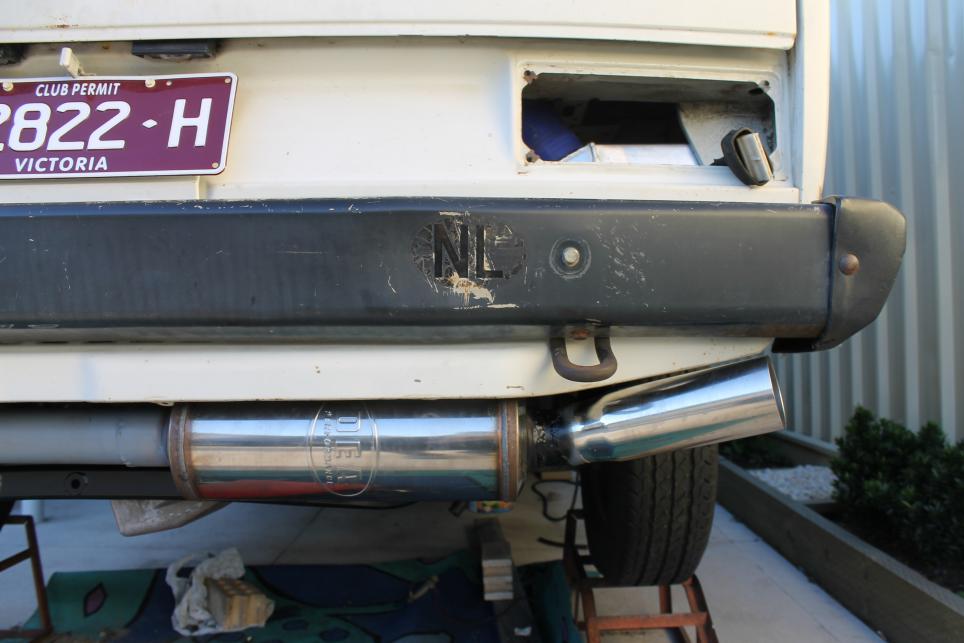
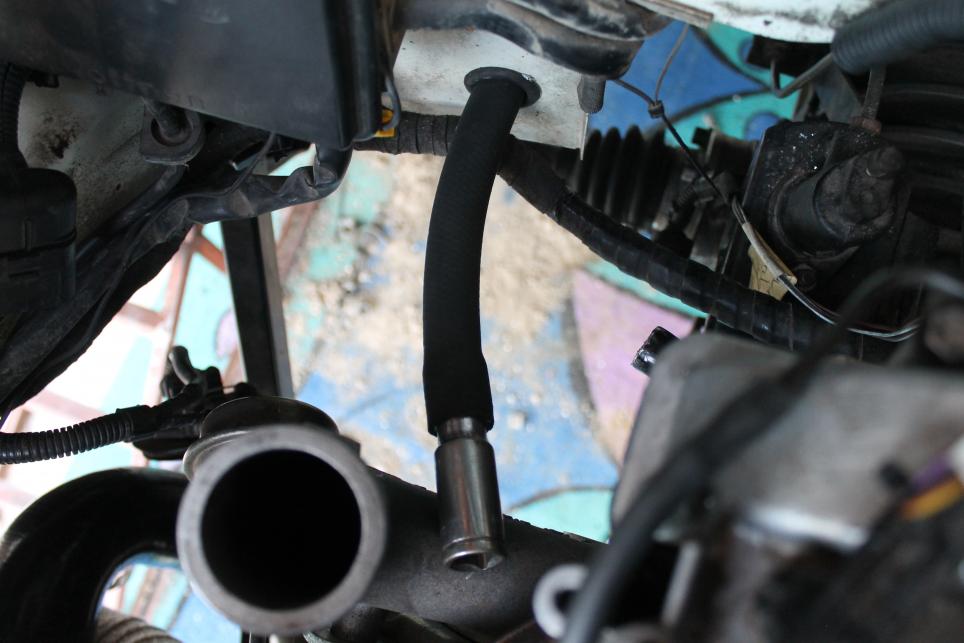
    Tested and it fits great!! Happy to have it work out with minimal modification needed.
    I was contemplating how much hangers to make, but the piping is really light, so 1 is all I need at this end, and will most likely make another 2, to support the mufflers weight.


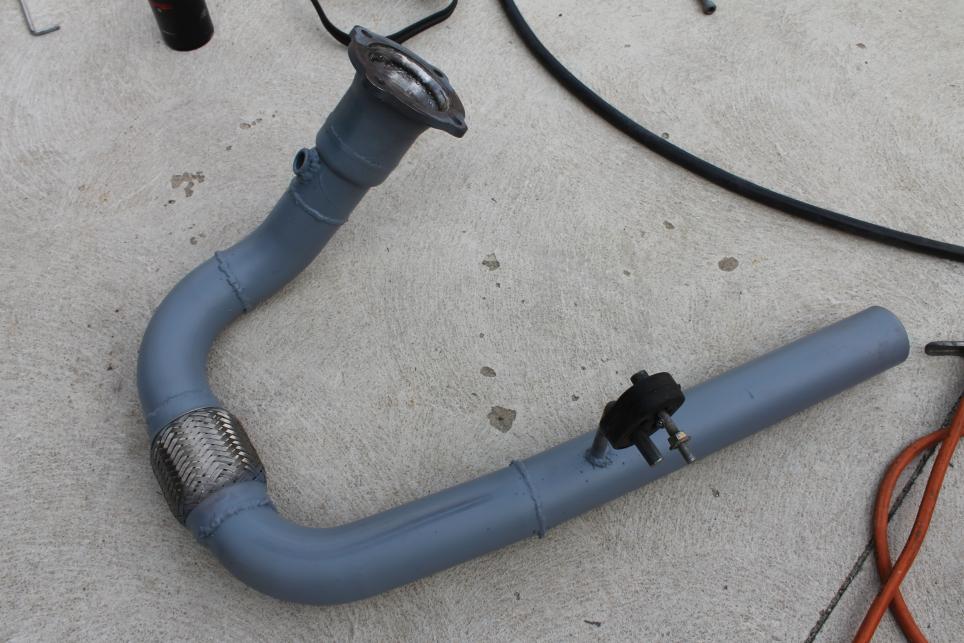
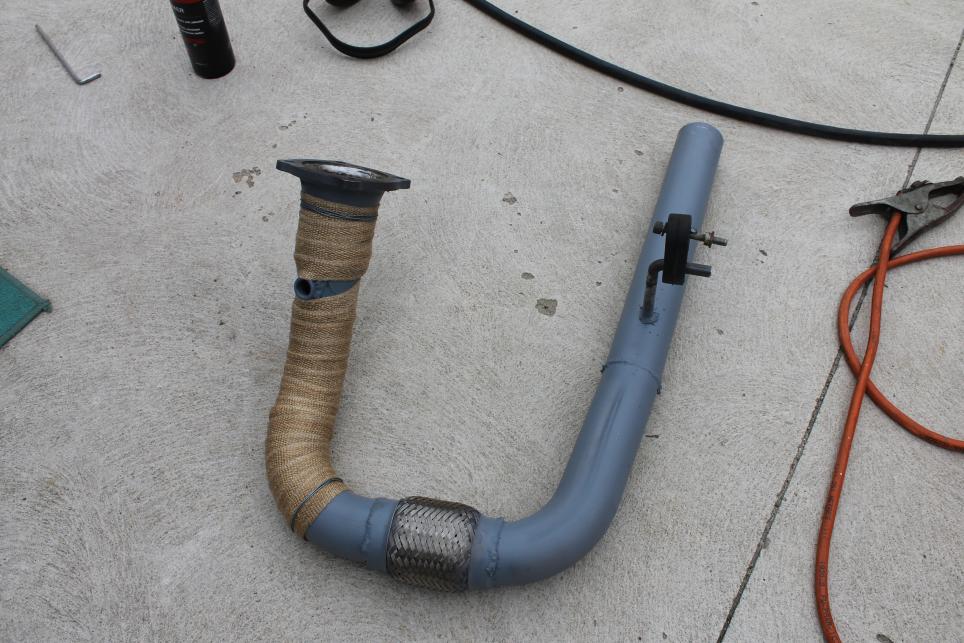
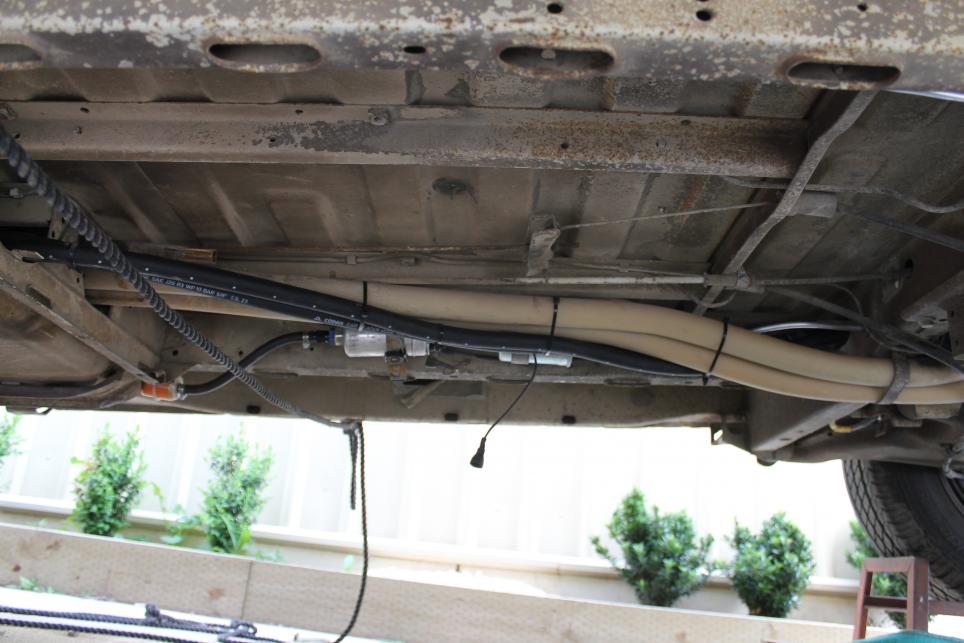
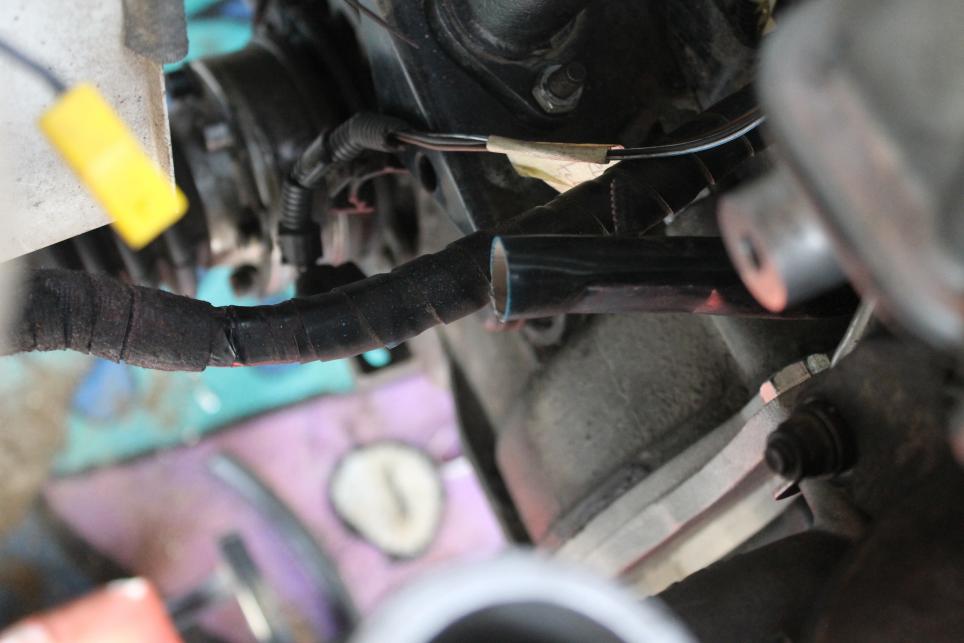
    Wire brushed the welds and gave the piping a quick spray in etch. Decided I will wrap up the exhaust to prevent any more heat in the engine bay seeing as its so close.


    I had a small roll laying around and thought I'd get started on wrapping it. Only lasted half the dump pipe, but I'll get more and finish it all off in time.
    Two tips for anyone planning to do this, 1) always wear gloves, as the fibres ITCH!!!! and 2), soak the heat wrap in water before starting.
    This allows it to stretch nicely, and when it dries up, its on very snug. Plus it's easier to use when its wet.
    I wrapped up a down pipe in the past and didn't get it wet or wear gloves - that led to lots of regret and swearing haha.


    That's all I had time to do yesterday , thanks
    Last edited by GeorgeMK1; 25-09-2017, 11:57 AM.
    - Orange Golf mk1 LS, 1.8 5speed, 32/36 - sold
    - Golf mk1 Swallowtail rebuild, completely stripped
    - Brown U.S import 81 cabby
    - 88 Honda crx b18cr

    Comment


    • #92
      Nice DIY work dude

      Sent from my Moto C using Tapatalk

      Comment


      • #93
        Love you welding done like a pro or are you qualified as one ? Reminds me of when I shoehorned a 186 Holden donk and gearbox into a1600cc 4 pot Hi Ace back in the early seventies . I made up my exhaust from scratch but guess what no bending machine and a pretty dodgy arc welder and virtually no experience with welding . I cut small sections with different angles to achieve the curves over the rear axle etc looked pretty bizarre .

        Comment


        • #94
          Originally posted by HaydEn View Post
          Nice DIY work dude

          Sent from my Moto C using Tapatalk
          Is there any other way dude?

          Originally posted by Sunny43.5 View Post
          Love you welding done like a pro or are you qualified as one ? Reminds me of when I shoehorned a 186 Holden donk and gearbox into a1600cc 4 pot Hi Ace back in the early seventies . I made up my exhaust from scratch but guess what no bending machine and a pretty dodgy arc welder and virtually no experience with welding . I cut small sections with different angles to achieve the curves over the rear axle etc looked pretty bizarre .
          Haha ewww arc welder, I've tried arc and it sucks (or maybe I suck at using it)!!! No qualifications here Sunny, just years and years of backyard DIY experience hahaha


          I had some left over alu pipe and decided to use it to connect the lines from the motor to the rest of the fuel lines on the chassis. I left some adequate hose at the end so that when the motor moves there is enough flex not to cause any issues.


          Then had to bend the fuel lines coming off the fuel rails from the 1.8t as it was fouling the chassis. I was surprised it bent quite easily, a bit of force and gently moving it did the trick.


          All mounted up, tucked away from any harm!


          That was Monday night. Yesterday, the post man came by and dropped off some goods
          Muffler and cooler. Muffler is actually a resonator from DEA (dandy exhausts) and the intercooler is a super small but double core, Renault R5 turbo cooler. I have been eyeing it off for ages but wasn't sure if it would fit. Then saw a dude from the internet use one and it was enough for me to pull the trigger on it.


          More on the cooler later. While daylight was out I quickly got to getting the muffler at a position I was happy with.


          Used a 45 deg bend and a 2.5-3" tip I had laying around for years.


          This is what I came up with. All tack welded in place in case I didn't like it - and guess what? I didn't.
          It stuck up a bit too much and was a bit obnoxious for the van. If you had asked me 5 years ago, I would have loveddd it.


          So back off it came again and I decided to redo it all. I did a lot of cutting and re-shaping but don't have too much pics as it was pretty late at this point. I also masked up the tip to avoid any damage to it while welding/cutting.
          Once I finished it I installed it to see, it's a lot more subtle now! Blends very nicely with the body shape of the van. Will have to take some pics during the day and upload them!


          This was a quick late night phone camera shot, doesn't do it justice at all.


          At this point of the night I decided to put down the power tools before an angry neighbour decided to jump the fence and cut me up with my own tools.
          So I grabbed the cooler and had a play with it.
          It will be mounted like you see in the pic, but I will have the bottom of the panel cut out so that the air can flow through.


          The cooler inlet/outlet is 2.25" and my cooler piping is 2.5", so I'll be using two 2.25-2.5" 90deg angles like this.
          One will be from the turbo, and the other obviously to the throttle body.


          Here you can just see the black intercooler pipe. This is what I have to fill in for. Thinking three 45deg aluminium pipes welded and it will go straight to the intercooler. Then all I have to worry about is the throttle body side (which is going to be really hard as the throttle body almost sits on the chassis so there's not space at all).

          Last edited by GeorgeMK1; 27-09-2017, 09:21 AM.
          - Orange Golf mk1 LS, 1.8 5speed, 32/36 - sold
          - Golf mk1 Swallowtail rebuild, completely stripped
          - Brown U.S import 81 cabby
          - 88 Honda crx b18cr

          Comment


          • #95
            After a few quick google searches, I found a pic to show what I am planning to do. As the intercooler sits flat, I will cut out the bottom of the panel, just like this.


            I read that the white shield you see there is to ensure that under the cooler remains a low pressure area, so that the air at the top has no where to flow but into the cooler. Interesting concept.

            However, as there's not much room under there to get in with a grinder, my dad actually suggested another idea. To drill approx. 40mm holes instead. That is a much easier solution, no messy cutting, and it will still have some structural rigidity (even though it's just sheet metal). So a pretty simple solution there

            The next question is, Should I run a fan that is connected to an air intake temp switch, or should I just make a funnel that goes directly to the intercooler. When I'm driving, there will be no issue - however I am worried about stop /start traffic.


            I have also compiled a list of things to do until I'm driving along *beep beep*
            Rad hoses
            Intercooler piping
            Intercooling mounting
            Coolant bottle mounting
            Catch can mounting
            Wiring and relays
            Heater core hoses
            Water temp sensor hookup
            Oil pressure sensor hookup
            Radiator swap
            Engine oil flush
            Gearbox oil flush
            Coolant flush
            Brake servo pipe to be connected
            Throttle cable
            Fuel pump wiring

            Zzzzz you think you're close haha
            - Orange Golf mk1 LS, 1.8 5speed, 32/36 - sold
            - Golf mk1 Swallowtail rebuild, completely stripped
            - Brown U.S import 81 cabby
            - 88 Honda crx b18cr

            Comment


            • #96
              Yes the first exhaust exit was pretty radical, I like the second one better. Yes ARC welders were pretty hard to get good with unless it was a reasonable gauge steel , in later years I invested in a nice MIG welder ah bliss what a difference . Even turned my hand to some alloy fabrication when I made huge alloy framed sliding roof over our back deck [sort of a sunroof for your house got the idea from the car sunroofs I fit .] But I digress still got a long way to go so keep up the good work , I have loved reminicising about the conversion I did in comparison to yours .

              Comment


              • #97
                Yeah i agree the second tail pipe design is nicer, very classy and works well.

                No one really wants to weld with an ARC unless conditions dictate that they have to (outdoors and too windy for shielding gas)

                I learnt to weld at TAFE, doing the boilermaker modules, really handy, but time on the stick is key, MIG is my go to, but i love HF TIG, buts its just time consuming when you just want to crack something out in a rush.

                Your really cracking on, its very impressive how fast your completing it.

                That list is manageable, hopefully it goes to plan and the wiring doesn't slow you down to much.
                2017 VW T6 3200KG GVM LWB 132kW 7 Speed DSG (Campervan Conversion)

                Comment


                • #98
                  I had some left over alu pipe and decided to use it to connect the lines from the motor to the rest of the fuel lines on the chassis. I left some adequate hose at the end so that when the motor moves there is enough flex not to cause any issues.
                  Widebody Cayman S Turbo, 83 ur Quattro
                  2000 996 C4 cab,12 Scirocco R OEM+ STG2+
                  72 914 (3.2S boxster pwr), 92 G60 Corrado
                  76 Scirocco(TFSI and DSG) 2018 Tiguan,Eureka,81 924.

                  Comment


                  • #99
                    Make sure you have a ridge at the end of the fuel lines as the rubber hose will come off. Better still just run rubber from the car to the engine.
                    From quote above???
                    Widebody Cayman S Turbo, 83 ur Quattro
                    2000 996 C4 cab,12 Scirocco R OEM+ STG2+
                    72 914 (3.2S boxster pwr), 92 G60 Corrado
                    76 Scirocco(TFSI and DSG) 2018 Tiguan,Eureka,81 924.

                    Comment


                    • Originally posted by Sunny43.5 View Post
                      Yes the first exhaust exit was pretty radical, I like the second one better. Yes ARC welders were pretty hard to get good with unless it was a reasonable gauge steel , in later years I invested in a nice MIG welder ah bliss what a difference . Even turned my hand to some alloy fabrication when I made huge alloy framed sliding roof over our back deck [sort of a sunroof for your house got the idea from the car sunroofs I fit .] But I digress still got a long way to go so keep up the good work , I have loved reminicising about the conversion I did in comparison to yours .
                      Yes, totally agree - a mig is perfection. I'm glad you're enjoying the read, thanks Sunny

                      Originally posted by Bryn23 View Post
                      Yeah i agree the second tail pipe design is nicer, very classy and works well.

                      No one really wants to weld with an ARC unless conditions dictate that they have to (outdoors and too windy for shielding gas)

                      I learnt to weld at TAFE, doing the boilermaker modules, really handy, but time on the stick is key, MIG is my go to, but i love HF TIG, buts its just time consuming when you just want to crack something out in a rush.

                      Your really cracking on, its very impressive how fast your completing it.

                      That list is manageable, hopefully it goes to plan and the wiring doesn't slow you down to much.
                      Jealous you can use TIG and actually did it in TAFE. I'd love to get a TIG at some point and learn, but they are just out of my budget at the moment. You're right, a MIG is just so easy, gas on and ready to weld. I've become quite accustomed to it now and can't live without it!!

                      Thanks mate much appreciated, I enjoy getting home after work and cracking on in the garage, but it's been very hard lately as the list is getting smaller and harder. I'm having the most issues with getting the larger diameter pipes (van) to match the smaller diameter pipes (engine) with the correct bends and length etc. But will work it out eventually.

                      Originally posted by aprr32 View Post
                      Make sure you have a ridge at the end of the fuel lines as the rubber hose will come off. Better still just run rubber from the car to the engine.
                      From quote above???
                      The ALU line helps keep it from dangling around and also keeps the bay nice and tidy dude. There's also plenty of flex within the rubber hoses so no real danger I guess. Any reason you'd suggest I do rubber hose the whole way?


                      Have been having internet issues at home and haven't been able to update for the past week. I've got a fair bit done but VWW will only allow 20 images upload at a time, so I'll do another update tomorrow morning while I'm bored at work.

                      I'll start off with a daylight shot of the exhaust and the way it sits.
                      I'll be getting some exhaust wrap today to finish the rest of it off, and have already ordered new exhaust gasket too.


                      Was now time to do the heater core hoses. I didn’t need to replace them, but they looked slightly fragile and for a piece of mind I figured why not.
                      Was chasing to get some heavy duty hose but wow, was the price high! Gates offered HD hose, but was $158 for 8m. I was also able to find silicone heater hose but at a high price too.
                      I got lucky enough to get mates rates at my local Autobarn store and emptied the store of their supply, for $40 woohoo!


                      Old next to new. Each side is approx. 3.8m? But I needed roughly 4.2m as I’m extending them both.


                      Then started routing the hoses and connecting them up. Cable ties FTW


                      This is the pipe that the hose needs connecting to. Problem here is the extreme angle I would have to get the hose into. The way around that problem, is the add one or two 90 deg joiners, but I don’t want to as it will increase the chance of another leak in between them all.


                      After much debate (all in my head like a crazy man lol) I decided to cut the pipe off. Now before anyone mentions “you need a lip on that pipe, or the hose will come off” – I know, but there’s no other way around this and I’ll elaborate further down as to why.


                      To be able to run the hose in a comfortable position and without the chance for a kink, I decided to add a rubber grommet into a wall.


                      Drilled a hole at close to 10pm and was certain that tonight was the night a neighbour was going to murder me – to my surprise I survived… hmm.


                      Yesterday I pulled the hose through and this is where things get a little hard. As mentioned earlier I don’t want to add a joiner or reducer at the expense of running future leaks. Also due to the size difference in hose/pipe (approx. 2/3mm) I cannot add a lip on the pipe to prevent the hose from bursting off.
                      I found a socket that I squished into the hose to open it up a bit and left it over night to settle. I will try and see how far I can go in with the hose later tonight. I think I’ll just clamp it on and see how it goes, fingers crossed it won’t leak or burst off.
                      So that tackles one side of the heater hose, but the other pipe from the engine is a lot larger, so am still thinking of ways around that.


                      On to the cooler.
                      I was going to drill holes for the intercooler to vent through the body, but after drilling a few holes it was just taking me too long, so grabbed the grinder and made short work of it.
                      After I cut it all out, I gave it a quick paint around the edges to avoid any future rust.


                      Also cut out a little foam to place it around on the bottom of the cooler so it doesn’t’ rub or make any noises.


                      …..aaaand bobs your uncle!
                      That’s all vww is letting me upload, will finish the rest of the update tomorrow. I’ve almost got the cooler piping finished too, how exciting and as always, thanks for reading!!

                      Last edited by GeorgeMK1; 06-10-2017, 01:00 PM.
                      - Orange Golf mk1 LS, 1.8 5speed, 32/36 - sold
                      - Golf mk1 Swallowtail rebuild, completely stripped
                      - Brown U.S import 81 cabby
                      - 88 Honda crx b18cr

                      Comment


                      • If I ever find the guy who invented cable ties I think I could be tempted to give him a big hug or maybe a kiss {no I'm not leaning towards the darkside either " As for your neighbour if you hear the sound of a chain saw starting up RUN like HELL . Keep up the updates loving it so far .

                        Comment


                        • I'm not sure what size pipes you are dealing with are but I recall the earlier Golfs used to have a coolant pipe that ran down low across the front of the engine (from the water pump?) that was about 1'' at one end and then tapered down to a narrower diameter. It might have been a heater hose off the top end of the cylinder head, I just can't recall. I think Falcons used to run a pipe like that as well that may be cheaper.
                          2001 Bora 4 Motion Sport now used by number two son
                          2011 Skoda Octavia Scout now with Underground Performance tune
                          2010 Jetta 125 tdi dsg for the misses - Impressed
                          2006 Polo GTI - Enhanced by some of Gav's magic - Absolutely loving it

                          Comment


                          • Originally posted by Sunny43.5 View Post
                            If I ever find the guy who invented cable ties I think I could be tempted to give him a big hug or maybe a kiss {no I'm not leaning towards the darkside either " As for your neighbour if you hear the sound of a chain saw starting up RUN like HELL . Keep up the updates loving it so far .
                            Hahaha if I hear a chainsaw I am running in the opposite direction. If the updates stop..... you know where to to look for me.

                            Originally posted by Bora Sport View Post
                            I'm not sure what size pipes you are dealing with are but I recall the earlier Golfs used to have a coolant pipe that ran down low across the front of the engine (from the water pump?) that was about 1'' at one end and then tapered down to a narrower diameter. It might have been a heater hose off the top end of the cylinder head, I just can't recall. I think Falcons used to run a pipe like that as well that may be cheaper.
                            Do you know from what year or engine possibly? If only I had some spare time to go and play in my local wreckers and find the right sized pipe. I have friends in SCA/autobarn/repco etc so might go play in their back rooms to try and find the right size.


                            Anyhow, moving onto PART 2 of yesterdays update.

                            Got the rest of the intercooler parts needed from VPW. Wow....does it add up to a small fortune reaaaaaal quick.


                            Then got to work. Needed to trim the 2.25-2.5 elbow a tad to fit nicely. A tip for anyone doing this, use a clamp like this to get a perfectly straight cut.


                            Got some of the piping trimmed and started piecing it together. Like lego really.
                            Once I had it taped together, I passed it over to a welder friend who welded it together for me. Going to pick it up from him tonight and finish the install.


                            After that was sorted I needed to work out the throttle body section. The issue I have here is there is not much room in between the TB and the chassis. So I thought I could just chop a 90deg pipe in a pretty extreme angle, and use silicon joiner to hold it together.
                            Sort of like this


                            As you can see, I would still have to get another bit of alu pipe welded on to the end of that, just making it all the more complicated.
                            So I grabbed a spare 2.5 90deg silicone hose I had and trimmed the life out of it to test fit it on.
                            Heres how it came out.


                            It's a much better outcome I think? A lot easier to install too.
                            Just before I put it all together, I grabbed some pliers and gave the pipe a quick roll around just to make sure the pipes don't burst off (hard to imagine with 8pis hahahaha).


                            All finished


                            Also needed to mount the catch can. I ran a catch can in the cabby before and it stopped quite a bit of oily crap from going back into the intake, so was very happy to have it installed again.

                            Made a little bracket to hold it, and on she goes!
                            Only issue is I'm struggling to find the correct hose to fit on. My local bunnings is closed for renovations and no other automotive hose is around the 21mm mark. But I'll keep searching.


                            Also just touching on yesterdays hose, I've fitted it all up nicely. Seams to hold very well - but time will tell.

                            - Orange Golf mk1 LS, 1.8 5speed, 32/36 - sold
                            - Golf mk1 Swallowtail rebuild, completely stripped
                            - Brown U.S import 81 cabby
                            - 88 Honda crx b18cr

                            Comment


                            • Quote
                              It's a much better outcome I think? A lot easier to install too.
                              Just before I put it all together, I grabbed some pliers and gave the pipe a quick roll around just to make sure the pipes don't burst off (hard to imagine with 8pis hahahaha).
                              Don,t be concerned with the pipes popping off with your mods VW wern't that crash hot with their high tech intercooler connections, with our 2.5 T5 they use a steel circlip to hold the section together problem is the clip is mounted onto die cast alloy and with every sudden acceleration deceleration is move minisculy to the point where it wore out the groove and would just pop off without warning with loads of black smoke and no power . A low tech repair fixed it forever , two screws one opposite each other around the collar stopped it from coming apart and cheaper than a new $600 plus part from VW . Those blue pipes remind me of my sons desire for new heater hose for his Moto Cross Race Bike , I paid for them begrudgingly as I kept pointing out to him that they looked good but did not make the bike go faster !

                              Comment


                              • I did a quick Google search. I’m pretty sure the one that I’m thinking of is from a Mk1 Golf. I did a couple of screen shots. You might get something out of these. Enjoying your thread by the way.

                                Click image for larger version

Name:	93CF1A33-1C50-4C0C-8153-E8625089756B.jpg
Views:	1
Size:	134.7 KB
ID:	1828689Click image for larger version

Name:	0F2ABFE2-6B3F-40B6-B211-437ECE0302C7.jpg
Views:	1
Size:	133.4 KB
ID:	1828690Click image for larger version

Name:	C5F10504-F7B8-4901-AEB0-B254146B8553.jpg
Views:	1
Size:	77.7 KB
ID:	1828691
                                2001 Bora 4 Motion Sport now used by number two son
                                2011 Skoda Octavia Scout now with Underground Performance tune
                                2010 Jetta 125 tdi dsg for the misses - Impressed
                                2006 Polo GTI - Enhanced by some of Gav's magic - Absolutely loving it

                                Comment

                                Working...
                                X