If this is your first visit, be sure to
check out the FAQ by clicking the
link above. You may have to register
before you can post: click the register link above to proceed, registering will remove the in post advertisements. To start viewing messages,
select the forum that you want to visit from the selection below.
This means you should apply for your renewal now to avoid any disruptions to your membership whilst the renewal process is taking place! NOTE: If you have an auto renewing subscription this will happen automatically.
In engineering, these are normally called easy-outs. One problem with these is if the stud is really tight, screwing it in [because of the taper] makes it even tighter. There is another type that is square on a slight taper with a slight cutting edge formed on one side so that it bites in when unscrewing. Once again if the stud is very tight, the square taper can distort it & make it even tighter. There is a skill required [based on previous stuff ups] on how large a drill is used. Too small & risk the possible breakage of easy-out or too large that allows the stud to distort & be made tighter.
In your case the head of the screw has broken off & the only thing needed to unscrew the stud [using the centre punch method] is to break the hold of the Loctite.
I am pleased for you that you had a happy outcome.
I think I have seen the square easy outs you are referring to. At work when one of our techs snaps out a stud, we have a specialist come out to us and I've seen him use it. Very interesting to see how the professionals do it, thats for sure !
will you be running an intercooler?
If so, there will a heap of pipe work needed!
How's the little brown cabby going, I called into your place a few years back to get some rear seat belts from the cab you were wrecking!
Hey Eric, I do actually remember you! long time no chat Brown cabby is gone, and this is actually the 1.8T from that cabby haha.
Yes intercooler will be run, but not a lot of plumping needed at all from what I can tell. I am however considering running a small 12v fan attached to it to assist in cooling, but am un-decided on how to monitor when to turn it on/off. I have read of some folks using a probed adjustable thermostat switch - then set it to a certain temp and when it gets too hot the fan turns on. This will allow me to route the intercooler in the back, rather than the front of the van to save the extra work.
i was expecting it to be more of an issue with you using loctite, got lucky
looking forwards to the install
Thanks mate, only a few more service items to go on today, and I'll be dropping the motor in. My welder has broken, so will be struggling to make engine mounts - but will cross that bridge when we get there.
Hey Eric, I do actually remember you! long time no chat Brown cabby is gone, and this is actually the 1.8T from that cabby haha.
Yes intercooler will be run, but not a lot of plumping needed at all from what I can tell. I am however considering running a small 12v fan attached to it to assist in cooling, but am un-decided on how to monitor when to turn it on/off. I have read of some folks using a probed adjustable thermostat switch - then set it to a certain temp and when it gets too hot the fan turns on. This will allow me to route the intercooler in the back, rather than the front of the van to save the extra work.
oh, ok. So the intercooler stays up the back, was wondering about the pipework going all the way to the front!
so, instead of cruising with your mates in the cabby, you now cruise with your lady in the T3. Interesting to watch you do something different with your cars, keep it up!
oh, ok. So the intercooler stays up the back, was wondering about the pipework going all the way to the front!
so, instead of cruising with your mates in the cabby, you now cruise with your lady in the T3. Interesting to watch you do something different with your cars, keep it up!
Haha, thanks mate. It's been a fun project that's for sure, I just can't have an un-modified car around me lmao so had to do something with it.
Alright so Sunday was a big day, put in a solid 5 hours and did quite a bit.
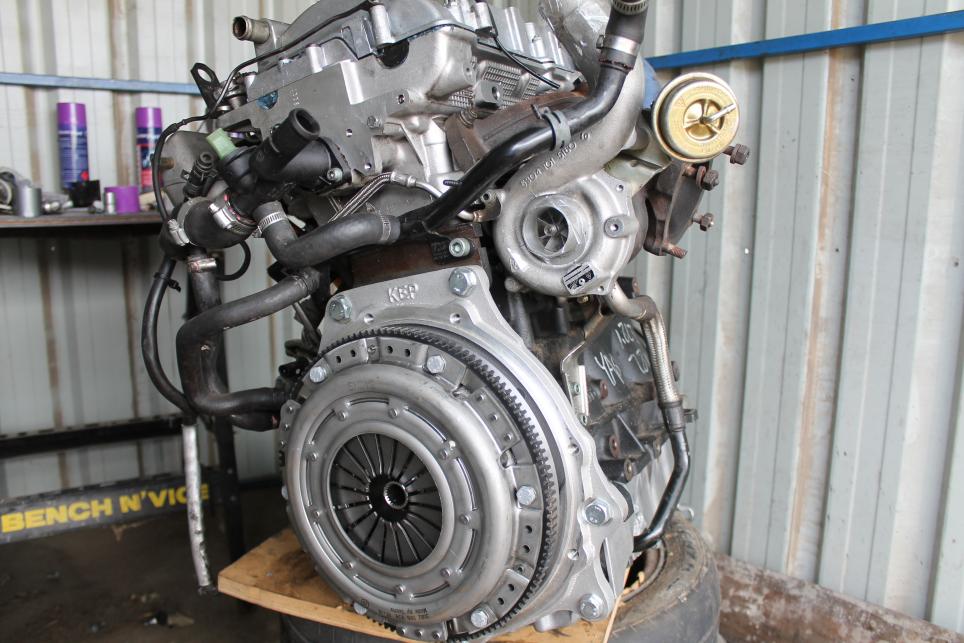
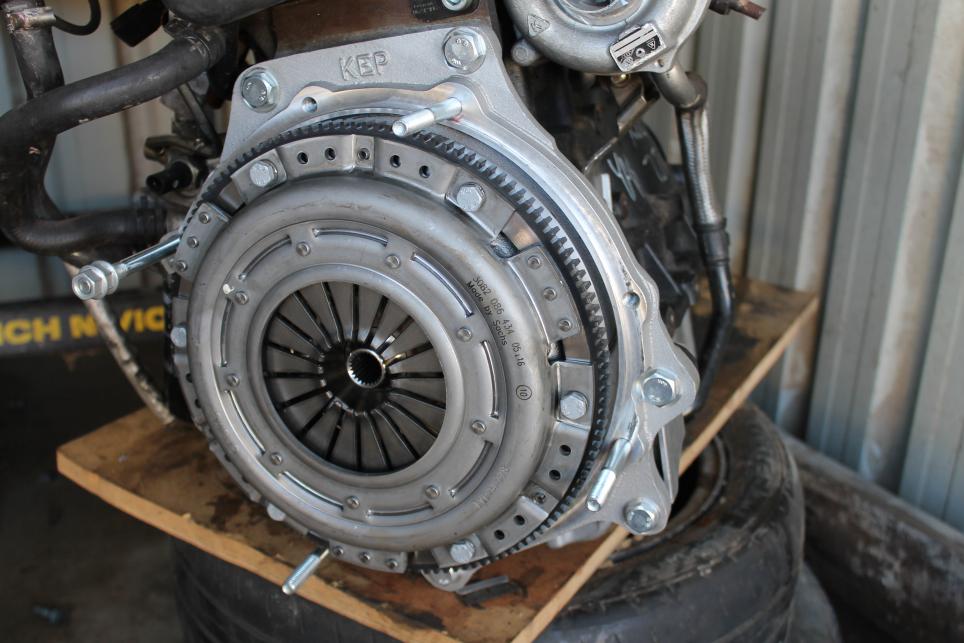
Ok, round 2 on the clutch pressure plate. Ordered new genuine 10.9 grade bolts this time to make sure we don't make the same mistake twice haha. Also actually tightened them to exact spec, AND didn't use Loctite hahaha. Things went well this time round.
Then came the studs. I used the 2 nut locking system thingo majigy trickery doo. Worked great.
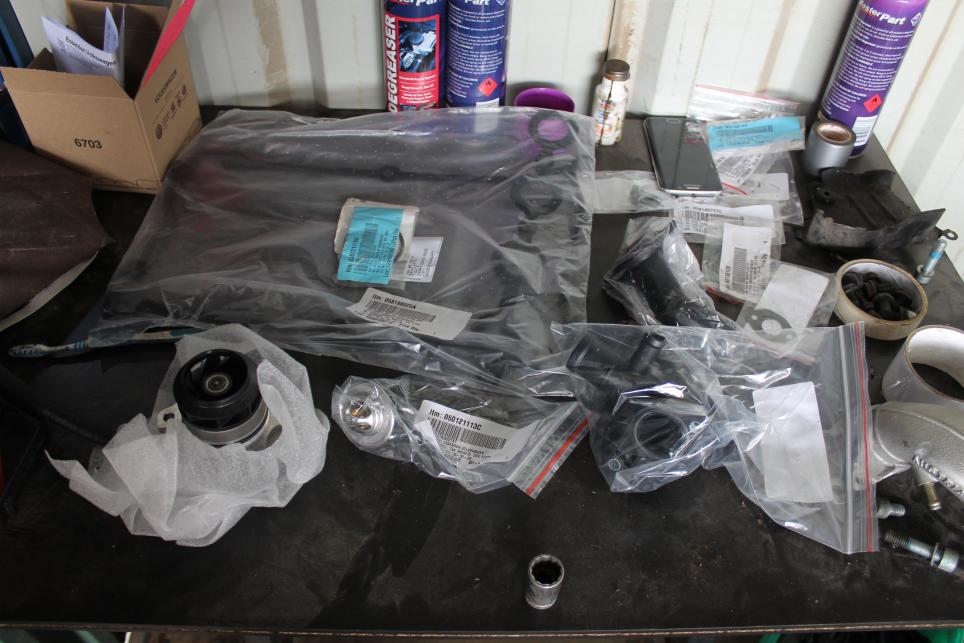
Ahh, the benefits of working at a VW dealer. All new gaskets, bolts, washers, seals etc. (only half pictured)
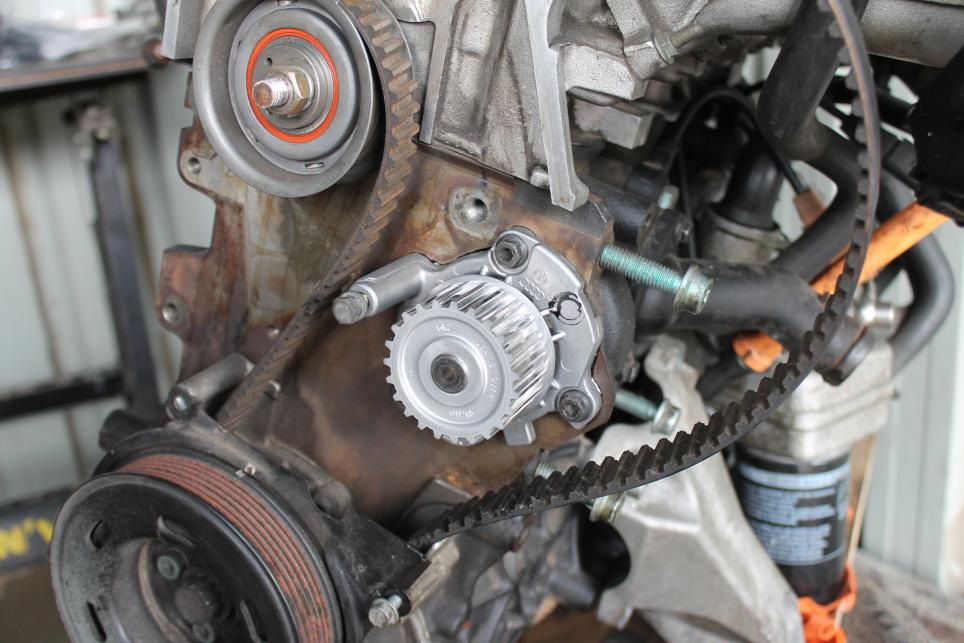
Did a new water pump, thermostat and all the plastic water housings too as they are notorious for cracking and breaking on the MK4s! Small price to pay for a piece of mind.
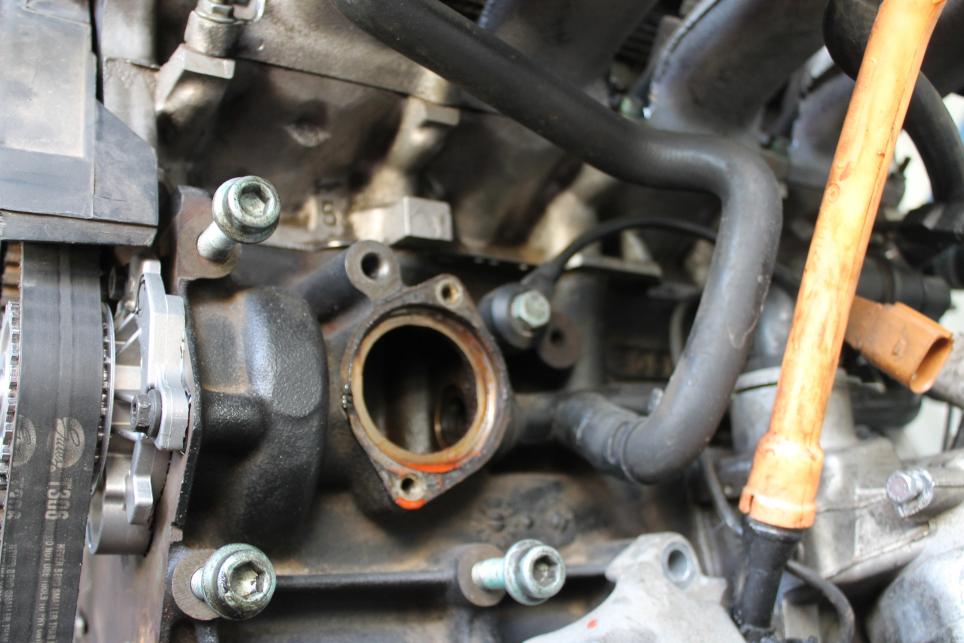
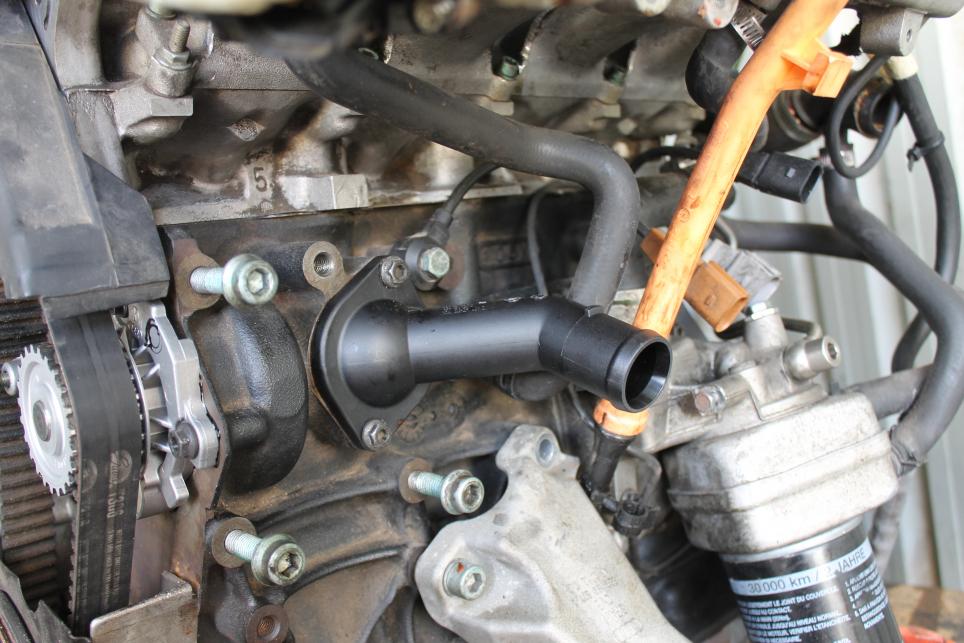
New thermostat and housing too.
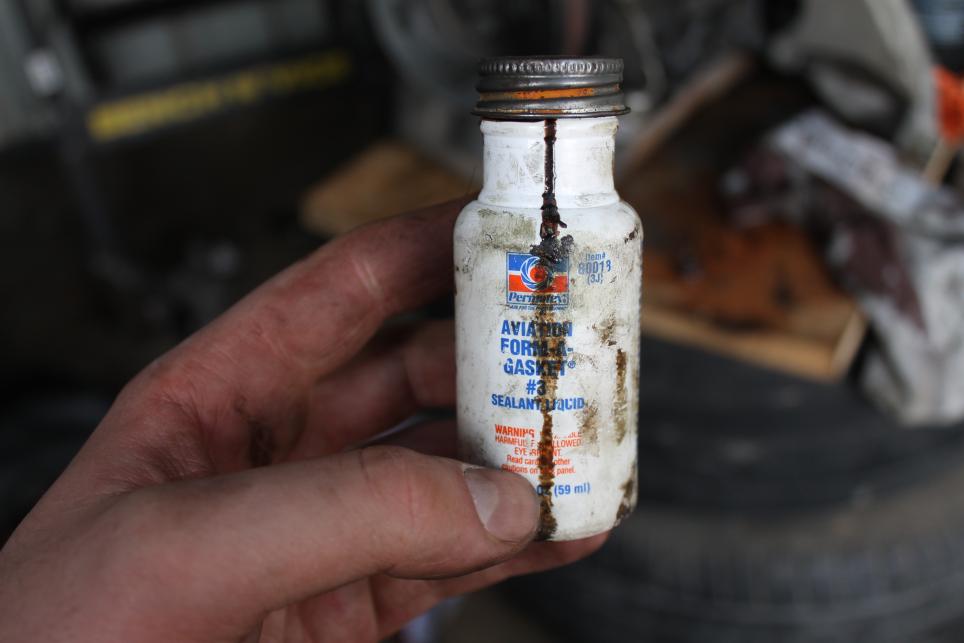
This is the glue/sealant I have been using for years. A lot of people always always tell me I don't need to use sealant for stuff like this, but I really like to for an added piece of mind. This particular one never technically dries, it is also very thin and easy to apply and seals very well - plus its always easy to remove. It can be bought from any Super Cheap Auto store, and is my personal favourite over the years.
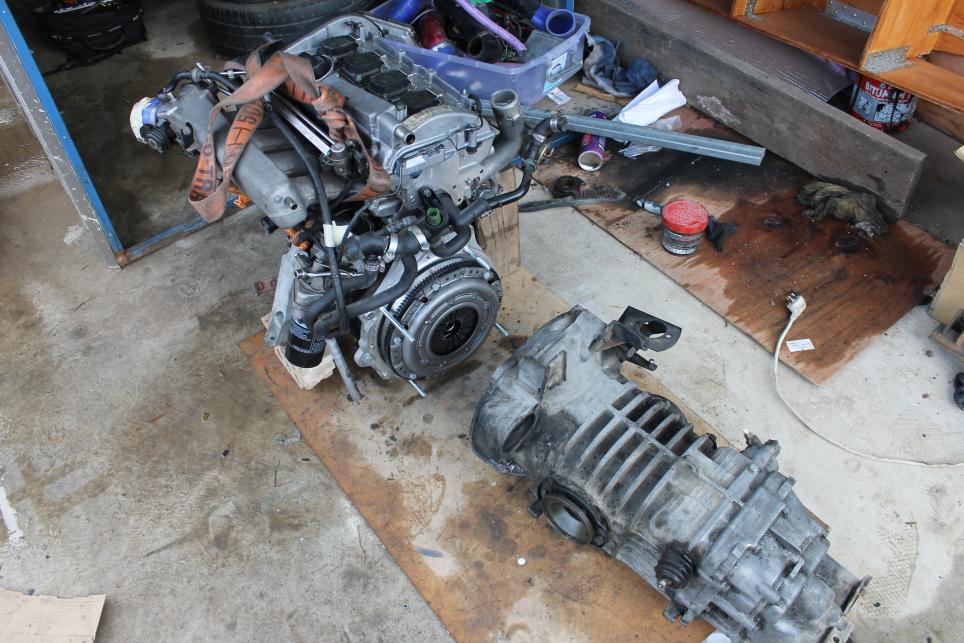
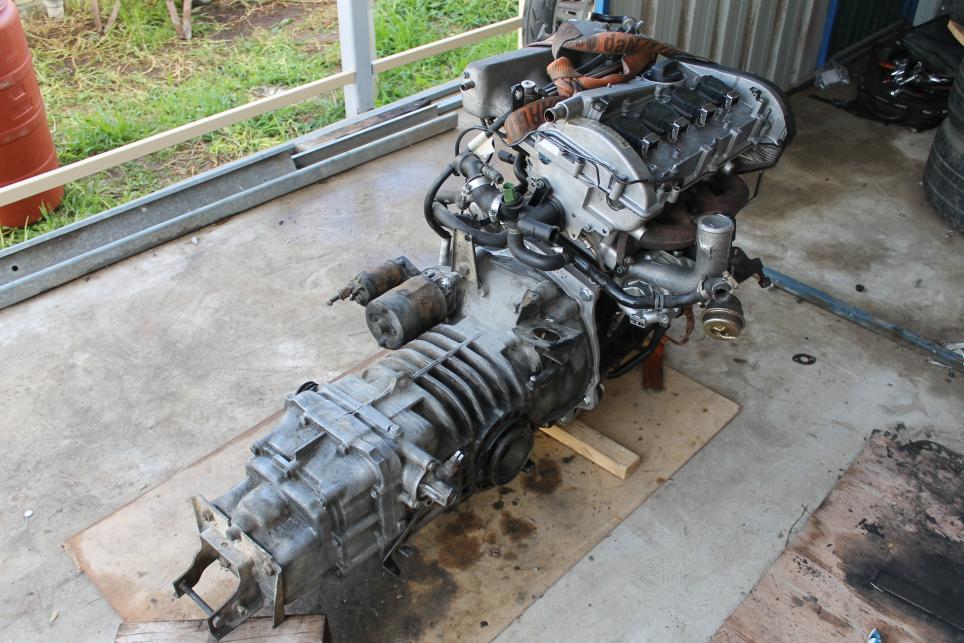
After that was all done, it was finally time to get the motor together along with the gearbox. My old man helped me lift the motor off of my make shift engine stand, and onto the floor to assemble the two together. I don't have a clutch alignment tool and always do it by eye, so it's always a good thing when they align first go hahah.
(Excuse the mess, it was raining pretty heavy yesterday and the whole floor was a big wet warzone)
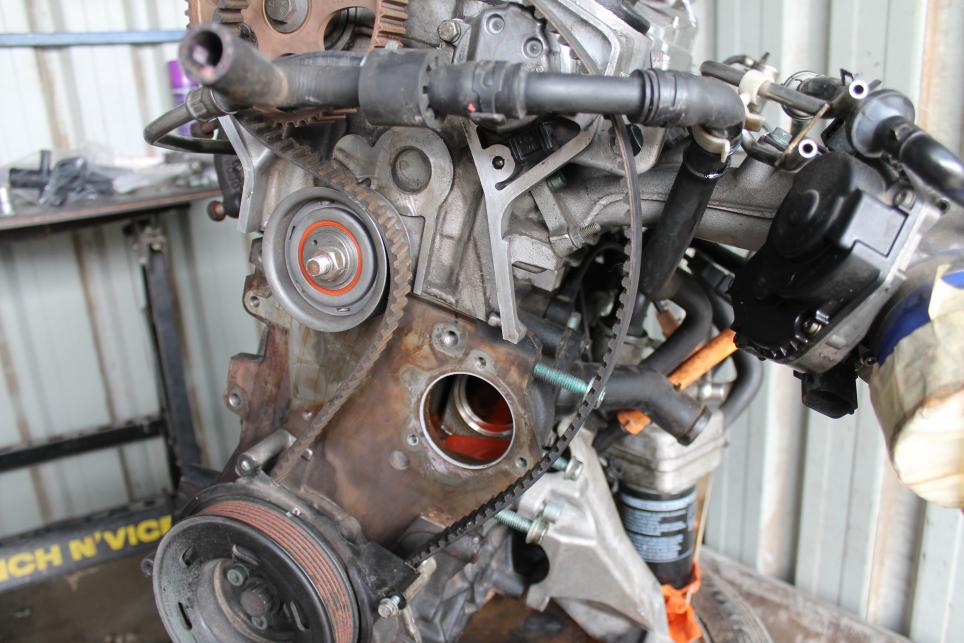
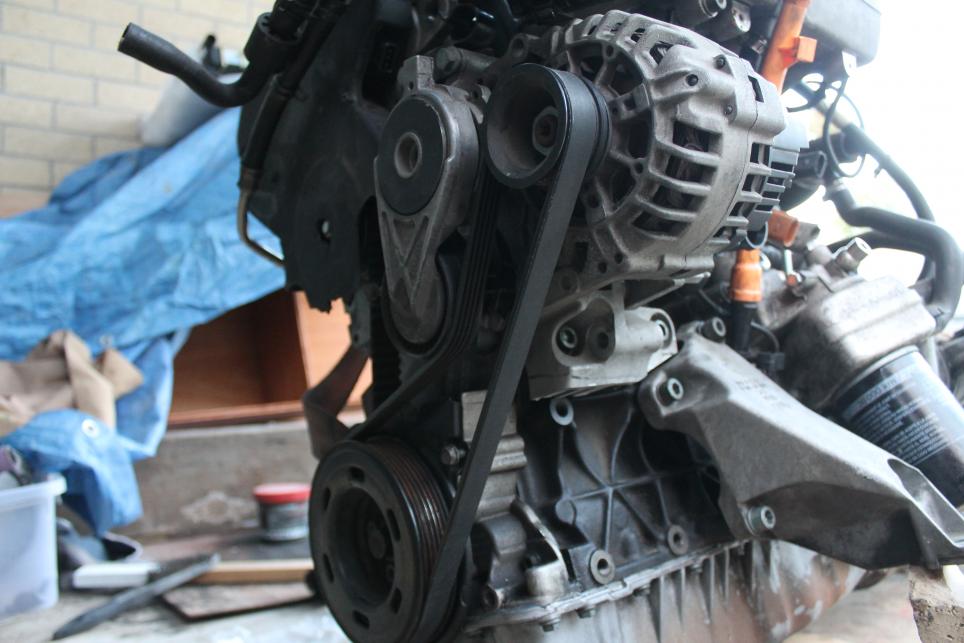
Once I tightened everything up I move onto the alternator bracket. The MK4's use this bracket for alternator and for P/S. But because I don't want the P/S I chopped the bracket up to save some room and weight on the motor. Then after that I fitted the Alternator onto the motor. Really happy about this as it's a much more modern alternator than the old one, so charging should be sweeeet
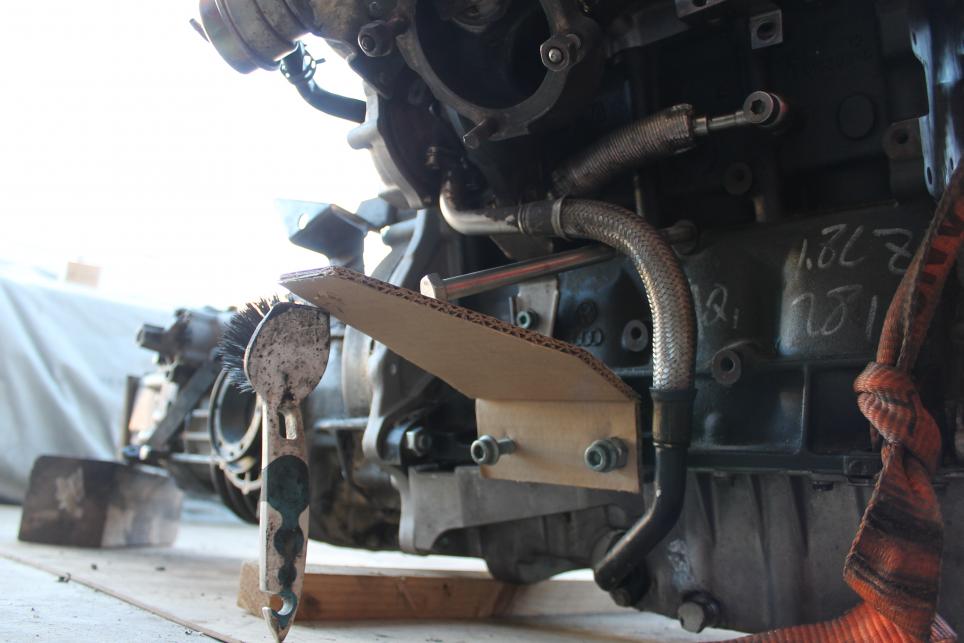
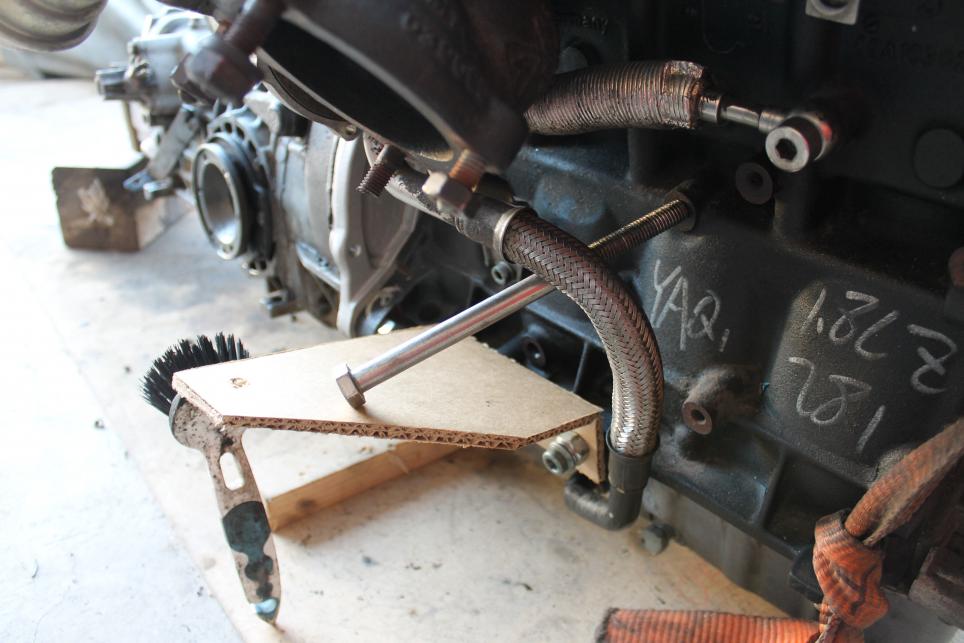
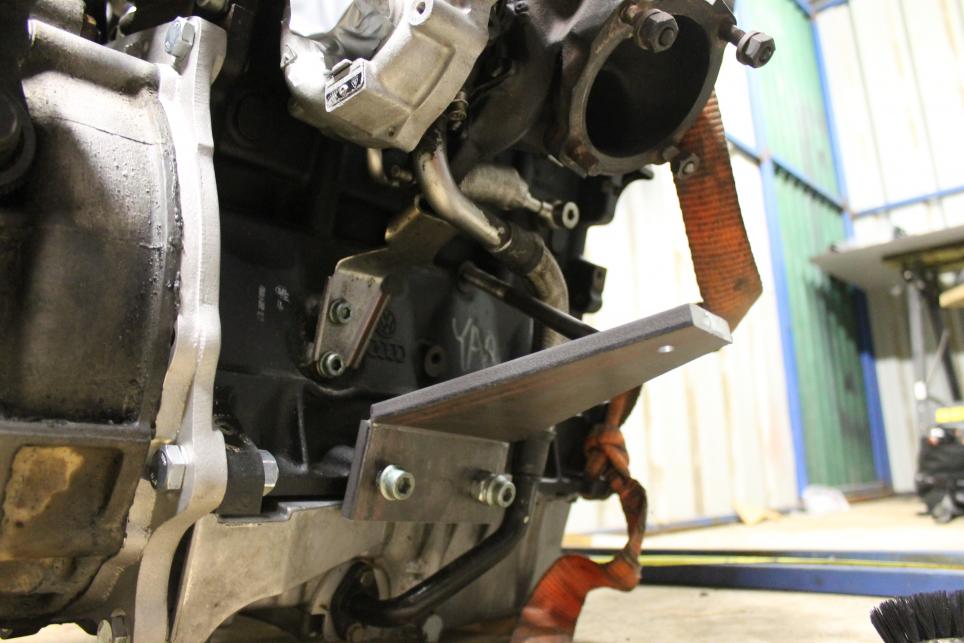
Toward the end of the day I was pretty well stuffed, so took on an easier task. I started designing the passenger side engine mount. After careful measurements, I found the exact same position of the mounting hole on the other side of the OEM drivers side mount I got from the Audi A4.
There is not much options for a support rod from the top of the block due to the turbo. There is only one mounting hole, and you can see where I placed the bolt to indicate where I plan on adding a support rod to strengthen the bracket up. I think it should do the job nicely, but I have a few more ideas to beef it up a bit. Just got to get my welder sorted ASAP!
Is that clutch running a Dual Mass Flywheel ? as for lining up the clutch my uncle showed me a cheap trick using a piece of wooden dowel always worked a treat .
Is that clutch running a Dual Mass Flywheel ? as for lining up the clutch my uncle showed me a cheap trick using a piece of wooden dowel always worked a treat .
It's a single mass flywheel mate, same as original bust slightly modified ring gear I believe from Kennedy Engineered Performance.
What's the trick? My dad made an alignment tool out of a broom handle once and carved it perfectly, but I find it easier to align by eye haha
My dad made an alignment tool out of a broom handle once and carved it perfectly, but I find it easier to align by eye haha
I use a shortened splined transmission shaft from a 36HP beetle. It seems to fit most VWs, last time was on our Polo.
I have also done the 'by eye' trick & that also works.
Understand how it works, troubleshoot logically BEFORE replacing parts.
2001 T4 TRAKKA Syncro 2.5TDI,2006 Mk5 2.0TDI Golf manual,2001 Polo 1.4 16V manual [now sold], '09 2.0CR TDI Tiguan manual,
Numerous Mk1 Golf diesels
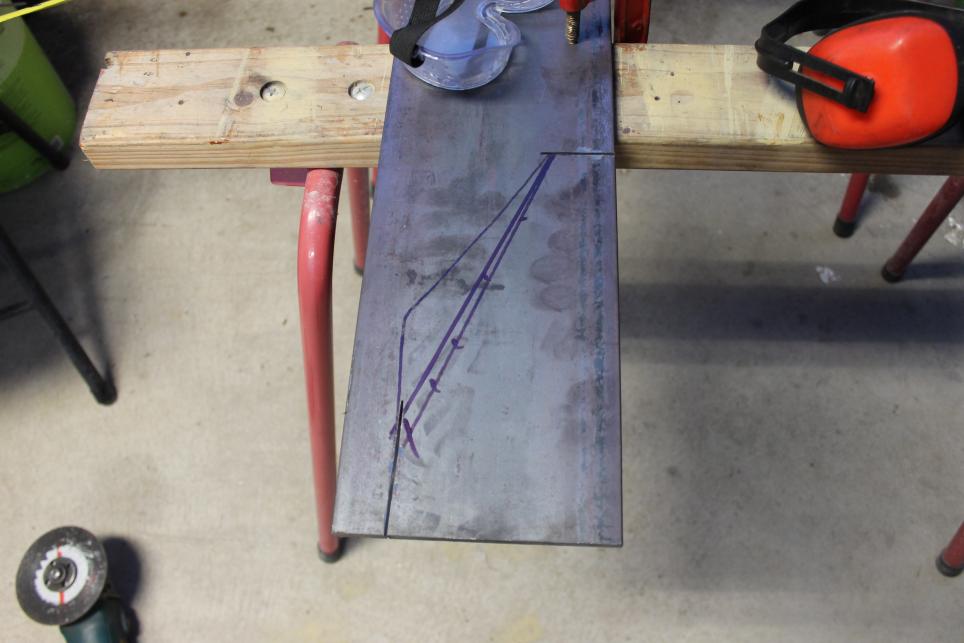
I went to buy a flat bar of steel to start making the engine mount yesterday at during lunch. I needed it to be 150mm wide and atleast 6mm thick. My local steel supplier only had 150x10. 10 bloody mm! That's way too thick, but I had no choice. Got it home after work and started cutting this huge chunk of metal. Its super heavy too, atleast I know I'll never be afraid of it breaking haha.
Outlined the template and some final changes made.
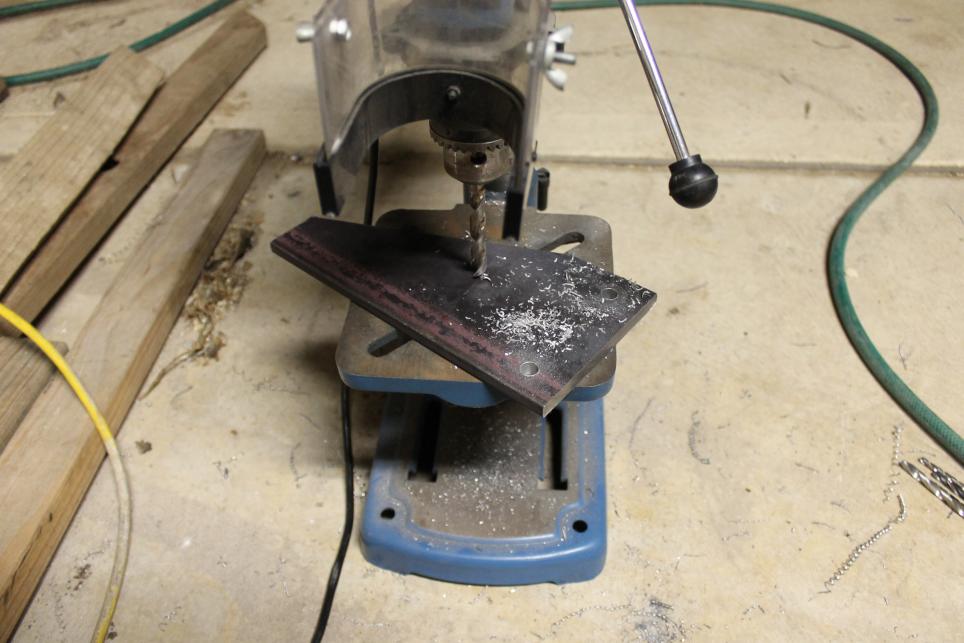
All cut out and using my super expensive $99 drill press.
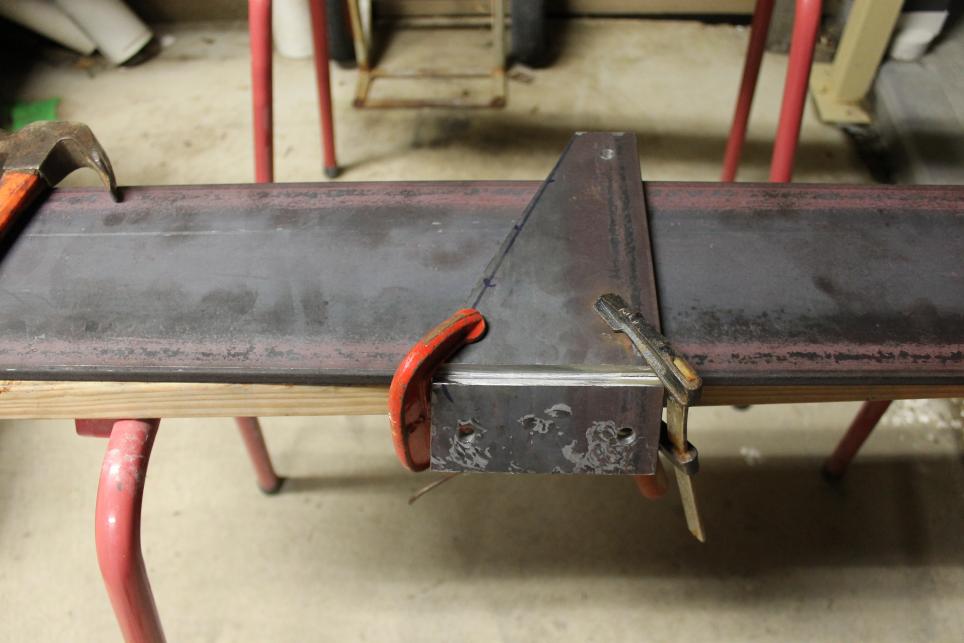
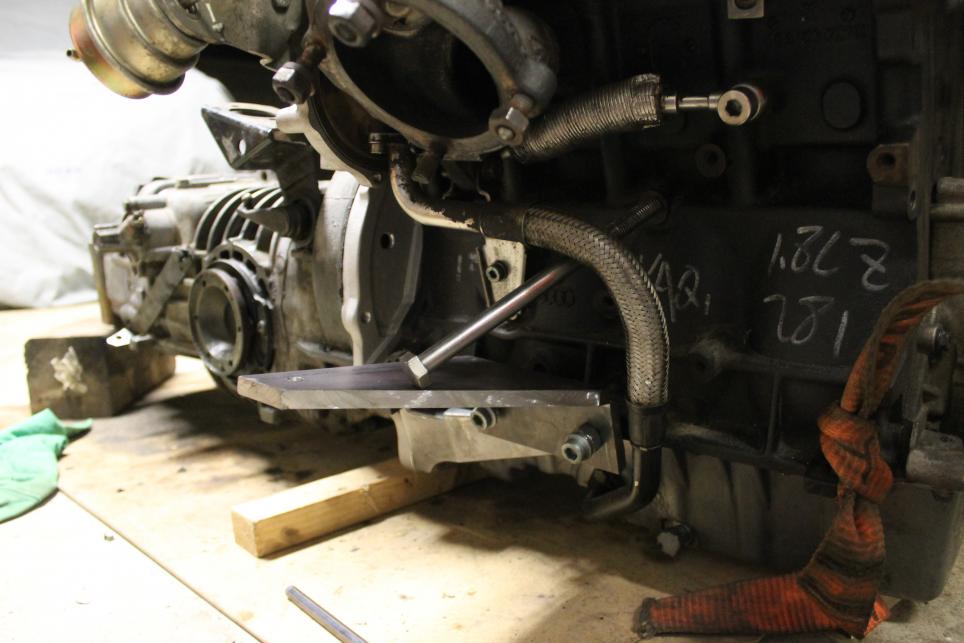
Then grinded a small line to help me bend this enormous chunk of beef, and beat the crap out of it with a huge hammer.
Tested, all good. I'm not going to finish the mount yet while I try to repair my welder. So just having the mount sit in like this so I can work around it and keep progressing till the welder is done.
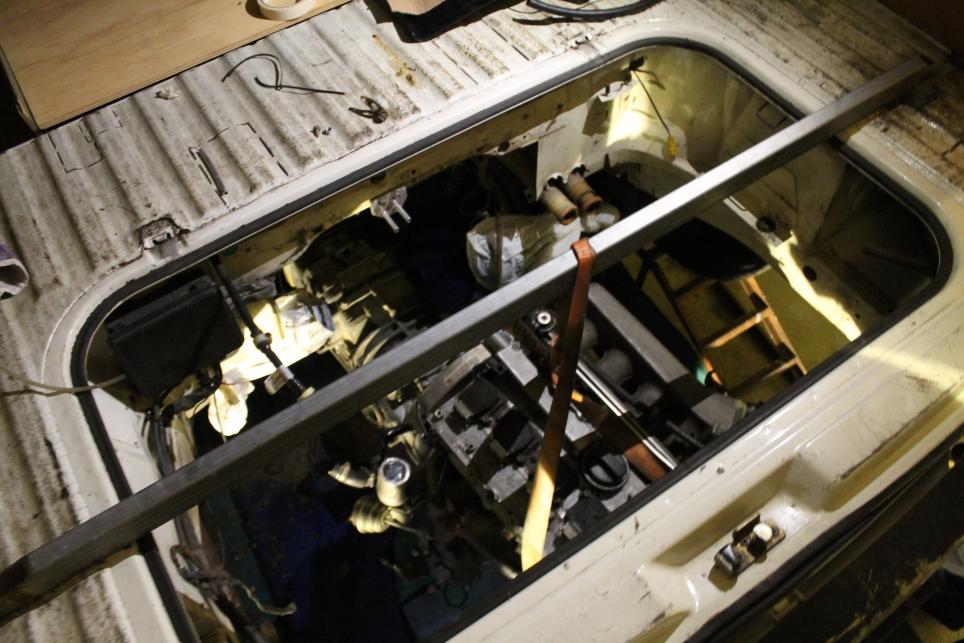
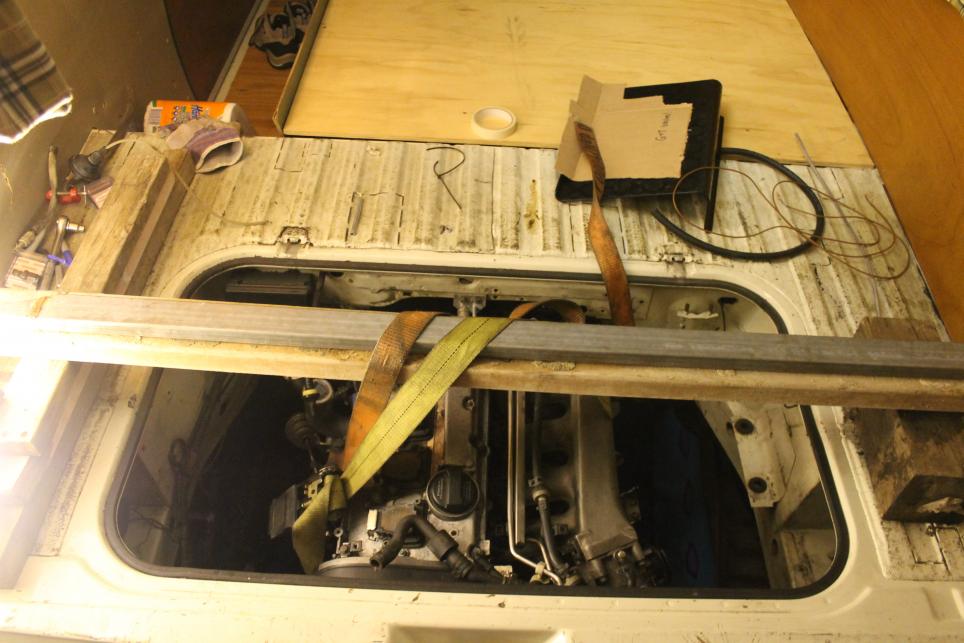
At this point in the night I was pretty ahead of time, so thought I'd try to get the motor in. A buddy of mine came in and gave me a hand.
We used a jack to lift the motor up, and one of his genius ideas of using a ratchet strap to help raise the motor!!
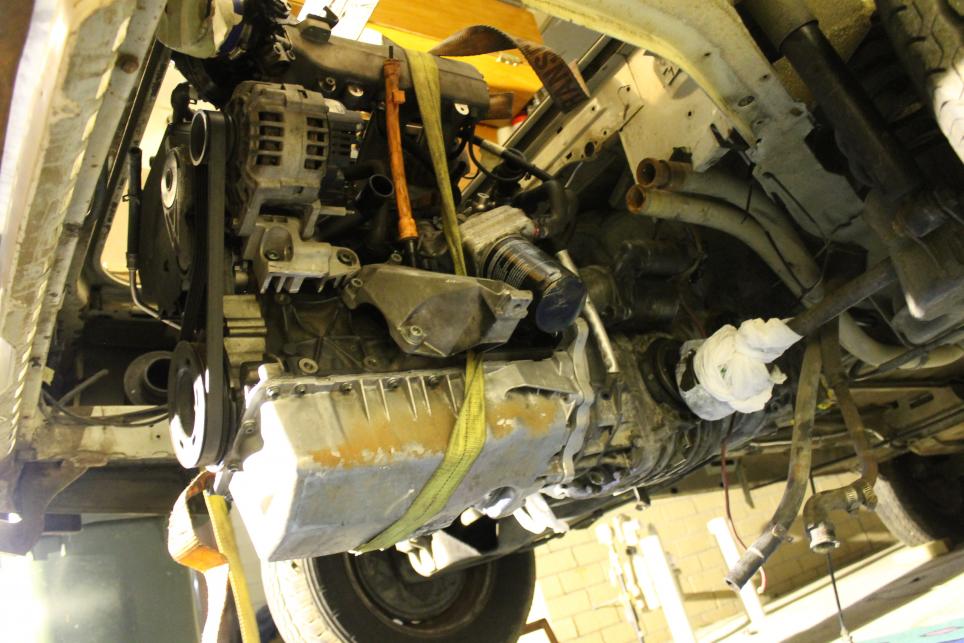
That's about as far as I took pics and forgot to after wards. I spent the last hour of last night moving things around and slowly raising it all the way into its final position. There's still lots of room around, but the only issue is the throttle body is really close to the body. I think I should be able to work out a way to fit it all snuggly.
My next 2 big issues are. 1) finding the correct final position of the engine. I have the gearbox mounted which gives me a really good indication of where it should be positioned, but I need that final 25% to be as accurate as possible. So I'm not quite sure what I'll do, but research is on the cards.
And 2) making and engine brace. It's proving to be a bit more difficult than I had imagined. Looks more complex and I will also have to do a lot more research into the best method here.
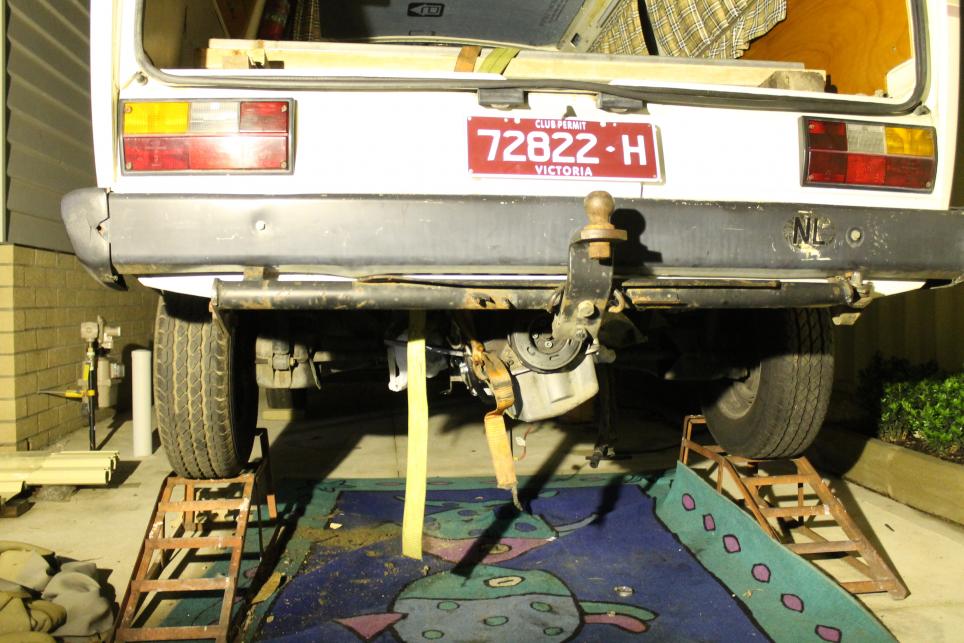
Overall I'm happy the engine is in. The original engine came out on the 9 August, and here we are on the 30th August with a new motor in already. Very pleased with the results so far
That so much reminded me of when I fitted a 186 Holden motor into my old Toyota Hi Ace , making up engine mounts from 10mm thick steel as well looks good keep up with more info .
Do you have a friendly engineer or is this allowable under some sort of club plate Victorian shenanigans? Are you upgrading brakes and/or suspension along with the powerplant?
Know it's 2F & late now, but when looking for metal, don't forget the local scrap dealer.
Yes! This for sure mate, the issue is they only open when I'm at work AND I work Saturdays too
Otherwise I would spend every minute of my life at a scrap dealer haha. Thinking of all the things I could weld and create!
That so much reminded me of when I fitted a 186 Holden motor into my old Toyota Hi Ace , making up engine mounts from 10mm thick steel as well looks good keep up with more info .
Haha, I'm not sure if 10mm looks over engineered - or poorly sourced material ahahaha.
Do you have a friendly engineer or is this allowable under some sort of club plate Victorian shenanigans? Are you upgrading brakes and/or suspension along with the powerplant?
Hey Tony, was actually wondering when someone would pull me up on this.
To be honest, I'm not completely sure. I was expecting this project to be done by December giving me plenty of time to consider my options, but I have ploughed through quicker than I imagined.
In short, no, its not allowed under club plate, and I will have to discuss this with my club president. It would have to be engineered at some point I assume, but its funny as the capacity is actually smaller than original - so should not pose too much issue as far as I'm aware. However, emissions and so forth will definitely need to be tented too to match the original car it came from.
The brakes have been completely over hauled at the start of the build and the van stops perfectly. I take it you havn't been in an old T3 haha, this engine will not require larger brakes, and I am expecting it to only really bring the van up to cruising speed quicker and hold speed better on uphills. I had it in a mk1, and although the 1.8t is fun - its no power monster by any means at all, so not expecting miracles on such a heavy vehicle. Merely reliability and more torque.
Yes! This for sure mate, the issue is they only open when I'm at work AND I work Saturdays too
Otherwise I would spend every minute of my life at a scrap dealer haha. Thinking of all the things I could weld and create!
Haha, I'm not sure if 10mm looks over engineered - or poorly sourced material ahahaha.
Hey Tony, was actually wondering when someone would pull me up on this.
To be honest, I'm not completely sure. I was expecting this project to be done by December giving me plenty of time to consider my options, but I have ploughed through quicker than I imagined.
In short, no, its not allowed under club plate, and I will have to discuss this with my club president. It would have to be engineered at some point I assume, but its funny as the capacity is actually smaller than original - so should not pose too much issue as far as I'm aware. However, emissions and so forth will definitely need to be tented too to match the original car it came from.
The brakes have been completely over hauled at the start of the build and the van stops perfectly. I take it you havn't been in an old T3 haha, this engine will not require larger brakes, and I am expecting it to only really bring the van up to cruising speed quicker and hold speed better on uphills. I had it in a mk1, and although the 1.8t is fun - its no power monster by any means at all, so not expecting miracles on such a heavy vehicle. Merely reliability and more torque.
how did you go with the brown cabby, wasn't it on club rego, and you had a turbo'd later model engine?
how did you go with the brown cabby, wasn't it on club rego, and you had a turbo'd later model engine?
The cabby was never registered with the 1.8t lol. ( I know I'm a sinner, blah blah blah).
The issue with Vicroads is that there is never any 2 people telling me the same thing. When I played with Hondas years ago I had swapped soooo many engines and actually went up in size AND double the power yet they just sign the engine change-over and that was it. I don't think most of them really know what is going on half the time (I have spent lots and lots of time at vicroads haha).
I think I might look into the new MOD plates and see what the requirement there is. There has been too much heat on club plates lately anyhow as too many people seam to be abusing it and driving cars daily etc so I think the police are cracking down on it, which I totally understand and support.
Once the engine conversion is done it might pay to pop by an engineer and get their opinion on the matter.
 Tweet
Tweet

 . Interesting to watch you do something different with your cars, keep it up!


Comment