 Tweet
Tweet
Hi all,
I did a dash cam install on my 2019 Arteon R-line over the weekend, and thought I would share some details, in particular cable routing to the rear dash cam.
My rear dash cam was mounted in the top middle of the rear windscreen, with the connector on the right side. I followed the Auto Instruct tutorial (Dash Cam Install Tutorial – Volkswagen MK7 Golf | AutoInstruct) up until Step 8, from there:
- Route and tuck the cable along the top of the left C-pillar trim.
- Continue to route and tuck the cable along rear roof liner edge, from the left side all the way until it reaches the right side rubber cable grommet/tube.

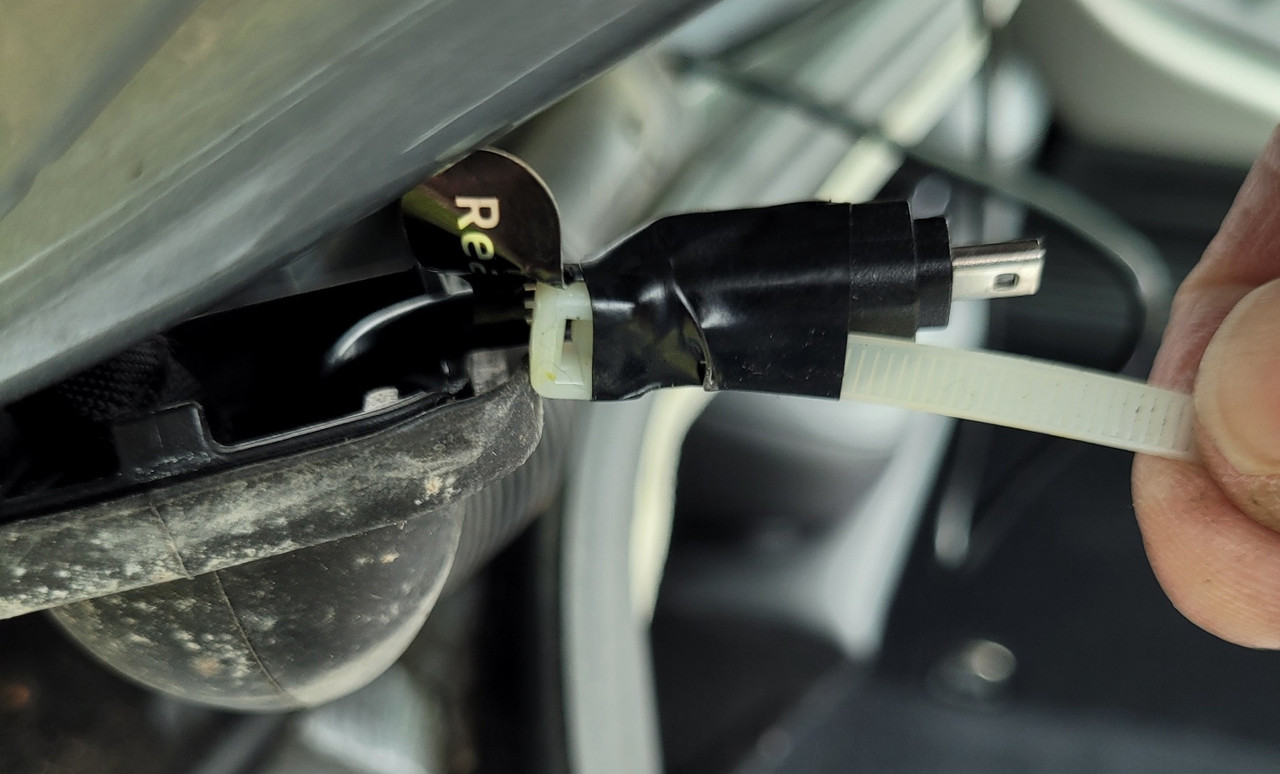
- Unclip the rubber grommet/tube. Use the plastic prying tool to push on the clips shown by the red arrows, and lift the grommet slightly at the same time, once the clips are disengaged, slide the grommet in the direction of the blue arrows. Don't push the clips too hard, as they are prone to breaking.

- Remove x3 torx screws (T20) from the lower boot lid trim. Items 4 and 6 in the image below.

- Pry the lower boot lid trim at the red arrows first to release these two clips, from there, pry around to release all the clips along the edges. Once edge clips are released, disconnect the boot lid button. Finally, use a few firm pulls to release the middle clips.
Some metal clips may detach from the trim and get stuck in the boot lid. If this happens, just pull the clips out with a pair of pliers and re-insert the clip back into the trim.

-Remove the expanding anchors from the upper boot lid trim using the pry tool. Make sure to remove the pin first, then remove the expanding anchor.

- To remove the upper boot lid trim, start by prying at the locations marked with the red arrows, then work your way from both sides until you reach the middle. Clip locations are shown below.

- Remove the right side C-pillar trim to allow the roof liner on this side to be pulled down further for cable routing. There are four clips holding the C-pillar trim, shown as items 2 in the image below
 .
.
- Pull down the roof liner slightly, feed the cable in and then pull the cable out through the grommet opening. Then feed the cable through the rubber tube and pass through the boot lid. You may need a cable puller or similar for this.

- Pull enough cable out and connect to the dash cam, keep some slack in the cable. Reinstall the upper boot lid trim. Tuck the cable using prying tool as needed.

- Reinstall the cable grommet, C-pillar trim, lower boot lid trim etc.
Hopefully this is useful and save you from breaking some trim clips.
I did a dash cam install on my 2019 Arteon R-line over the weekend, and thought I would share some details, in particular cable routing to the rear dash cam.
My rear dash cam was mounted in the top middle of the rear windscreen, with the connector on the right side. I followed the Auto Instruct tutorial (Dash Cam Install Tutorial – Volkswagen MK7 Golf | AutoInstruct) up until Step 8, from there:
- Route and tuck the cable along the top of the left C-pillar trim.
- Continue to route and tuck the cable along rear roof liner edge, from the left side all the way until it reaches the right side rubber cable grommet/tube.
- Unclip the rubber grommet/tube. Use the plastic prying tool to push on the clips shown by the red arrows, and lift the grommet slightly at the same time, once the clips are disengaged, slide the grommet in the direction of the blue arrows. Don't push the clips too hard, as they are prone to breaking.
- Remove x3 torx screws (T20) from the lower boot lid trim. Items 4 and 6 in the image below.
- Pry the lower boot lid trim at the red arrows first to release these two clips, from there, pry around to release all the clips along the edges. Once edge clips are released, disconnect the boot lid button. Finally, use a few firm pulls to release the middle clips.
Some metal clips may detach from the trim and get stuck in the boot lid. If this happens, just pull the clips out with a pair of pliers and re-insert the clip back into the trim.
-Remove the expanding anchors from the upper boot lid trim using the pry tool. Make sure to remove the pin first, then remove the expanding anchor.
- To remove the upper boot lid trim, start by prying at the locations marked with the red arrows, then work your way from both sides until you reach the middle. Clip locations are shown below.
- Remove the right side C-pillar trim to allow the roof liner on this side to be pulled down further for cable routing. There are four clips holding the C-pillar trim, shown as items 2 in the image below
- Pull down the roof liner slightly, feed the cable in and then pull the cable out through the grommet opening. Then feed the cable through the rubber tube and pass through the boot lid. You may need a cable puller or similar for this.
- Pull enough cable out and connect to the dash cam, keep some slack in the cable. Reinstall the upper boot lid trim. Tuck the cable using prying tool as needed.
- Reinstall the cable grommet, C-pillar trim, lower boot lid trim etc.
Hopefully this is useful and save you from breaking some trim clips.
Comment