 Tweet
Tweet
Nice one NZ_GolfR. I'm looking forward to pics/vids post install.
-
-
Looks good. Be interested in how you go especially if you get the valves connected up.Originally posted by NZ_GolfR View Post
Sent from my iPhone using Tapatalk
2017 Tiguan Sportline - Tigger73's 162TSI Sportline
2016 Scirocco R, stage 1, 205kwaw (sold) - Tigger73's Scirocco R Build
2013 Tiguan 155TSI, stage 1, 144kwaw (sold) - Tigger73's 155TSI Build
2011 Tiguan 125TSI, Stage 2+, 152kwaw (sold) - Tigger73's 125TSI Build
Comment
-
nice work! good luck with the installOriginally posted by NZ_GolfR View Post
I'm keen to get your/the shop's experience on the trim removal - that's been the blocker for all the shops I've gone to so far >.<MY09 MKV Golf R32 | Black Pearl | Recaros | Sunroof | RNS510 | Purchased Feb '10 | Sold Jul '17
MY19 MKII Tiguan Highline 162TSI | Indium Grey | S&V | Pano Roof | R-Line | Purchased Nov '18Comment
-
Well that was a real fizzer!! Despite me having gone in and talked to them before hand about what I wanted to do and showed them the pictures of what you other guys had done they didn't have and of the gear needed when I went in there today (no stainless pipe or exhaust clamps). They got part way into it and the boss comes over and says that he thought it was a straight bolt in replacement despite me having specifically told him that the tips needed to be cut, extended and welded back on plus extra pipe to remove the central resonator and join to the existing exhaust pipe. They wanted me to leave the car with them over night but that is a no go as it is my work vehicle. They hung up the new exhaust and measured up how much pipe they need so will get it organised plus and extra clamp and hanger and then we will re-schedule.
On the plus side, I managed to get the fake trims off myself before I took it in so it can be done without the car jacked up. The first one took about 30-45 minutes before i worked out how to get it off then the second one only took 5 minutes!! I will take some photos later and write up instructions as best as I can to help you other guys in getting these off.Current Ride: 2019 CUPRA Ateca in Energy Blue with Bucket SeatsComment
-
haha bugger!Originally posted by NZ_GolfR View Post
theoretically you could leave the Tig res as is and just attach the R muffler from where the pipe starts/comes out of the muffler. Remove the res later on (depending on sound preference)
Round of applause for removing the trim! looking forward to the write up, might give me some confidence to try myself (thanks in advance)MY09 MKV Golf R32 | Black Pearl | Recaros | Sunroof | RNS510 | Purchased Feb '10 | Sold Jul '17
MY19 MKII Tiguan Highline 162TSI | Indium Grey | S&V | Pano Roof | R-Line | Purchased Nov '18Comment
-
Just had a quick look, I think you will be able to get to the plugs without dropping the exhaust. Having the rear raised on ramps or something would make it alot easier as I assume there will be some hand acrobatics required.Originally posted by NZ_GolfR View PostCurrent:
2017 Mk2 Tiguan 162TSI, R-line, White
2020 Mk7.5 Golf R Wagon, WhiteComment
-
So update on Exhaust Valves.
Rob Bliss has a supplier that has a harness with remotes that will allow us to control the valves. I'll get the suppliers details on Thursday when I go in for my set and share with you all
Sent from my SM-G975F using TapatalkComment
-
This is the one that I was looking at:Originally posted by twyat1 View Post

Have been speaking with AWE and they think it should work for what I want, just need to supply 12v and ground.
APR also do something similar haven’t found much info on this as it seems to be pretty new.
Sent from my iPhone using TapatalkCurrent Ride: 2019 CUPRA Ateca in Energy Blue with Bucket SeatsComment
-
Comment
-
I’m waiting for them to get back to me on few things including price but on USP Motorsports site I think the are about US$229.Originally posted by twyat1 View Post
Sent from my iPhone using TapatalkCurrent Ride: 2019 CUPRA Ateca in Energy Blue with Bucket SeatsComment
-
Thats not too bad. On Modeconcepts it is AU$399. I looked into it, but looking at the instructions my understanding was that it has to connect to the male connector from the factory wiring (that we dont have).Originally posted by NZ_GolfR View Post
Sent from my SM-G975F using TapatalkComment
-
Yes that was why I spoke to AWE. All it needs is 12v and ground to work. There system bypasses the factory operation all together and you manually open or close it so doesn’t rely on the control wire. The APR one from what I read switches between being fully open and back to ECU controlled but if it was used in our cars without the ECU feed it would just be permanently close when turned off.Originally posted by twyat1 View Post
Both systems should still work in our cars as a manual open and close system if we just supply them with 12v and ground.
Sent from my iPhone using TapatalkCurrent Ride: 2019 CUPRA Ateca in Energy Blue with Bucket SeatsComment
-
Does the MK7 or 7.5 R have 1 or 2 exhaust valves?
AWE kit looks like a simple install, just the the 12v and ground... Any 12V at the rear of the car that could be tapped into?Tiguan Gen2 162TSI Etuners IS38 Stage 3 238.6 kw@4 wheelsComment
-
The Mk7/7.5 Exhaust has 2 valves.
There is a cigarette lighter in the boot which will be switched 12v which I was planning to wire it from. Should be able to feed the cable through one of the existing rubber grommets to under the car.
Sent from my iPhone using TapatalkCurrent Ride: 2019 CUPRA Ateca in Energy Blue with Bucket SeatsComment
-
Tiguan Exhaust
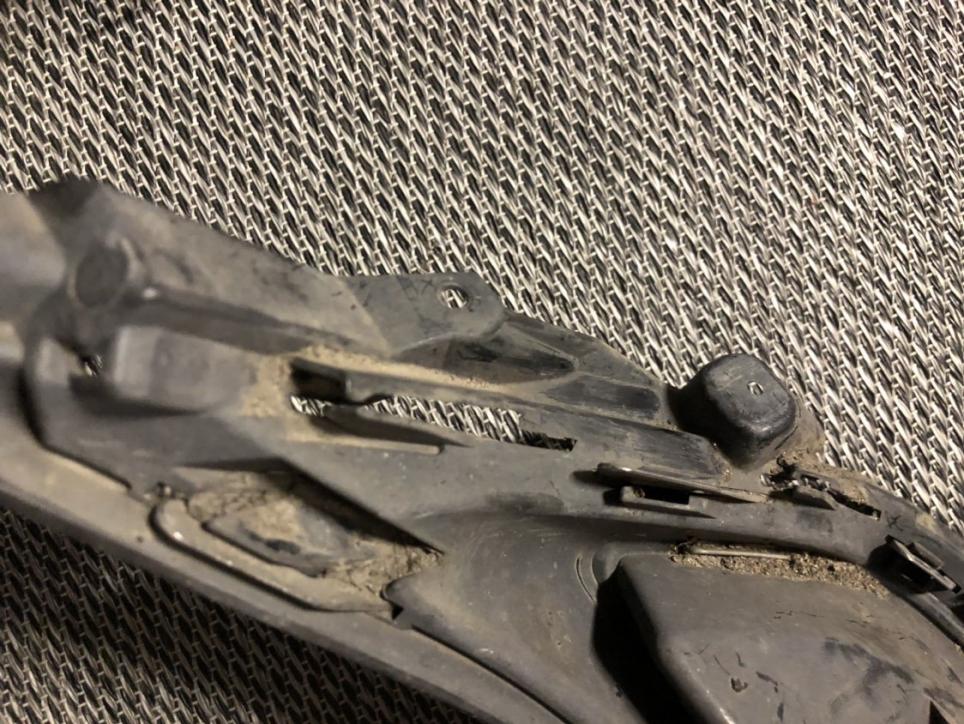
Sorry, been meaning to do the write up for removing the exhaust trims but just haven't had the time which is why I am doing it now at midnight instead of going to bed.
Firstly, you don't need a rubber mallet, the only thing I found this useful for was knocking loose all the stones and road grit that you will find behind the exhaust trim. All you really need is 2 flat blade screw drivers, I found the smaller the better especially since space can be a bit tight.
Secondly, if you are doing this with the car on the ground then I would lay something down on the ground for you to lie on plus find something you can use as a pillow to lift you head up. I didn't use anything for doing most of the first side and it really strained my neck as you have to lift you head up to look what you are doing. The following day I had really stiff neck and shoulder muscles from doing this.
The way I found it the easiest was to start at the end closest to the middle of the car. There is a small clip right at the front edge (when underneath the car looking back) that is easy enough to release. The rest of the clips are the tricky ones as they weren't what I expected.
The male part of the clip is attached to the bumper itself and slots into the exhaust trim. Then on the exhaust trim side there are plastic tabs that lock into the male part of the clip. Unfortunately it is too dark for me to get any pictures of the clips on the bumper but here is what the clip parts on the exhaust trim look like, the tab on the bumper slides into the gap:
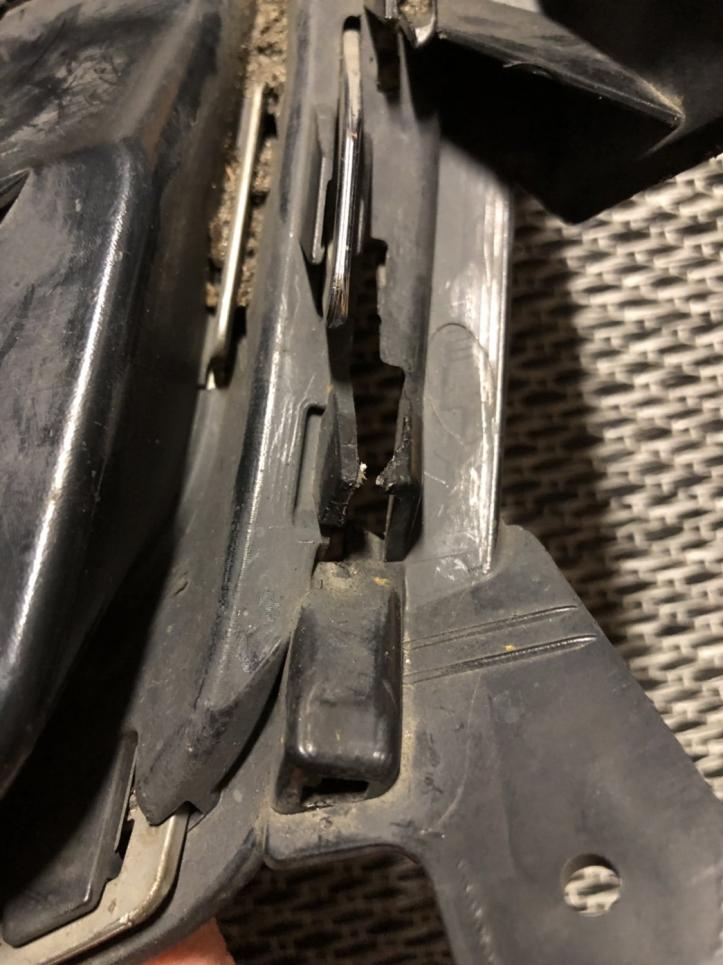
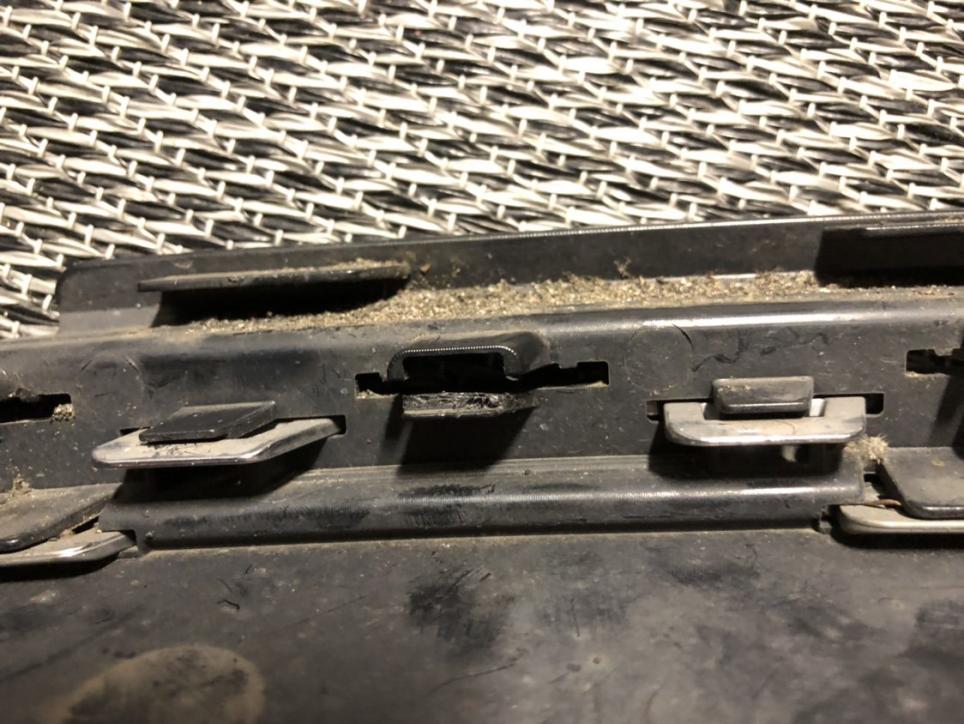
What I did was get the 2 small flat blade screw drivers and slot them down either side of the male part of the clip to push the tabs on the exhaust trim out of the way. Whilst holding the screw drivers in place with one hand use your other hand to push the exhaust trim from the outside towards the front of the car. Don't try and hit it as I found this didn't work and usually just knocked the screw drivers out of place. Instead just push with really firm pressure until you feel the exhaust trim move slightly, it won't move much to start with as all the other clips are still holding it in place but it will move enough to slide far enough forward on the clip that you don't need the screw drivers in place anymore.
Once you have done the first clip there is a second one behind it on the same side, just repeat the process with the screw drivers and pushing the exhaust trim and it will move a bit more this time.
Along the back edge there are 3 more clips then another 2 on the other side. Each time you release one of them and push the exhaust trim it will move more.
Once you release all the clips then on the outside edge of the exhaust trim you will notice that it sits behind the bumper support so you have to push if over a bit to get it around this and then it will come away.
Be aware that on both sides I had cables clipped to the top inside edge of the exhaust trims for the automatic boot opening sensor and parking sensors etc. You will need to pry these clips off before you can totally remove the exhaust trims. I then clipped these to the top edge of the bumper above were the trims went.
The main issue I found is just getting the technique right for releasing the clips, once I had worked that out (took a good 30-40 mins) then they came off pretty quickly and I managed to get the second one off in about 5 minutes.
Hopefully this helps you guys trying to get them off. Definitely glad I did it myself before hand as I am not so sure they would have been so delicate.
Good news, it is attempt number 2 tomorrow (actually today now since it is so late) for getting the exhaust installed. Hopefully it goes better than last time and I can post so nice pictures afterwards.Last edited by NZ_GolfR; 09-04-2019, 10:44 PM.Current Ride: 2019 CUPRA Ateca in Energy Blue with Bucket SeatsComment
Comment