 Tweet
Tweet
Love it! Good on you for keeping it nice, clean and original!
-
- Mk2 Golf GTI 16v, 2-door, Tornado Rot, BBS RS, 1988 - SOLD
- E30 325i Coupe, Manual, Alpinweiss
- E30 325i Touring, Manual, Diamantschwarz x 2
- On the lookout for another E30 325i Coupe, Manual (red would be nice)... -
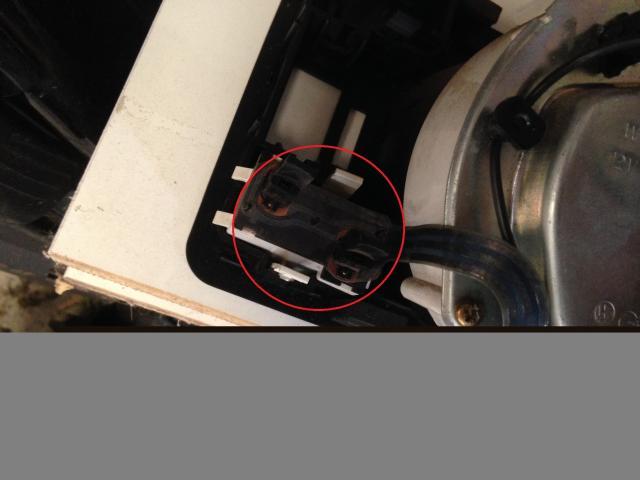
you will see the mounts for this bracket when you pull out the radio! its on the right hand sideComment
-
This week I have been doing two things to Andy
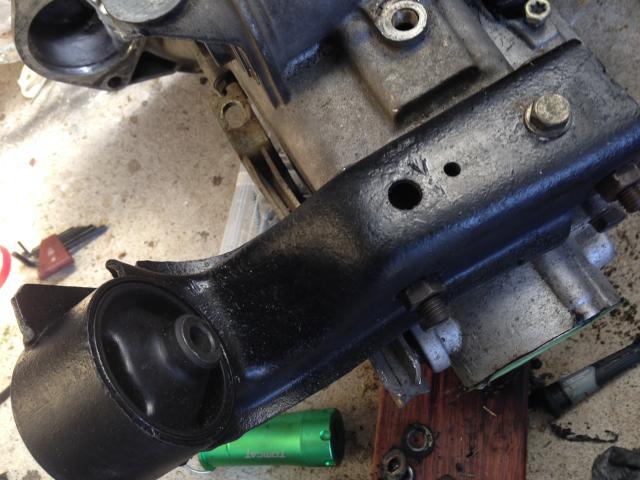
1. Getting all the parts ready for the 5 speed conversion. I have purchased a linkage kit, 90mm drive flanges and a few other bits and pieces needed to upgrade. I am just cleaning up the box now, I was thing about painting it, but the aluminium has come up looking fresh and clean after a little kerosene and toothbrush action, so that will be all that is needed.
2. The odometer stopped working randomly a little while ago so I pulled the cluster and set about repairing the issue. Here is a write up with photos to help others and also for my own reference:
Once you have the gauge cluster removed from the dash (refer to Haynes or Bentley) this is what you are left with:
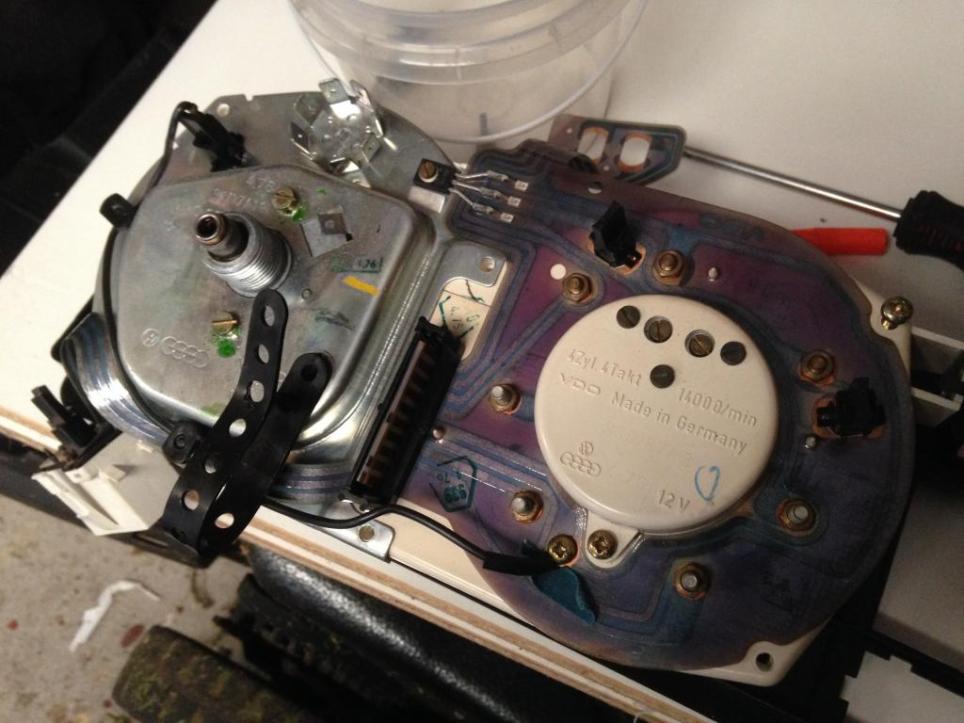
Set yourself up on a nice flat surface, you will need Philips and flat screwdrivers of various sizes as well as a set of sliding jaw pliers and some little picks/tweezers.
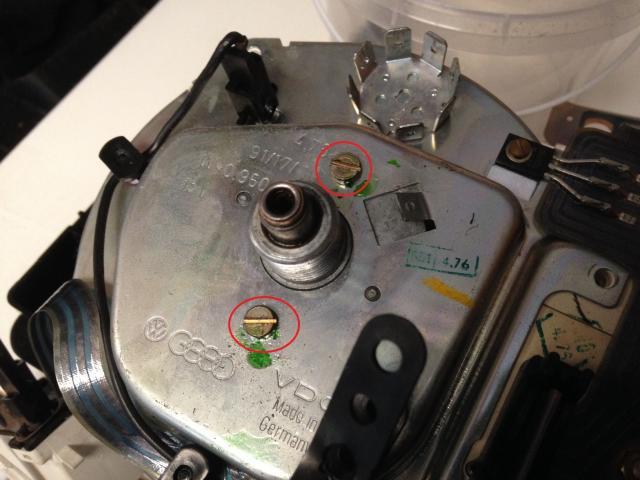
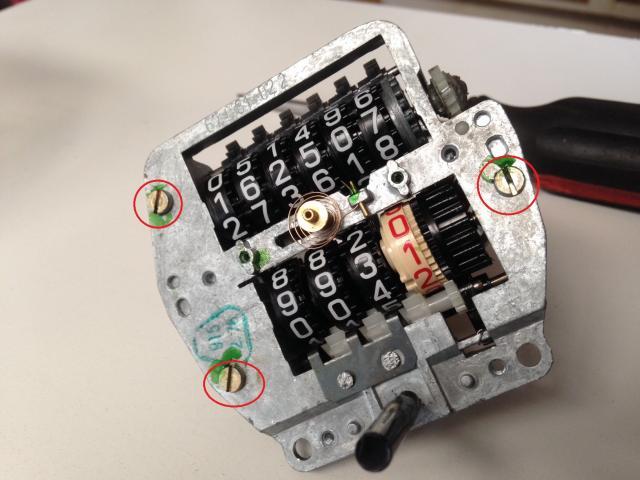
Undo the 6 screws circled below:
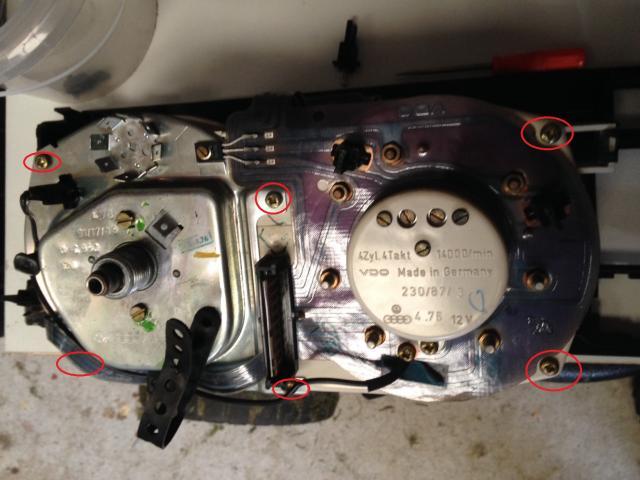
You need to remove 4 bulb holders to free the printed circuit board (bulbs shown in next 2 pictures). This will allow you to remove the tach and speedo from the cluster housing.
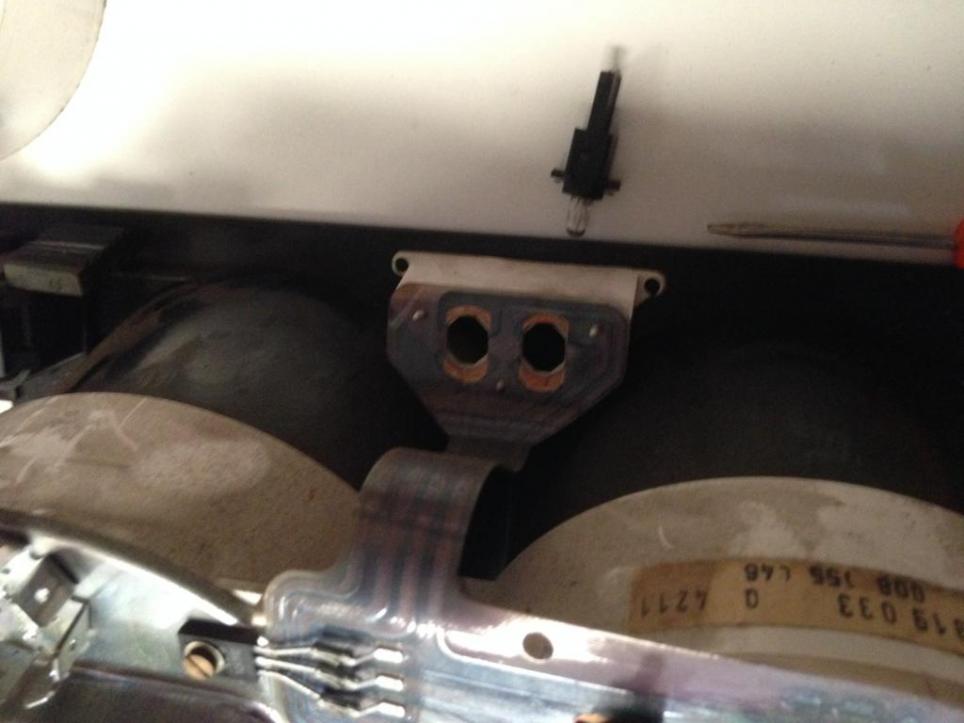
Now you need to remove the speedo from the tach. This requires the removal of the 2 screws highlighted below:
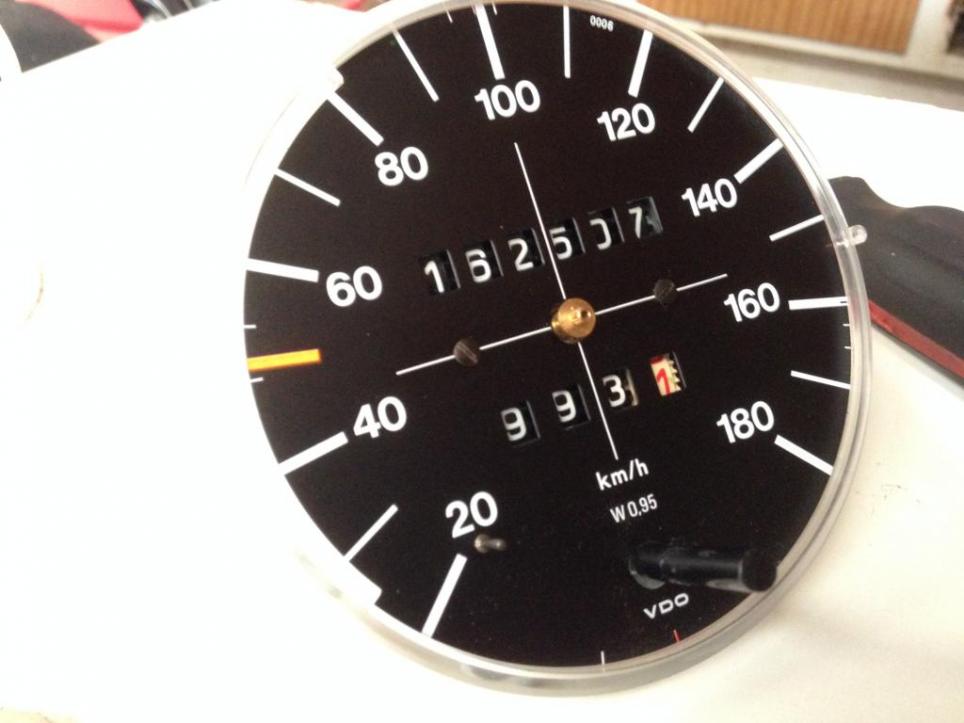
Now you should have the speedometer free from everything else. Be VERY careful not drop it or lose any screws, etc&..
This is what you should have in front of you now:
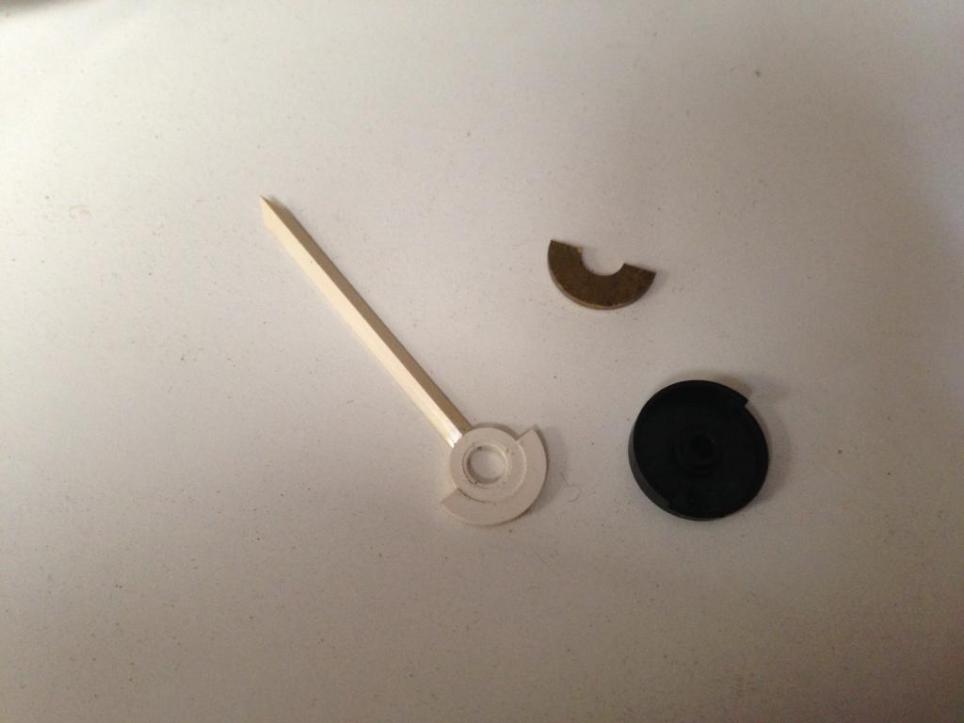
Remove the needle by sliding the tweezers/picks under the base of the needle and pulling up gently. It will come free with some persuasion. The needle will fall apart into 3 pieces, like such:
Now undo the 2 screws on the gauge face, make sure you dont scratch it!!
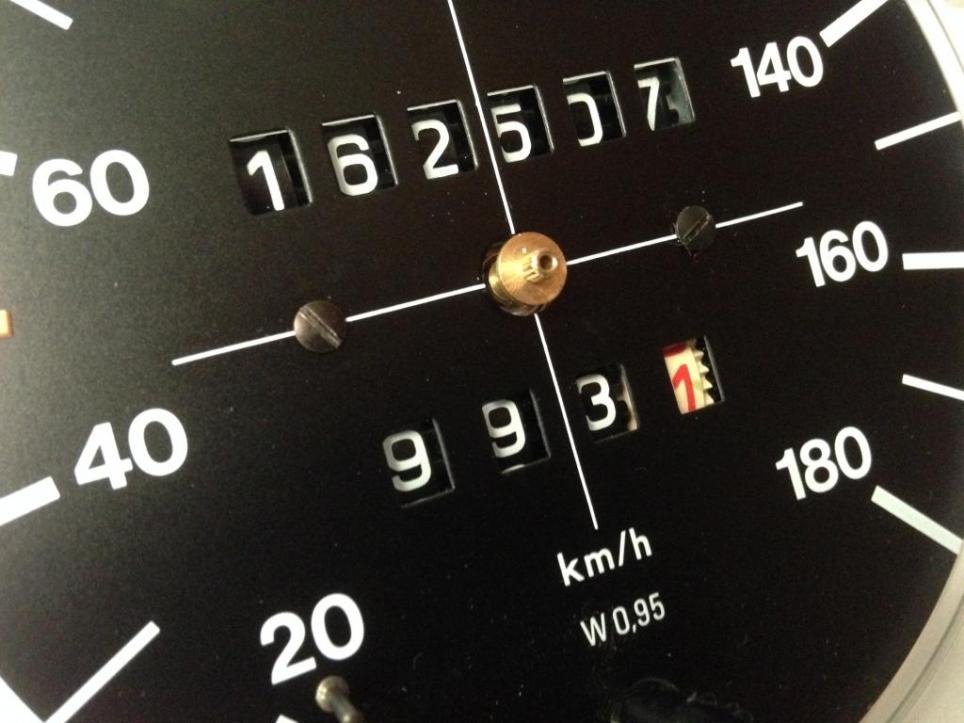
You now have access to the inner workings of the odometer and speedo.
To allow you to access the gears and tumblers, remove these 3 screws CAREFULLY. A white gear will drop out and you will also have to be careful of the speedometer flywheel thingee.
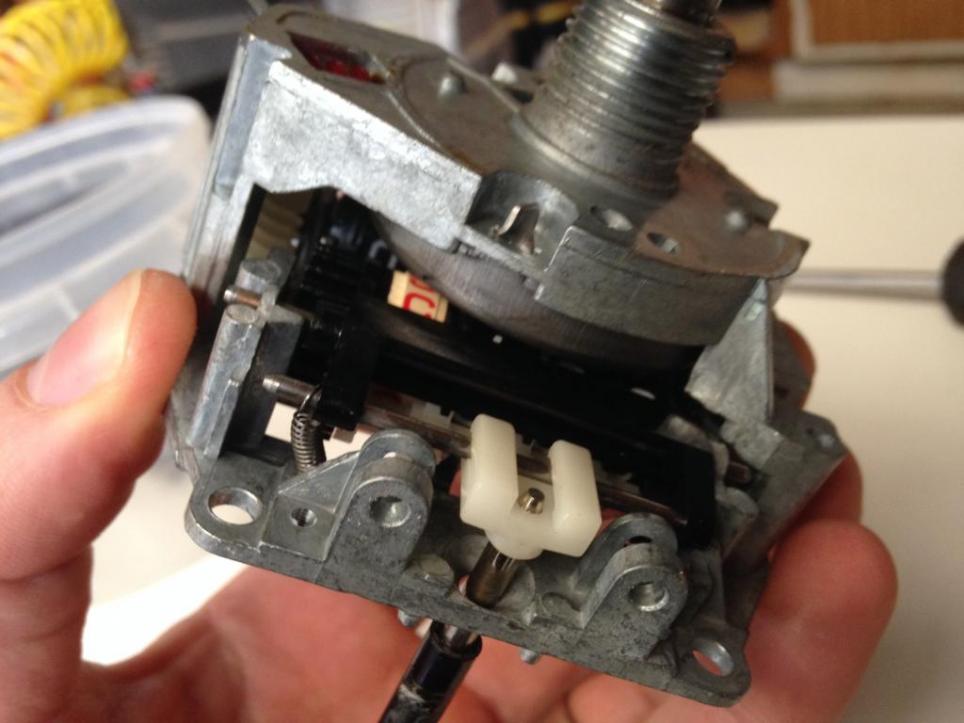
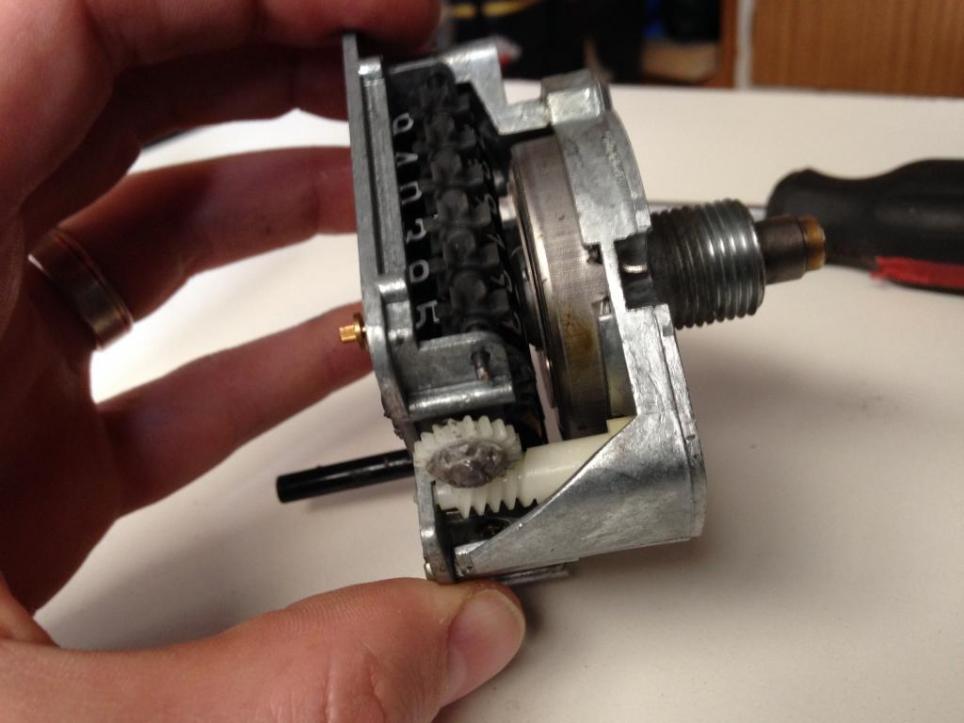
The way the odometer works is that the little white gear on the end (covered in grey snot in this photo) turns the shaft which turns the big metal tumbler. This in turn drives the odometer through a series of small gears and black numbered tumblers, as well as driving the trip meter via the tiny white gear.
The common issue is that the white gear on the end (the one with the grey snot) cracks and spins freely on the shaft. I also found that the big metal tumbler was spinning free on the shaft, thus nothing was happening when the speedo drive turned.
To fix the small white gear you need to start by levering the gear off the shaft. I used a small screwdriver and it came off quite easily. I used 2 tiny star washers that I pressed over the sides of the white gear and then covered them in JB Weld and let it dry.
To fix the metal tumbler I slide the shaft out just enough so the tumbler dropped out. Dont remove it completely otherwise the black numbered tumblers will fall out!! I added a smidge of JB Weld to the centre of the metal tumbler and then slide the shaft back through. Make sure no JB Weld is on any of the other components, otherwise the whole thing wont work.
Once the white gear is dry and the metal tumbler is dry (i.e. it wont spin freely on the shaft) you can start reassembly. I used the sliding jaw pliers to press the white gear back on the shaft with a little JB Weld to keep it locked on.
Everything else is just the reverse of dismantling. I would take the time to install some T5 LED bulbs in the cluster so you never have to pull it apart again to change the incandescents.
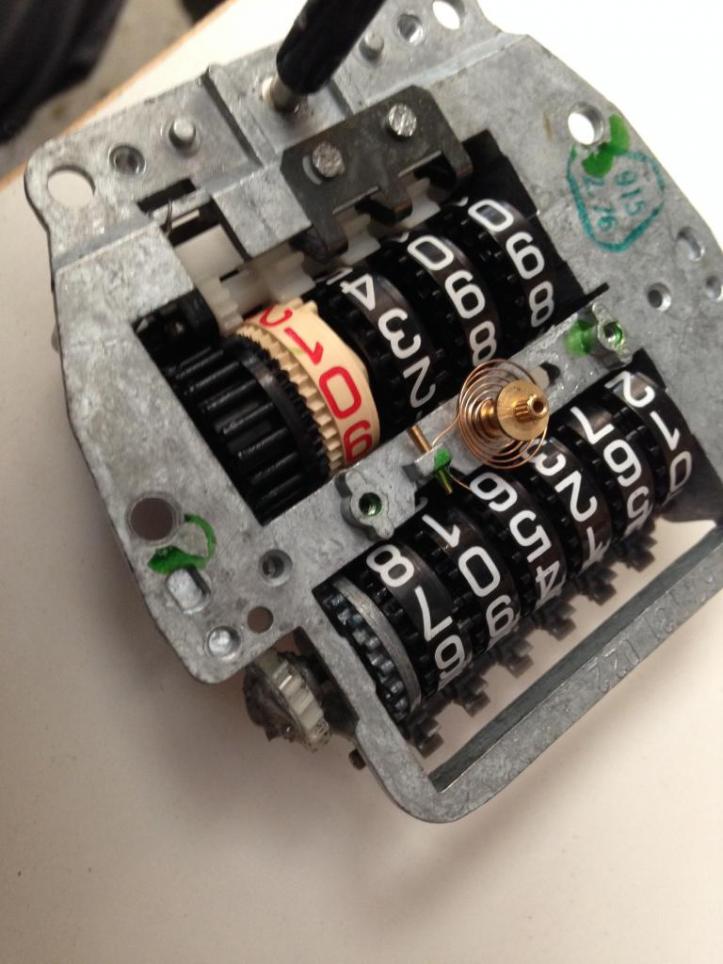
Further pics for detail
Sorry for the wordy post, hopefully someone finds it useful.Last edited by dubstar; 12-08-2014, 02:32 PM.sigpicComment
-
CHanged the title of this topic, so it should now work on IE and ChromesigpicComment
-
excellent work with the suspension refresh!!
i feel like my car could do with that too. where was the x-brace purchased from? I have something similar in my car but its a Z-brace, and i feel like it twists around and its not very rigid.Comment
-
A Z-brace is better than any other brace but it's an overkill. You need a bar joining the front suspension pickup points together which is what the Z-brace does. The chassis extension arms which are a solid part of the car give the z brace it's sideways support. The diagonal part of the Z-brace is overkill, it isn't really needed except in extreme cornering such as a race car with slicks. The rear part of the Z-brace is there to give the diagonal bar extra support.
An X-brace is OK only if it also has a piece going across the chassis and bolted to the 2 front pivot points for the lower A arms, joining them together with a solid bar. That's where it does the most good.
All my MK1's have had a home made brace that only goes across the chassis, no Z or X-brace and I've done lots of hillclimbs and club events.
No photos of mine but I found this on the web. Lower brace is just a piece of 1" square section hollow bar running from one side to the other with a flat piece of 5mm thick iron plate welded on each end with a hole drilled for the bolts. Make up one end and weld it together. Bolt it to the car and make up the other end but bolt it to the car BEFORE you weld the plate to the bar so it's the exact length to suit your car. Make sure the holes you drill for the bolt to go through are just big enough for the bolt to go through. You don't want any side movement in this bar. Also, the hole has to be far enough away from the bar so you can fit a socket on the bolt to tighten it.
Make sure the bolts have a spring washer to hold them in place or Loctite! I once spent 4 hours trying to get one of these bolts back in place after it had worked it's way loose one night going home from work.
Upper bar was similar to this but 2 parallel bars across the engine bay with a short piece at each end joining them so it looked like the letter H turned on it's side at each end. I used 1/2 inch square section hollow bar which was real easy to weld. The ends were similar to the picture above.
The lower bar makes a big difference to the handling. The car turns into tight corners much easier. The upper bar makes very little difference but looks good when you show off the car to your mates, especially if painted bright red.
Cheers
PaulLast edited by sports racer; 12-08-2014, 01:41 PM.1978 MK1 2.0 16v http://www.vwwatercooled.com.au/foru...-46488-70.html
1991 MK2 GTI 2.0 8v, white (RIP) and it's red replacement http://www.vwwatercooled.com.au/foru...gti-42078.html
1997 MK3 CL http://www.vwwatercooled.com.au/foru...ml#post1292061
2001 & 2002 Bora 4motion. http://www.vwwatercooled.com.au/foru...st-123823.htmlComment
-
sorry for the thread hijack, but this is the one in my car. pic from Mark's thread.

Comment
-
It may be overkill, but whats wrong with that? I've never seen an X brace without the front tie section on it.
T, your Z brace looks fine, I don't think there would be much gain adding the extra \.sigpicComment
-
that brace will be fine.
As paul said the simple tie brace is the main part that makes a massive difference.
Get that blasted and Coated and you'll be good to goComment
-
That looks homemade which is the best type - they fit perfectly. It's solid enough to resist any stress and deflection when cornering and doesn't need the X bit added because it's triangulated with the chassis when bolted on. Just make sure all the bolts are tight.1978 MK1 2.0 16v http://www.vwwatercooled.com.au/foru...-46488-70.html
1991 MK2 GTI 2.0 8v, white (RIP) and it's red replacement http://www.vwwatercooled.com.au/foru...gti-42078.html
1997 MK3 CL http://www.vwwatercooled.com.au/foru...ml#post1292061
2001 & 2002 Bora 4motion. http://www.vwwatercooled.com.au/foru...st-123823.htmlComment
-
-
On mine I will weld the strut brace to the strutsFor a better ride, go WIDE!!!
VS Commodore V6 Berlina- FOR SALE
1979 Golf Mk1- http://www.vwwatercooled.com.au/foru...one-92128.htmlComment
-
Not a good idea. You need to have it removable so that you can drop the engine out whenever you have to.1978 MK1 2.0 16v http://www.vwwatercooled.com.au/foru...-46488-70.html
1991 MK2 GTI 2.0 8v, white (RIP) and it's red replacement http://www.vwwatercooled.com.au/foru...gti-42078.html
1997 MK3 CL http://www.vwwatercooled.com.au/foru...ml#post1292061
2001 & 2002 Bora 4motion. http://www.vwwatercooled.com.au/foru...st-123823.htmlComment
-
Perhaps move this discussion elsewhere?
Elton, I got the pads from Demon Tweaks they are EBC Greenstuff and it was much cheaper than local. The rotors are from GSLrallysport a few years ago. They are DBA sport (slotted) and they were bargain basement $89 for the pair.sigpicComment
-
After a year and a half of driving on a 4 speed box, I decided to upgrade to a 5 speed. The box I have is an AMC with ratios 3.45, 1.94, 1.28, 0.97, 0.80, 3.67 (1,2,3,4,5,Final). I believe it came off a Mk3, but may also be found on SEATs. The big difference about this box is that it has a 24mm input shaft, instead of the ‘standard’ 22mm input shaft.
There’s a few things that are needed for a 5 speed conversion:
1) 5speed gearbox mount. This is the mount that bolts to the left hand chassis rail. I received a genuine one with the box.
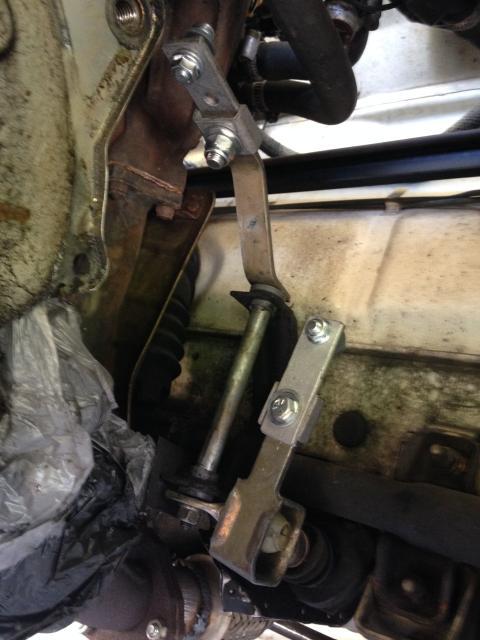
2) 5 speed linkage. You can either find the full 5 speed linkage from a mk1 (cabby would be the most abundant in Aus) or you can buy an adjustable set-up and 4 speed extension from MissingLinkz. You can see the setup all bolted in to my car here:
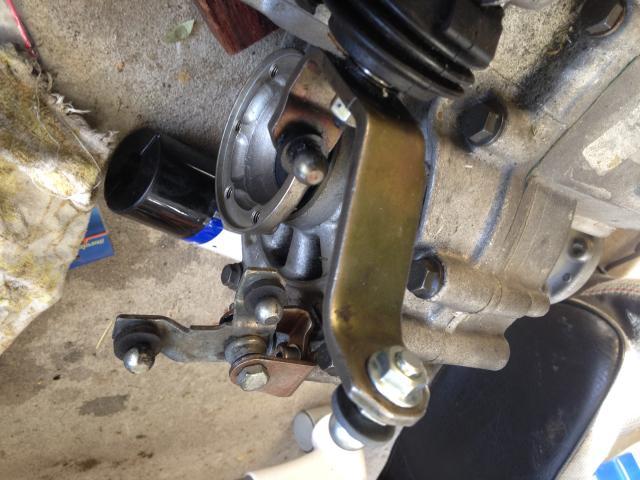
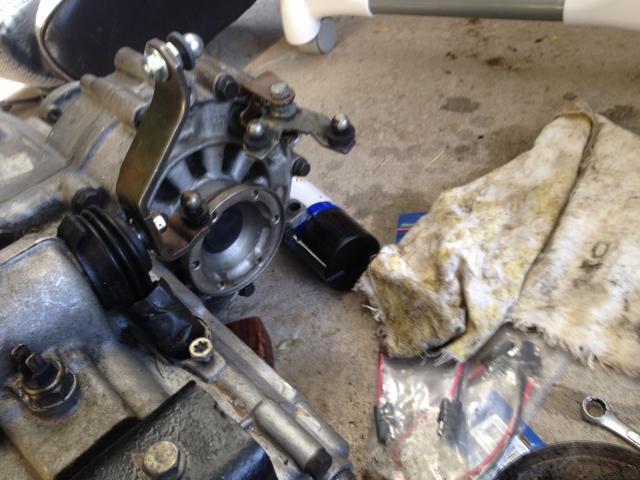
3) 100mm drive flanges. I want to retain the 90mm driveshafts and uprights that I have, so I switched the 100mm flanges in the AMC box for brand new 90mm flanges from GAP. Note: your old 4 speed flanges will not fit.
4) Clutch. I am using the full 24mm clutch setup (flywheel, pressure plate, disc) that came with the box. There are lots of options to mix and match.
5) Speedo drive. You will need to match the speedo drive to the final drive ratio of the gearbox. Mine is a 3.67 final drive which means a ‘red’ speedo gear is needed.
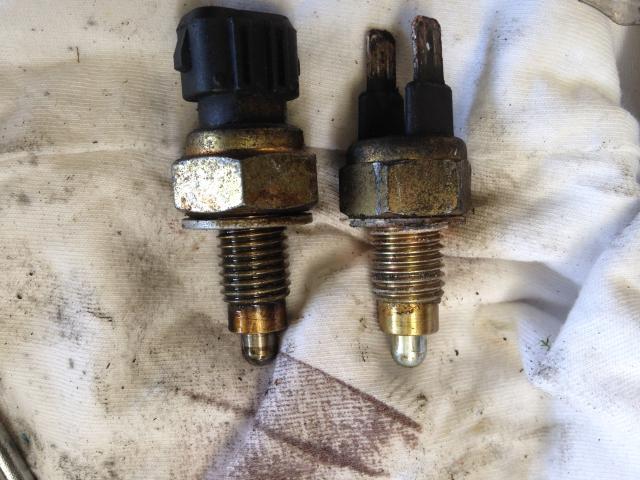
One thing that wasn’t an issue was the reverse switch. Some boxes have a bigger threaded switch, however, the AMC has the same thread as the old 4 speed, so I could just use the 4 speed switch.
I’m using all new gearbox mounts and also the OEM style dampening rings that Mk1autohaus sell. I’ve spent a bit of time scrubbing my nuts (and bolts and hardware) with kero and a toothbrush so that everything is nice and clean.
At the moment it is now ready for the box to be lifted into place, just need some quiet time when I don’t have my 18-month old ‘helper’ around.sigpicComment


Comment