 Tweet
Tweet
Time for some more:
Remember to label stuff. i labelled the bits I pulled off the old engine and then made labels for the corresponding bits on the new one.

Any screws or bolts removed were either put back into the holes they came from or taped and labelled next to where they went.
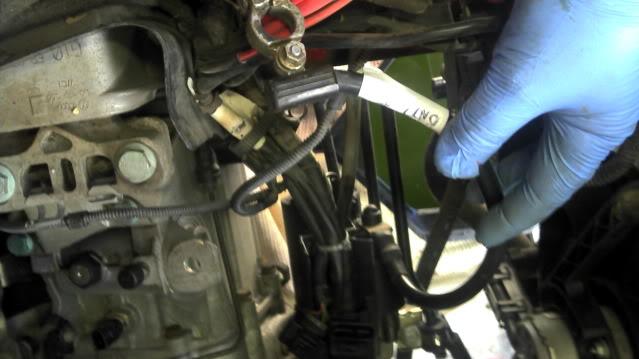
If it is a duct or hole, tape it up or stuff a rag in it - bits of debris in an engine can kill it - even more so with a turbo:
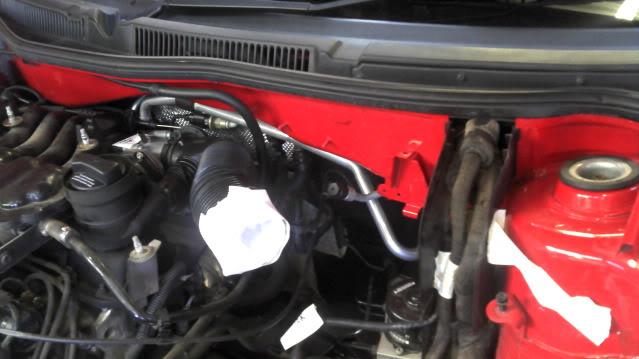
With everything undone, labelled and taped up. The engine is supported with the chain hoist.
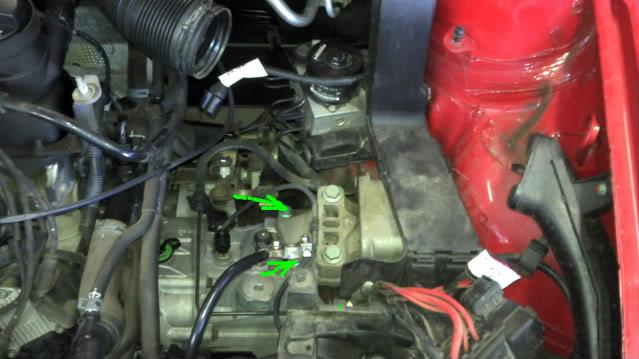
Time to undo the engine mounts. I checked the part numbers and they are exactly the same. So Initially I undid the bolts that attach the mount to the engine - These two:
And similar on the other side. This allows the engine to drop away, free of the mounts. When the engine was out I completely removed and exchanged the mounts , as the others were a good 100K kms newer.
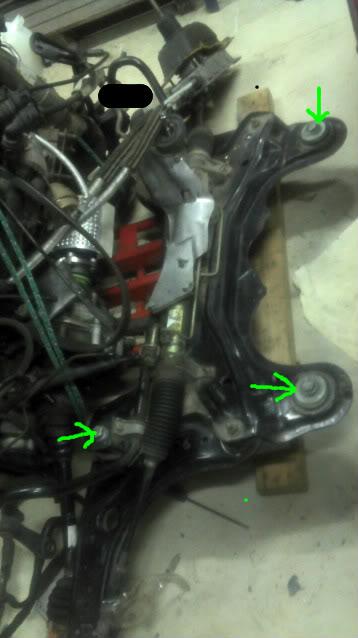
With the mounts undone, the whole front subframe is held in by 4 bolts. You can reach them easily enough without getting under the subframe - so if something goes wrong, you dont end up with an engine on your head....
This is the AGU, but it shows where 3 of the 4 subframe bolts are. these bolts actually go in the other way around, they are in this way so they dont fall out:
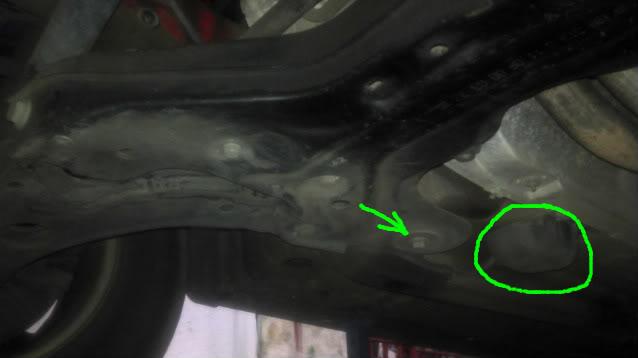
Same from under the car. Circled is the o2 sensor housing - it is simply a cover and two cables clip together beneath it. Undo this connection, as the forward cable is attached a sensor on the downpipe:
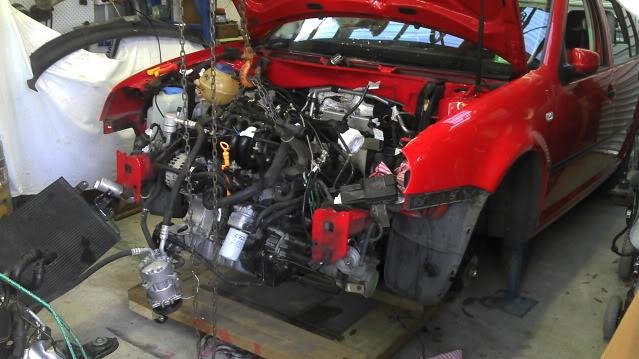
At this point the engine is held by the hoist and ready to be lowered onto the dolly. Go very slowly as something is sure to be still attached. As best you can, run your hands around the engine to feel for any possible snags. If something needs undoing , stop the lowering, undo it and continue. I had a mate helping me at this stage to help guide the engine, an extra pair of eyes and this is potentially dangerous - good the have someone else there:
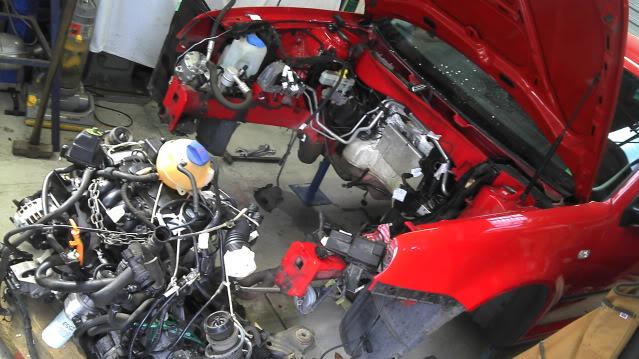
Things snag up a bit, so take your time and deal with them, but in a very short time you get this:
Remember to label stuff. i labelled the bits I pulled off the old engine and then made labels for the corresponding bits on the new one.
Any screws or bolts removed were either put back into the holes they came from or taped and labelled next to where they went.
If it is a duct or hole, tape it up or stuff a rag in it - bits of debris in an engine can kill it - even more so with a turbo:
With everything undone, labelled and taped up. The engine is supported with the chain hoist.
Time to undo the engine mounts. I checked the part numbers and they are exactly the same. So Initially I undid the bolts that attach the mount to the engine - These two:
And similar on the other side. This allows the engine to drop away, free of the mounts. When the engine was out I completely removed and exchanged the mounts , as the others were a good 100K kms newer.
With the mounts undone, the whole front subframe is held in by 4 bolts. You can reach them easily enough without getting under the subframe - so if something goes wrong, you dont end up with an engine on your head....
This is the AGU, but it shows where 3 of the 4 subframe bolts are. these bolts actually go in the other way around, they are in this way so they dont fall out:
Same from under the car. Circled is the o2 sensor housing - it is simply a cover and two cables clip together beneath it. Undo this connection, as the forward cable is attached a sensor on the downpipe:
At this point the engine is held by the hoist and ready to be lowered onto the dolly. Go very slowly as something is sure to be still attached. As best you can, run your hands around the engine to feel for any possible snags. If something needs undoing , stop the lowering, undo it and continue. I had a mate helping me at this stage to help guide the engine, an extra pair of eyes and this is potentially dangerous - good the have someone else there:
Things snag up a bit, so take your time and deal with them, but in a very short time you get this:


Comment