Above Forum Ad

Collapse

Announcement

Collapse
No announcement yet.

I accidentally disabled the gear stick in the T4

Collapse
X
 
  • Filter
  • Time
  • Show
Clear All
new posts

  • I accidentally disabled the gear stick in the T4

    Was 'negotiating' with the child in the back seat from the front seat whilst parked in town. My manoeuvre pushed weight against the T4's gearstick which I felt shift under my weight and I thought I'd simply pushed the stick out of 2nd and into neutral.

    Nope.

    When I came to getting underway the lever had gone well floppy and there was no notchy gate feeling. A quick play made me realise I had 3rd and 4th but nothing else. Pox! We got underway with the intention of hitting up my mechanic before I realised that Old Mate has Friday's off. Double Pox! So I had to do a block and get the DOKA up to the VW dealer (triple pox?)....no mean feat in 3rd with numerous roundabouts and the odd stop sign but I only stalled it the once.

    Rolled into their carpark and the hit up the desk to find the VW mechanic was a lunch. Tried to track down the missus for a lift but no go - out of office. Quad Pox!

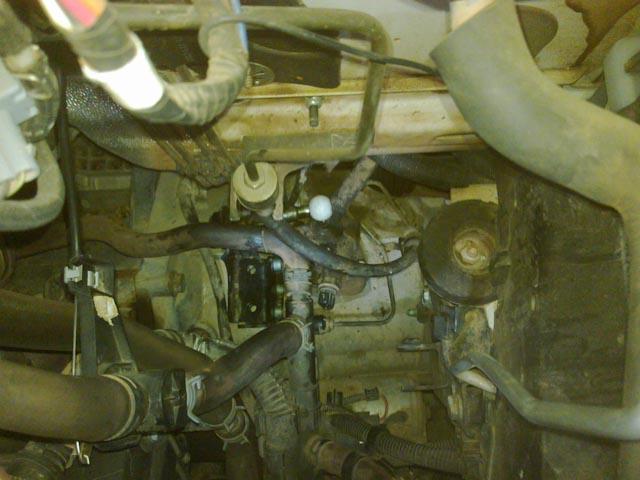
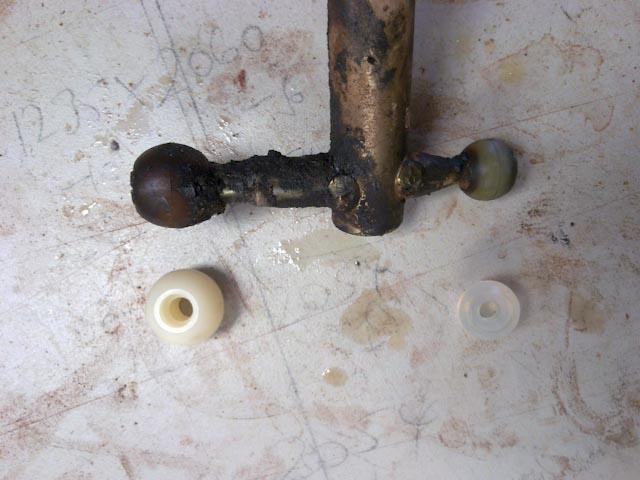
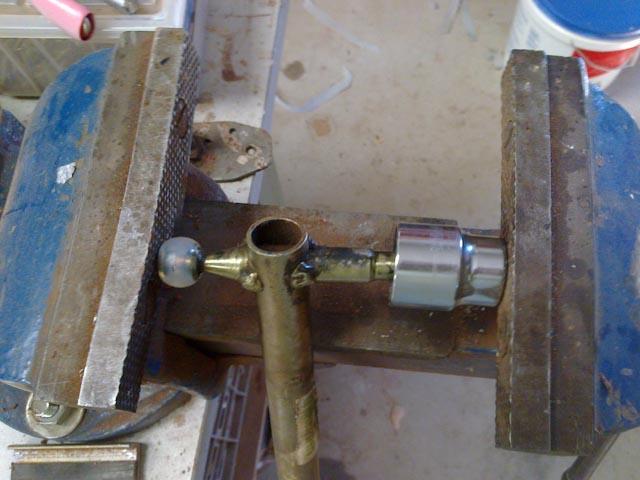
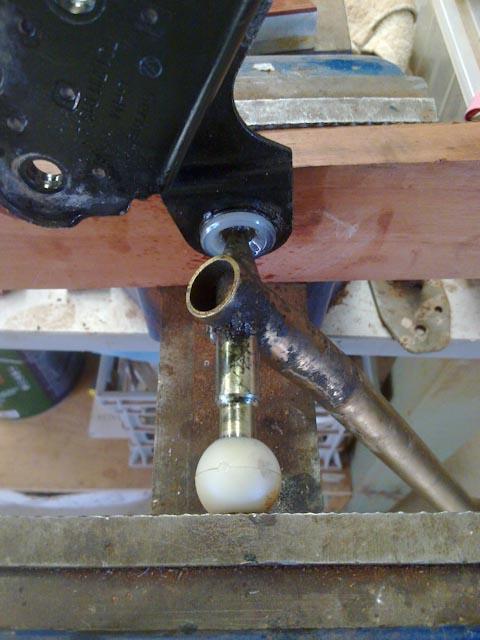
    The child and I had nothing better to do so after peering underneath to find linkage in place but wickedly floppy I though to lift the bonnet and see what I could see over the gearbox. Sure enough...the T bar end of the selector rod (bottom of diagram) had been displaced. The ball (41) side of the T situated over the selector plate (50) had been pushed out of the clevis socket (49).


    A simple grab with one hand and squeeze got the parts back together with only well greasy fingers being the cost. And I had full functionality again though some of the easiest least resistant shift feel one is ever likely to experience.

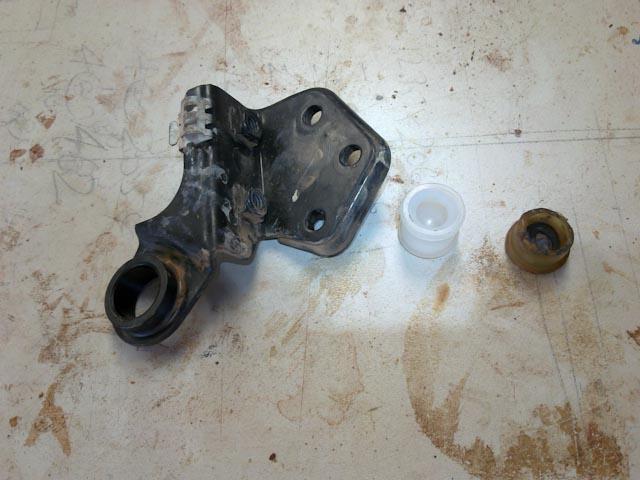
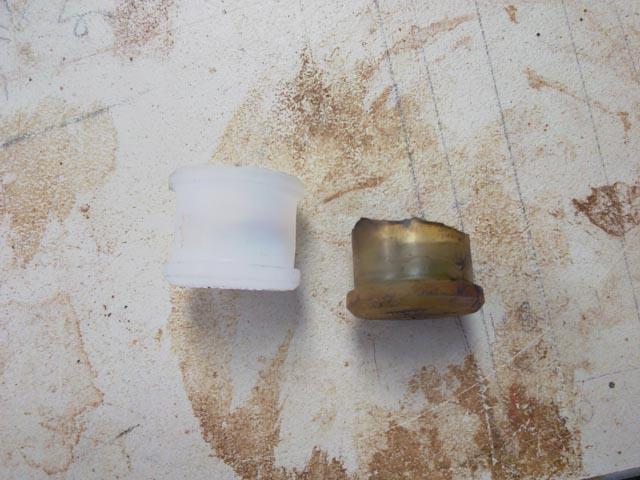
    I suspect that since it was so easy to both break and fix that worn parts are distinctly likely. So the VW bloke can have it next week and I suspect some wear parts (balls, bearings and clevis can be renewed...

    Damn glad though I was sufficiently aware to manage to avoid a rather hefty taxi bill...

  • #2
    Job well done I know what you mean about the T4 selector gizmo I did two of them on my sons T4 .

    Comment


    • #3
      Yes, replacing of balls on linkage comes up quite frequently on higher mileage vans on the T4 Forum.Yours may have gone bit longer if it hadn't been for your mishap, worth changing though. Thanks for sharing.

      I know you are getting VW to replace them Seano but here's a link for anyone else reading this thread with the same problem.

      Gearshift Bushes - how to - VW T4 Forum - VW T5 Forum
      Last edited by jets; 16-02-2013, 08:58 AM.
      Understand how it works, troubleshoot logically BEFORE replacing parts.
      2001 T4 TRAKKA Syncro 2.5TDI,2006 Mk5 2.0TDI Golf manual,2001 Polo 1.4 16V manual [now sold], '09 2.0CR TDI Tiguan manual,
      Numerous Mk1 Golf diesels

      Comment


      • #4
        Thanks for the link. The smaller ball end has to be knackered...it was too easy to relocate. I'm not wedded to the idea of the dealer fixing it but current lack of a suitable press is a concern. I do have a bench vice that could suffice if I did the small ball end of T bar first.

        The key will be sorting the right part numbers (though I suspect that most noughties T4 will be the same) and sourcing the parts...might be worth checking out the dealer parts counter tomorrow...

        Comment


        • #5
          There's a wrinkle with my DIY plan....

          The parts diagram for the selector rod is actually this one...


          which in itself is no big deal. However, my suspicion that there's not enough bolts for part 52 was borne out when I realised upon inspection that a transmission mount/strut is bolted in over the top of it. It runs across towards the battery box and it seems to be required to prevent lateral movement rather than up and down movement. It's part 8 in this diagram...


          So I suspect that I need to support the engine whilst I'm playing...which can be done but it does make it a bit more complicated...
          Last edited by Seano; 18-02-2013, 08:48 AM.

          Comment


          • #6
            A follow-up to this little tale. I've established that replacing the bushes 'should' be a methodical arm wrestle so I set about hunting the parts.


            The parts I needed are labelled 27 (2 of), 40 (2 of), 43 (3 of), 46, 47 and 53 (1 of each) in the Vagcat image. Turns out they are all still available. I turned up three of the parts in the UK and none were much more than a couple of Oz dollars each . However, shipping was expensive and three parts couldn't be IDed.

            I left a couple of messages with Inchcape and ASV but got nothing back. Camden GTI got back to me saying they couldn't help. So I trundled down to the local VW parts counter this morning and walked away $123 poorer. That's right - ten pieces of engineered plastic with an average price of $12.30 each. Like....wow. Even allowing for $10 freight...that's still what can only be described as an adequate markup...<sigh>

            Hopefully I'll have them mid next week.

            Comment


            • #7
              I feel your pain whilst I don't deny that companies have to make a profit its widely known that Australian customers are paying an inflated price compared to other countries . I recently priced up a air con blower fan under the dash for my van Aussie price over $500 I did some research and found out that in China they make parts for VW and the same fan was less than $20 naturally I would have to buy at least a hundred to get that price but it shows up the difference . Naturally I would expect the part from Europe would have been made in Europe but the difference is too much in my opinion

              Comment


              • #8
                Originally posted by Seano View Post
                The parts I needed are labelled 27 (2 of), 40 (2 of), 43 (3 of), 46, 47 and 53 (1 of each) in the Vagcat image.
                Just wondering why 3 off no43.
                Understand how it works, troubleshoot logically BEFORE replacing parts.
                2001 T4 TRAKKA Syncro 2.5TDI,2006 Mk5 2.0TDI Golf manual,2001 Polo 1.4 16V manual [now sold], '09 2.0CR TDI Tiguan manual,
                Numerous Mk1 Golf diesels

                Comment


                • #9
                  That'd be a typo...42 is the widget I meant.

                  True the price is a bit eye watering when you consider I could have bought a rather swish (and far more complicated) rear derailleur for the mountain bike for the same sort of money. On the upside...the gear selection should be good for another decade. The only way I'd get a decade out of a derailleur is to hang the bike on the wall!!!

                  Comment


                  • #10
                    Success. Four hours.

                    Only fail was that I couldn't change the bush on the shift plate (48 in the image above) because there wasn't enough leverage available to get the thing off the gearbox...and by the time I realised I might've been able to push the bush out and in by hand...I'd already replaced the shift lever and clevis which blocked access to the bush. Never mind. All the similar bushes were in good nick.

                    I'll write it up properly later with some pics as there's the odd trick with the ACV/02G combination that hasn't been covered by other similar threads. Suffice to say that access through the engine bay is...compromised and you need the odd 'special' tool to get the parts in and out.
                    Last edited by Seano; 15-03-2013, 01:23 PM.

                    Comment


                    • #11
                      Originally posted by Seano View Post
                      I'll write it up properly later with some pics as there's the odd trick with the ACV/02G combination that hasn't been covered by other similar threads.
                      I look forward to reading it. Mine hasn't needed doing yet but one day it will.
                      Understand how it works, troubleshoot logically BEFORE replacing parts.
                      2001 T4 TRAKKA Syncro 2.5TDI,2006 Mk5 2.0TDI Golf manual,2001 Polo 1.4 16V manual [now sold], '09 2.0CR TDI Tiguan manual,
                      Numerous Mk1 Golf diesels

                      Comment


                      • #12
                        Righto. It is actually a simple enough job. As other threads already linked here suggest...start underneath.

                        Drop the gearstick link off the gearstick assembly with an 11 and 13 mm spanner then undo the pivot arm (13mm nut) and drop it off the main selector rod. Remove the gearstick link from the pivot arm and pull the pivot arm from the gearbox selector link. Undo the clamp (11mm top and bottom) that holds the main selector rod to the gearstick assembly - this is the 1st constrained space job - and push it towards the rear of the vehicle. The clamp may need to be spread slightly to achieve this.

                        Now go to the front right of the engine bay. You are looking for this support strut...the double bolt end fits over the ball linkage carrier while the single end fits to a bracket on the chassis rail.


                        It can be removed by removing the three 11mm bolts that hold it in...revealing what lies beneath


                        Now this is after I've started refitting but you'll get the picture. All the action is in the centre of the picture underneath the heater hoses (the white ball is the new big ball on the end of the gear selector rod. It's rather crowded - more so when you have air-con like I do. The support strut has been removed - you can see the double holes left of centre while the U bracket for the single bolt end sits and the end of the air-con pipe on the right of pic. It sits over the heater hoses...

                        Firstly you'll need to disconnect what I assume to be the wiring for the reverse switch (just south of the white ball in pic above). Then remove the holder on the back of the carrier for the wire that runs alongside it. Then find yourself a 6mm hex key (preferably a ball end version) AND a 6mm hex key driver bit with a spanner to suit. There are three machine screws that hold the ball linkage carrier to the engine block (they are visible next to the heater hose in the pic above) - the rear two will need the stubby driver bit to undo them because there isn't enough room due to their proximity to the gearbox selector housing (under the white ball). Some machinations later you will have them out. At which point you can remove the plate...and take a deep sigh and a long stretch.

                        Next trick is to remove the clevis from the selector plate (10mm bolts). I had to hang on to the arm of the plate to get the leverage required but it was straightforward. Ideally, one would then remove the selector plate itself but I couldn't get enough leverage on the 13mm nut to get it to go.

                        At this point, you can pull the gear selector rod forward to disconnect it from the gearstick assembly underneath, spin it over 180 degrees and push it towards the back of the vehicle. Then get underneath and remove the rod entirely.

                        Then take all the bits to the workspace and get to replacing the busted bits. Firstly the ball linkage carrier.


                        The old bush had snapped in two and was lost. The remaining 'cup' could be pushed out by hand. The new bush is the white one.


                        Pushing the new bush into the carrier seems simple enough. It has to go in from the back side (the view in the previous image to the one above) as this side is chamfered and the bush is more compressible on the open end. With a block of wood on the back side (pushing) and a 1" socket on the receiving side plus considerable Lanotec lubrication I squashed them together in the vice. Due to the poor tolerances of the vice the bush didn't go in that straight but I was able to lever the bush slightly from the inside with a socket spanner to sort it and it popped in with a bit more squashing. It's a very very tight fit and the bush deformed alarmingly in the process but it did go in.


                        After that it's a doddle. Here's the gear selector rod with old and new balls


                        Cut the old ones off with a knife. Push the new ones on in the vice. I used appropriately size sockets as carriers for the balls.


                        Then push the smaller ball into the bush on the carrier. You'll definitely need the vice!!


                        The remaining bushes in the pivot arm can pushed out by hand or with a screwdriver. And pushed back in by hand too.

                        After that it is a simple case of reassembly. The only major wrinkle is the effort of getting the selector rod back into the vehicle with the carrier on the end of it. The minor wrinkle is getting the pivot arm back onto the selector rod - I found I had to fit the top bush then the arm then the bottom bush which was pushed home by the nut. The remainder is the arm wrestle in reverse. And the result is a nice tight gear change.

                        I didn't do the short shift mod as the pivot arm ends are canted into a different plane from the rest of the arm. If I had chosen to shorten it then the plane of arm to rod would change and put considerable pressure on the bush...increasing wear. Not a biggy but nothing I really look forward to either...
                        Last edited by Seano; 15-03-2013, 03:03 PM.

                        Comment


                        • #13
                          Thanks Seano.
                          Mods, could this writeup be made a sticky in the T4 DIY & How to section please?
                          Understand how it works, troubleshoot logically BEFORE replacing parts.
                          2001 T4 TRAKKA Syncro 2.5TDI,2006 Mk5 2.0TDI Golf manual,2001 Polo 1.4 16V manual [now sold], '09 2.0CR TDI Tiguan manual,
                          Numerous Mk1 Golf diesels

                          Comment


                          • #14
                            Done! The link is in T4 DIY sticky.
                            Performance Tunes from $850
                            Wrecking RS OCTAVIA 2 Link

                            Comment


                            • #15
                              Guess where I am?

                              Look at that... nearly ten years later and I'm doing this job again!!!
                              Click image for larger version

Name:	16745366202238679962686231308707.jpg
Views:	1
Size:	84.2 KB
ID:	1860712
                              Last edited by Seano; 24-01-2023, 03:04 PM.

                              Comment

                              Working...
                              X