 Tweet
Tweet
Very jelous. This thing is going to look great. Well done.
-
Some say... -
Thanks guys
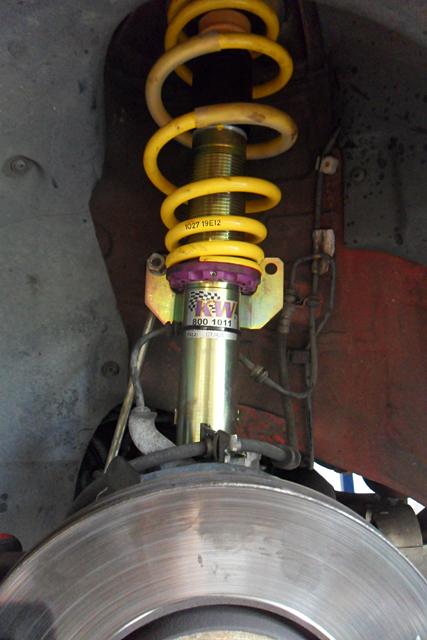
Fitted the rear KW shockies and springs; easy as pie taking my time.
Here's a few pics, I'll do a bit of a write up when I finish the fronts
--
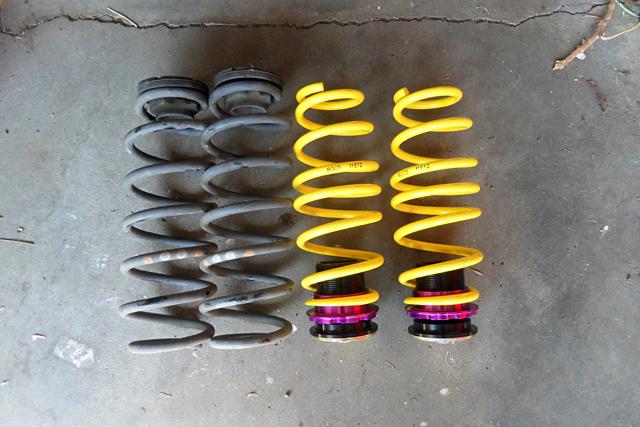
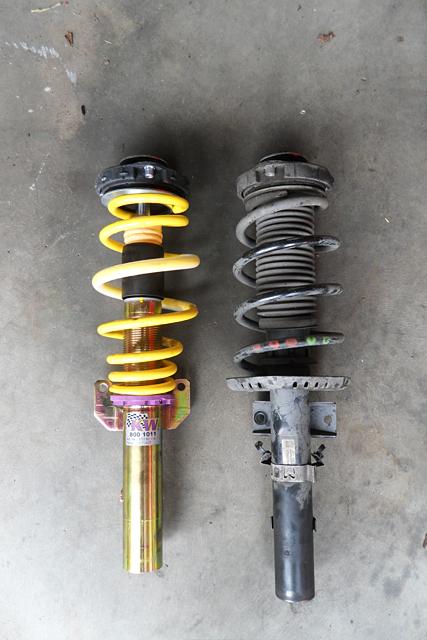
Stock rear springs v new springs and adjusters --
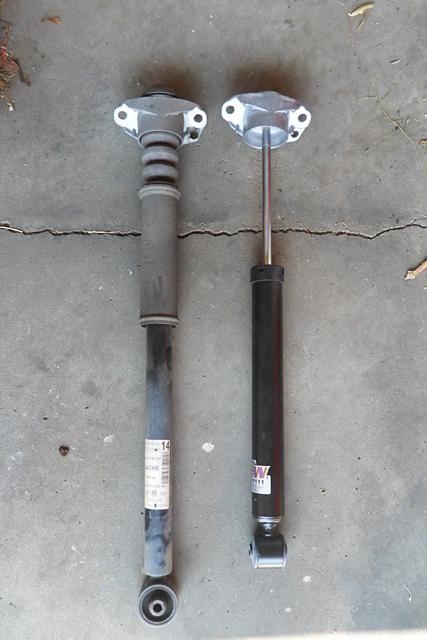
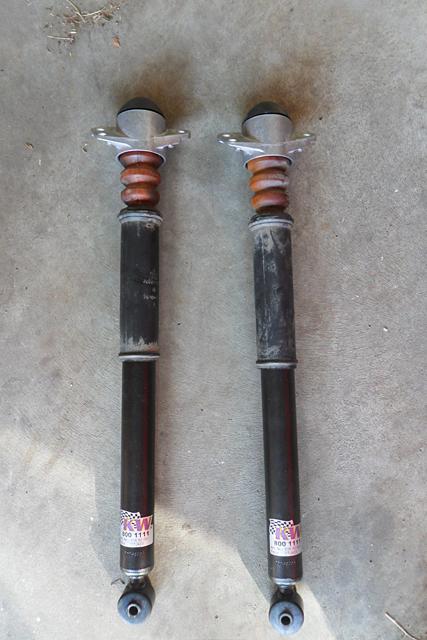
Stock shock v KW shock ..and the two KW shocks ready to go with new mounts and dust protectors and caps from the stock shockies--
All fitted up --
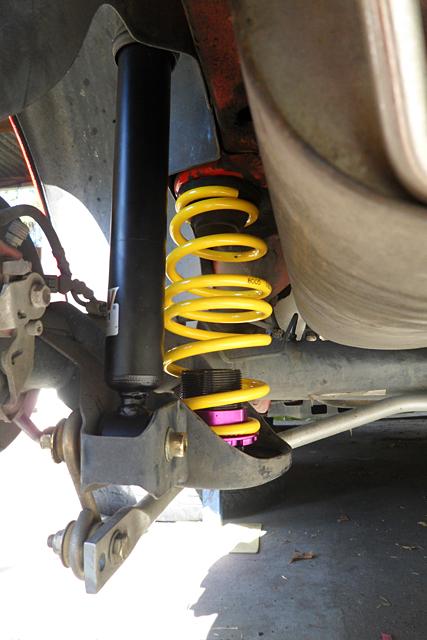
It's adjusted right down at the moment. It's settled a little lower since the pics. That's all for now
Last edited by s4mmie; 08-10-2012, 02:22 PM.Comment
-
Looks high, you can remove the rear adjusters to get it properly low...Comment
-
Coming along well. Nice write up as i'm waiting for my kw's as well.Comment
-
-
Yeah when I initially fitted them, the car still sat high so I took it for a quick spin to settle them down a bit and it dropped a fair bit.
I'll see how the car looks after I've fit the fronts and it's settled for a week or so.
Fine tuning once the wheels get here
Comment
-
I put mine back in when I still had the KWs. Looked great without them in, sure, but it was uncomfortable and crashy and scrubbed with anything more than empty seats in the back.Originally posted by vwthunder View Post
'16 Octavia RS Wagon
Past - '07 Polo GTI
'08 RenaultSport Clio 197Comment
-
So I got the front struts in today.
Big cheers to Lukas (gotboost) for the lend of some spring compressors and M14 bit
Tools I used:
Spring compressors
Strut spreader socket
6mm allen key
7/8 socket with ground edges to fit a large adjustable wrench
M14 triple square bit
18, 17, 16 and 13mm sockets
Various jacks
Long socket extension bar
Torque wrench, shifters, etc
WD40.
I would highly advise using spring compressors and the strut spreader as it would've been a complete pain in the ass without them.
KW V1 coilover kit came with:
Front dampers, springs, adjusters and piston rod nut
Rear dampers, springs and adjusters
Allen key for adjuster grub screws
Adjusting wrench
Additional parts I ordered:
New strut top mounts and bolts
New strut top bearings
New rear shock mounts and bolts
New rear shock piston rod nuts
There might be other ways but this is how I did it
For removing the front:
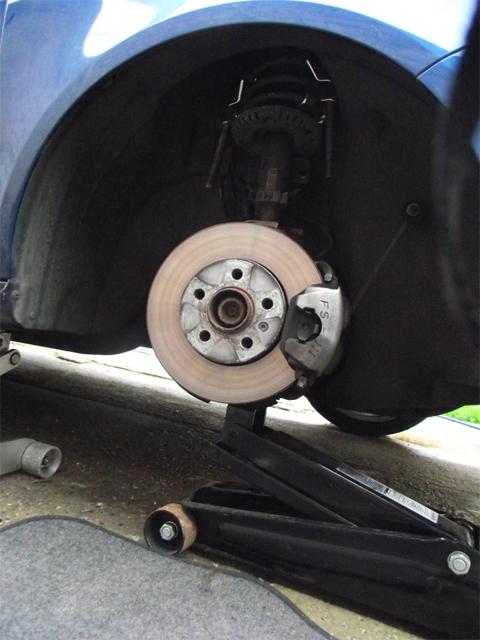
- Jack the car up and put it on jack stands either side to get it up nice and high.
- Take your wheels off, etc.
- Disconnect the speed sensor wire and brake line off the strut and make sure it's not in the way.
- Now would be a good time to spray some WD40 around where the strut fits in the hub.
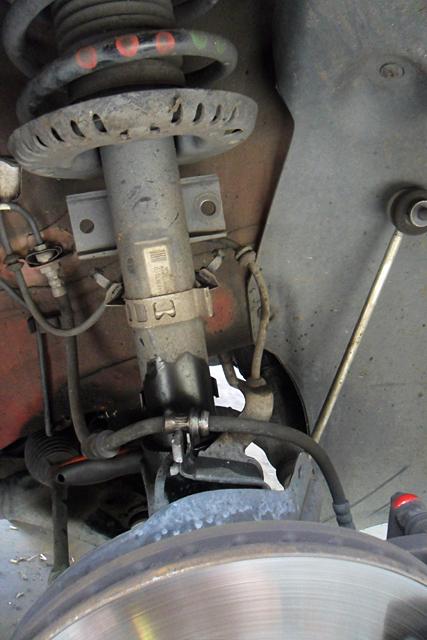
- Use a socket to undo the front ARB droplink nut on the shock absorber and move the drop link out of the way. Mine came off nice and easy but I've heard others have been tricky.
- Get your M14 bit and undo the bolt and nut clamping the hub around the base of the shock absorber.
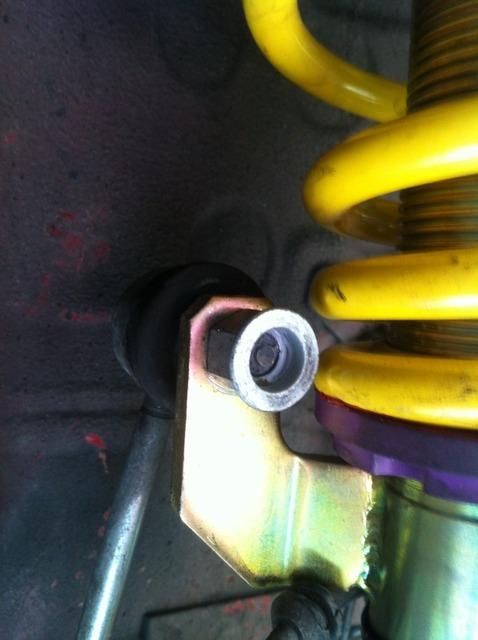
- This should get you here --
- Get out your spring compressors and fit them to the spring upside down, like so --
- Put a jack underneath the hub and slowly start to jack it up, stop every now and again and take up the slack with your spring compressors.
- When you get it fully compressed and held by the spring compressors, grab a steel pole or similar (I used my 600mm extension bar) on a jack and position it so that it is holding the spring platform up. You can now let the jack down. The bar should hold the strut up there.
- Insert the strut spreader in between the space at the rear of the hub and turn it to open up the hub.
- Grab a hard PU mallet or hammer and give the hub a good belt downwards or on the side, it's a little tedious but you'll see the strut working its way out of the hub.
- When it pops out, grab a socket and remove the three bolts holding the strut to the towers and yank it up out of there! Which should get you here --
Installing the front:
- Sort out your new coilovers, if you have new mounts and bearings get them all assembled on the coilover and torque up the nut on the piston rod. After a bit of head scratching I grabbed a 7/8 socket and ground down two edges so I could use a large adjustable wrench to tighten it up, like this --
...while at the same time I had a 6mm allen socket through the 7/8 socket stopping it from spinning. KW specify the torque for the piston rod at 50Nm, but I just tightened the hell out of it and checked it with my torque wrench after it was fitted, all good --
- Put your strut in place and loosely screw in your three strut top bolts to hold it in place.
- Place your jack under the hub again and slowly jack it up to get it into position.
- Insert your strut spreader again and open up the hub.
- Now it's a balancing act between jacking it up slowly and tapping away at the hub to make the strut wiggle it's way in.
- If you have KW's pay attention to the tab at the back on the bottom of the strut, this has to go in between the gap (where the strut spreader is) and fit so the locking bolt goes through it's hole as well as the hub. Have a look at it before you do it and you'll know what I mean.
- When the strut gets close, look through the pinch bolt hole to make sure the tab on the strut is lined up, it may need a tap into place.
- Grab your pinch bolt and tap it back through the hub and tighten it up. ETKA reckons 60Nm and 90 deg.
- Get a socket and tighten the three bolts on the strut tops. 15Nm and 90 deg.
- You can let the jack down now.
- Repeat everything for the other side.
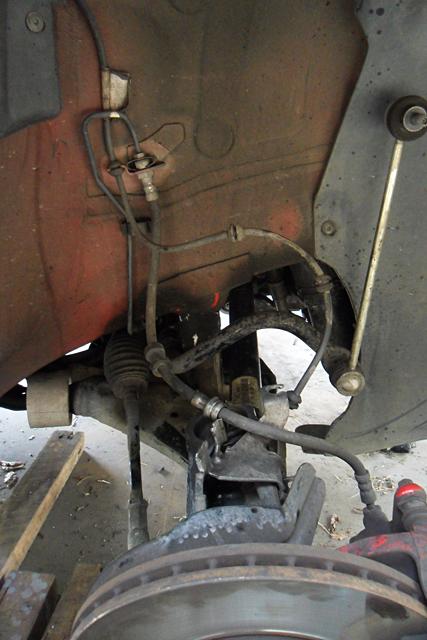
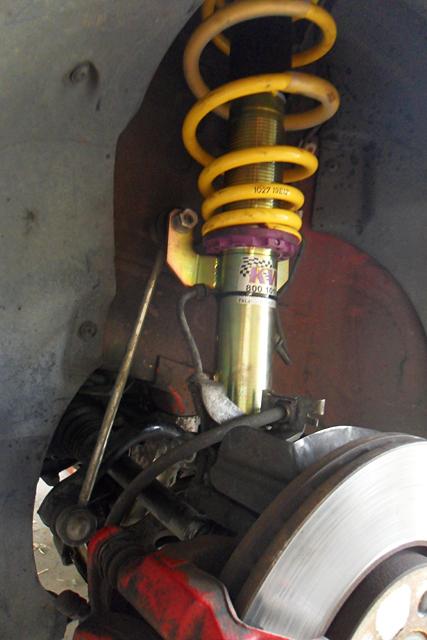
- Reconnect your brake lines, zip tie yourspeed sensor wires out of the way and tighten your ARB drop link nuts. 40Nm. When I tightened up my droplink nut, one of them sheared the end off with the torx bit. It almost looked like it was designed this way. Anyway, be careful and just nip them up tight, not overly tight. I reversed the nut and tightened it onto what was left of the droplink thread--
..I'll have to order another one. Should now look something like this when it's all done --
- Refit your wheels, tighten up the nuts and go take it for a spin to make sure it's all good
The rears are too easy, I don't really need to do a write up of those. Basically put the rear on jack stands, support one of the arms with a jack and undo the shock bolts, let the arms come down till you can get the springs out, unbolt the shocks and do the reverse to fit them.
I'll try and get some more pics together. No real pics of the ride height yet as I've got it all wound up till I get the wheels and then I'll fine tune it and take some pics
I'm sure there'll be something I've forgotten! Last edited by s4mmie; 29-09-2012, 07:28 PM.
Comment
-
Hoyhoy.Originally posted by spraycanmansam View Post
Sam, in the second pic. I think you'll find that their bump stops & not dust covers, so the travel might not be going down to the spring tension & riding on the bump stops instead, ya can cut the dump stops to suit what ya want.
The bump stops are only to come into action so as the shocky piston doesn't bottom out or for the purpose to prevent scrubbing.Hooroo.Comment
-
Hey Eddy, I think you're right on the money. I was more concerned with crud getting in the shock I didn't even think about the bumpstop. Where's the best place to cut them? 1 knob or 2?
Comment
-
Hoyhoy.
Sam I can't tell ya that one, it depends on the travel of the shock, @ least make sure if cutting that the piston still can't bottom out.
It might be O.K. as is, but if the springs don't get to do their full travel it can be a harse ride.Hooroo.Comment
-
Interested to see if you do cut them down, not aware anyone else with KW's has and most of us are running without the adjustable collar.
Personally, I think the rear is so light that unless you have junk in the trunk or rear passengers, the rear springs don't get much chance to compress.
And thanks for going to the effort of a detailed write up.Last edited by noone; 30-09-2012, 03:37 PM.Comment
-
I think I'm going to have to remove the perch/adjuster to get the rears to sit where I want them to...
When I installed the KW's it said to remove the little metal ring on the arm that the stock spring sat on, then bolt the adjuster on.
If I remove the adjuster all together won't the spring have nothing to seat on properly? I was thinking that I'd remove the purple collar and leave the black perch so that the spring isn't slopping about making any noises...
I'll also unbolt the shocks and check the travel, but I agree with you noone; I think they'd only bottom out under extreme circumstances, like a huge speedbump or something. I've got no spare tyre so it's even lighter still. I haven't noticed it being overly stiff but it will be good to double check to be sure.. Thanks for the heads up Eddy I would have missed it
Comment
-
Yeah, remove the adjuster, not the perch. Some on here might be running without either, I get a slight tuck of the top of the rim under the arch with the collar out.
I'm running whiteline sways front and back, so some of the stiffness is likely attributable to that.
It will also be more noticeable on your new rims, assuming your new ones are 17 x 8, you'll feel the road moreLast edited by noone; 30-09-2012, 03:40 PM.Comment
-
Thanks for the write up on your install. A couple of good tips for anyone doing an install of coilovers.
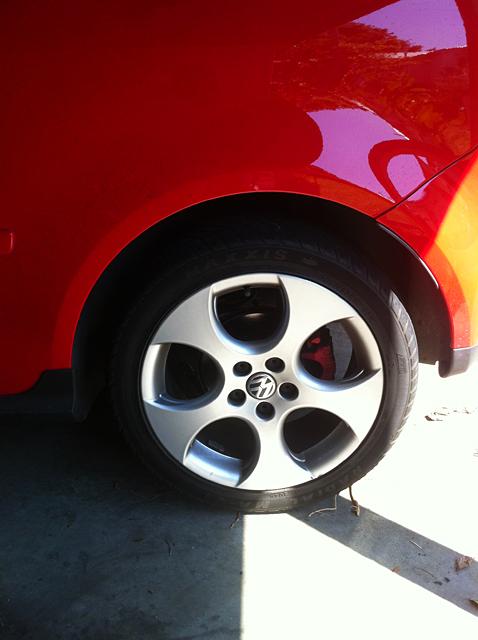
Should look great with your new wheels.Comment
Comment