Above Forum Ad

Collapse

Announcement

Collapse
1 of 2 < >

Email Notifications Failing (mostly Telstra)

Hello everyone. Seems there is an issue with Telstra (possible others) blocking email from our server. If you are trying to sign up I would suggest a different email if possible. If you're trying to reset your password and it fails please use the Contact Us page:
2 of 2 < >

Welcome to the new look VWWatercooled

After much work and little sleep there is a new version of the forums running on more powerful and recent hardware as well as an upgraded software platform.

Things are mostly the same, but some things are a little different. We will be learning together, so please post questions (and answers if you've worked things out) in the help thread.

The new forum software is an upgraded version of what came before, it's mostly the same but also a little different. Hopefully easier to use and more stable than before. We are learning together here, so please be patient. If you have questions, please post them here. If you have worked something out and can provide an answer,
See more
See less

Guide: How to fit a boost gauge

Collapse
X
 
  • Filter
  • Time
  • Show
Clear All
new posts

  • #16
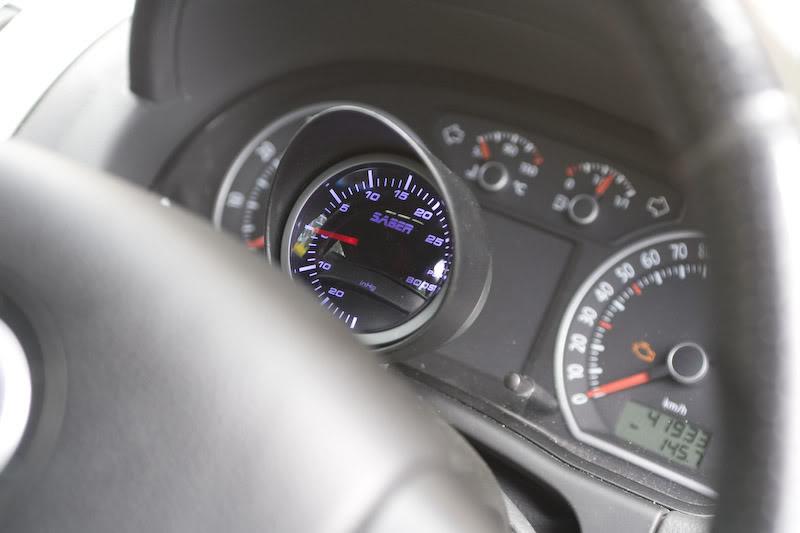
    Figured I'd give this a quick update for anyone interested, seeing since I wrote this the car has been GIAC'd, so I figured I'd share the boost info I have from GIAC compared to stock.

    Stock boost: ~9psi peak, occasionally overboosting to just shy of 10psi. This tapers to the ~7psi zone by the end of the gear.

    GIAC boost: ~20psi peak, occasionally overboosting to ~21/21.5psi. This tapers down to ~15/16psi by the end of the gear.
    Previous Rides: Polo GTI, Mx5 10AE, MY05 WRX WRP10, Renault Sport Clio 172
    Current Ride: Evo 8 MR, Fabia MK3

    Comment


    • #17
      Originally posted by break View Post
      I finally got around to installing my Saber electronic boost gauge today, and figured why not make a 'how to' thread out of it for you all (please bare in mind, I got lazy and didn't take many photos of the wiring... sue me )

      Tools and Parts Required:

      * Good screwdriver set with torx screw bits
      * Scissors
      * Needle nose pliers
      * Soldering iron and solder
      * Lighter
      * Heat shrink (although electrical tape is fine)
      * Zip ties
      * Electrical tape
      * Sticky zip ties (can be bought at Bunnings, but look like a hook that you'd stick on a wall to mount a paining, but instead have a zip tie attached to the base. These make EXCELLENT mounting points for wires/tubes running through the cabin under the dash)

      Step 1: Engine Cover Removal

      The first step of the install is to remove the engine cover.


      To do so, there are three clips that you need to lift the cover out of (you won't break them, don't worry).


      Then just slide the cover forward out from the U shaped bracket at the back.


      Step 2: Finding the pressure regulator line and fitting the T-piece and hose

      Find the pressure regulator line below and cut it at a right angle in the middle of the line.


      At this point, I ran the hose through my firewall as it's easier to do it at this step. The grommet I used is in the passenger footwell seen here.


      I used a screwdriver to push the grommet in far enough to allow me to fit the tube through. This required me pushing the screwdriver through the grommet ~10-12cm. I then fed the tube through this point.

      You can find the exit point of this grommet behind the airbox and to the left of the ECU in the engine bay. Just slip your hand down there (I have big hands and it was a tight squeeze but I could do it) and grab it and pull it up.

      One you have the tube find a neat path to run it, or see my path in the image further down the page.

      To fit the T-piece onto the cut tubes you can do it two ways, you can put the tubes into a shot glass of boiling water and let them soften up before pushing on the T-piece, or you can use a lighter. I found the hot water trick worked well for the black fuel pressure regulator lines, but the clear boost gauge line needed the lighter to get soft. Once all three lines are connected secure them with clamps or small zip ties.


      Step 3: Dismount the center column and dash

      The panels I removed for the job were the two center console panels, I used the guide below I found elsewhere on the forums.


      The third panel I removed was the panel below and to the right of the steering wheel column, just above the shelf on the drivers side. It's a panel ~15cm x 15cm and just pops out to give access to behind the dash.

      Step 4: The wiring

      I'm going to assume you know how to wire, so instead I'm just going to tell you where the wires you need are.

      I used the 12v lighter socket for my illumination and negative lines. The illumination is the white wire, the negative the brown line, and the constant 12v on the plug is the red/yellow line.

      WARNING: Do not use the constant 12v line from the lighter socket to power your gauge, it's permanently on and will cause the gauge to eventually flatten your battery!.

      Below is the diagram of the lighter socket plug:


      Instead, for my 12v line I used a wire on the headlight controls to give my gauge it's power (particularly seeing the draw of power for the gauge is so low).

      The plug can be accessed by laying on your back in the drivers footwell and looking up behind the dash. You can then reach your hand in and release the two clips either side of the headlight plug to release it, then poke it out of the hole the removed panel has given you.

      The plug has a number of wires going into it, the wire you want to use is the wire on the far bottom right of the plug. I can't remember the color, but you can use a multimeter to check the power source if you're not sure.

      The plug looks like this, with the wire marked.


      Step 5: Enjoy the fruits of your labor

      Once all tubing and wiring is done, mount the gauge (mine came with mounting cup, mount, and double sided tape so I used that). I chose to fit mine on the steering column and have tested the position to ensure it doesn't foul with both the turning of the wheel, and that I can adjust the steering wheel for reach/rake without it fouling.

      The end product:


      I'm happy to answer any questions you guys may have. Hope this helps!
      excellent thread, so easy i'm going to do mine

      Comment


      • #18
        Originally posted by break View Post
        GIAC boost: ~20psi peak, occasionally overboosting to ~21/21.5psi. This tapers down to ~15/16psi by the end of the gear.
        log it. I had a gauge that said I was barely hitting 1 bar, vag-com disagrees.

        I don't think Giac boosts that hard, but I don't have it...

        Comment


        • #19
          Originally posted by noone View Post
          log it. I had a gauge that said I was barely hitting 1 bar, vag-com disagrees.

          I don't think GIAC boosts that hard, but I don't have it...
          Given my boost was accurate pre-tune I wouldn't expect the gauge to become inaccurate post-tune.

          From all reports I've read/seen, the GIAC tunes are stronger than the comparable APR tunes.
          Previous Rides: Polo GTI, Mx5 10AE, MY05 WRX WRP10, Renault Sport Clio 172
          Current Ride: Evo 8 MR, Fabia MK3

          Comment


          • #20
            Originally posted by 46TDI View Post
            Anyone know what a 1.9 TDi boosts at?
            should be around 15-16psi with spikes up to 18.

            once chipped, apparently the bv39 in the 1.9 tdi pd100 can hold 18psi all day, peaking at 21~psi.

            Comment


            • #21
              Another interesting point, had to fill up with V-power last night because that was all that was available to me.

              Driving to the servo I was running 20.5psi peak last... leaving the servo that dropped to just shy of 18psi and the mid-range has lost a LOT of power. I thought I might recover some boost and timing as the car got used to the fuel... but 50km of driving later and its still woefull compared to BP Ultimate that I normally use.

              So yeah, long and the short of it... my local V-power is shocking and I wouldn't recommend it to anyone.
              Previous Rides: Polo GTI, Mx5 10AE, MY05 WRX WRP10, Renault Sport Clio 172
              Current Ride: Evo 8 MR, Fabia MK3

              Comment


              • #22
                Originally posted by break View Post
                From all reports I've read/seen, the GIAC tunes are stronger than the comparable APR tunes.
                if only they had a giac tune for the 1.9 diesel..... (they do, but the place in melb wasnt advertising it)

                Comment


                • #23
                  Originally posted by Buller_Scott View Post
                  if only they had a giac tune for the 1.9 diesel..... (they do, but the place in melb wasnt advertising it)
                  PM me about this
                  2008 VW Polo TDi
                  GIAC | REMSA | PD160 | DECAT | MUFFLERECTOMY | ECS | SUPERPRO | PXL KIWI WIFI | 312mm BRAKES | OZ RACING | KUMHO V70A
                  To Buy: VNT 17/22 or K3 Turbo | R783 Nozzles | Intercooler | Water meth kit.

                  Comment


                  • #24
                    How'd you guys run the hose from the passenger footwell over to the steering wheel or top of the dash? Can't seem to be able to hide this thing quite well.

                    Comment


                    • #25
                      Top write up mate! good info! cheers

                      Comment


                      • #26
                        Lots of electrical tape


                        Sent from my iPhone using Tapatalk

                        Comment

                        Working...
                        X