 Tweet
Tweet
I finally got around to installing my Saber electronic boost gauge today, and figured why not make a 'how to' thread out of it for you all (please bare in mind, I got lazy and didn't take many photos of the wiring... sue me  )
)
Tools and Parts Required:
* Good screwdriver set with torx screw bits
* Scissors
* Needle nose pliers
* Soldering iron and solder
* Lighter
* Heat shrink (although electrical tape is fine)
* Zip ties
* Electrical tape
* Sticky zip ties (can be bought at Bunnings, but look like a hook that you'd stick on a wall to mount a paining, but instead have a zip tie attached to the base. These make EXCELLENT mounting points for wires/tubes running through the cabin under the dash)
Step 1: Engine Cover Removal
The first step of the install is to remove the engine cover.
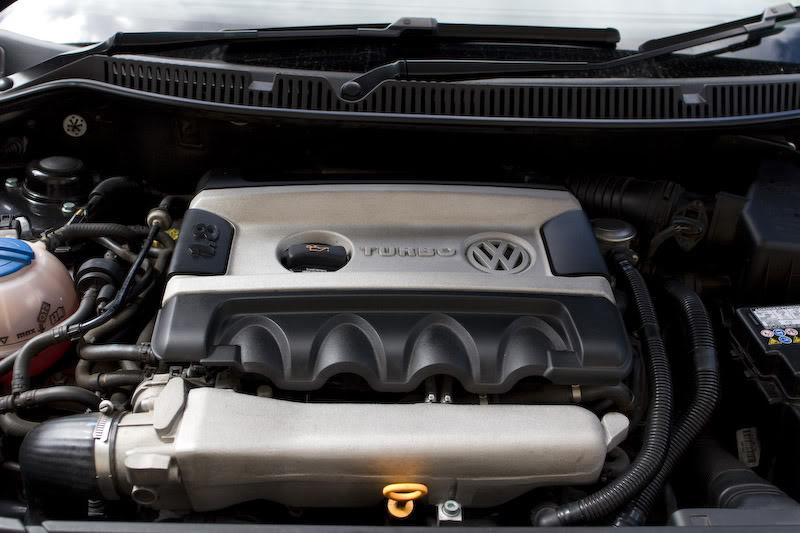
To do so, there are three clips that you need to lift the cover out of (you won't break them, don't worry).
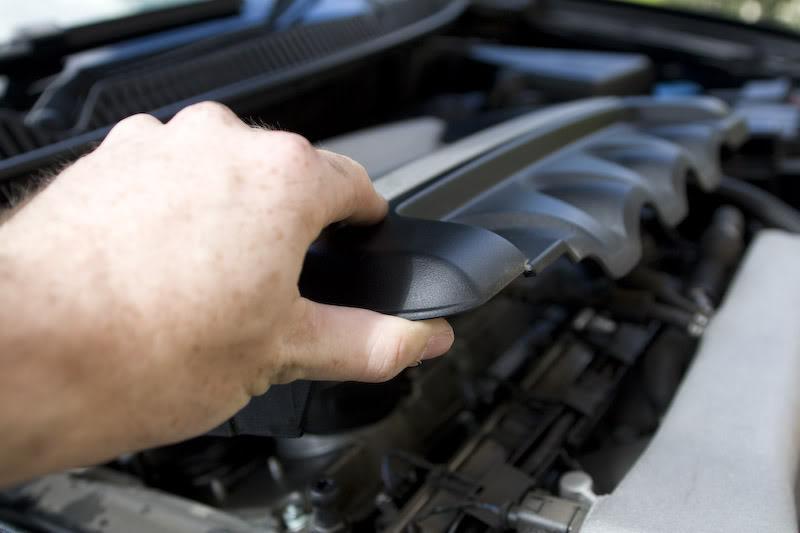
Then just slide the cover forward out from the U shaped bracket at the back.
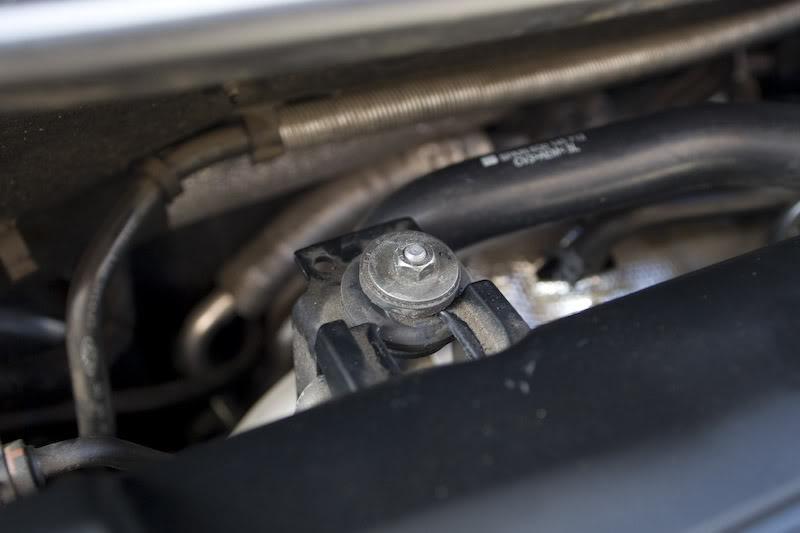
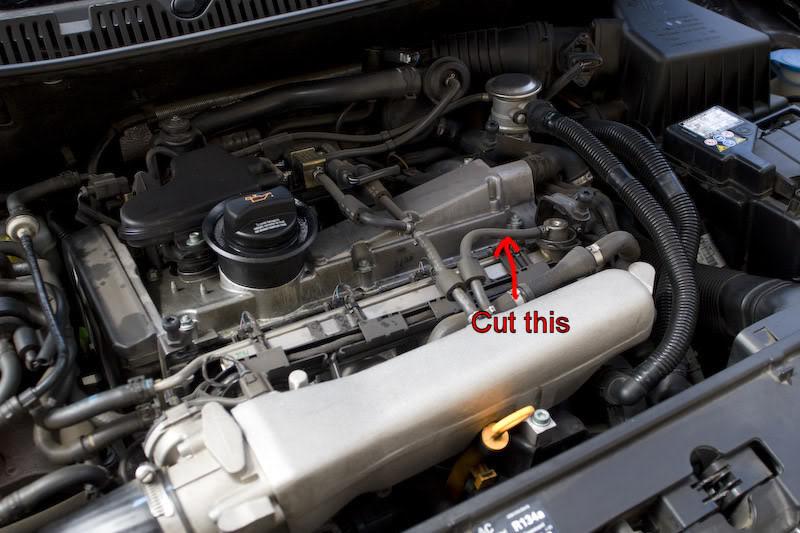
Step 2: Finding the pressure regulator line and fitting the T-piece and hose
Find the pressure regulator line below and cut it at a right angle in the middle of the line.
At this point, I ran the hose through my firewall as it's easier to do it at this step. The grommet I used is in the passenger footwell seen here.
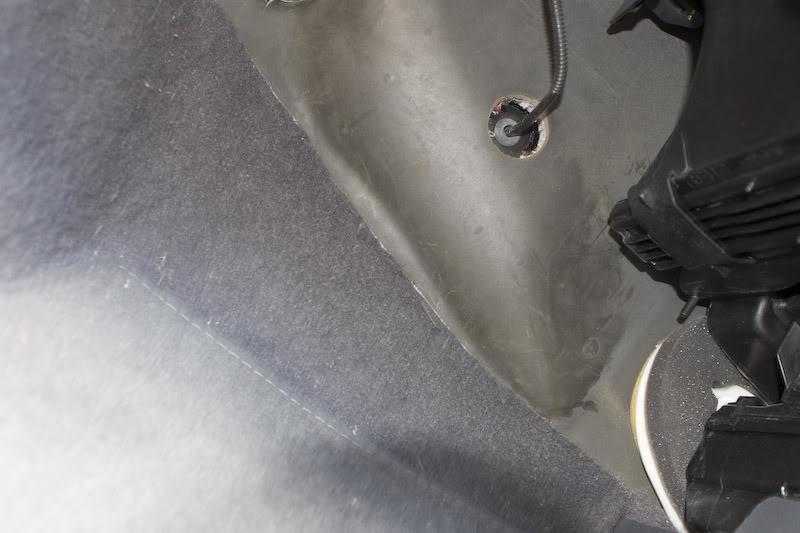
I used a screwdriver to push the grommet in far enough to allow me to fit the tube through. This required me pushing the screwdriver through the grommet ~10-12cm. I then fed the tube through this point.
You can find the exit point of this grommet behind the airbox and to the left of the ECU in the engine bay. Just slip your hand down there (I have big hands and it was a tight squeeze but I could do it) and grab it and pull it up.
One you have the tube find a neat path to run it, or see my path in the image further down the page.
To fit the T-piece onto the cut tubes you can do it two ways, you can put the tubes into a shot glass of boiling water and let them soften up before pushing on the T-piece, or you can use a lighter. I found the hot water trick worked well for the black fuel pressure regulator lines, but the clear boost gauge line needed the lighter to get soft. Once all three lines are connected secure them with clamps or small zip ties.

Step 3: Dismount the center column and dash
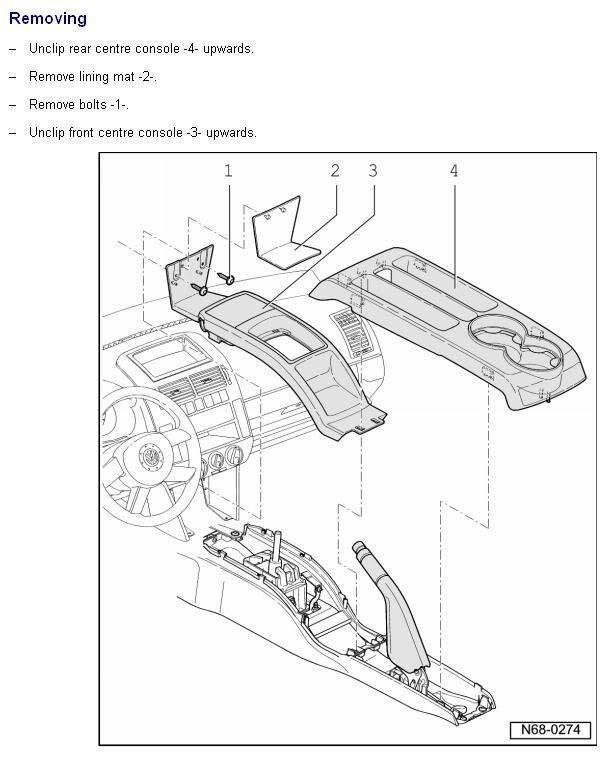
The panels I removed for the job were the two center console panels, I used the guide below I found elsewhere on the forums.
The third panel I removed was the panel below and to the right of the steering wheel column, just above the shelf on the drivers side. It's a panel ~15cm x 15cm and just pops out to give access to behind the dash.
Step 4: The wiring
I'm going to assume you know how to wire, so instead I'm just going to tell you where the wires you need are.
I used the 12v lighter socket for my illumination and negative lines. The illumination is the white wire, the negative the brown line, and the constant 12v on the plug is the red/yellow line.
WARNING: Do not use the constant 12v line from the lighter socket to power your gauge, it's permanently on and will cause the gauge to eventually flatten your battery!.
Below is the diagram of the lighter socket plug:

Instead, for my 12v line I used a wire on the headlight controls to give my gauge it's power (particularly seeing the draw of power for the gauge is so low).
The plug can be accessed by laying on your back in the drivers footwell and looking up behind the dash. You can then reach your hand in and release the two clips either side of the headlight plug to release it, then poke it out of the hole the removed panel has given you.
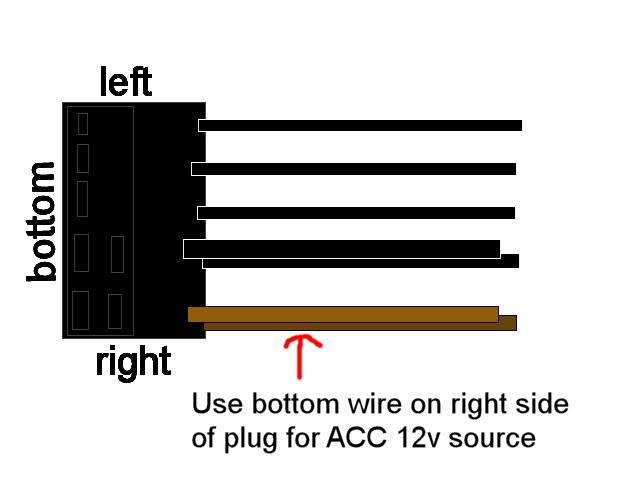
The plug has a number of wires going into it, the wire you want to use is the wire on the far bottom right of the plug. I can't remember the color, but you can use a multimeter to check the power source if you're not sure.
The plug looks like this, with the wire marked.
Step 5: Enjoy the fruits of your labor
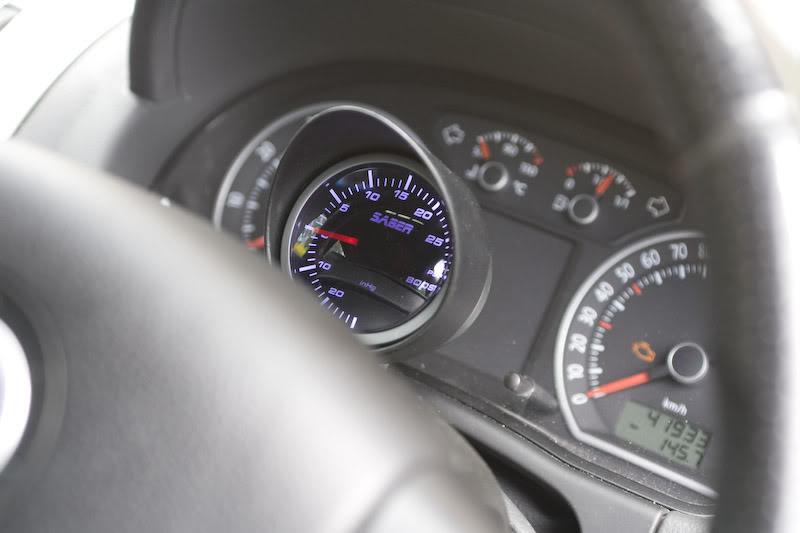
Once all tubing and wiring is done, mount the gauge (mine came with mounting cup, mount, and double sided tape so I used that). I chose to fit mine on the steering column and have tested the position to ensure it doesn't foul with both the turning of the wheel, and that I can adjust the steering wheel for reach/rake without it fouling.
The end product:
I'm happy to answer any questions you guys may have. Hope this helps!
)Tools and Parts Required:
* Good screwdriver set with torx screw bits
* Scissors
* Needle nose pliers
* Soldering iron and solder
* Lighter
* Heat shrink (although electrical tape is fine)
* Zip ties
* Electrical tape
* Sticky zip ties (can be bought at Bunnings, but look like a hook that you'd stick on a wall to mount a paining, but instead have a zip tie attached to the base. These make EXCELLENT mounting points for wires/tubes running through the cabin under the dash)
Step 1: Engine Cover Removal
The first step of the install is to remove the engine cover.
To do so, there are three clips that you need to lift the cover out of (you won't break them, don't worry).
Then just slide the cover forward out from the U shaped bracket at the back.
Step 2: Finding the pressure regulator line and fitting the T-piece and hose
Find the pressure regulator line below and cut it at a right angle in the middle of the line.
At this point, I ran the hose through my firewall as it's easier to do it at this step. The grommet I used is in the passenger footwell seen here.
I used a screwdriver to push the grommet in far enough to allow me to fit the tube through. This required me pushing the screwdriver through the grommet ~10-12cm. I then fed the tube through this point.
You can find the exit point of this grommet behind the airbox and to the left of the ECU in the engine bay. Just slip your hand down there (I have big hands and it was a tight squeeze but I could do it) and grab it and pull it up.
One you have the tube find a neat path to run it, or see my path in the image further down the page.
To fit the T-piece onto the cut tubes you can do it two ways, you can put the tubes into a shot glass of boiling water and let them soften up before pushing on the T-piece, or you can use a lighter. I found the hot water trick worked well for the black fuel pressure regulator lines, but the clear boost gauge line needed the lighter to get soft. Once all three lines are connected secure them with clamps or small zip ties.
Step 3: Dismount the center column and dash
The panels I removed for the job were the two center console panels, I used the guide below I found elsewhere on the forums.
The third panel I removed was the panel below and to the right of the steering wheel column, just above the shelf on the drivers side. It's a panel ~15cm x 15cm and just pops out to give access to behind the dash.
Step 4: The wiring
I'm going to assume you know how to wire, so instead I'm just going to tell you where the wires you need are.
I used the 12v lighter socket for my illumination and negative lines. The illumination is the white wire, the negative the brown line, and the constant 12v on the plug is the red/yellow line.
WARNING: Do not use the constant 12v line from the lighter socket to power your gauge, it's permanently on and will cause the gauge to eventually flatten your battery!.
Below is the diagram of the lighter socket plug:
Instead, for my 12v line I used a wire on the headlight controls to give my gauge it's power (particularly seeing the draw of power for the gauge is so low).
The plug can be accessed by laying on your back in the drivers footwell and looking up behind the dash. You can then reach your hand in and release the two clips either side of the headlight plug to release it, then poke it out of the hole the removed panel has given you.
The plug has a number of wires going into it, the wire you want to use is the wire on the far bottom right of the plug. I can't remember the color, but you can use a multimeter to check the power source if you're not sure.
The plug looks like this, with the wire marked.
Step 5: Enjoy the fruits of your labor
Once all tubing and wiring is done, mount the gauge (mine came with mounting cup, mount, and double sided tape so I used that). I chose to fit mine on the steering column and have tested the position to ensure it doesn't foul with both the turning of the wheel, and that I can adjust the steering wheel for reach/rake without it fouling.
The end product:
I'm happy to answer any questions you guys may have. Hope this helps!


Comment