Above Forum Ad

Collapse

Announcement

Collapse
No announcement yet.

Definitive Guide to removing Polo 6R VW Badges

Collapse
X
 
  • Filter
  • Time
  • Show
Clear All
new posts

  • Definitive Guide to removing Polo 6R VW Badges

    Hi guys,

    I've been Googling, YouTubing and searching these forums for a definitive answer on how to remove the front VW emblam and the rear VW badge.

    Now before you suggest just plasti-dipping the badges the colour of your choice, I am aware of this option, but some people may want to remove the badges to get a more even finish.

    Regardless, removal is still a viable option and hopefully we can get to a consensus on how to remove the emblems on the 6R.

    Links from my search:


    DIY Remove Rear VW Emblem


    There were many more, including videos etc, however nothing conclusive for the 6R that is easy (without having to remove the grill).

    Based on research i've found
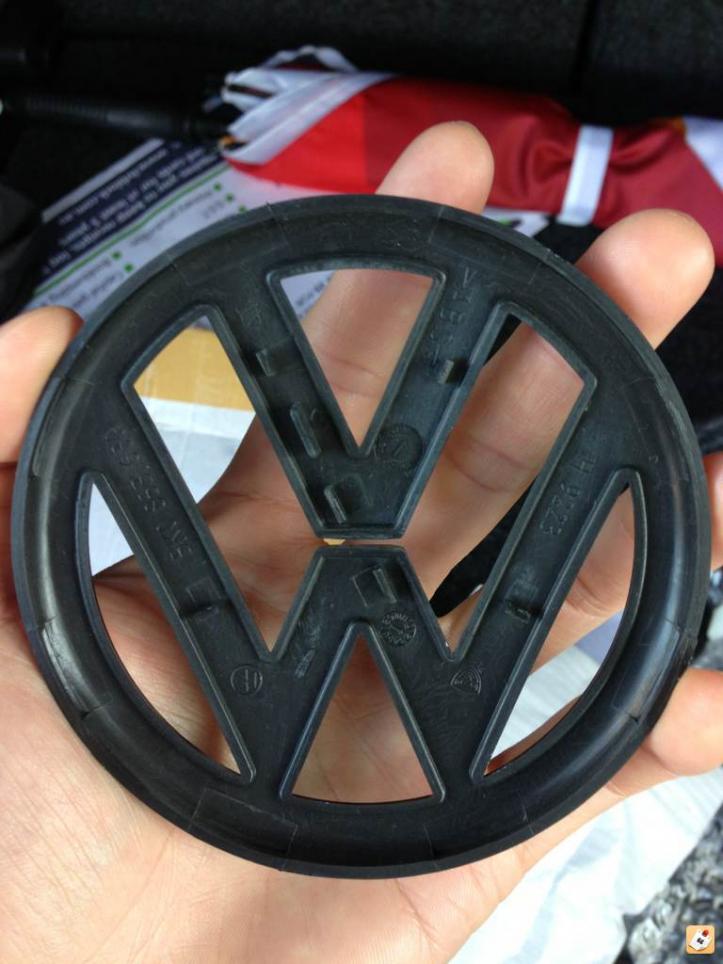
    Front VW Emblem:
    Method 1: Removal of the whole front/honeycomb grill and then taking out the emblem by turning either clockwise or counter clockwise

    Method 2: Without removing the front/honeycomb grill, turn the emblem counter clockwise or clockwise.

    Rear VW Emblem:
    Method 1: Flip up the badge, there is a small space/gap, use a fine flat head screw driver and then carefully pry it off, be weary of the tabs/clips that hold the badge in place, you'll have to bed those tabs to get the badge off.

    Method 2: Do the same as above, using an old credit card (pictures in the links above of this being done).

    Granted most or all of the links above are for Polo 9N's, Golfs, Jetta and other VW's, does anyone know of or can locate instructions for front and back VW emblem removal on the Polo 6R?

    If not, I will be endevoring to put something together here with some videoes uploaded, as i've just recently ordered some gloss black emblems for both the front and the rear of my Polo.

    Watch this space and please share if you have any further info!

    Thanks guys,
    Lawrence
    sigpic
    Mods: 18x7.5 Tenzo Tracer, EZ Lip, Piano black front/rear emblems, Metallic foot rest, Gloss black vinyl wrapped roof, Weitec Hicon GT coilovers, HP CAI

  • #2
    On this Polo 6R build thread it claims: UK-POLOS.NET • View topic - My Polo 6R Build Thread.

    "to remove the badge turn to the right while pulling slightly and it unclips from the grille, I'm soon to do the rear badge when I have some free time it's held in by three bolts behind it"
    sigpic
    Mods: 18x7.5 Tenzo Tracer, EZ Lip, Piano black front/rear emblems, Metallic foot rest, Gloss black vinyl wrapped roof, Weitec Hicon GT coilovers, HP CAI

    Comment


    • #3
      Definitive Guide to removing Polo 6R VW Badges

      Here: http://forum.vwpoloclubmalaysia.com/...eb565495447c76

      Front emblem: No need to remove grill to remove badge

      Rear emblem: Use small flat head screw driver to pry off carefully, be careful of the 3 little clips
      sigpic
      Mods: 18x7.5 Tenzo Tracer, EZ Lip, Piano black front/rear emblems, Metallic foot rest, Gloss black vinyl wrapped roof, Weitec Hicon GT coilovers, HP CAI

      Comment


      • #4
        Definitive Guide to removing Polo 6R VW Badges

        Here: http://squarespokes.com/09/plasti-dipping-vw-emblems/

        It's for a 9N Polo but the rear emblem should be the same, detailed images in how to remove the rear emblem, front emblem is still a mystery at this stage.
        sigpic
        Mods: 18x7.5 Tenzo Tracer, EZ Lip, Piano black front/rear emblems, Metallic foot rest, Gloss black vinyl wrapped roof, Weitec Hicon GT coilovers, HP CAI

        Comment


        • #5
          Of course if this has already been done and they have instructions, please share and save me the time! Otherwise once my front and rear emblems arrive from eBay i'll be giving it a go and putting a tutorial together.
          sigpic
          Mods: 18x7.5 Tenzo Tracer, EZ Lip, Piano black front/rear emblems, Metallic foot rest, Gloss black vinyl wrapped roof, Weitec Hicon GT coilovers, HP CAI

          Comment


          • #6
            Definitive Guide to removing Polo 6R VW Badges

            Stickied!
            sigpic
            Stage 2+ Intercooler Carbon Intake Downpipe Swaybar DV+ Remsa.

            Comment


            • #7
              Definitive Guide to removing Polo 6R VW Badges

              CONFIRMED:

              Rear badge emblem removal:

              There is no glue, just a few clips on the actual emblem and some on the surrounding edges of the emblem. I removed the badge as a test. Once my OEM piano black rear emblem arrives i'll post more photos of me removing it a second time and attaching the new one!

              Method:
              1. Use a small flat head screw driver and gently put it into the hole at the bottom of the emblem, work the mini screw driver in. It will take a little force. You'll need to work it slowly until a space is created big enough to insert the corner of an old credit card. (Picture was borrowed from SquareSpokes post)

              Click image for larger version

Name:	6192358203_d2d0f28b11_b.jpg
Views:	1
Size:	210.0 KB
ID:	1807395

              2. Once you loosen the badge, insert an old credit card or plastic card and start loosening it along the edges. (Image borrowed from VWGolf site)

              Click image for larger version

Name:	4569394587_192246faab_o.jpg
Views:	1
Size:	140.3 KB
ID:	1807396

              3. Work the card through to the bottom half of the W. You will see in the images below that there are three clips inside the W. As you work the card through the bottom half of the "W" twist the card slightly and you will hear a pop sound.

              ** Be careful not to snap your W in half, and be weary not to break the clips.

              To see where the badge clips into the rear latch see image:

              See here the little clips on the center of the "W" that click into the center of the rear trunk release latch, as well as the clips that click into the outside edges (notice the 8 little squares along the outside edge of the emblem):


              Those little clips slot into the holes below, and the outside edges are held on using clips (scroll to the next image further down).

              Click image for larger version

Name:	photo 3 (2).JPG
Views:	1
Size:	69.7 KB
ID:	1807397

              4. Once you have popped the first clip in the lower half of the W, work your way to the opposite side and pop that clip out, DO NOT MOVE STRAIGHT TO THE TOP OF THE W.

              5. Upon popping out the two outer edges of the lower half, pop the middle clip by working the card into the middle.

              6. Now take notice, there are no clips holding the outside edges of the emblem. There are however grooves that keep the emblem in place. You'll have to start gently working the card along both edges of the emblem now that the bottom half is completely loose.

              See image of the grooves that clip onto the inside edge of the rear emblem:

              Click image for larger version

Name:	photo 4 (2).JPG
Views:	1
Size:	92.8 KB
ID:	1807398

              7. Once both upper outer edges are loose (along with the bottom half of the emblem) using your card start twisting the card to loosen the clips on the top half of the W.

              8. The badge from here should pop off quite easily.
              Last edited by llai8501; 05-09-2013, 12:27 PM.
              sigpic
              Mods: 18x7.5 Tenzo Tracer, EZ Lip, Piano black front/rear emblems, Metallic foot rest, Gloss black vinyl wrapped roof, Weitec Hicon GT coilovers, HP CAI

              Comment


              • #8
                CONFIRMED:

                Front grill / emblem removal:

                1. Watch this video, i essentially followed this as a guide, but I didnt have a panel tool which I will explain below.

                WATCH:


                2. Using T20 sized TORX screw driver, as in the video, undo the two screws

                Sorry about the blurry photos.

                Here on the left:
                Click image for larger version

Name:	photo 3 a.JPG
Views:	1
Size:	121.4 KB
ID:	1807399

                and here on the right:
                Click image for larger version

Name:	photo 4 (2).JPG
Views:	1
Size:	116.0 KB
ID:	1807400


                3. Rather than using a panel tool to pop out the four top clips, there are four holes you can simply put a flat head screw driver in, press down and forcefully pull the grill clips out one at a time, moving down the grill.

                See four points where you put the flat head screw driver:
                Click image for larger version

Name:	photo 5 (2).JPG
Views:	1
Size:	168.9 KB
ID:	1807401

                4. Once you pull out the top four clips, you'll notice that there are 6 clips that hold the bottom section of the grill. Pull the top of the grill ajar and you'll see 4 of them, the other two are on the outside edges closest to the headlights. To unclip the four visible clips, put your hand inside the grill (unless you have a panel tool and can do whats on the video) and use a flat head screw driver and press down on each of the 4 the black tabs that you can see. As you press down on the tab, put your fingers in the honeycomb section of the grill and pull UP and OUT.

                It will take some force, as you get the first clip out, the others will be easy. The outside edges on either side unclip easily once the center four upclip.

                The tabs are clipped onto these four white tabs on your bumper.

                Here:
                Click image for larger version

Name:	photo 1 (1).JPG
Views:	1
Size:	63.6 KB
ID:	1807402

                and here:
                Click image for larger version

Name:	photo 2 (1).JPG
Views:	1
Size:	80.9 KB
ID:	1807403
                Last edited by llai8501; 25-08-2013, 11:29 PM.
                sigpic
                Mods: 18x7.5 Tenzo Tracer, EZ Lip, Piano black front/rear emblems, Metallic foot rest, Gloss black vinyl wrapped roof, Weitec Hicon GT coilovers, HP CAI

                Comment


                • #9
                  5. The last 2 remaining clips are on either side, on the edge closest to the headlights, and they latch onto these:

                  Here:
                  Click image for larger version

Name:	photo 3a.JPG
Views:	1
Size:	104.7 KB
ID:	1807409

                  and here:
                  Click image for larger version

Name:	photo 41.jpg
Views:	1
Size:	97.2 KB
ID:	1807410

                  6. Once its off, you can see the top four clips and the bottom 6 clips circled in the image below:
                  Click image for larger version

Name:	grill.jpg
Views:	1
Size:	246.9 KB
ID:	1807412

                  8. So you got the grill off! Good work. Now to unlodge the badge. First you need to remove that mesh looking backing. To do that you need to just unhinge the two clips pictured here:

                  Click image for larger version

Name:	photo 1.jpg
Views:	1
Size:	147.0 KB
ID:	1807413

                  Just bend the frame sideways slightly to allow for it to unclip
                  Click image for larger version

Name:	photo2.jpg
Views:	1
Size:	179.6 KB
ID:	1807414

                  Once you pop it off, you can remove it
                  sigpic
                  Mods: 18x7.5 Tenzo Tracer, EZ Lip, Piano black front/rear emblems, Metallic foot rest, Gloss black vinyl wrapped roof, Weitec Hicon GT coilovers, HP CAI

                  Comment


                  • #10
                    Now to remove the badge, its not as simple as the other VW's where you can turn it clockwise.

                    9. You need to use a small flat head screw driver and lift the tab on the bottom two clips that are circled in green (its held in place by 3 clips pictured below).

                    How to lift the clip:
                    Click image for larger version

Name:	photo 3.JPG
Views:	1
Size:	140.9 KB
ID:	1807415

                    Which ones need to be lifted (in green)
                    Click image for larger version

Name:	photo 1.JPG
Views:	1
Size:	232.1 KB
ID:	1807416

                    You can see from the image above, where the arrow is, it locks the emblem in place, so to twist it clockwise you first need to lift those two clips over the latches.

                    10. Great work! You got it off!

                    Click image for larger version

Name:	photo 5 (1).JPG
Views:	1
Size:	145.0 KB
ID:	1807418

                    11. Enjoy the finished results

                    Click image for larger version

Name:	photo 4.JPG
Views:	1
Size:	141.3 KB
ID:	1807417

                    Click image for larger version

Name:	photo 5.JPG
Views:	1
Size:	73.8 KB
ID:	1807419
                    sigpic
                    Mods: 18x7.5 Tenzo Tracer, EZ Lip, Piano black front/rear emblems, Metallic foot rest, Gloss black vinyl wrapped roof, Weitec Hicon GT coilovers, HP CAI

                    Comment


                    • #11
                      I can confirm that if you twist the front badge to the left (counter clockwise) and pull firmly, the front badge will detach. I found the bottom clip detached first and the top followed.

                      I just installed my matte black badges, the front badge using this 'twist' method

                      Comment


                      • #12
                        Wow been a year since I last posted here and this is still up!
                        sigpic
                        Mods: 18x7.5 Tenzo Tracer, EZ Lip, Piano black front/rear emblems, Metallic foot rest, Gloss black vinyl wrapped roof, Weitec Hicon GT coilovers, HP CAI

                        Comment

                        Working...
                        X