 Tweet
Tweet
Hi all
I thought I would make this guide for those interested in installing Lakin custom plate brackets on their R36, because the method differs from other Passats. Also, bear in mind that I'm terrible with these kind of things, so I figured there might be others who would benefit from a step by step guide.
This guide picks up from the info in this thread - thanks to all who posted in there for their help.
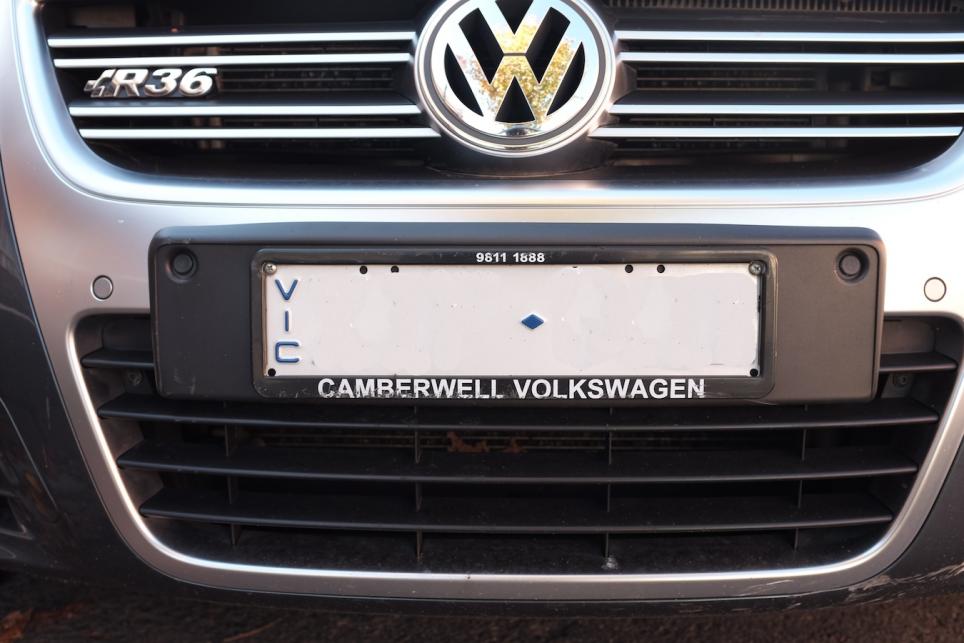
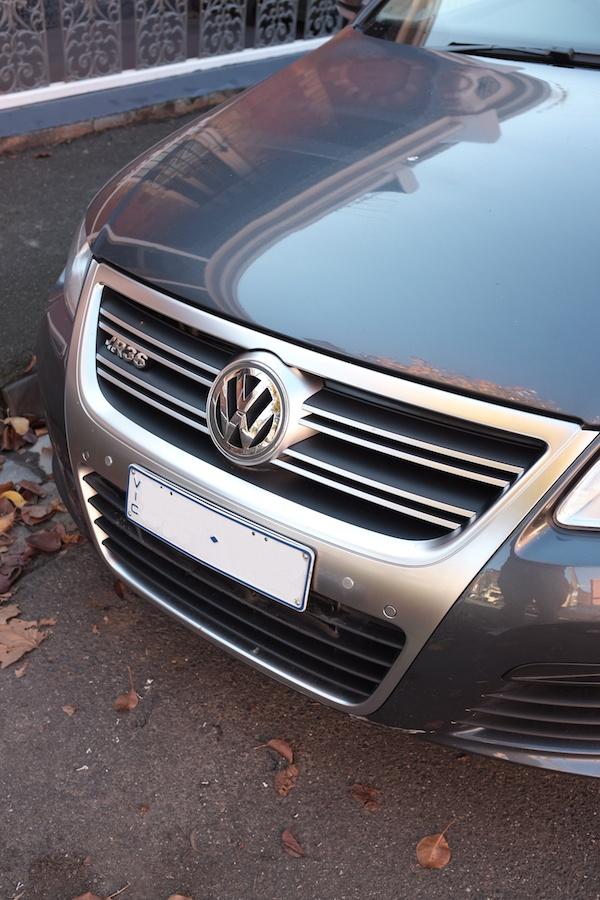
This was my starting position, with horrible big black plastic bracket and dealer-fit plate holders:
The steps are as follows:
1) Remove existing plate and OEM big black plastic plate bracket
In my case, I just unscrewed the existing plate to get it off the big black plastic bracket.
Removing the black plastic bracket involved removing the central plastic pin in the 4 plugs that hold the bracket in place. I removed the top two by gently hammering the pin out (ie. towards the engine bay) using an allen key of approximately the same size as the central pin.
The bottom two were not as easy to remove by this method, so I drilled them out using a 3.5mm drill bit.
This is a good time to clean the bumper area that has been sitting behind the big black plastic bracket for all this time.
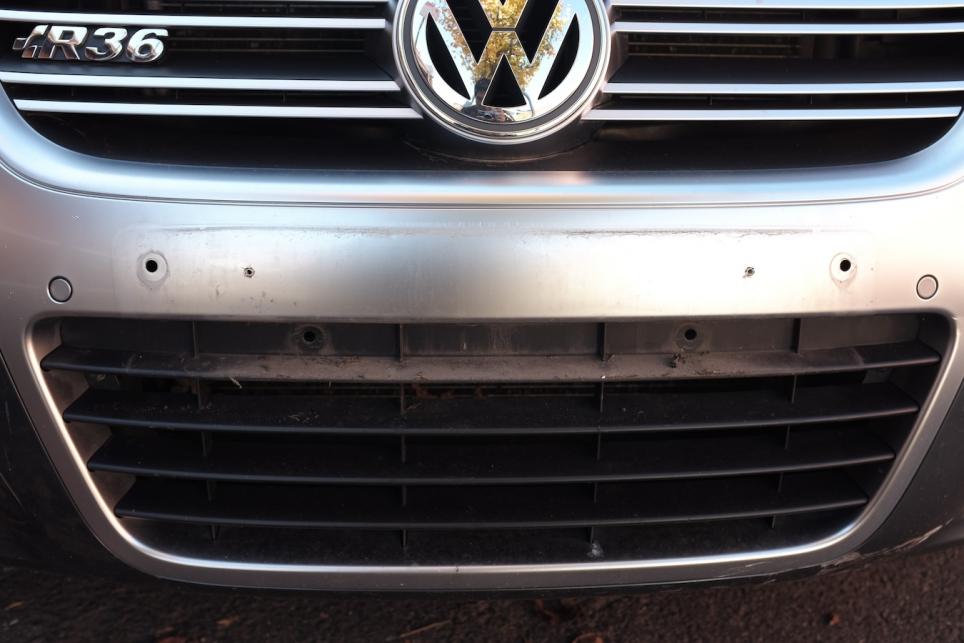
Note that in the photo below, you can see four holes - two are from the top two plugs holding the big black plastic bracket in place, and two are holes from where the dealer drilled the original long screws in that held the plate to the big black plastic bracket. These holes will not be used in this process, and will be hidden by the new Lakin plate bracket anyway.
2) Drill new holes in the existing bumper to fit new Lakin braket
Lakin provides pretty detailed instructions on how to drill the bumper.
Basically, you need to put a bunch of masking tape around, mark out the vertical and horizontal centres (for placement) and add a couple of strips of tape to where you will be drilling the bumper (to make the drill holes nice and clean, unlike the ones created by the dealership's "handiwork").
Once the paper template (provided in the kit) has been set up as you want it, you basically drill four 3.5mm holes through the template and the masking tape, leaving nice clean holes.
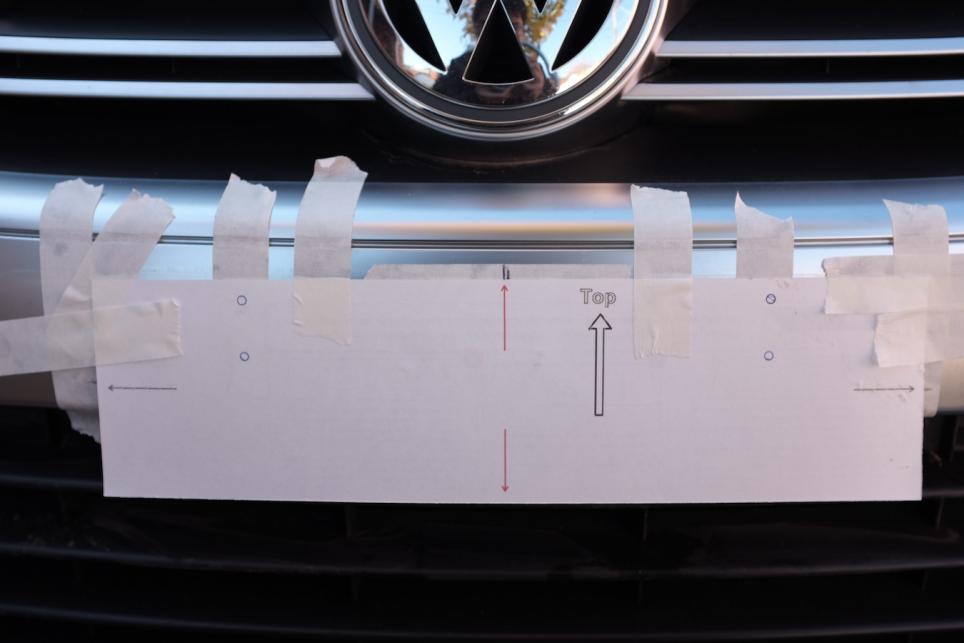
When you're done, you should end up with something like this (hopefully with slightly better measurements yours might even be horizontal...I didn't get it quite right as you can see).

3) Install new Lakin braket using screws into these new holes
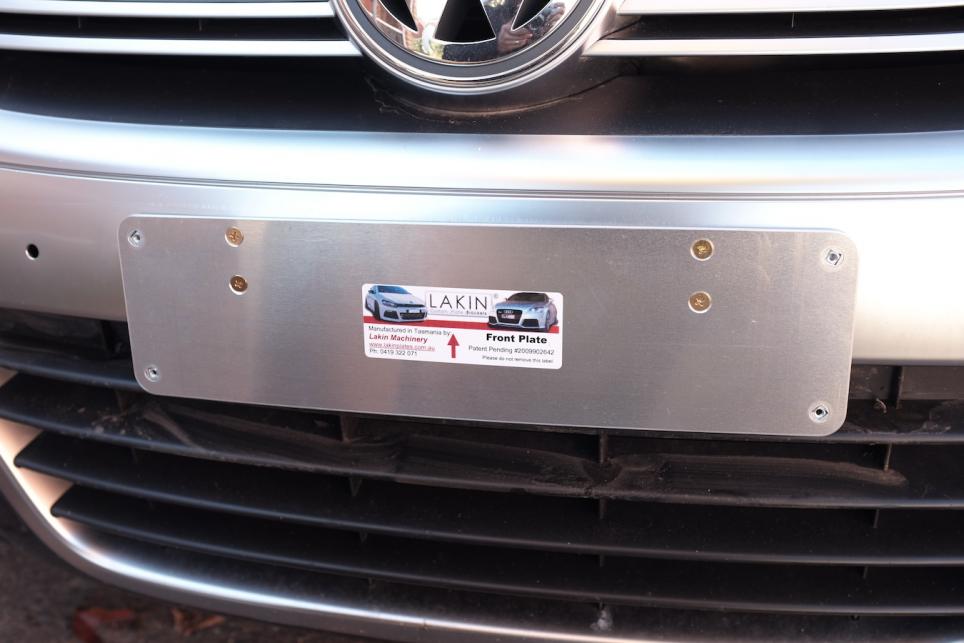
Next, you just screw the Lakin plate bracket to the bumper via your new holes.
There were two types of screw grommets supplied in the kit. I used these behind the plate bracket (ie between the plate bracket and the bumper), otherwise the screws would not have sat flush in the tapered section of the plate bracket.
This steps take seconds.
4) Install plate on to Lakin bracket and bumper plugs
Last step - just screw the plate into the plate bracket using the allen-head screws provided. There were two colours in my pack (black and aluminium).

I also ordered the custom aluminium coloured plugs with my plate bracket, to fill in the holes left by the big plastic bracket. They're not a perfect match, but they are much better than other colour options. You need to use some silicone to hold these in place.
That's it - you're done!
E
I thought I would make this guide for those interested in installing Lakin custom plate brackets on their R36, because the method differs from other Passats. Also, bear in mind that I'm terrible with these kind of things, so I figured there might be others who would benefit from a step by step guide.
This guide picks up from the info in this thread - thanks to all who posted in there for their help.
This was my starting position, with horrible big black plastic bracket and dealer-fit plate holders:
The steps are as follows:
1) Remove existing plate and OEM big black plastic plate bracket
In my case, I just unscrewed the existing plate to get it off the big black plastic bracket.
Removing the black plastic bracket involved removing the central plastic pin in the 4 plugs that hold the bracket in place. I removed the top two by gently hammering the pin out (ie. towards the engine bay) using an allen key of approximately the same size as the central pin.
The bottom two were not as easy to remove by this method, so I drilled them out using a 3.5mm drill bit.
This is a good time to clean the bumper area that has been sitting behind the big black plastic bracket for all this time.
Note that in the photo below, you can see four holes - two are from the top two plugs holding the big black plastic bracket in place, and two are holes from where the dealer drilled the original long screws in that held the plate to the big black plastic bracket. These holes will not be used in this process, and will be hidden by the new Lakin plate bracket anyway.
2) Drill new holes in the existing bumper to fit new Lakin braket
Lakin provides pretty detailed instructions on how to drill the bumper.
Basically, you need to put a bunch of masking tape around, mark out the vertical and horizontal centres (for placement) and add a couple of strips of tape to where you will be drilling the bumper (to make the drill holes nice and clean, unlike the ones created by the dealership's "handiwork").
Once the paper template (provided in the kit) has been set up as you want it, you basically drill four 3.5mm holes through the template and the masking tape, leaving nice clean holes.
When you're done, you should end up with something like this (hopefully with slightly better measurements yours might even be horizontal...I didn't get it quite right as you can see).
3) Install new Lakin braket using screws into these new holes
Next, you just screw the Lakin plate bracket to the bumper via your new holes.
There were two types of screw grommets supplied in the kit. I used these behind the plate bracket (ie between the plate bracket and the bumper), otherwise the screws would not have sat flush in the tapered section of the plate bracket.
This steps take seconds.
4) Install plate on to Lakin bracket and bumper plugs
Last step - just screw the plate into the plate bracket using the allen-head screws provided. There were two colours in my pack (black and aluminium).
I also ordered the custom aluminium coloured plugs with my plate bracket, to fill in the holes left by the big plastic bracket. They're not a perfect match, but they are much better than other colour options. You need to use some silicone to hold these in place.
That's it - you're done!
E
Comment