If this is your first visit, be sure to
check out the FAQ by clicking the
link above. You may have to register
before you can post: click the register link above to proceed, registering will remove the in post advertisements. To start viewing messages,
select the forum that you want to visit from the selection below.
This means you should apply for your renewal now to avoid any disruptions to your membership whilst the renewal process is taking place! NOTE: If you have an auto renewing subscription this will happen automatically.
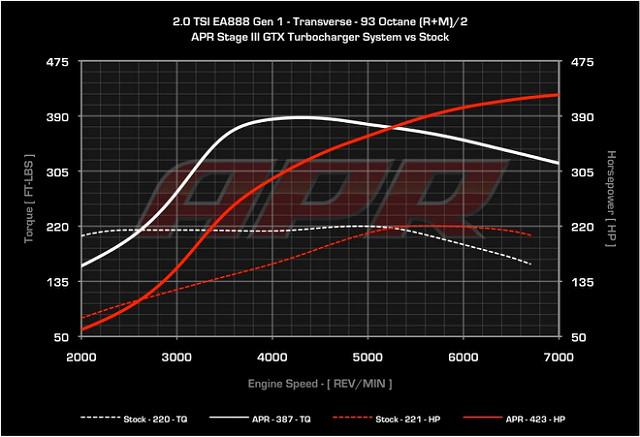
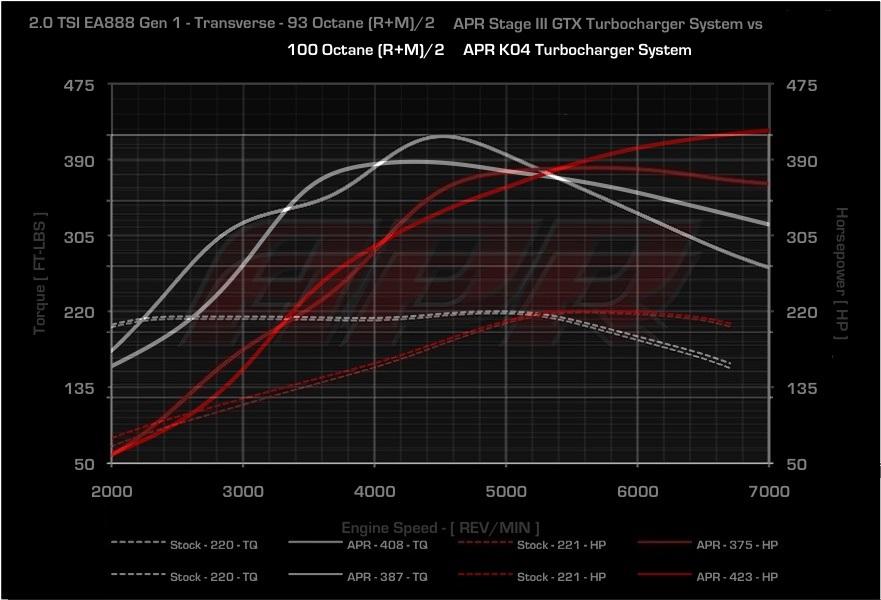
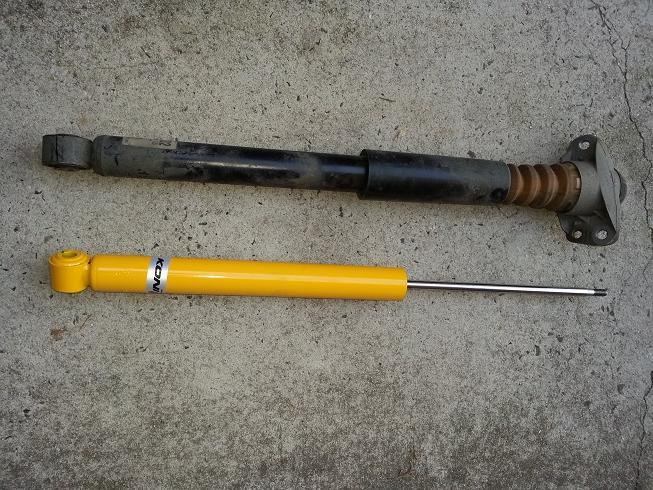
Honestly speaking I like more power So I am thinking more ways to improve the performance even though I haven't found any threat or reason to do something about it Another thing is daily drivability, I like more response from the engine. Given that K04 bit lagging to my liking (in normal D mode , sports mode is ok) I thought to compare K04 and GTX and see how they compete with each other. Looks like K04 produce better drivability in daily commute considering almost same power and more torque up to 5000rpm with much better low end response.
Now how we merge GTX top end with K04 low end that is my problem even though I know we don't have any existing off the shelf solution. I like to put an R32 engine in the Tig in future as starters. How to find a good R32 engine and how to do a swap is another matter
So after long time this Friday is a holiday for me. Time to update the build with some pics of the Mods I did to the car, It wont be complete at first since I am looking for pics every where and have to take some more to complete.
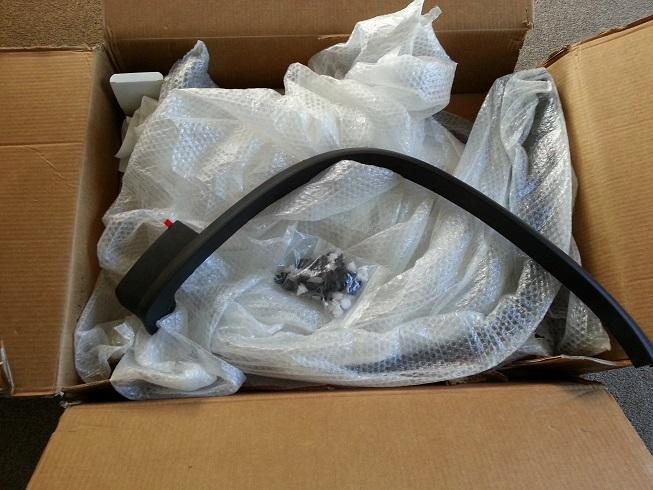
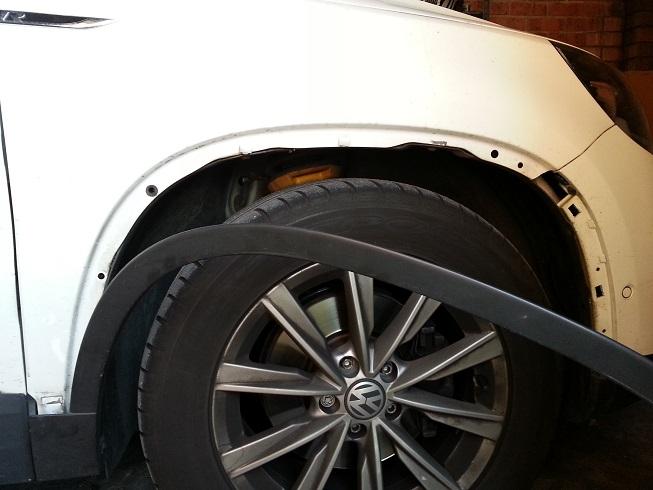
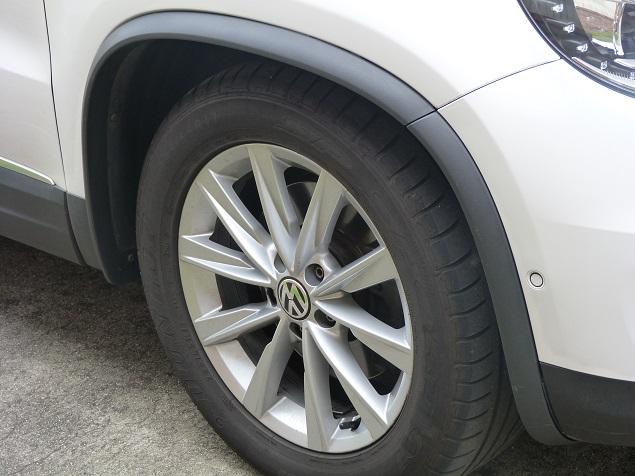
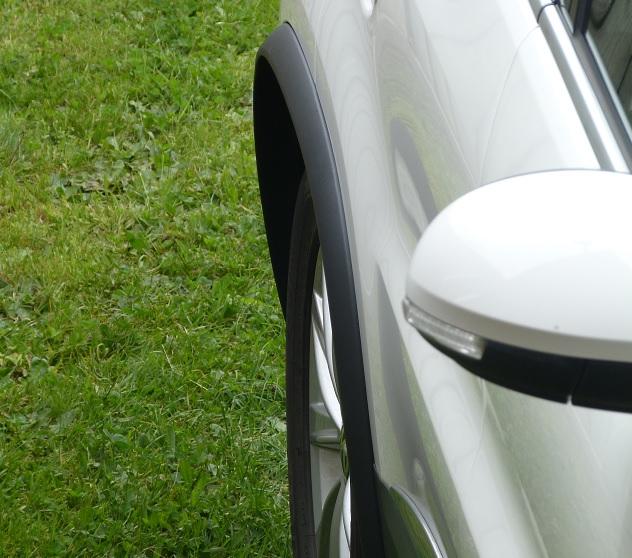
Since I abandon the idea of installing wide wheel arches I had, I decided to get a narrow arch extension kit and see how it goes. The kit I was looking at was bit expensive about 900 AUD from US when landed here. But fortunately I found a kit for sale in sales section for half the price and jumped for the opportunity Kit was from forum member Dr freedom and it was band new! Great guy excellent communications and a very fast shipping (did i just wrote an Ebay feedback! haha)
My first look at the package. Only took out one piece from the parcel and I am satisfied. All OEM quality is there compared to the kit I got from aftermarket manufacture.
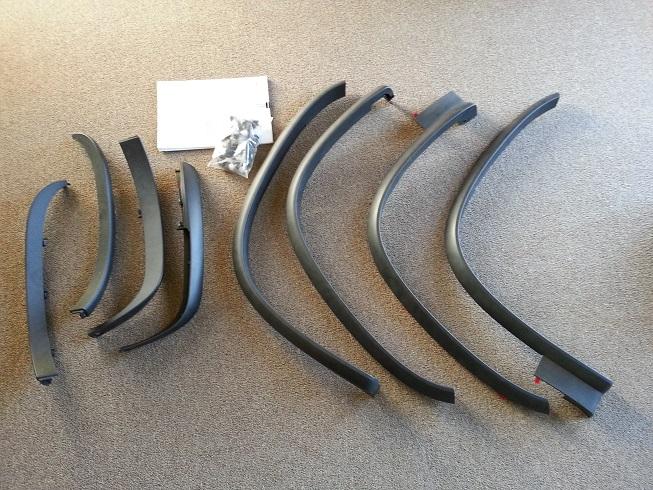
Kit has 8 pieces altogether.
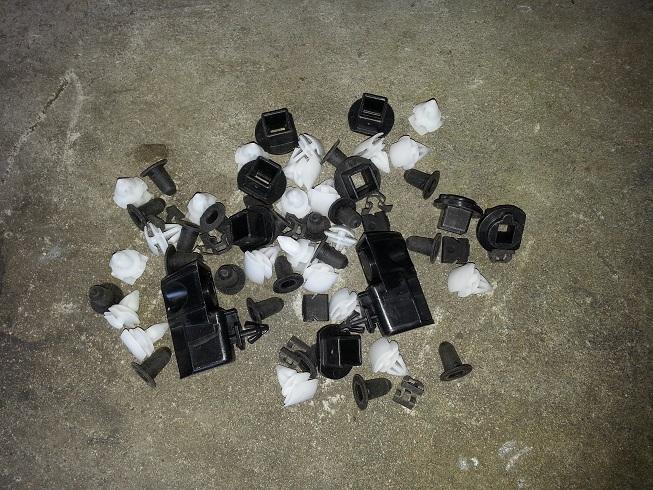
And lots of fasteners and plastic pieces as well + instruction manual in many languages.
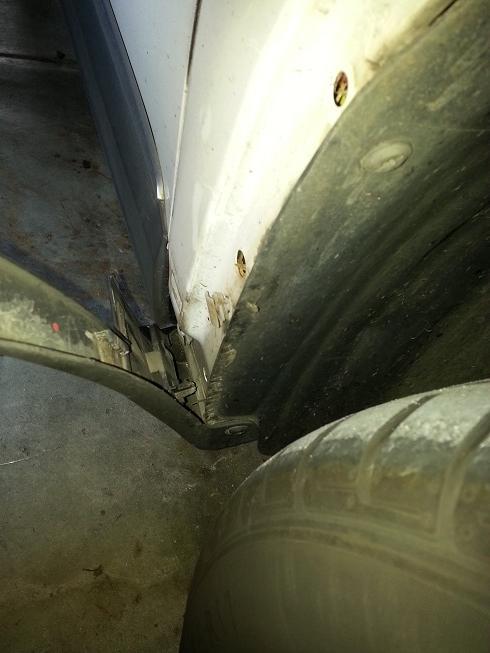
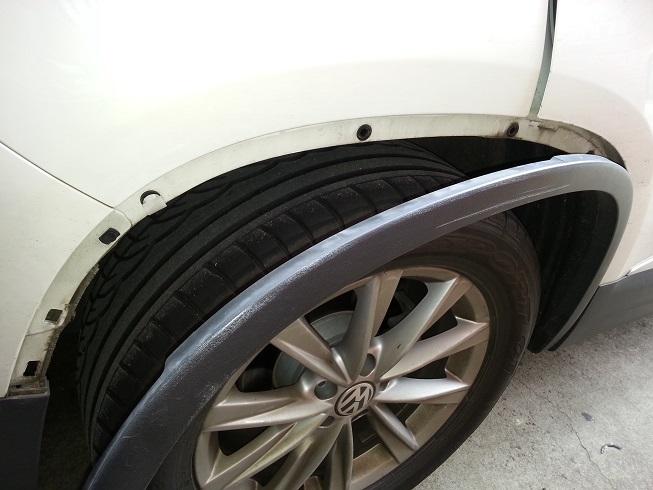
So began the front install by removing existing plastic arch. Removing is easy I just pulled it out without any mercy on the clips since I
am going to replace them all.
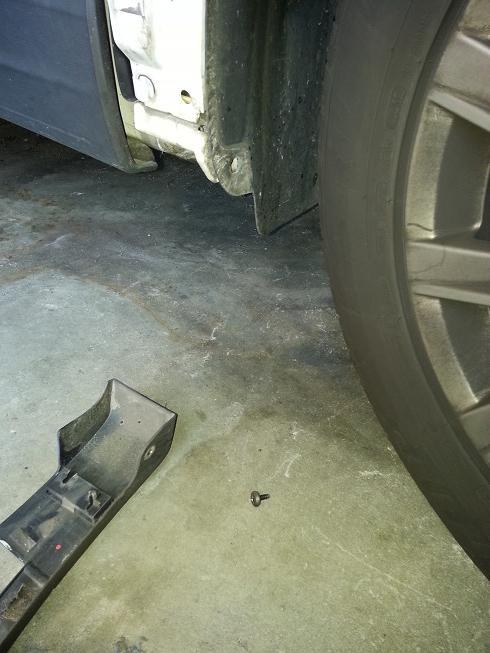
One screw at the bottom stopped me from my barbaric action.. ha!
And the poor screw is down and wheel arch is out.
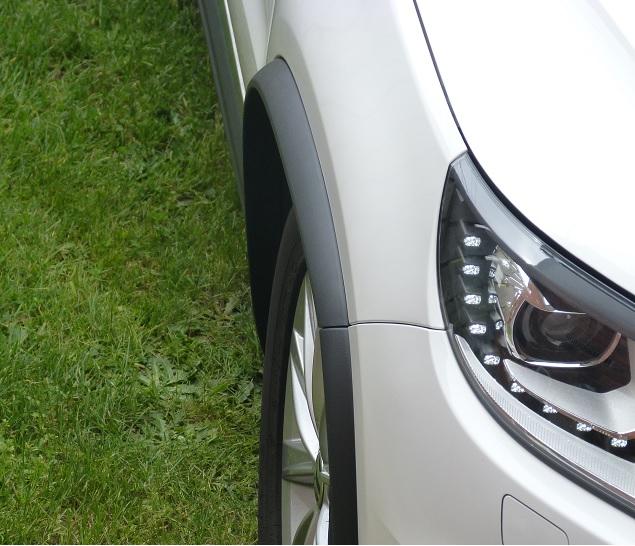
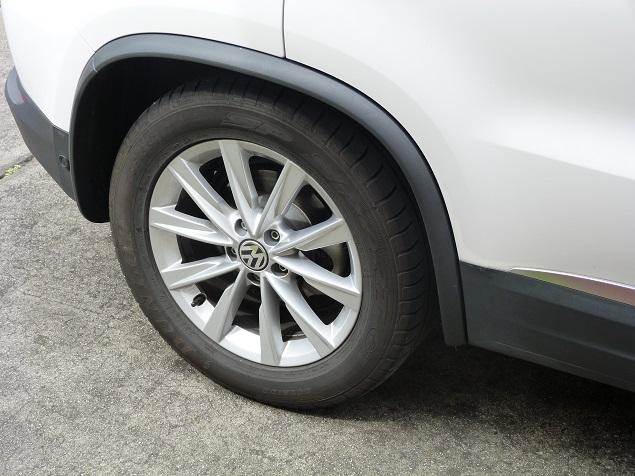
New arch extension is ready to go in.
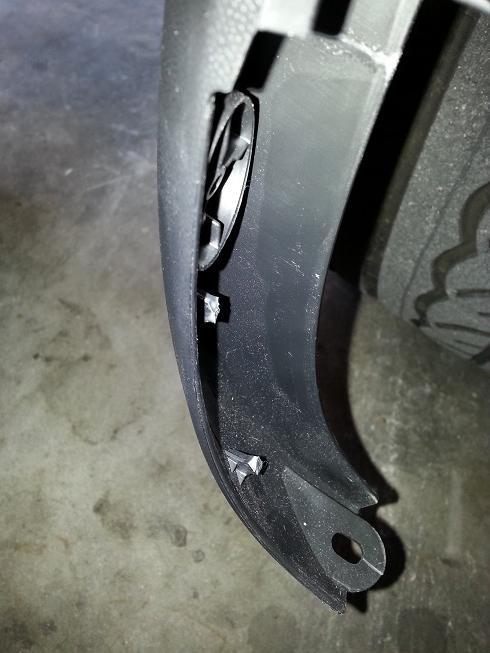
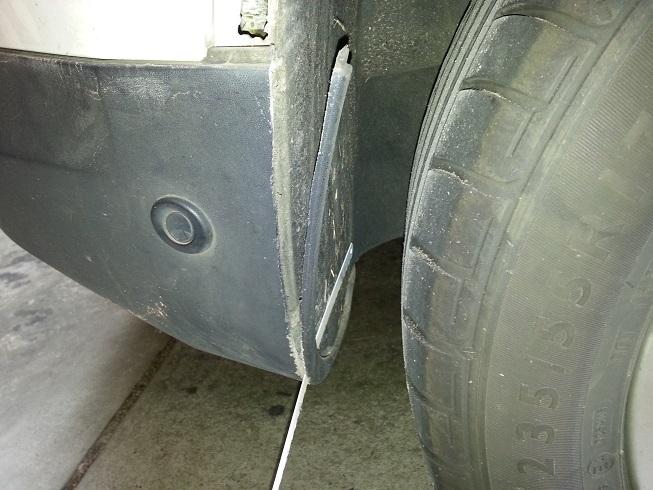
New arch got few retaining clips which goes in to the bumper and according to instruction manual I supposed to drill some complex holes based on a given template and do a bit of surgery inserting special plastic clips etc etc. Who got time for those, just trimmed the buggers off.
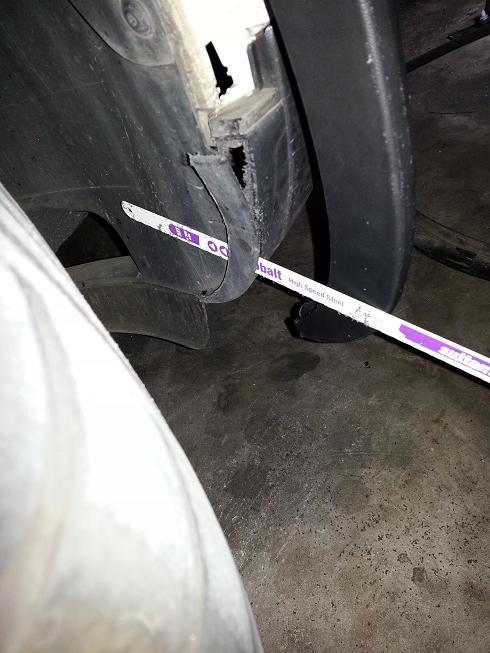
Now the best part. According to instruction manual I have to cut small slice from the edge of the bumper otherwise new piece will not sit flush. So doing that, and no going back after doing this. But who cares we got awesome arch extensions and who wants to go back!
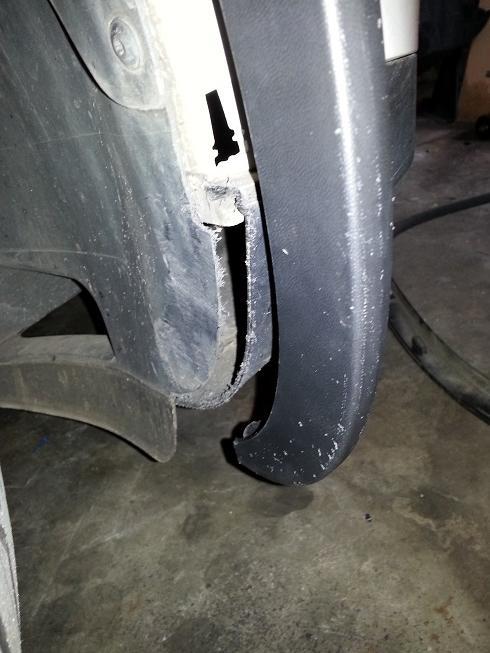
And sanded little bit to clean the edges
Finally have to drill a small hole to put a screw at the bottom to hold the piece. Even a self tapping wide head screw will do.
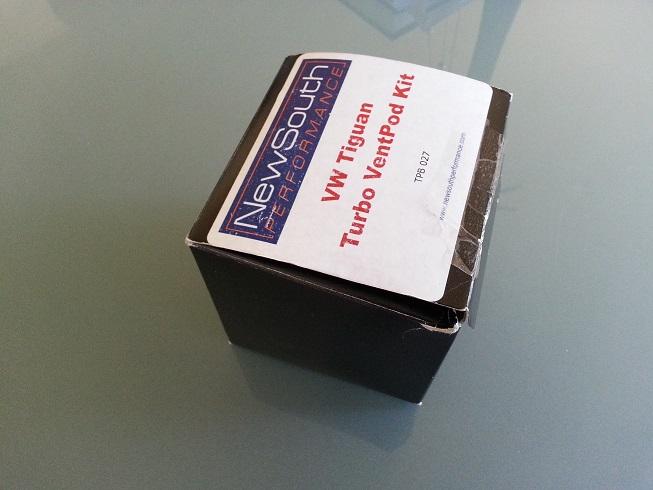
Got this same time with the wheel arch kit from Dr freedom. He advertised it soon after I paid for the arch kit and was kind enough to send it in the same package even before we agree for a price for it Also band new!
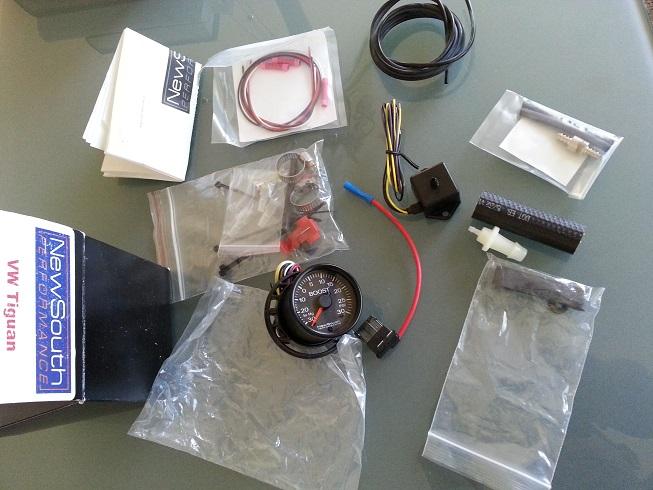
Kit comes with everything required for a install and some more.
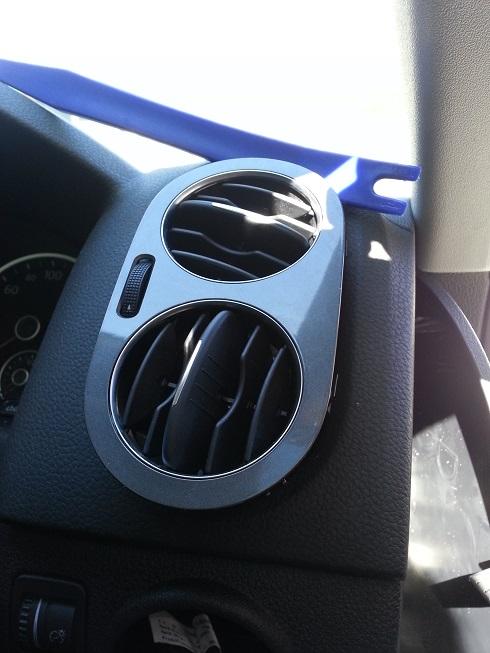
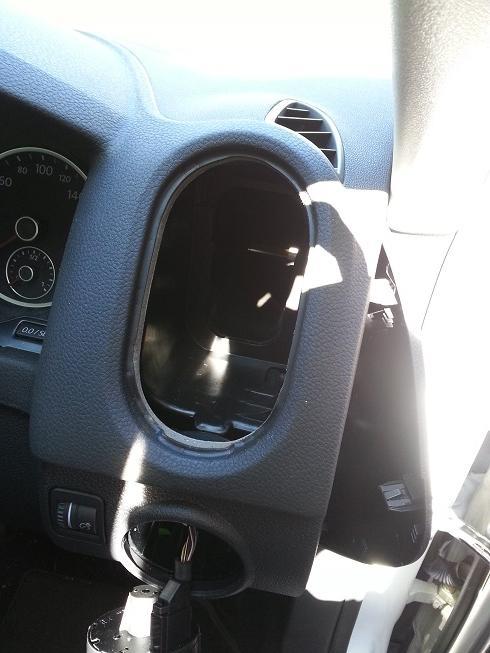
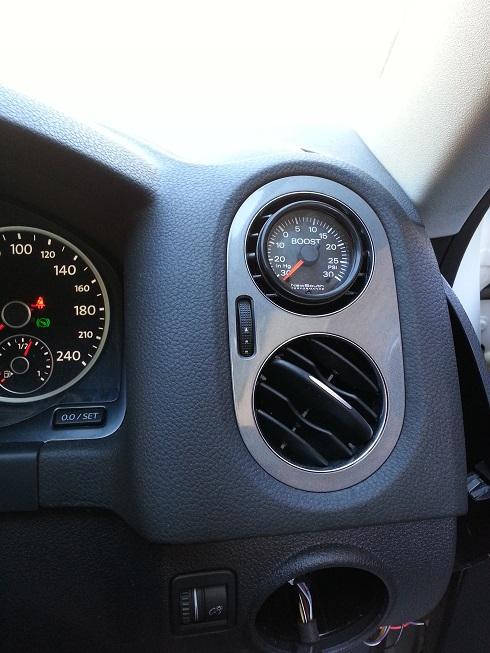
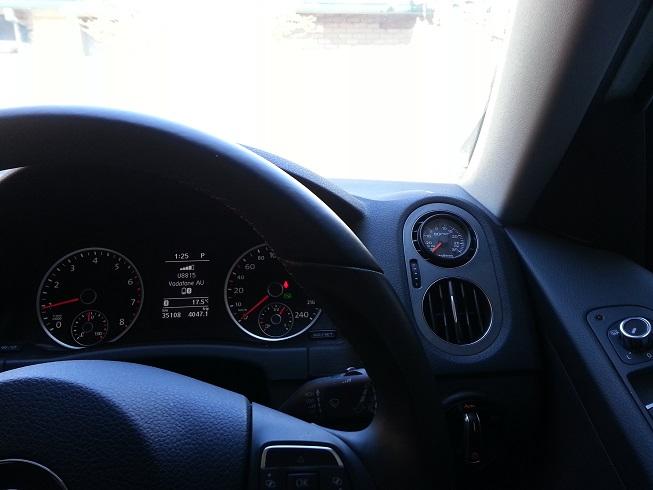
Boost gauge can be installed in any air vent on the front dashboard so I decided to install it on top right side vent. Plastic trim remover kit I got from Ebay was very useful for pulling the vent apparatus out.
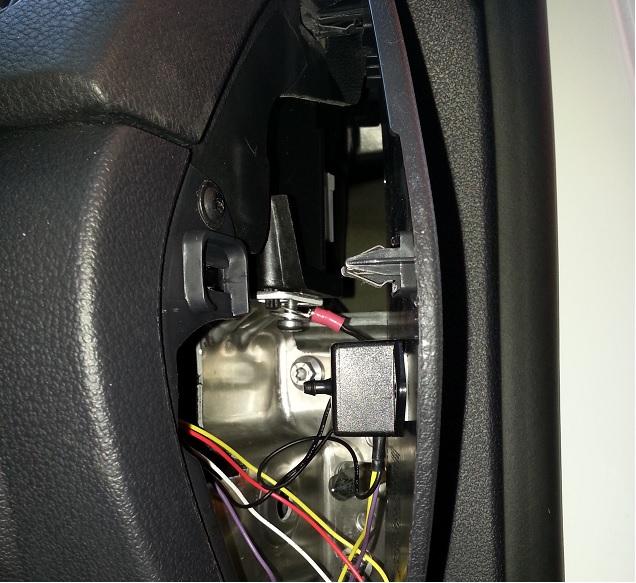
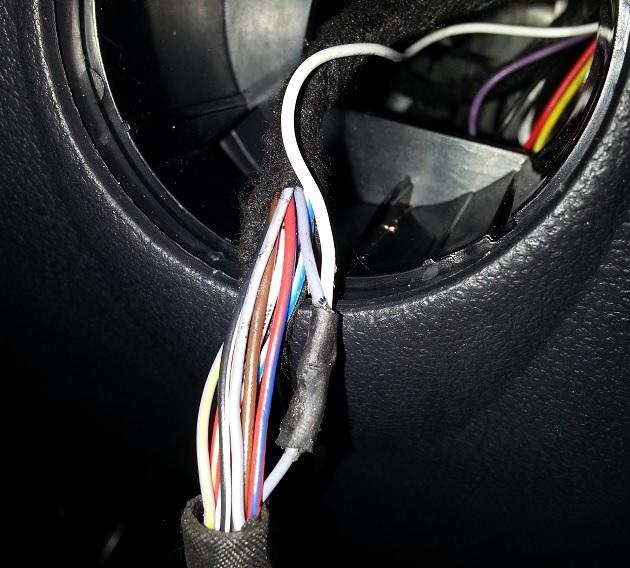
I also removed to side dash trim and light switch to see how all the wiring should go.
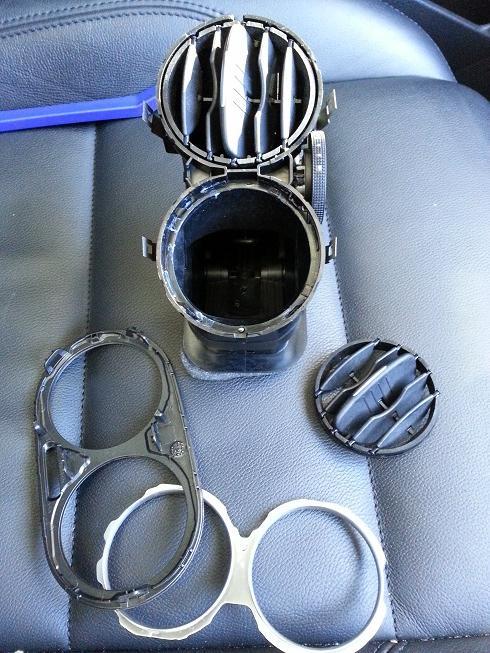
Time to dissect the vent unit to install the new gauge.
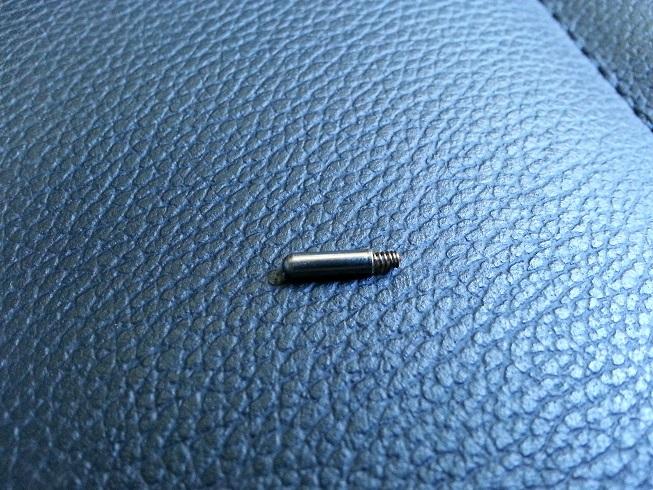
Be careful with this tiny piece, I nearly lost it!
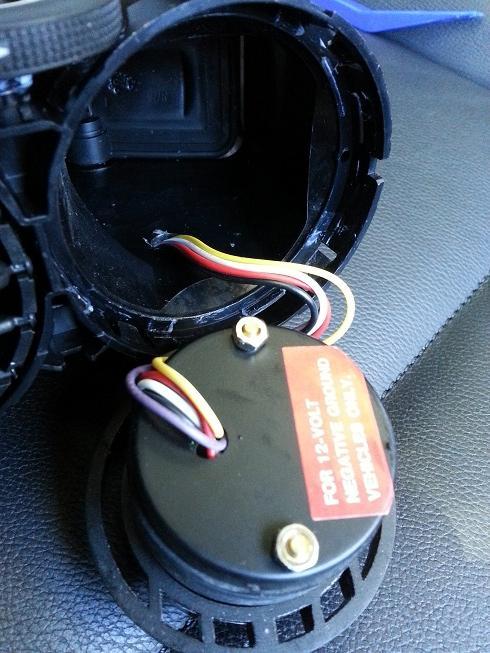
Drilled a small hole on side to get the gauge wiring out.
And gauge is pressed in to the vent and aligned properly
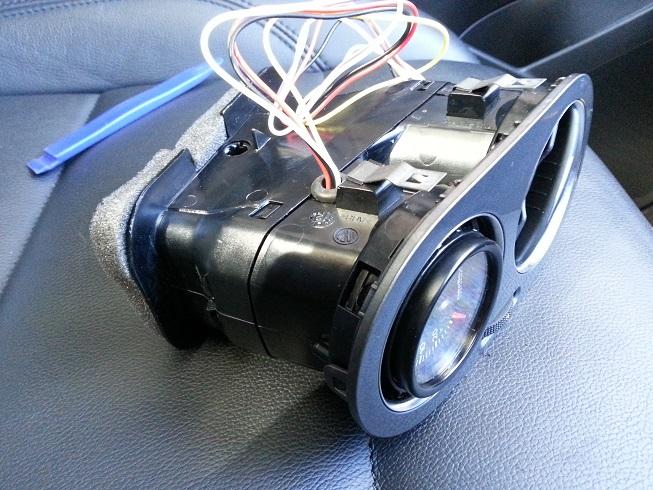
Finally installed the vent in to the dash. It looks good
Pressure sensor and all the wiring can be easily installed behind the dash side trim panel. Grounding point for boost gauge and sensor is also easily found near by!
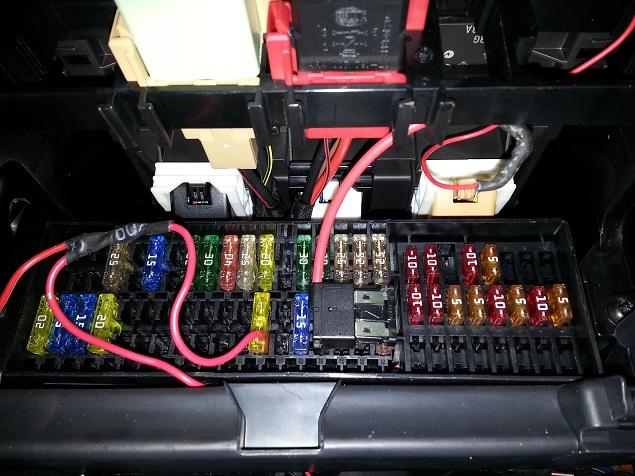
Power for the boost gauge supplied from fuse panel using Add-A-circuit fuse plug connector cable came with the boost gauge kit.
Back light wire for the boost gauge from No10 pin of the light switch, wire color to tap into is Solid Gray.
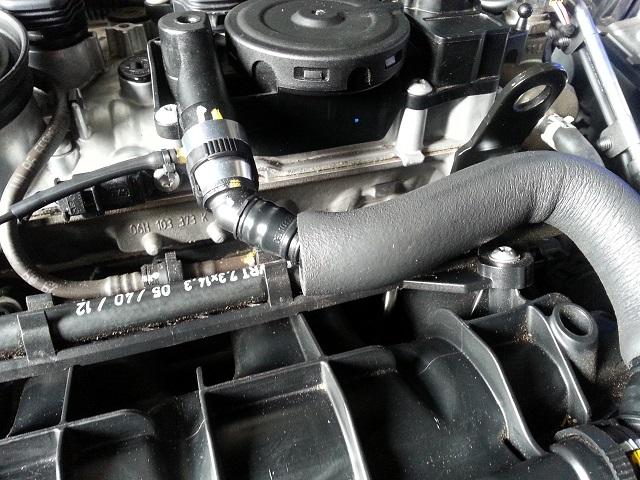
I used a podi aluminium boost tap to get a boost signal instead of tapping in to the manifold from side as instructions of the kit suggested.
 Tweet
Tweet


Comment