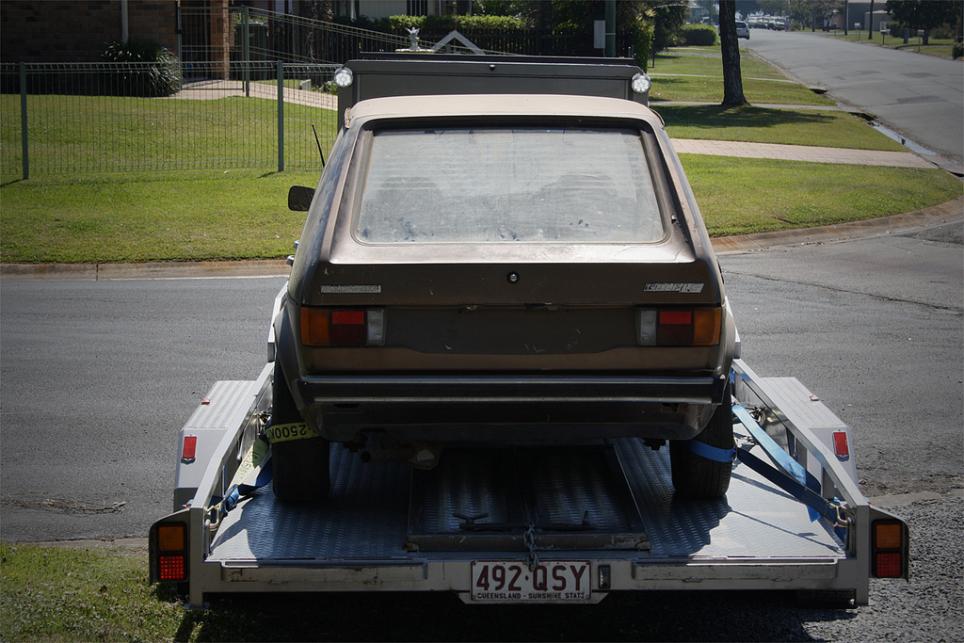
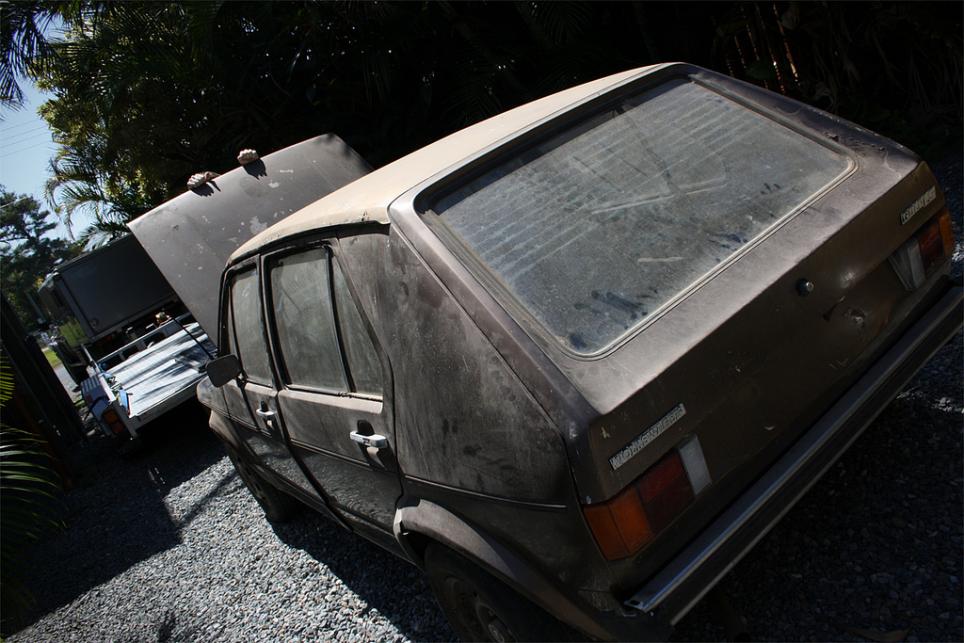
Above Forum Ad

Collapse

Announcement

Collapse
No announcement yet.

My Mk1 Golf project - slow build thread

Collapse
X
 
  • Filter
  • Time
  • Show
Clear All
new posts

  • #31
    Way to go, mate.

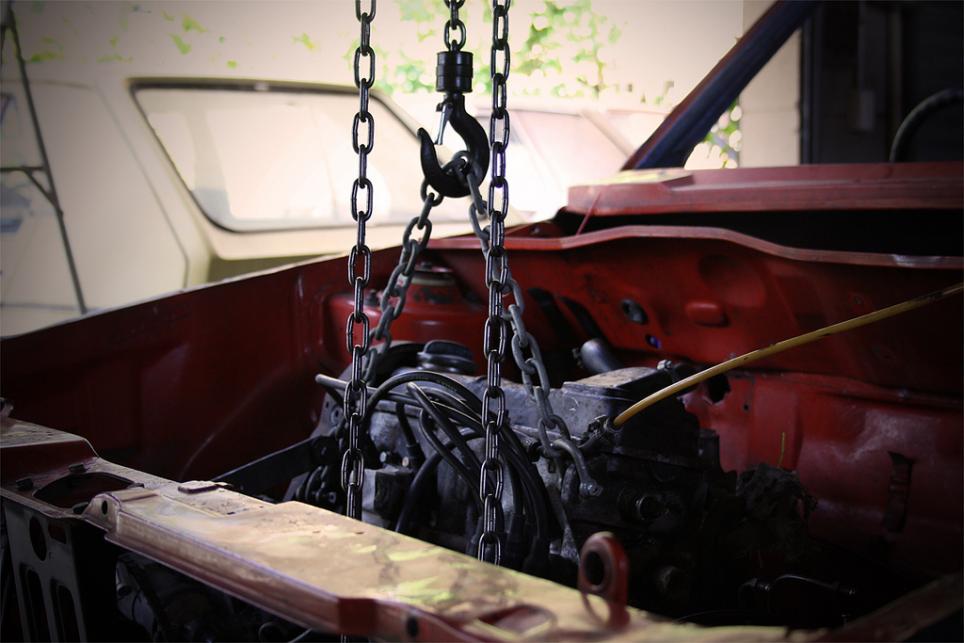
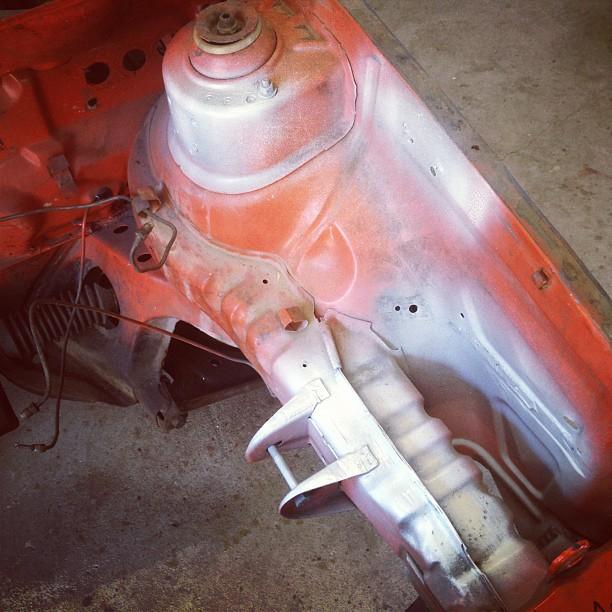
    Pull ALL that tar sound deadening up, just to be sure. Use dry ice if you can. If not, a heat gun.

    Get some POR15 to seal it once you're finished.

    APR Tuned | KW Suspension | INA Engineering | Mocal Oil Control |
    Website: http://www.tprengineering.com
    Email: chris@tprengineering.com

    Comment


    • #32
      Thanks Preen,

      I'm using a heat gun to do it but I've got to get a spatula or something, as I only have a small razorblade at the moment which isn't the best to use.

      I'm thinking that I might have to speak to you in the future about getting some body repair parts from Mk1Autohaus or RabbitParts.com - namely floor panels, and (depending on the rust) perhaps a RHS A-Pillar repair panel. I'm hoping that the A-pillar rust is only superficial and from bog and paint bubbbling alot but I'm not getting my hopes up.

      At any stage, I won't be doing the repairs for a little while until I buy a welder and learn how to use it.

      So this POR15 stuff is just applied straight to metal without any etching/priming? And you just spread it on with a brush?
      Mk3.Mk4.Mk1
      My Mk1 Project

      Comment


      • #33
        It is a whole system and should be used as the whole system. There is a cleaner (marine clean), metal prep and then the final coating. If it is going to be in sunlight you should also apply a normal primer/overcoat as POR 15 is not UV resistant.
        sigpic

        Comment


        • #34
          What dub star said.. But yes, you can paint it on with a brush.

          APR Tuned | KW Suspension | INA Engineering | Mocal Oil Control |
          Website: http://www.tprengineering.com
          Email: chris@tprengineering.com

          Comment


          • #35
            Thanks for the tips guys - I'll look into it more soon. I'd say it won't see any UV as I will out carpet back into the front atleast, and other sections like the underside won't see any daylight (hopefully).
            Mk3.Mk4.Mk1
            My Mk1 Project

            Comment


            • #36
              So I've been slack and haven't updated this thread, apologies. I've not done great amounts of work recently, but have aqcuired two more Mk1s for parts/hoarding purposes. This saturday morning I'll collect the last one, and after this I'll post some more photos of them.

              Here's a picture of the road out to get them


              Here's another I thought was quite cool; rainbow, nice bay view and Mk1.


              I will update this thread again soon.
              Mk3.Mk4.Mk1
              My Mk1 Project

              Comment


              • #37
                So here are the other two cars I got for parts - both 76'ers and both 4 doors.


                Through a clearning I saw. by Matthew Dart, on Flickr

                The brown one is an August build date with swallow-tail rear panel:


                Third Golf rescued by Matthew Dart, on Flickr

                1976 with Swallow tail rear panel by Matthew Dart, on Flickr

                Golf no. 4 - August 1976 by Matthew Dart, on Flickr


                The Yellow one is a July build


                Then there was three by Matthew Dart, on Flickr


                Rats have chewed on my knob. by Matthew Dart, on Flickr


                Messed up interior by Matthew Dart, on Flickr


                What's this in the glovebox? by Matthew Dart, on Flickr


                Owner's manual by Matthew Dart, on Flickr

                So the plan is to strip them for parts. The brown one is in really bad condition - rust everywhere, structural damage to the roof and doors from being liften with a chain through the windows at some stage, and a cactus interior. It's a shame as it's a swallow tail. I might try to cut out that panel and save it though. The engine in the brown car is okay - The carby is partly dismantled but it cranks over. I think it probably just needs some fuel. There is fresh oil in it, and inside the rocker cover looks quite clean.

                The yellow one is in okay condition - the floors appear to be quite good (I'm really after the very front section near the footwell-front passenger arch and some parts of the floor for patching). It even has a towbar on it with the appropriate wiring too.

                Both cars have been savaged by rats pretty bad, they have eaten through all the reservoirs, the gear knobs, even the clear plastic on the instuments (delicious).
                Last edited by madglf3; 18-09-2011, 09:11 PM.
                Mk3.Mk4.Mk1
                My Mk1 Project

                Comment


                • #38
                  Only just come across this thread. Really impressed mate, you are really throwing yourself into it!
                  Unlucky with all the rust but that's the joy of old cars. Best of luck with it all.
                  oh and nice mexican blanket

                  Comment


                  • #39
                    a true volkswagenist! good work!

                    which i had the space for more cars!


                    i like volkswagens
                    My blog: http://garagefiftythree.blogspot.com.au/

                    Comment


                    • #40
                      Cheers Allan + Jarred, it is bad luck with the rust but when I hit uni holidays I'll hopefully have more time to spend on the cars and some more progress will be made.

                      So I'm soon going to look into buying some floor panels for the front and perhaps a few other bits and pieces from the States. I'm thinking Mk1Autohaus might be the go. Has anyone else here bought those from them are are they pretty much just a cut out and replace job?
                      Mk3.Mk4.Mk1
                      My Mk1 Project

                      Comment


                      • #41
                        Awesome work!

                        What ever you do, keep that manual in good nick mate! They're pretty rare. I still have mine for the '77 16v.

                        APR Tuned | KW Suspension | INA Engineering | Mocal Oil Control |
                        Website: http://www.tprengineering.com
                        Email: chris@tprengineering.com

                        Comment


                        • #42
                          No updates in Spring. No updates in summer.

                          Truly a slow build!

                          C'mon bro let's get you motivated!

                          Comment


                          • #43
                            After someone posted a link to my thread on Facebook a few weeks back, I realised that I haven't updated this thread for a while. Which makes sense because I've not really done much on the Mk1. I'll give a little update here about my car(s) and personal circumstances.

                            Last year and the year before I was working full-time and studying in the evenings which left very little time for tinkering with the Mk1. Although I did buy the car in 2011, perhaps I had expectations of myself which were more grand than reality allowed for.

                            Not much was done to the car since the last update in October 2011. Around November-December 2011 I proceeded to strip the car further after realising just how much rust it seemed to have and removed the doors, hatch, dash, windows, entire interior, engine, gearbox, fuel tank and driveshafts; leaving me with a naked Mk1 shell showing all of the sins from its past life.

                            I originally bought an engine crane from Super Cheap to remove the engine but was underwhelmed with the quality of the crane and the amount of missing nuts and bolts and returned it. I ended up using one of the large overhead beams in my garage as the mounting point for a hook and winch setup which allowed my to hoist the engine up and move the car around much more freely once the engine was suspended.


                            IMG_7667 by Matthew Dart, on Flickr

                            Both front floors were badly rusted. The passenger front floor was rusted out as a result of what I'd imagine started as water ingress from a rust spot near the fusebox & rain tray. This floor rust was then bogged over by the person who painted it orange I would assume. Many dusty and enjoyable hours were spent taking a wire brush to the bog. I probably shouldn't have bothered really. Driver's side floor didn't have rust, but had previously been patched up with about six separate pieces of metal tacked together over the top of the existing rusty floor panel.

                            Both sides a lost cause which resulted in my buying two complete front floors from Michael (Mikinoz) and Mk1 Autohaus. I still have these sitting in the garage ready to go when (if?) the time comes.

                            Around this time I also went with Matty B up to the Mk1 Drivers meet up in Brows Plains. Nice collection of cars there that day and good to see a few other Mk1s:

                            Das VW Cluster by Matthew Dart, on Flickr
                            Highlight of the day for me was the ride / brap up from the Coast in the Mk1 after it just received the twin carbs. Sounded amazing.

                            After seeing some nice Mk1s my enthusiasm was reignited. I bought some spot weld drill bits to remove various brackets from the engine bay with a view to cleaning the look up a little. I removed the brackets on the passenger side strut tower which previously held what appeared to be a primitive diagnostic port, the air box tabs on the driver side chassis rail, and the battery tray. I only managed to remove these tabs and not really do any more body work to the engine bay after this so I only cleaned these areas up and sprayed some etch primer and white enamel to hold off the rust a little longer.


                            Mk1 engine bay - battery tray removal by Matthew Dart, on Flickr

                            After this stage I took a little too much on in terms of work, starting to do consulting on the side and study. Very little time was left for the poor Swallowtail. Truthfully I became quite overwhelmed with the sheer amount of work required to get the car into a state I'd be happy with, and my non-existent welding skills. Up until this stage I had been trying to teach myself to weld but wasn't confident enough to try it on the car. The Mk1 then sat in the garage neglected for a while. Again.

                            Late last year my girlfriend and I were both not feeling particularly fulfilled in our jobs and needed a change of lifestyle scenery. I'd always loved Melbourne and so we both agreed we should give it a go. In November we each applied for one job on the off chance one of us would hear back. She ended up landing a job in Melbourne and we moved to Bayside Melbourne mid December last year (2012).

                            This meant we really only had around 3 weeks to give two weeks notice at work, pack our house, then drive two cars down to Melbourne. It was an exciting but stressful time. We were going to move into a small townhouse without space for three cars, let alone the Brown and Yellow Mk1s. So these were sold off, and sadly the 3dr MK1 had to be left in Queensland. With help from the girlfriend I was able to put the engine and gearbox back in the Mk1 before we left for Melbourne so that if it needed to be moved around it wasn't such a hassle. It probably would have made more sense then to put the steering column back in so that it could be steered around if necessary. Oops .


                            On the road - Parkes, NSW by Matthew Dart, on Flickr
                            I took this photo on our journey down to Melbourne after we stopped near the dish near Parkes, NSW.

                            We've now been in Melbourne for almost exactly six months now and our decision to move has been the best decision we have ever made. We arrived not really knowing anyone, and since our arrival have been welcomed by everyone we've met. Thank you everyone.


                            Melbourne Dub Crew *Photo taken by Matt Cincotta on Australia Day this year. Nice photo mate.

                            Although I miss my VW friends in QLD, there are a truly great bunch of dubbers down here in Melbourne who I am proud to now call my close friends.

                            GOPR0015 by Matthew Dart, on Flickr


                            Lowering it by Matthew Dart, on Flickr
                            This happened to the Mk4. It'll happen some more in the future too


                            MAD-VIC-JAN-2013 by Matthew Dart, on Flickr

                            DART by HOTWTR, on Flickr - Thanks for the pic Woody!

                            I've got my Mk4 in Melbourne, but there's only thing that's missing in my life now - my Mk1 Golf. I hope that this will change when I have access to some more space. The passion for Volkswagens is definitely still with me and I miss having the Mk1 to play with and learn about.

                            Until next time....
                            Mk3.Mk4.Mk1
                            My Mk1 Project

                            Comment


                            • #44
                              Oi Dart update ya thread!

                              Comment


                              • #45
                                No updates to this Woody. After a quick visit to Queensland a month or so back I cracked the shed door and yeah - it's still sitting and waiting patiently for some attention. I hope this happens in the next few years.
                                Mk3.Mk4.Mk1
                                My Mk1 Project

                                Comment

                                Working...
                                X