 Tweet
Tweet
I'll put my hand up for one of those flanges 
-
VW: it aint just a car, its a way of life
There are few things more satisfying in life than finding a solution to a problem and implementing it
My Blog: tinkererstales.blogspot.com.au -
Going back to some of the initial conversation, it seems from the top post on this page at TDI Club, that the Europeans and North Americans think the KP39 is rather less reliable than the VNT-15 as Borg Warner have used lighter construction to reduce the inertia for quicker spool. The preceding page has a nice pic of one that destructed with a tuned engine.Originally posted by Evaded Motorsport View Post
It may be a very good thing that you have the VNT-1749VB ready to bolt on, gldgti.Last edited by kaanage; 16-11-2012, 06:24 AM.Resident grumpy old fart
VW - Metallic Paint, Radial Tyres, Laminated Windscreen, Electric Windows, VW Alloy Wheels, Variable Geometry Exhaust Driven Supercharger, Direct Unit Fuel Injection, Adiabatic Ignition, MacPherson Struts front, Torsion Beam rear, Coil Springs, Hydraulic Dampers, Front Anti-Roll Bar, Disc Brakes, Bosch ECU, ABSComment
-
interesting that Greg.
It wouldnt surprise me at all - i've always thought bor-warner turbos have been more 'refined' than the garrett turbo's in their construction.
However, it really surprised me when I was rebuilding the vnt-17 just how much more refined and 'lightly built' the new generation of turbochargers are compared to those of 15-20 years ago.
Materials technology is coming along '07 Touareg V6 TDI with air suspension
'98 Mk3 Cabriolet 2.0 8V
'99 A4 Quattro 1.8TComment
-
Timing belt job done
Tackled the timing belt yesterday.
Was a bit easier than all the stuff I'd read had lead me to believe, thankfully. I started the Job at 12pm and I was done by 6pm, with about 3 hours mixed in there where I wasnt actually working on the car (lunch etc).
For anyone with an octavia out there considering this job - theres a few things that aren't like the 'how-to's you find on the net (which are mostly written for jetta's or golfs).
1) Engine mount bracket -
The engine mount bracket on the octavia is bolted to a riser on the chassis rail which has aan access hole in the top and engine side. This means that once you support the engine from above or below, you can unbolt the mount and then remove the sneaky bolt that goes into the block. On jetta's and golfs, you need to remove the wheel arch lining to access this bolt through a hole in the chassis rail. I would still recommend removing the lower wheel arch lining on the octavia - it makes visibility easier and its a cinch to remove it (only 5-6 T25 torx screws).
Getting the actual bracket out is difficult once its unbolted as there just isnt quite enough clearance to wiggle it out. You can do it, but it takes some patience and a bit of force. Oh well.
2) Timing -
There seems to be some mystery about the procedure for putting the new belt on. Well, I don't know why - its a piece of cake. Assuming you have the camshaft locking pin and crank sprocket lock fitted, this is what you do:
a) loosly slide the tensioner onto the stud... only about 10mm or so, not all the way. dont worry about it being lined up, but make sure you leave the locking pin in it (they ship with one fitted)
b) leave the idler roller off for now
c) ensure the 3 M8 bolts holding the camshaft sprocket onto the cam are loose
d) slide belt belt halfway onto the crank sprocket, and similarly over the water pump sprocket.
e) ease the back side of the belt onto the tensioner. You should still have plenty of slack to finally partly slide the belt onto the camshaft sprocket.
f) now that the belt is located, do a little check to make sure that the camshaft sprocket adjustment is roughly in the middle.
g) work your way around the belt gradually pushing the belt further onto each sprocket. Once you are pretty much all the way on, you should be able to fit the tensioner pulley nut loosely onto the stud - but dont even tighten it down yet.
h) use a screwdriver or your finger (if you are hard ) to rotate the tensioner locating tab back towards the slot in the timing cover. you should be able to do this if you have pushed the belt on 'not too far'. A new tensioner will have rotated on the stud when you were fitting hte belt so that you need to push on to locating tab in the anticlockwise direction to get it in the slot. Leave the locking pin fitted during this step. After the tab is located, push the belt on the rest of the way on all the pulleys.
i) Now you should see that the belt is a bit tight because you have still got the pin fitted. well, now pull out the pin. the tensioner will give more slack, and now you can fit the idler roller easily.
j) torque up the idler, then tension the belt by rotating the tensioner mechanism CLOCKWISE ONLY until the little tension pin thingys line up. tighten down the tensioner locking nut.
k) now the camshaft sprocket should still be where you want it. Tighten the 3 securing bolts.
l) you should now be able to pull out the locking pins and turn the engine clockwise by hand 2 complete revolutions. Have a look at the tensioner and make sure the tension is still good.
m) thats it!
When I was fitting the locking tools, I found that the cam timing was slightly retarded - not by much, but enough to make fitting the locking pin impossible without rotating the cam a bit with a spanner)
After reassembly, the timing of the cam is of course where it should be. I can definately feel/hear/see the difference:
- the engine is louder (more 'diesel' noise)
- its faster (through the whole rev range)
- there is less smoke out the back.
This difference (must be about 1 degree of timing I reckon) is all the difference - especially where the smoke is concerned.
I know Julian Edgar posted something up after he had the timing belt done on his TDI. I'm not sure how it was that his was so far off after the job was done (if you use the correct tools its got to be right AFAI can tell.) However, I can definitely confirm it makes a significant difference to performance.
Also, after haivng my head under there for an afternoon, I can confirm my turbo as a Garrett jobbie.Last edited by gldgti; 29-12-2012, 08:46 AM.'07 Touareg V6 TDI with air suspension
'98 Mk3 Cabriolet 2.0 8V
'99 A4 Quattro 1.8TComment
-
UPDATE regarding fuel economy.
Wow! After having done about 1000km after the timing belt change, fuel economy is definately improved by around 10%. Incredible really.
Where before on a drive from Godford to Elands (northweks of Taree in the mountains) I would average 5.6l/100km, now I am averageing about 5.1l/100km.'07 Touareg V6 TDI with air suspension
'98 Mk3 Cabriolet 2.0 8V
'99 A4 Quattro 1.8TComment
-
I assume that you still use biodiesel. Great result!
Performance Tunes from $850Wrecking RS OCTAVIA 2 LinkComment
-
-
Impressive that you've noticed significant improvement in performance and economy.
There seems to be an order in which everything comes apart that makes removal of the engine bracket either impossible, or it just falls out the bottom. There is a sweet spot where the engine must be height-wise, where it comes out quite easy. You can leave the bracket in, and work around it, but it's clumsy and annoying.
Occasionally, I've found one to be a little retarded, but only slightly.'07 Transporter 1.9 TDI
'01 Beetle 2.0Comment
-
Yes, I did move the engine up and down a bit to try and find 'the spot' since I figured there must be one, but I didnt really get there. Nonetheless it was more a matter of persistence and patienceOriginally posted by Umai Naa!! View Post
Yes, still using 100% biodiesel Miro.
Actually, the true highway economy is more impressive still - Without counting the mountainous/dirt road parts of my journey, I'm seeing averages over 200km of distance (without much altitude change) at 110km/h of 4.8l/100km (on the trip computer). Thats down from about 5.1l/100km for the same kind of trip before.
Hopefully the cruise economy will improve with the VNT-17. I've decided to fit that very soon. I was going to do it last week sometime, but I realised I have to get a downpipe flange made up too (my current turbo uses a v-band clamp). So it will be a couple of weeks yet before that happens.
Anyway, things are in the pipeline
'07 Touareg V6 TDI with air suspension
'98 Mk3 Cabriolet 2.0 8V
'99 A4 Quattro 1.8TComment
-
Great timing mate ( see what I did there ) due to tackle mine, you give me faith I can handle it over a weekend.
Any leads as to good Golf how to's, have not found much thus far.....2014 Skoda Yeti TDI Outdoor 4x4 | Audi Q3 CFGC repower | Darkside tune and Race Cams | Darkside dump pDPF | Wagner Comp IC | Snow Water Meth | Bilstein B6 H&R springs | Rays Homura 2x7 18 x 8" 255 Potenza Sports | Golf R subframe | Superpro sways and bushings | 034 engine mounts | MK6 GTI brakes |Comment
-
Just dive in greg, its easy.
I bought my timing belt tool set from a UK ebay store...eBay Australia: Buy new & used fashion, electronics & home d
myturbodiesel.com has a good few writeups:
Mk5 VW Jetta TDI DIY and VW TDI forumLast edited by gldgti; 08-01-2013, 10:41 AM.'07 Touareg V6 TDI with air suspension
'98 Mk3 Cabriolet 2.0 8V
'99 A4 Quattro 1.8TComment
-
egr/asv delete pipe done!
So here it is - the gldgti egr/asv delete pipe - manufactured from 304 SS:
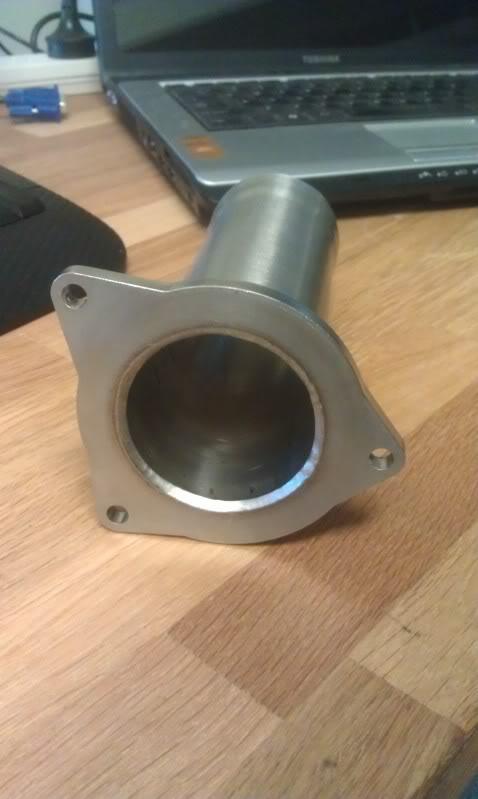
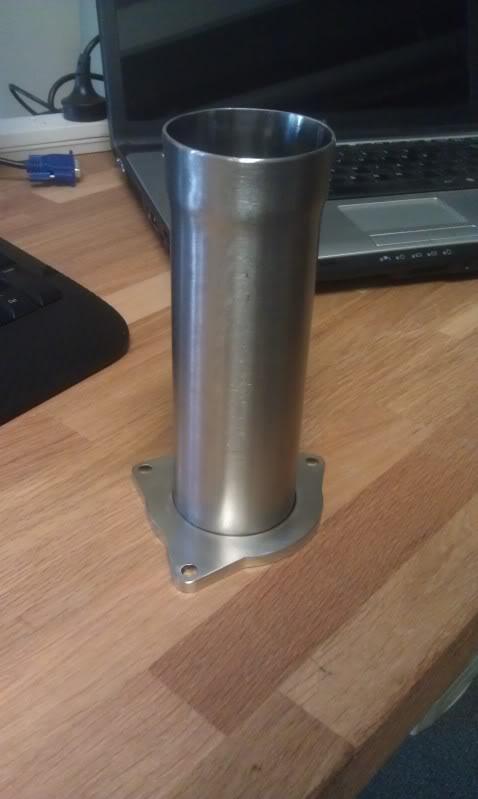
Keen observers will note the lack of an o-ring groove - well, thats because its way too hard and too expensive for me to get one machined. However, its very cheap and easy (and just as effective!) for me to cut a paper gasket with a hobby knife and use that instead (this is what I did on the last race pipe I made - for the PD150 intake I put on my old mk3 golf).
If any of you keen dieselers would like one of my race pipes, I will also supply you with a gasket because I'm such a nice guy '07 Touareg V6 TDI with air suspension
'98 Mk3 Cabriolet 2.0 8V
'99 A4 Quattro 1.8TComment
-
MISTAKE!
I must have accidentally scaled my drawing for the flange a bit, unfortunately my lovely pipe doesnt bolt up. All the holes are about 1mm closer to eachother than they ought to be.
Ahh well, revised edition coming soon I think this time I will open up the ID to 57mm and make a reducer from 63.5mm to 57mm for the pipe for easy fitting of 2.5" boost piping rather than 2".
Anyway it gave me a chance to clean out my ASV and egr valves, which I did. They were pretty dirty but not as bad as I expected. Also, the nature of the soot buildup in the manifold is very dry - I put this down to me having a provent fitted for the past 40,000km.'07 Touareg V6 TDI with air suspension
'98 Mk3 Cabriolet 2.0 8V
'99 A4 Quattro 1.8TComment
-
The simplest EGR defeat ever. (not really!)
Another thing I did yesterday, which seems to work perfectly:
To defeat the EGR on the 1.9TDI, it is sufficient to simply unplug the vacuum hose from the egr valve and block it. Thats it.
I thought it might throw the CEL or something, but no, drove the 50km to work this morning with no problem.
So, forget your blanking plates. You dont even need to lift a spanner. Just disconnect the vaccuum pipe, block it and cable tie the hose out if the way (or buy a vacuum plug and block the outlet on the big actuator matrix instead.)
With vacuum disconnected, the valve will just remain closed and no exhaust will be recirculated.
***EDIT*** after another few km, the CEL popped on with the 'emissions workshop' notification on the dash. Oh well, I guess I jumped the gun on this one too!
Otherwise the engine runs just fine though.Last edited by gldgti; 14-01-2013, 05:31 PM.'07 Touareg V6 TDI with air suspension
'98 Mk3 Cabriolet 2.0 8V
'99 A4 Quattro 1.8TComment
-
busy day today...
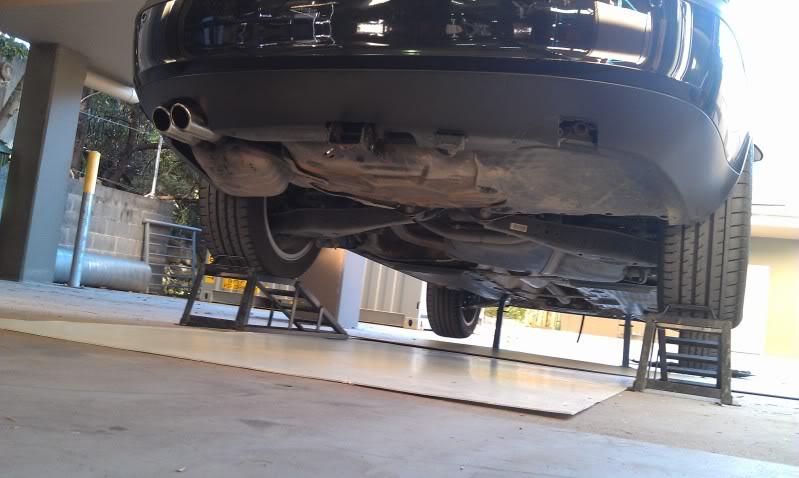
took the car to work, back end on ramps and front on stands just so I could squeeze under and undo the downpipe etc....
I didnt take any during photo's unfortunately, I was a bit flat out - but finally:
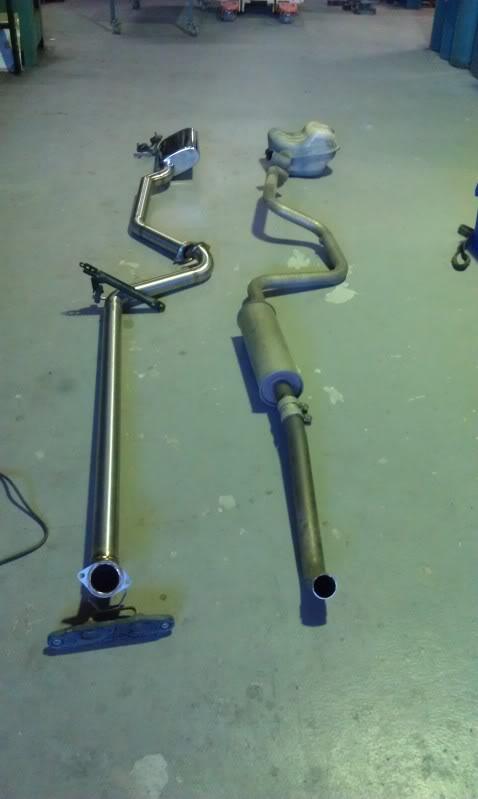
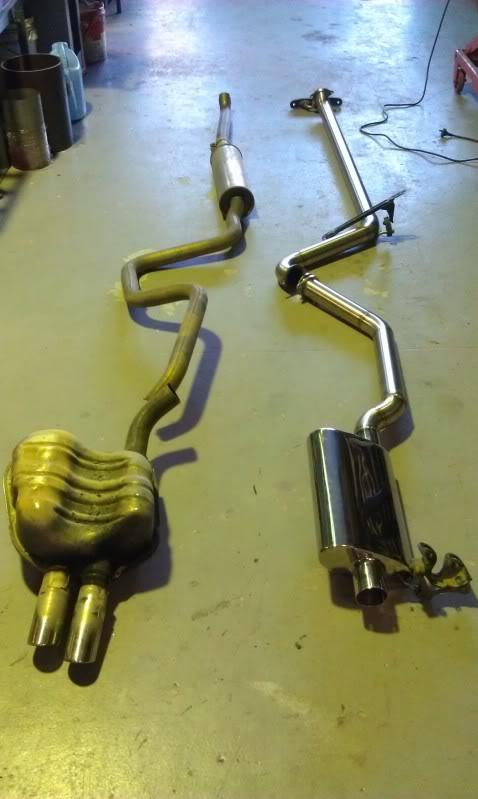
and a bit of noise:
Skoda Octavia 1.9tdi 2.5" stainless exhaust - YouTube
So - apart from the coming off boost whistle, its remarkably quiet still with only that muffler, but by golly has it gained some top end - Fantastic!'07 Touareg V6 TDI with air suspension
'98 Mk3 Cabriolet 2.0 8V
'99 A4 Quattro 1.8TComment

Comment