G-8VXWWTRHPN How to mod a late booster for MK1. - VWWatercooled Australia

Announcement

Collapse
1 of 2 < >

Email Notifications Failing (mostly Telstra)

Hello everyone. Seems there is an issue with Telstra (possible others) blocking email from our server. If you are trying to sign up I would suggest a different email if possible. If you're trying to reset your password and it fails please use the Contact Us page:
2 of 2 < >

Welcome to the new look VWWatercooled

After much work and little sleep there is a new version of the forums running on more powerful and recent hardware as well as an upgraded software platform.

Things are mostly the same, but some things are a little different. We will be learning together, so please post questions (and answers if you've worked things out) in the help thread.

The new forum software is an upgraded version of what came before, it's mostly the same but also a little different. Hopefully easier to use and more stable than before. We are learning together here, so please be patient. If you have questions, please post them here. If you have worked something out and can provide an answer,
See more
See less

How to mod a late booster for MK1.

Collapse
X
 
  • Filter
  • Time
  • Show
Clear All
new posts

  • #16
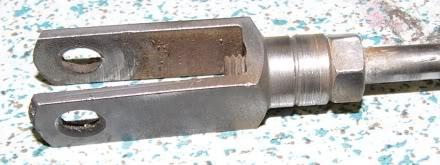
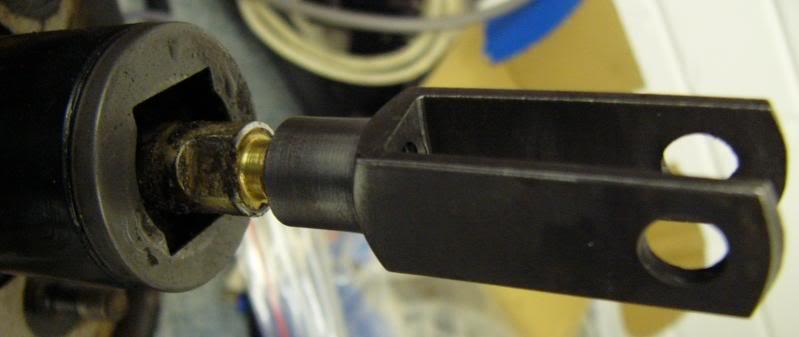
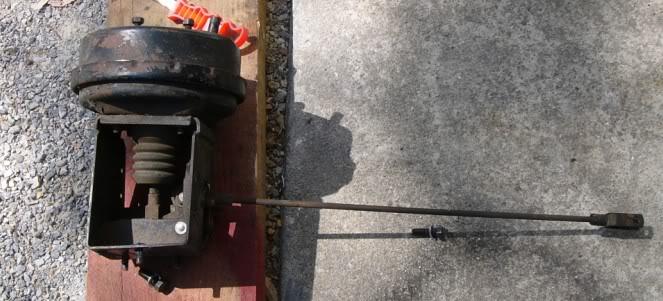
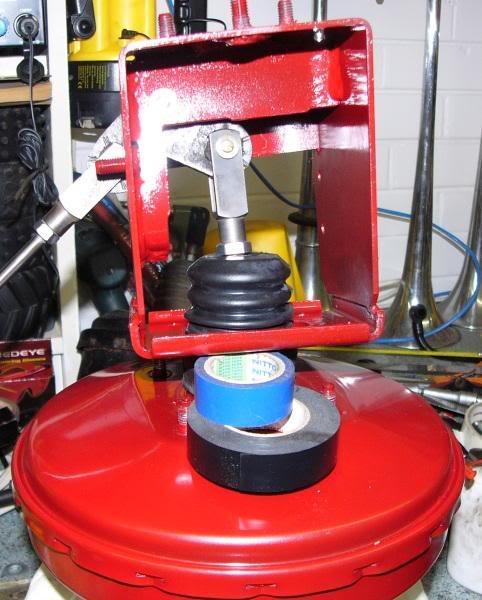
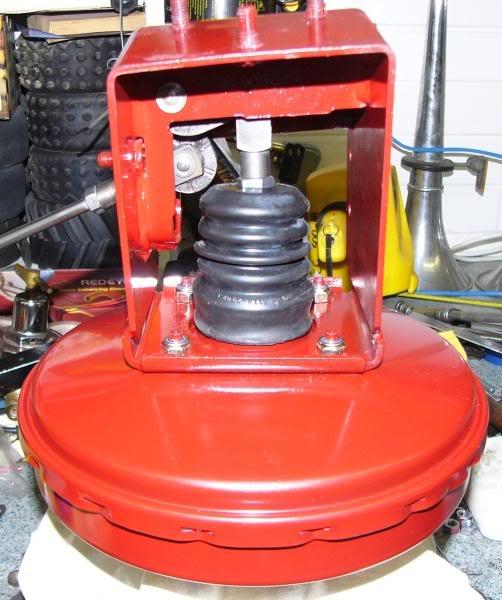
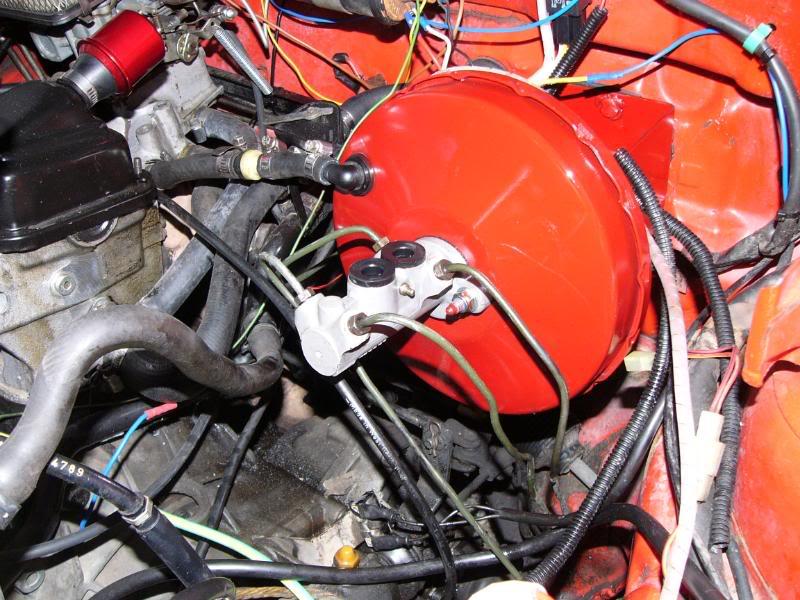
    The yokes on that bar across the back of the engine bay are the same casting as the one on the end of the booster, they're just machined differently.

    One end is M8 with a left hand thread and the other is M8 with a right hand thread as you would expect from a tie rod. The left handed one is designated by a groove machined into the collar.

    Both of these ends could be drilled and tapped to M10 and be used to convert more boosters.

    The hole across the end for the pin is the same in all cases - 10mm diameter.

    Here's a tip for you youngsters at home - To measure the diameter of a hole use the shank of a drill bit as a gauge.


    79 MK1 Golf Wreck to Race / 79 MK1 Golf The Red Thread / 76 MK1 Golf Kamei Race Car
    7? MK1 Caddy
    79 B1 Passat Dasher Project
    12 Amarok

    Comment


    • #17
      And just one last shot tonight of a MK I booster in it's natural environment.

      (Before I pull it out of there!)

      79 MK1 Golf Wreck to Race / 79 MK1 Golf The Red Thread / 76 MK1 Golf Kamei Race Car
      7? MK1 Caddy
      79 B1 Passat Dasher Project
      12 Amarok

      Comment


      • #18
        And now it's time to actually bolt it in!

        Move the cables and expansion bottle out of the way. Pull the reservoir off the master cylinder. Unplug the brake light switches.


        Undo the brake lines and remove the master cylinder. A dose of WD40 the night before is a good idea.


        I found the easiest way to get the booster off is to remove the entire assembly from the fire wall along with the transverse tie rod. It's easiest to get at the linkage clip on the other side of the engine bay and pull the whole rod out wit the lot. The "box" the the booster is attached to comes out with three bolts inside the cabin below the glovebox, right next to the heater pipes.


        Better have a clean up in there and tidy up that wiring!

        The removed assembly.


        Stay tuned space cadets!
        79 MK1 Golf Wreck to Race / 79 MK1 Golf The Red Thread / 76 MK1 Golf Kamei Race Car
        7? MK1 Caddy
        79 B1 Passat Dasher Project
        12 Amarok

        Comment


        • #19
          Setting up the linkage.

          The Booster rod in this car measured 130mm so I adjusted the new booster to match. I found it easiest to build it up as an assembly on the bench. I resisted the urge to paint the linkages and just cleaned them up as well as greasing all the pins and joints.


          Bolted together with new M8 nylocks. I managed to drag the MK I rubber boot over the booster neck, it was a bit of a tight fit though.


          Assembly bolted up to the firewall.

          79 MK1 Golf Wreck to Race / 79 MK1 Golf The Red Thread / 76 MK1 Golf Kamei Race Car
          7? MK1 Caddy
          79 B1 Passat Dasher Project
          12 Amarok

          Comment


          • #20
            wow pete, what a write up! Very informative and well presented., and you have a lathe! comes in handy aye?

            the mk 1 community thanks you. Or at least I do.
            oh and p.s. what do you have covering the top of your strut towers?


            i like volkswagens
            My blog: http://garagefiftythree.blogspot.com.au/

            Comment


            • #21
              Cylinder attached.


              Vacuum line attached (after testing). and brake lines attached. Bending the lines is a bit fiddly but so long as you take your time and take it easy you'll avoid kinking the lines.

              I'm going to install a brake switch directly off the pedal rather than use the hydraulic switches. You could plumb in T pieces and run the switches of them if you wanted to use the hydraulic switches.


              Nissan Pulsar reservoir fitted up.


              I was a bit worried the expansion tank wouldn't fit but it clears the booster by just enough.

              Last edited by Peter Jones; 09-01-2008, 09:29 PM.
              79 MK1 Golf Wreck to Race / 79 MK1 Golf The Red Thread / 76 MK1 Golf Kamei Race Car
              7? MK1 Caddy
              79 B1 Passat Dasher Project
              12 Amarok

              Comment


              • #22
                Because the new booster isn't as deep as the old one and the cylinder is shorter there's actually more room in the engine bay which is a pleasant surprise. Maybe enough room for my next air horn project.

                79 MK1 Golf Wreck to Race / 79 MK1 Golf The Red Thread / 76 MK1 Golf Kamei Race Car
                7? MK1 Caddy
                79 B1 Passat Dasher Project
                12 Amarok

                Comment


                • #23
                  nice work mate... very impressive

                  I love using later model golf/seat stuff on mk1s. Keeps stuff "original"-looking but much more usable and reliable. Seat brakes especially, as the mk1s stoppers were never very good!!

                  this is the sort of writeup that makes vwwatercooled so useful! mods, please put this in the friggin awesome section so it can be found easily and never disappers.

                  keep up the good work

                  mike

                  ps ... love the horns.. do it.. you know you want to
                  TDI mk1 on the road!!

                  Comment


                  • #24
                    Originally posted by Jarred View Post
                    wow pete, what a write up! Very informative and well presented., and you have a lathe! comes in handy aye?

                    the mk 1 community thanks you. Or at least I do.
                    oh and p.s. what do you have covering the top of your strut towers?
                    Those are strut top covers! Every Golf left the factory with them but few survived. I was lucky and found a pair in a wreckers on a GLD. I'd never seen a pair before then.

                    They stop dirt getting into the bearing on top of the strut.

                    I reckon you could find caps off another car with struts that would do the same job. Take a wander through a self service wrecker and see what you can find.

                    The lathe is very handy, I'm still learning how to use it. I can only do very basic stuff. It's very small, you'll never get a brake disc or a clutch on there. Great for nuts and bolts and just making things fit. Good for making up pins, stepbolts, bushes etc. I wish I could get the hang of the cut-off tool though. I usually resort to cutting the piece long with a hacksaw and trimming the end in the lathe.

                    Pete
                    79 MK1 Golf Wreck to Race / 79 MK1 Golf The Red Thread / 76 MK1 Golf Kamei Race Car
                    7? MK1 Caddy
                    79 B1 Passat Dasher Project
                    12 Amarok

                    Comment


                    • #25
                      Originally posted by Peter Jones View Post
                      Those are strut top covers! Every Golf left the factory with them but few survived. I was lucky and found a pair in a wreckers on a GLD. I'd never seen a pair before then.
                      ..
                      ah... I see. MIght fab some up out of something, if they are as rare as they are. What are they made, looks like plastic from here??

                      Mods. how bout a sticky on this thread perhaps?


                      i like volkswagens
                      My blog: http://garagefiftythree.blogspot.com.au/

                      Comment


                      • #26
                        Originally posted by Jarred View Post
                        ah... I see. MIght fab some up out of something, if they are as rare as they are. What are they made, looks like plastic from here??

                        Mods. how bout a sticky on this thread perhaps?
                        Yep,plastic. I'll pop up a close up later on when it isn't 100 degrees out in my driveway.

                        Pete
                        79 MK1 Golf Wreck to Race / 79 MK1 Golf The Red Thread / 76 MK1 Golf Kamei Race Car
                        7? MK1 Caddy
                        79 B1 Passat Dasher Project
                        12 Amarok

                        Comment


                        • #27
                          Originally posted by Peter Jones View Post
                          There's a limit of 4 pics per post - so bear with me here.


                          by the way pete i spoke with the other moderators and the images per post has been changed to 10 as it was something that always peeved me too

                          Originally posted by Preen59
                          I would have gotten wood from the picture message you sent me.. But I was sniffing Nitro, so i already had it. Hahaha.

                          Comment


                          • #28
                            Originally posted by dubstarmk2 View Post
                            by the way pete i spoke with the other moderators and the images per post has been changed to 10 as it was something that always peeved me too
                            Cool!

                            FYI I resize everything to 800x600 so they'll fit on anybody's screen. Then I crop them if there's irrelevant stuff on the edges to save everyone's bandwidth (hence the oddly shaped images sometimes). So the biggest image I'll use is 800x600 - the originals are 2304 x 1728 if anybody wants more detail.

                            I host everything on Photobucket so I guess it'll be available for a long time, the links should never expire hopefully.

                            Pete
                            79 MK1 Golf Wreck to Race / 79 MK1 Golf The Red Thread / 76 MK1 Golf Kamei Race Car
                            7? MK1 Caddy
                            79 B1 Passat Dasher Project
                            12 Amarok

                            Comment


                            • #29
                              Great Write up Pete!
                              I used to work at a joint that had 2 lathes, But I never thought about doin the stuff you do!
                              Keep it goin!
                              77'Golf

                              Comment


                              • #30
                                I read in Australian model engineering magazine that after 40 years practice with cut off tools become easy to use.
                                They advised that until you have 40 years experience use a hacksaw.
                                I know a guy who built a full size triple expansion steam engine and he uses a hacksaw.
                                The best way i have found is to take off as much as you dare with the part off tool and then hacksaw through the rest with the lathe turning as this makes it much quicker.
                                The worse thing is persisting with the part off tool and then just when you think you are going to do it this time it catches and it bends at 90 degrees right were you are trying to part off and the job goes bang bang bang into the bed of the lathe . Followed by a clunk as you chuck it in the bin

                                Nick

                                Comment

                                Working...
                                X