If this is your first visit, be sure to
check out the FAQ by clicking the
link above. You may have to register
before you can post: click the register link above to proceed, registering will remove the in post advertisements. To start viewing messages,
select the forum that you want to visit from the selection below.
This means you should apply for your renewal now to avoid any disruptions to your membership whilst the renewal process is taking place! NOTE: If you have an auto renewing subscription this will happen automatically.
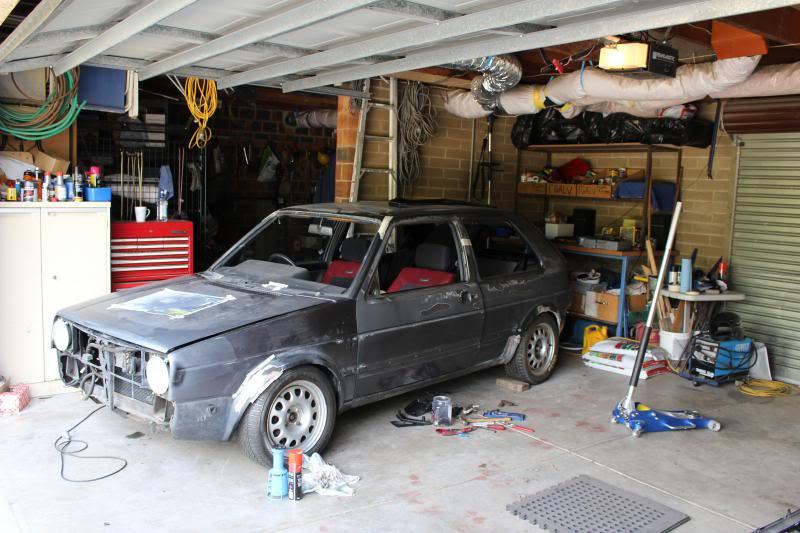
Nice score. Where did that come from? Very brown. Let's say chocolate! I have a red one about as assembled as that.
Sent from my iPad using Tapatalk
sigpic Camden GTI Performance. VW / AUDI Specialists
All Mechanical Work, Log book Servicing, New and used Parts and Imports
19-20/6 Badgally Road, Campbelltown, 2560 02 4627 3072 or 0423 051737www.camdengti.com
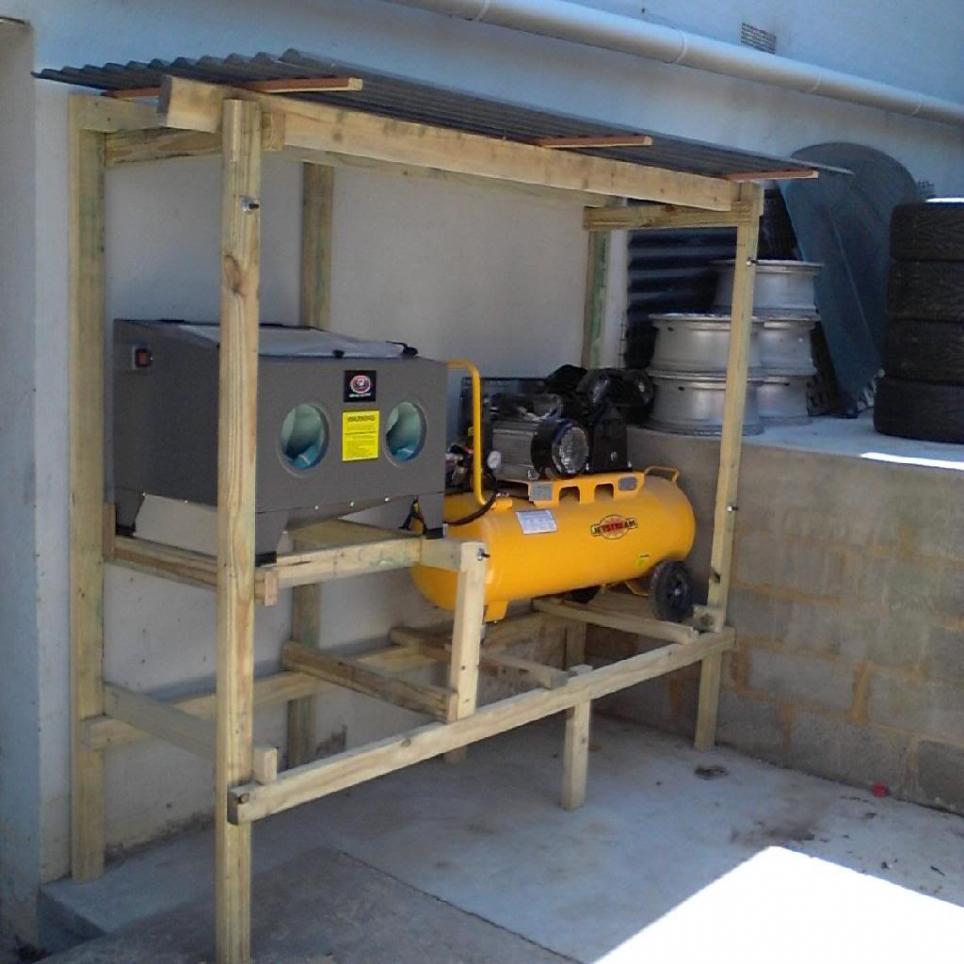
So there wasn't really room for my new compressor in the garage/workshop, and I also got a bench top sandblast cabinet for my birthday, something that I've always fancied. Not having room for that in the garage either, nor wanting to make a mess inside, I spent a few afternoons putting this together.
Some old laserlite sheeting that was in the back yard has formed the roof, and 'door'. It isn't winter yet, but with the combination of where this is located in reference to the house, it should stay reasonably dry. Only time will tell though.
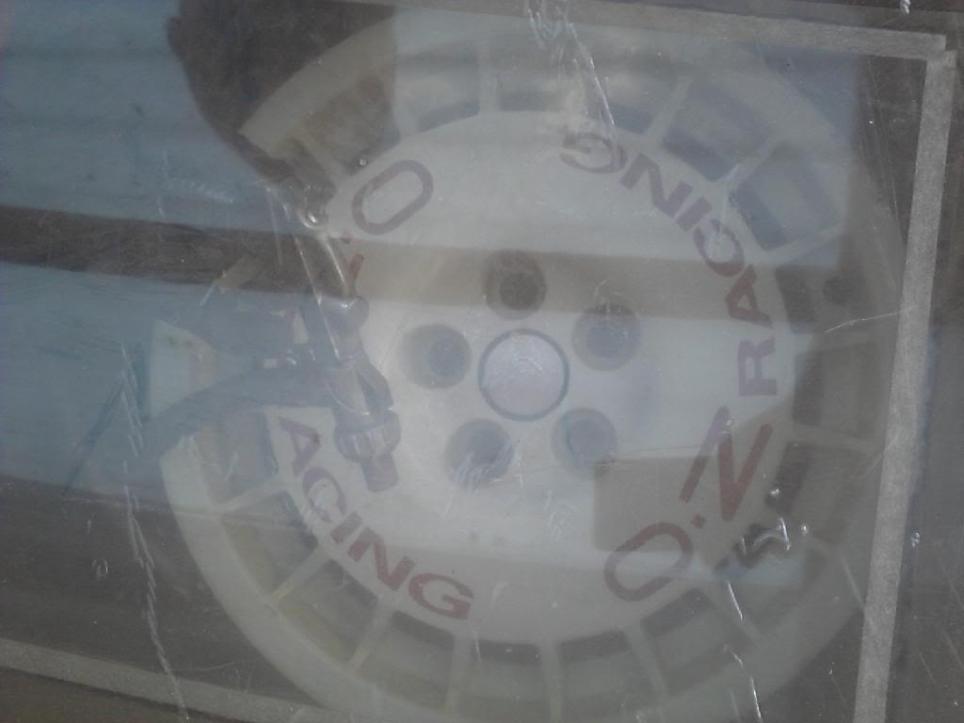
The blast cabinet was from Supercheap. For size reference, here it is with a 15x7 wheel inside.
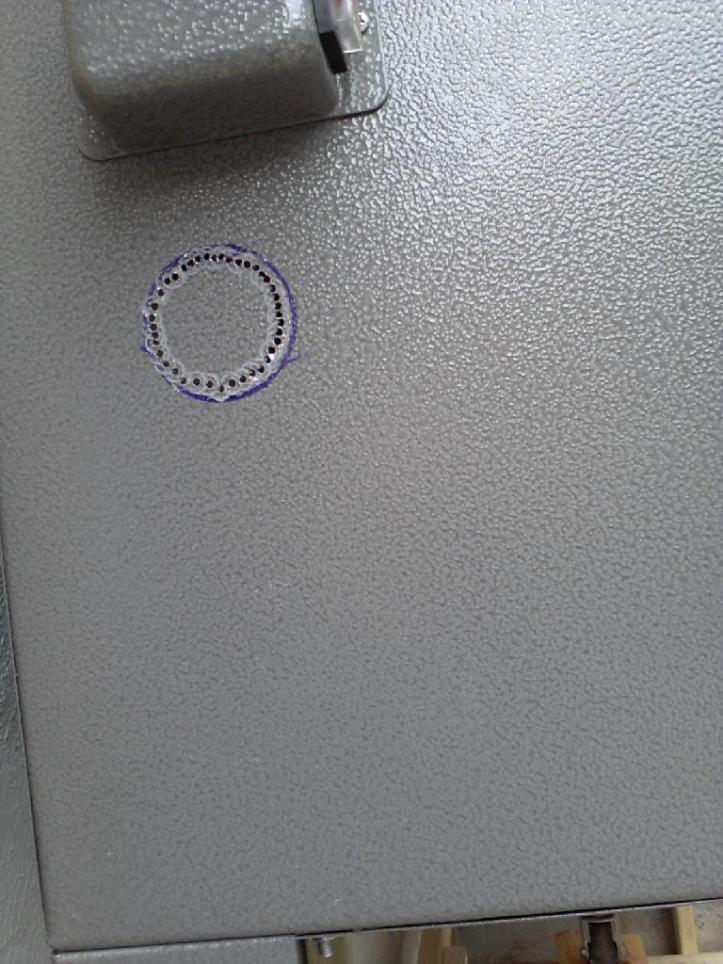
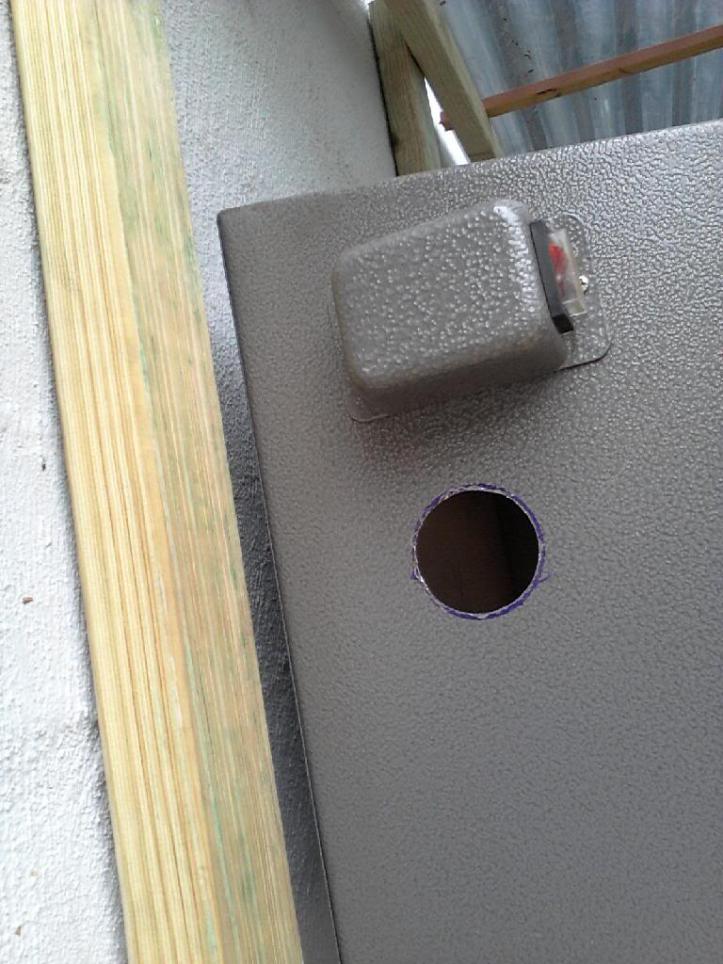
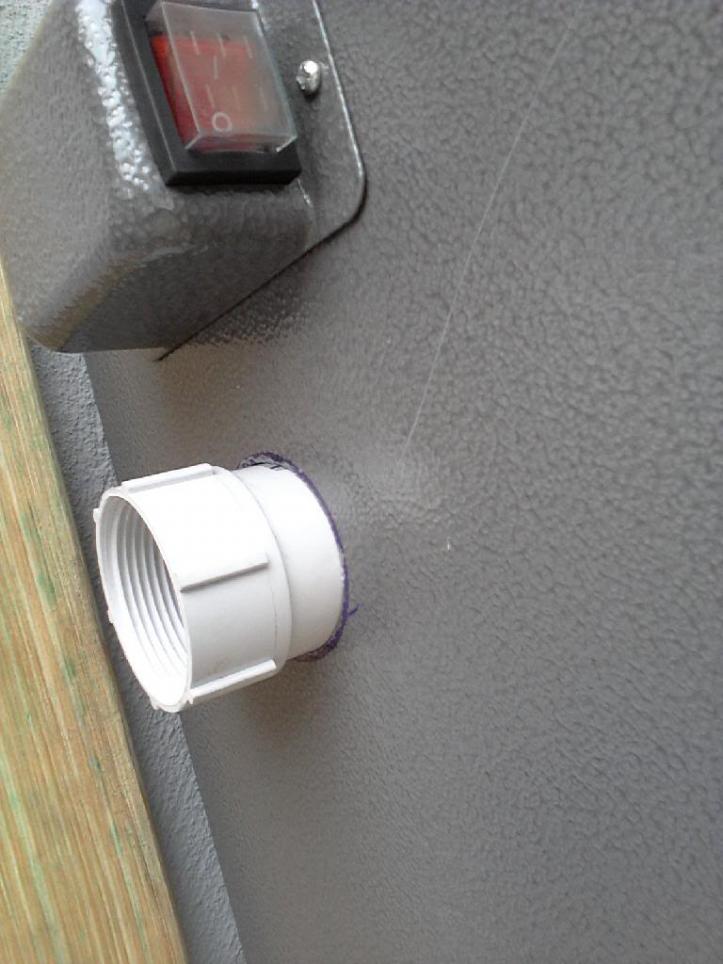
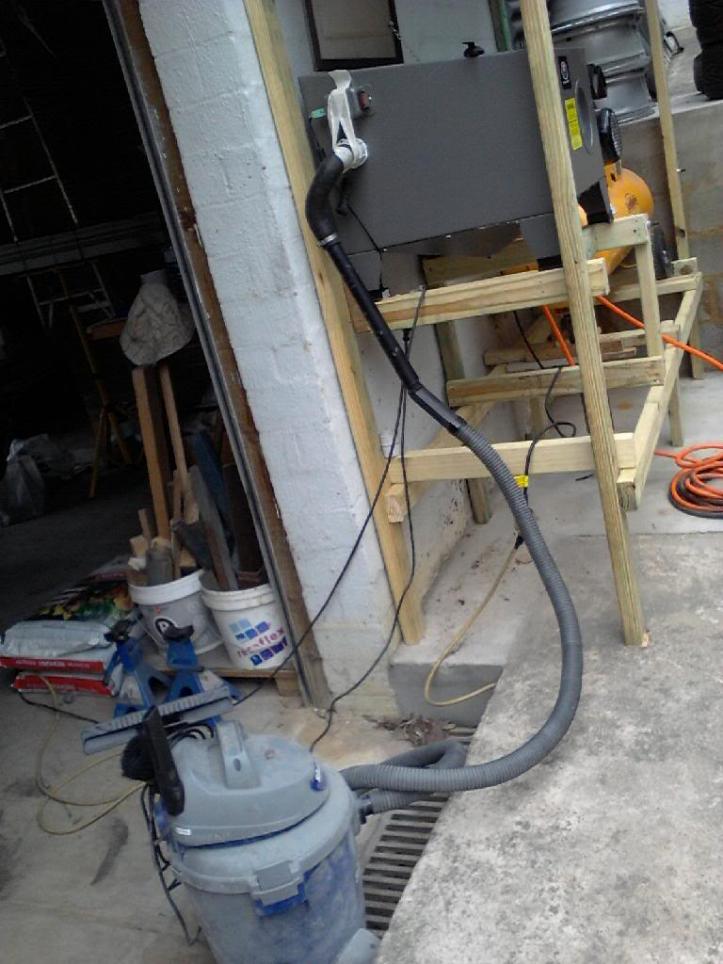
When blasting some really rust brake backing plates, I couldn't see bugger, so I modded the cabinet to accept some vaccum.
Final product:
Nothing a few plumbing fittings, an old radiator hose and some sikaflex couldn't fix. Mostly solved the problem, just need to fit some more lights now.
Next job on Walter is to refit the rear brakes onto the mk 3 rear beam (hard lines are a little different), still need to cut and polish the paint, and then a few bits and pieces that I'll need for RWC having been ordered and should be here in a fortnight or so.
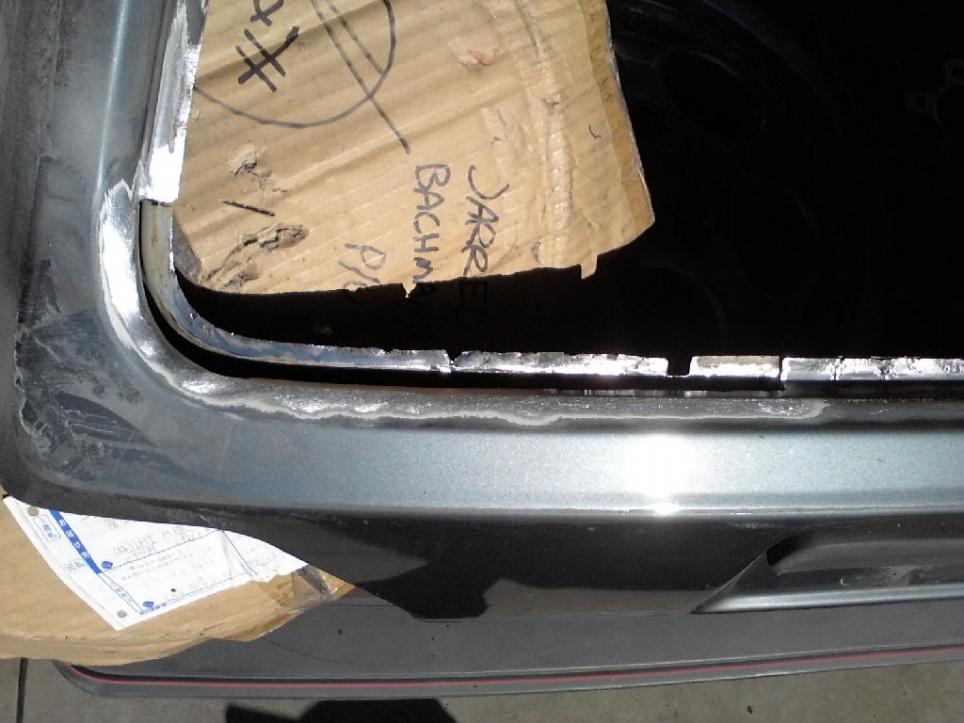
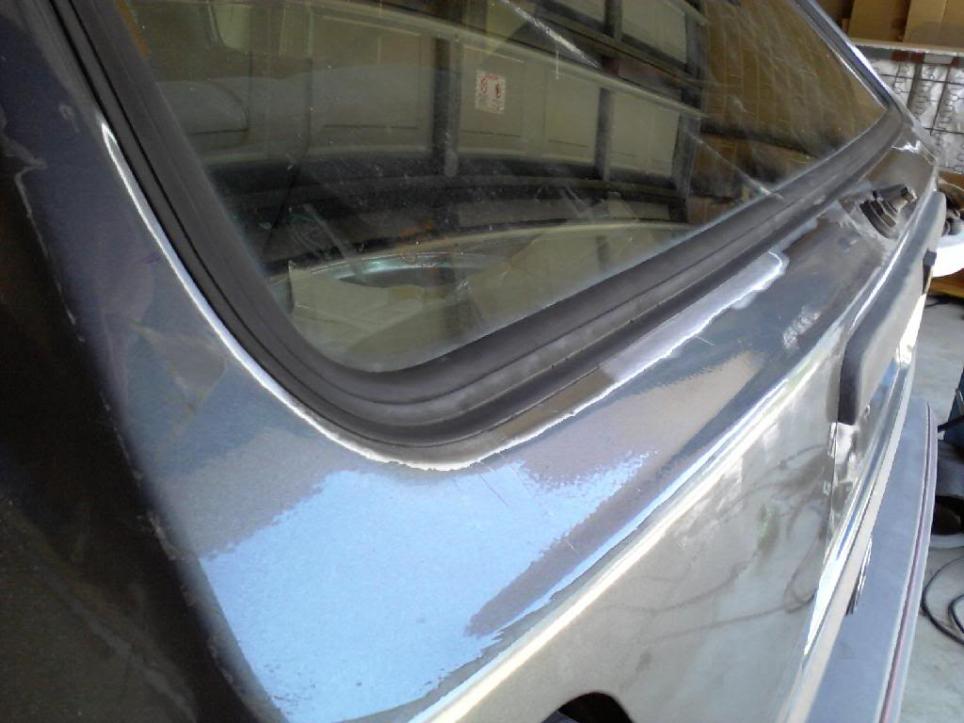
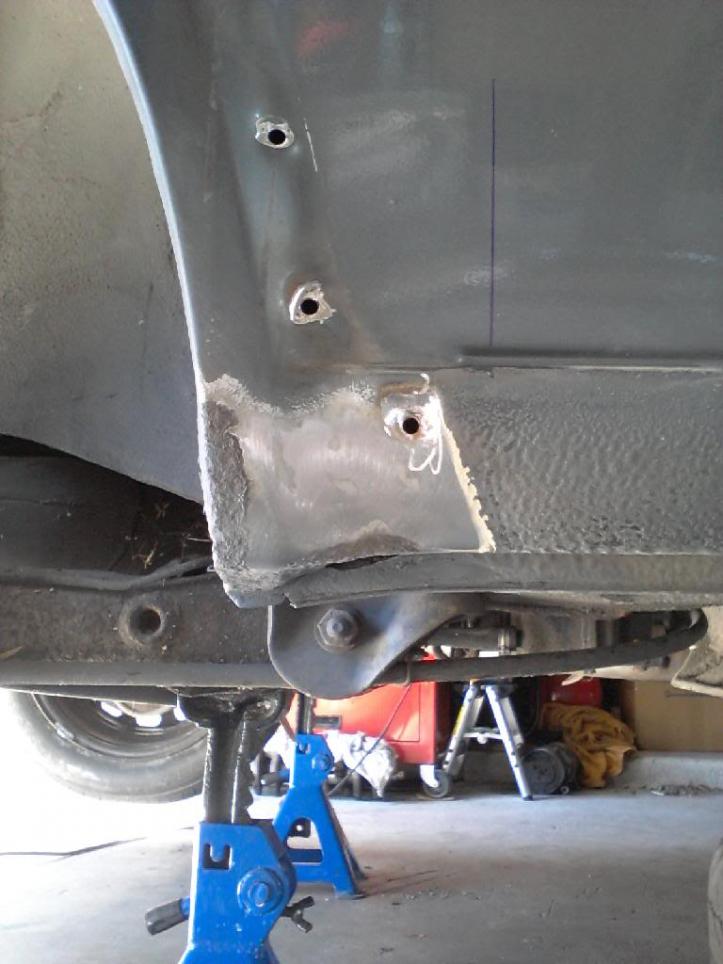
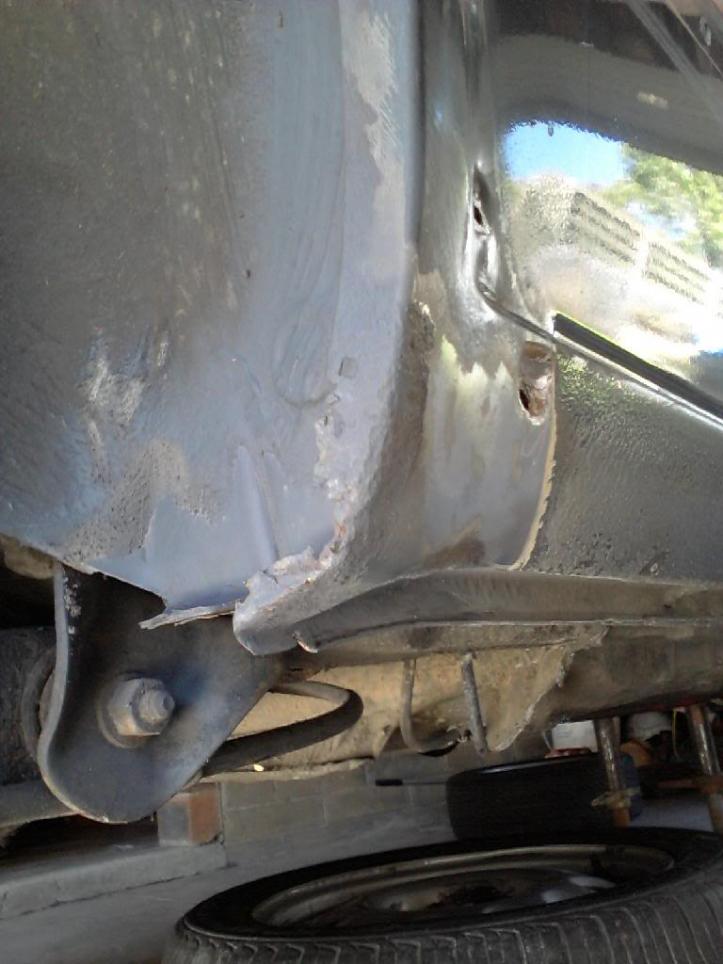
The number one job to perform on Walter was rust repairs. Being an ex-UK car, rust was always going to be a problem. I do think that the rust on Walter wasn't too bad though. The main areas that needed attention were under the windscreen, the bottom of the rear arches, both sides, front and back, the rear beaver, the tailgate and under the battery tray. There was also a few other areas where the rust had started to develop, but was nothing a wire brush and/or some rust convertor couldn't fix, such as the lower edges of the front guards or along the floor. I think if this car was left to sit in the weather for another couple of years, it really would have been a different story.
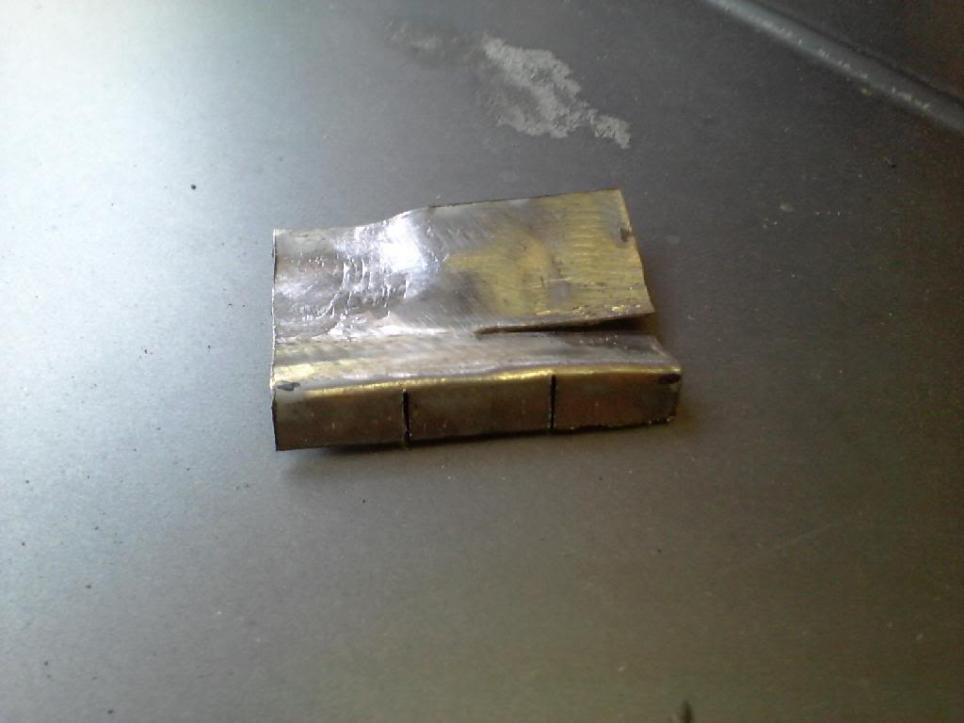
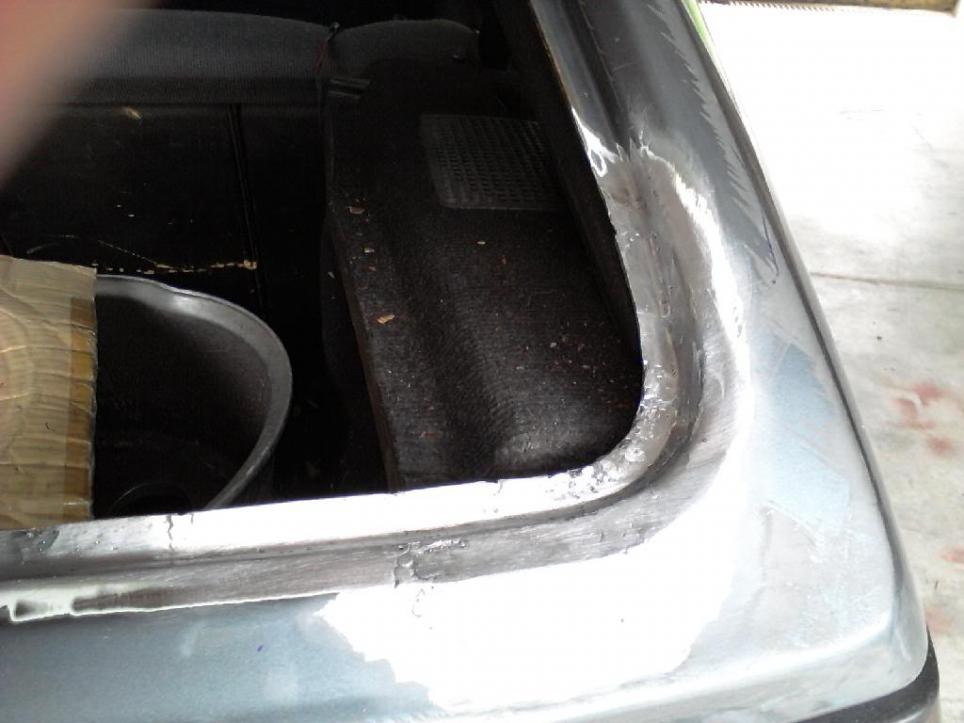
First up was the windscreen and the tailgate. Both panels only had minor holes, which didn't really warrant purchasing rust repair sections. I fabbed up replacement sections using the skin off an old audi door.
Here's the start of the repair patch. Manipulated by hammer and dolly and also using the area due for replacement, as a 'mould'. I found it to be a pretty effective trick when tackling this sort of rust, in window channels etc, where the surrounding structure is still solid. (Thanks Pete Jones!)
When it came to cutting the rusted section out, I used the patch panel as a template, rather than trying to cut the rust out, and then fabricate a section to fit the whole. I have no doubt this way was 100 times easier, and more accurate.
and cut..
Tacked in
The gap was just filled with MIG. it would have been far too fiddly to try and fabricate a little section to fit in there. Welded, ground and filed back. Happy with this repair.
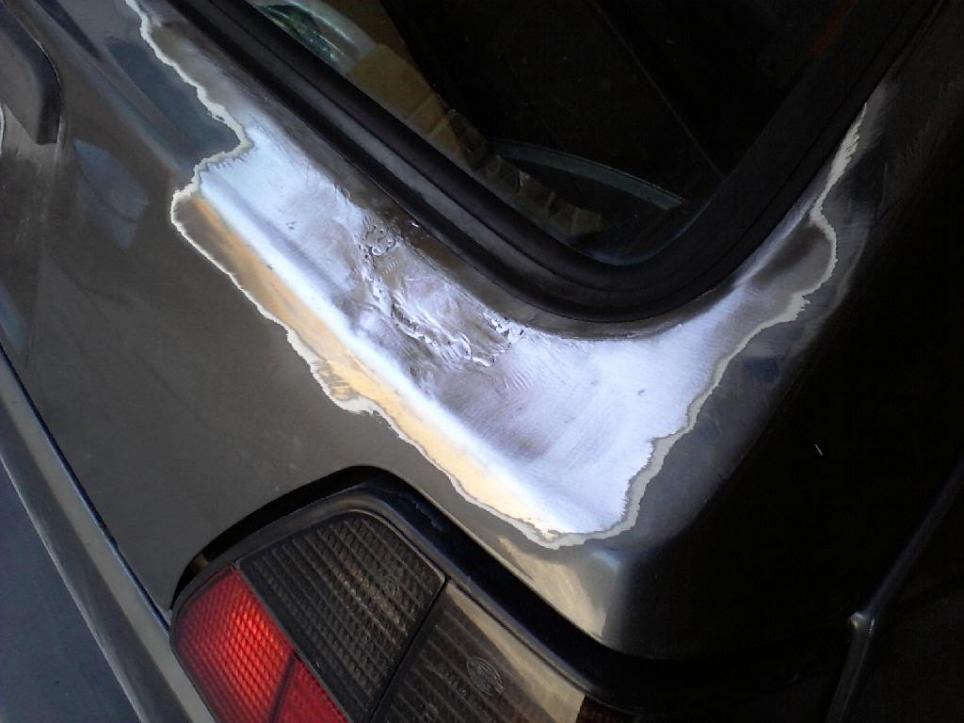
And onto the tailgate:
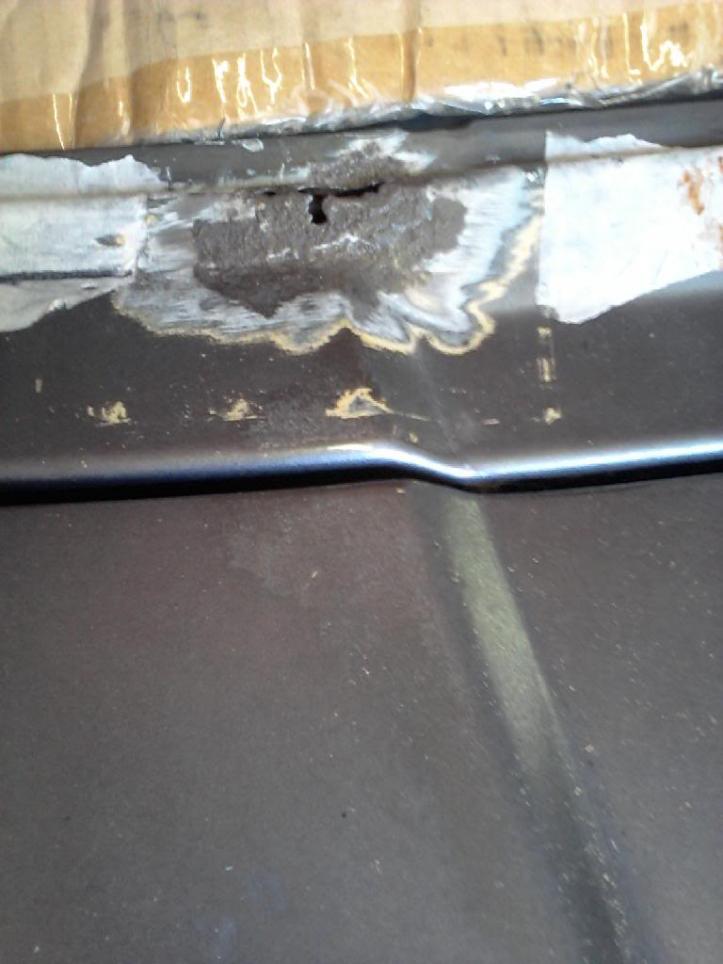
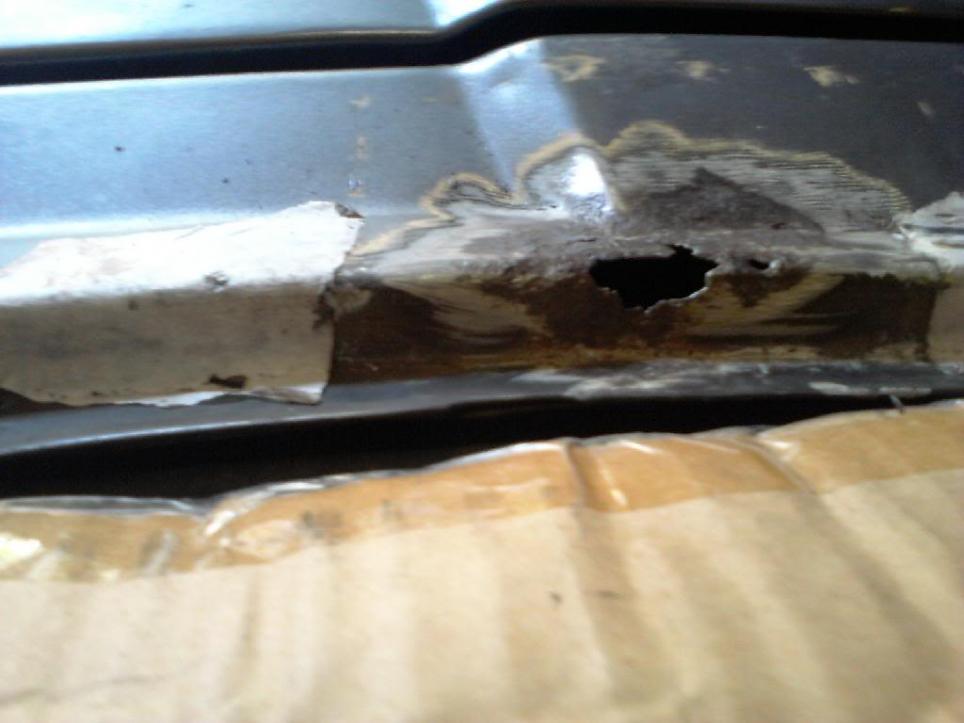
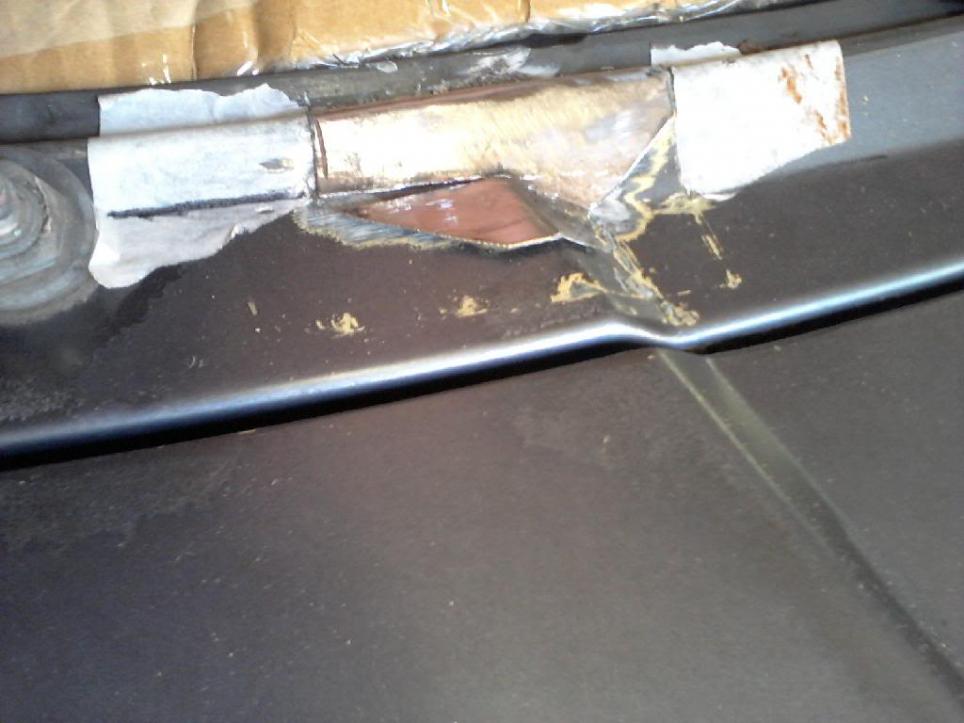
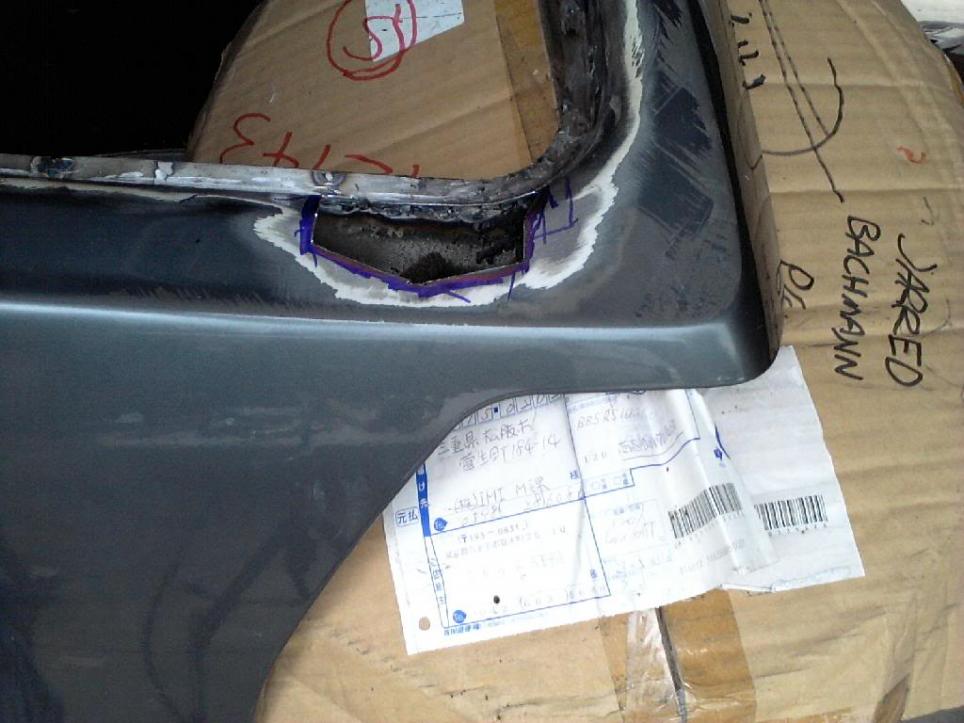
Here's the RHS side of the window sill of the tailgate
As you can see, the flanged where the two pieces of steel were spot welded has been well and truely attacked by rust. This continued around the entire lower flange, and between a number of other 'joins' within the tailgate. It was at this point that I decided I'd get a new tailgate eventually, but for now, I would accept the challenge to repair this tailgate. This allowed me to get on with the work, and means that I'll probably look to purchase a brand new, or very good second hand tailgate, in the final stage of the project.
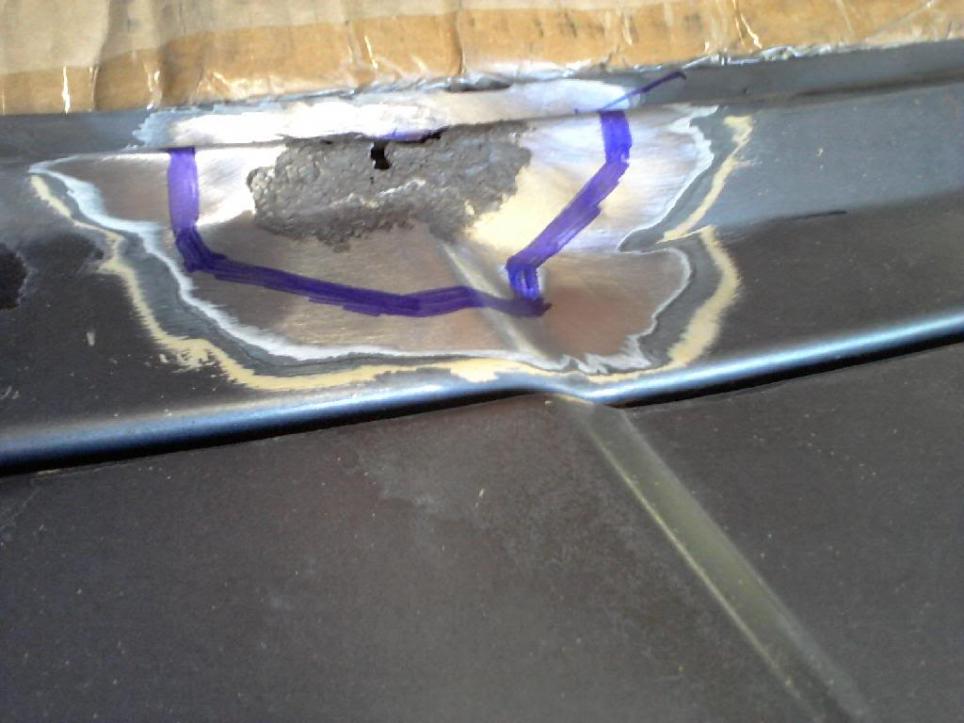
I used the same technique to manufacture the replacement patch, and then used it as a template for cutting the rusted section.
The repair wasn't 100% perfect, but definately much more solid and will certainly be good enough for the next few years.
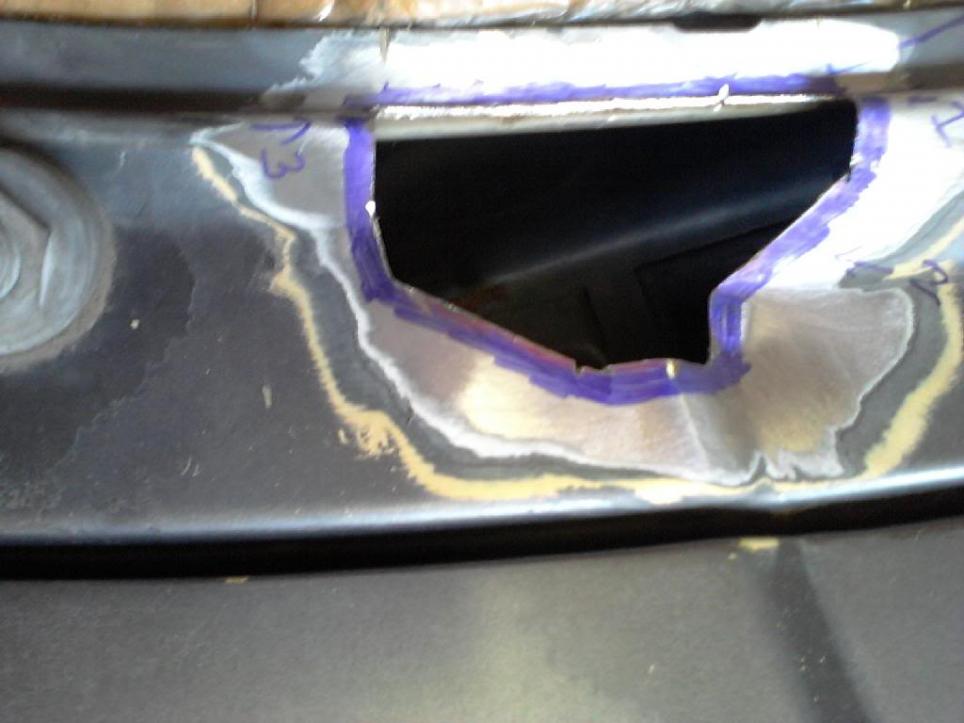
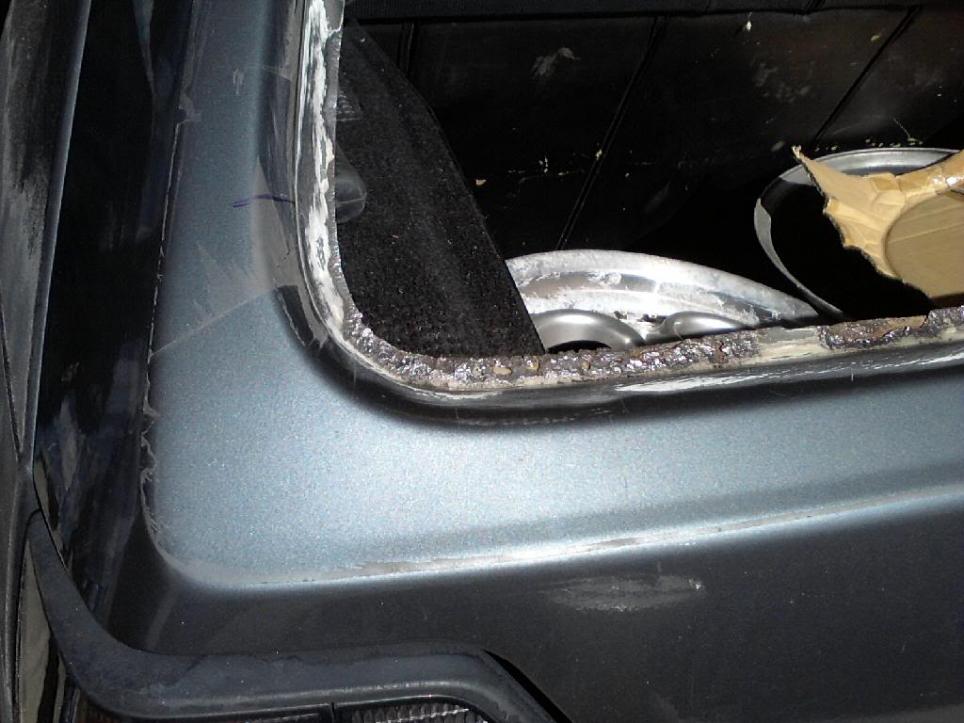
The other side of the tailgate didn't have such a big hole, but the flange was still just as rusty.
here's a pic of one of the replacement panels for the flanged section. using pie cuts to get the desired shape, but led to some difficulty welding (especially for an amature such as myself!)
Here's the cut for the above replacement section
Here's the finished left side:
And the (almost) finsihed right side: Nothing that a touch of filler couldn't fix.
Rust repairs continued.
(Sorry for all the phone pics, I hadn't got my camera at this stage)
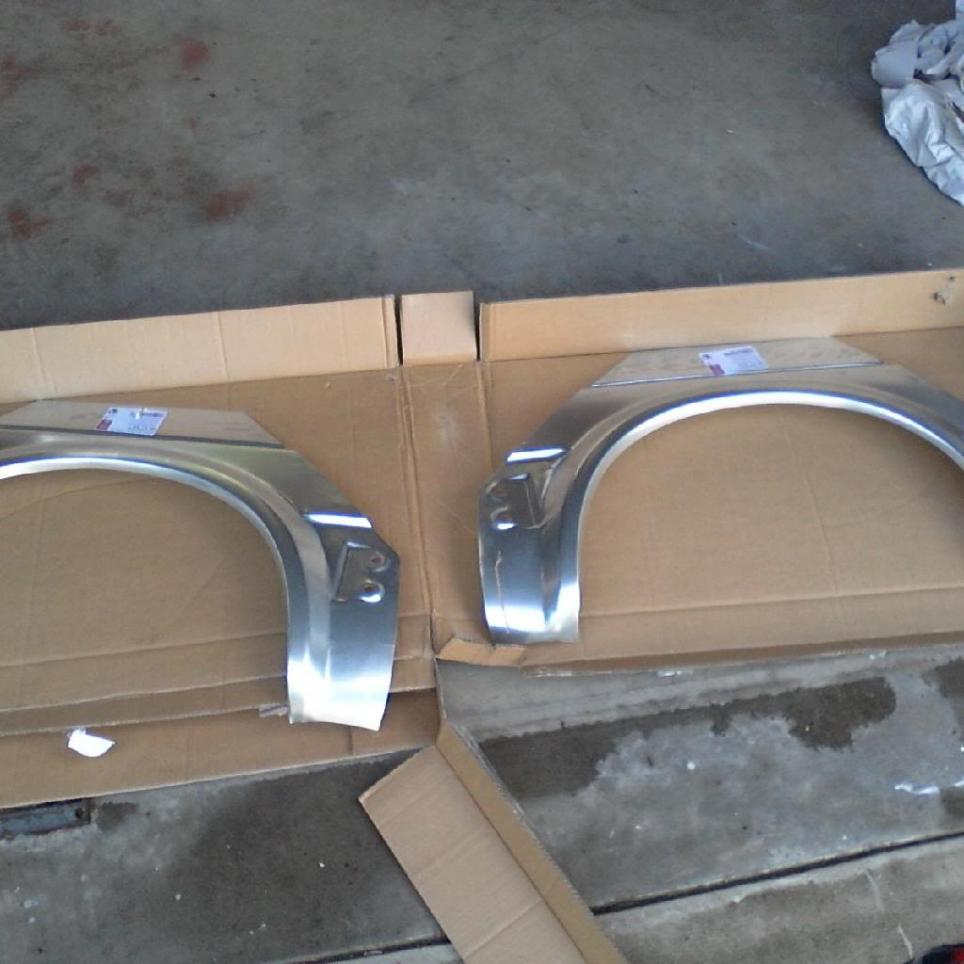
With the tailgate and windscreen taken care of, it was time to focus on the rust around the rear arches and rear beaver. I purchased some brand new outer skin repair panels from the UK prior to starting the rust repairs, cause I knew there was no way I was going to be able to form the difficult curves and bends around the arches, and being that they're not a 'bolt on' panel, (such as the tailgate) I wanted to makesure I did these right. Although the panels themselves were only about $30 each, the shipping was, typically - painful. About $90 to ship. still worth it though, as I'd have had a right breakdown trying to fix the rust wthout them!
Buying these made me feel like a real pro - ha!
Starting off with the reasons why I bought the repair panels:
A bit daunghting at first, but even the pro's put thier pants on one leg at a time, so I just got stuck in.
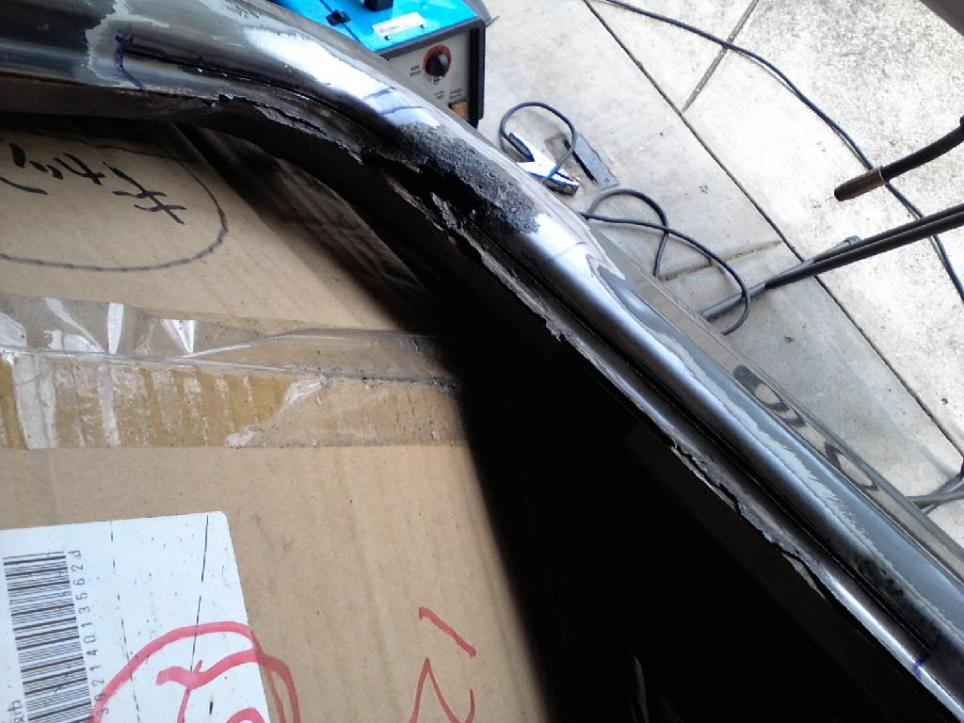
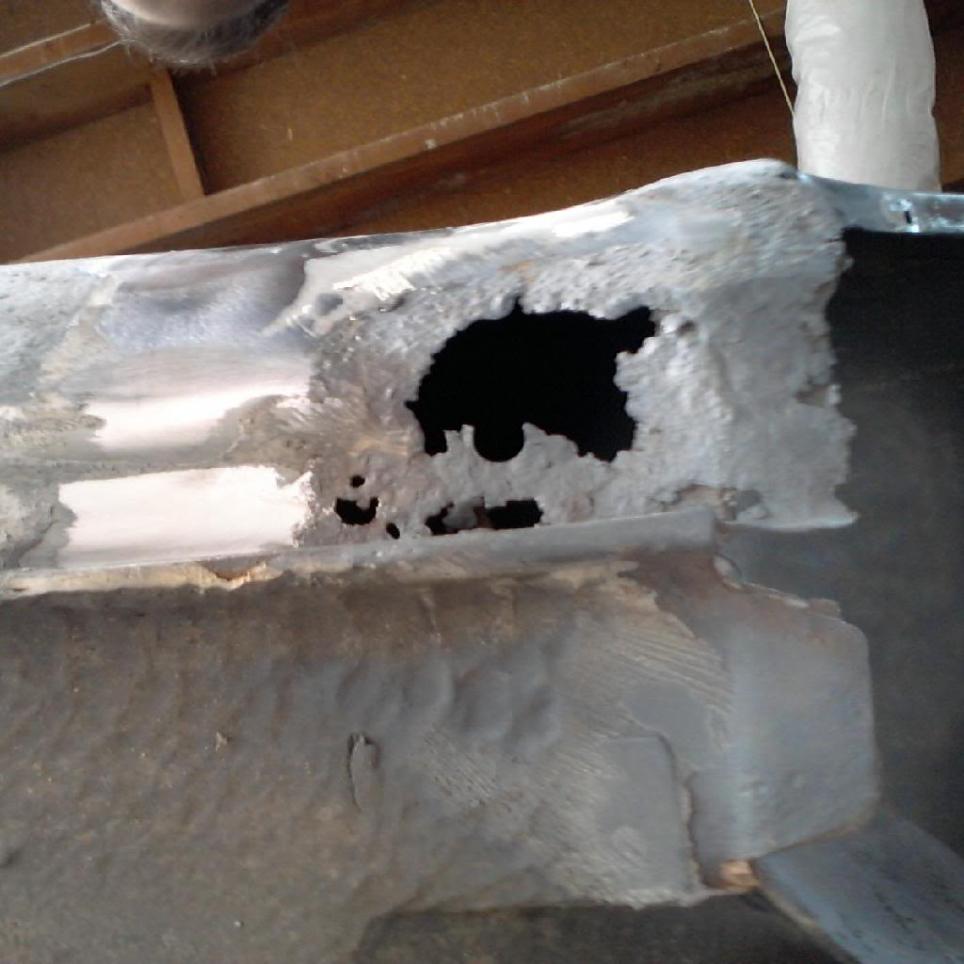
Here's the rear beaver. I repaired this much the same way as the tailgate and windscreen channel, bashed out some repair patches, used them as templates and cut from there. it's not a perfect system, and there is probably going to be some additional cutting and trimming after, but it's better to cut too little, and have to file or trim some more off, rather than trying to add some more!
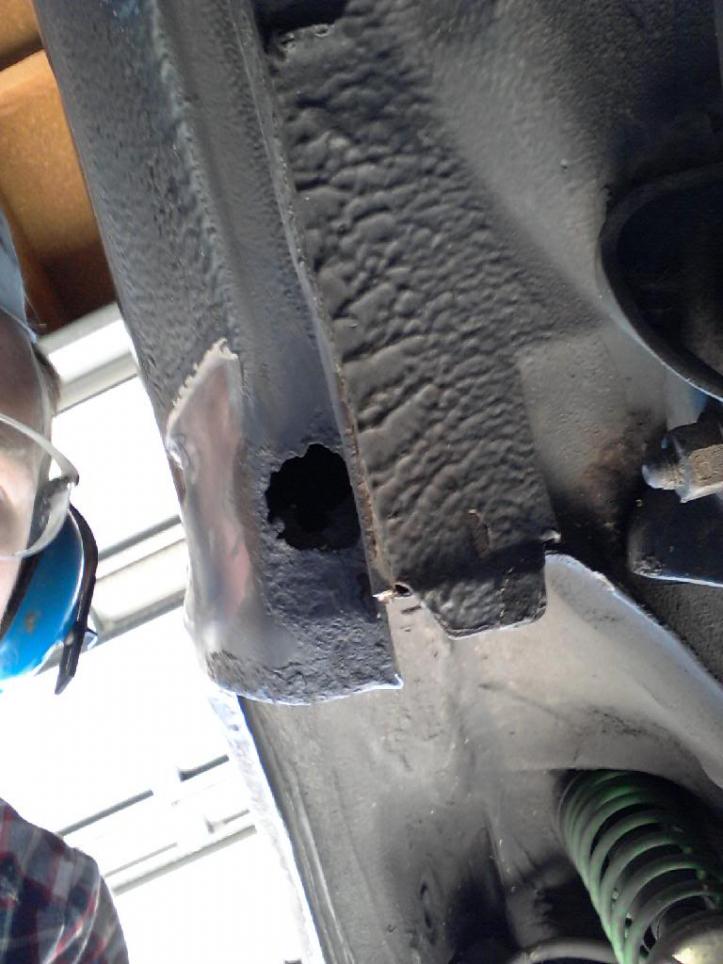
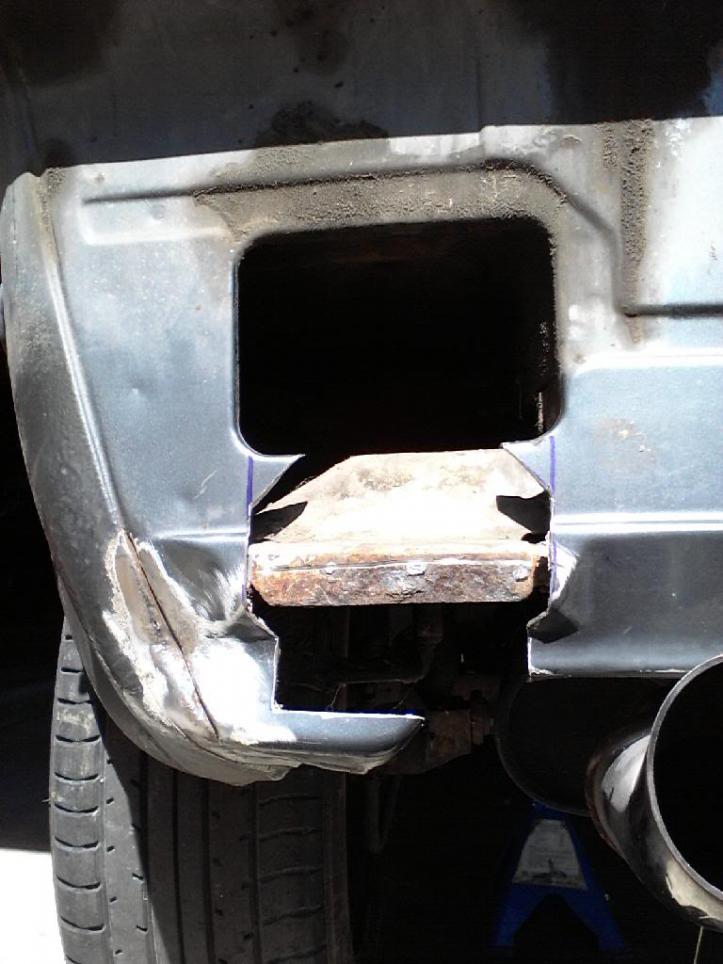
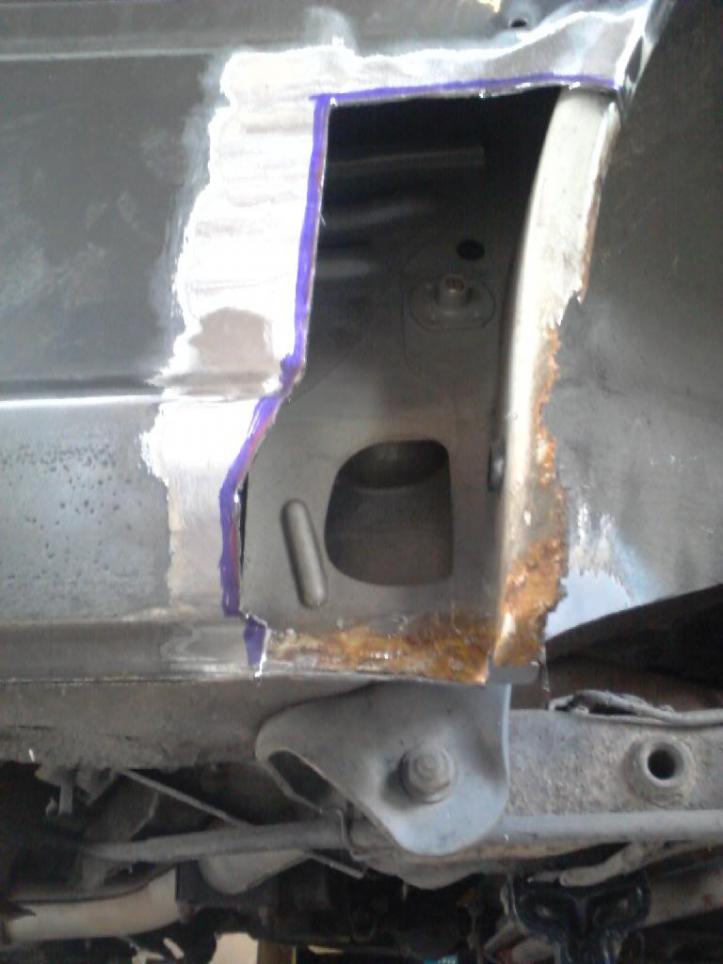
That rusted end of the chassis leg actually got replaced too, as it really wasn't much chop.
and the (almost) finished product
I'm paraphasing alot here, cause this was actually a pretty tricky repair, with all the different curves, lines and small details. happy with the repair, even if it will get mostly hidden by the rear bumper.
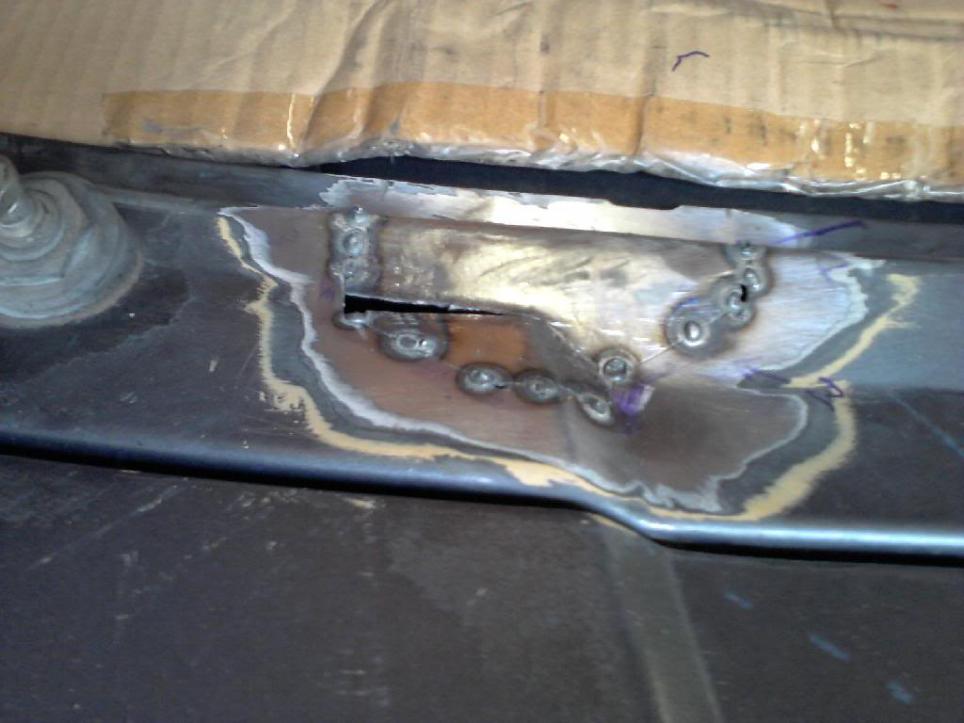
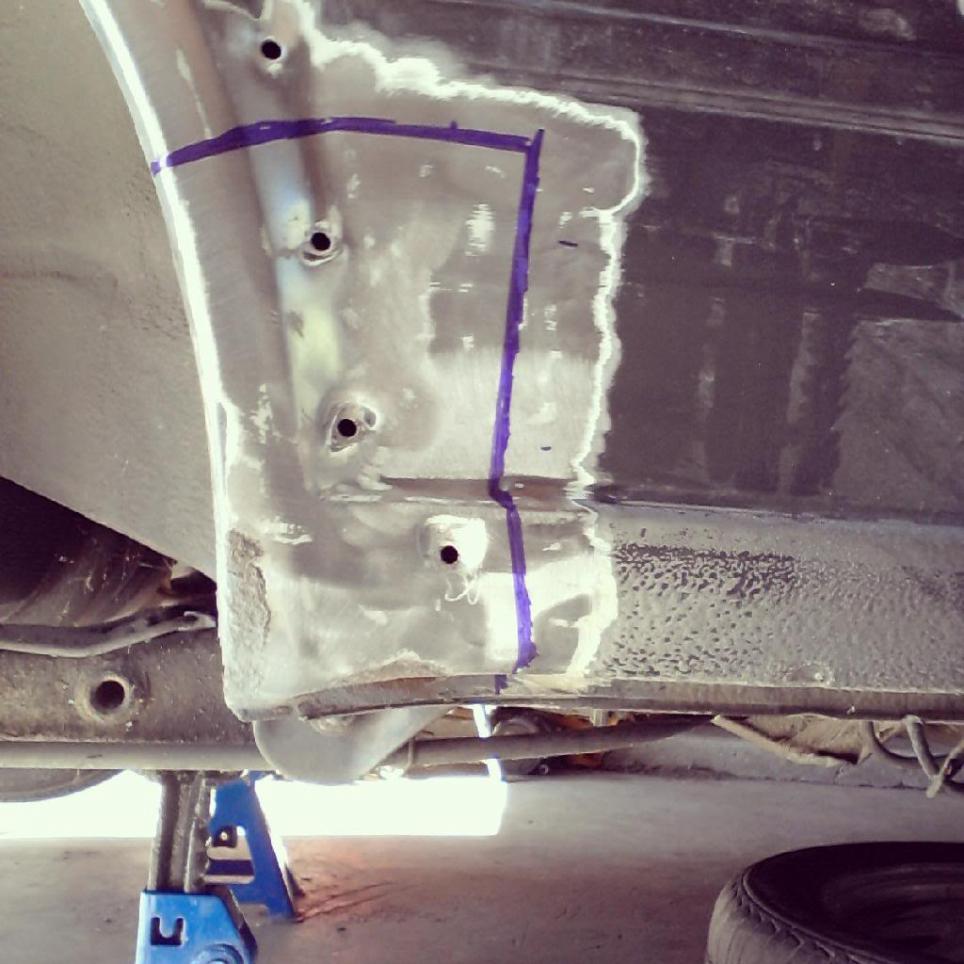
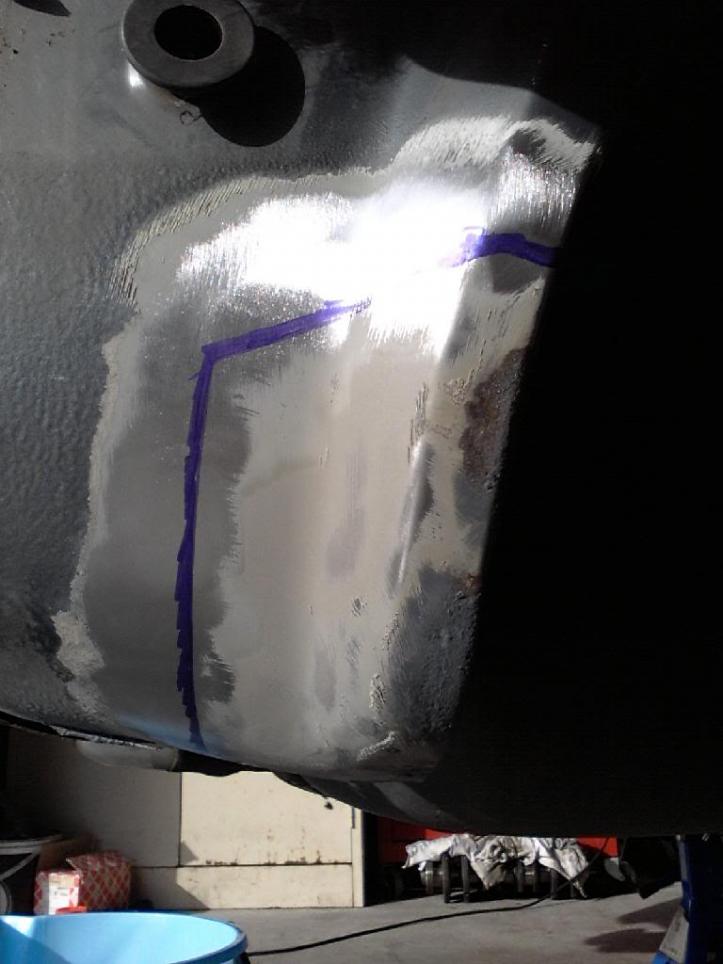
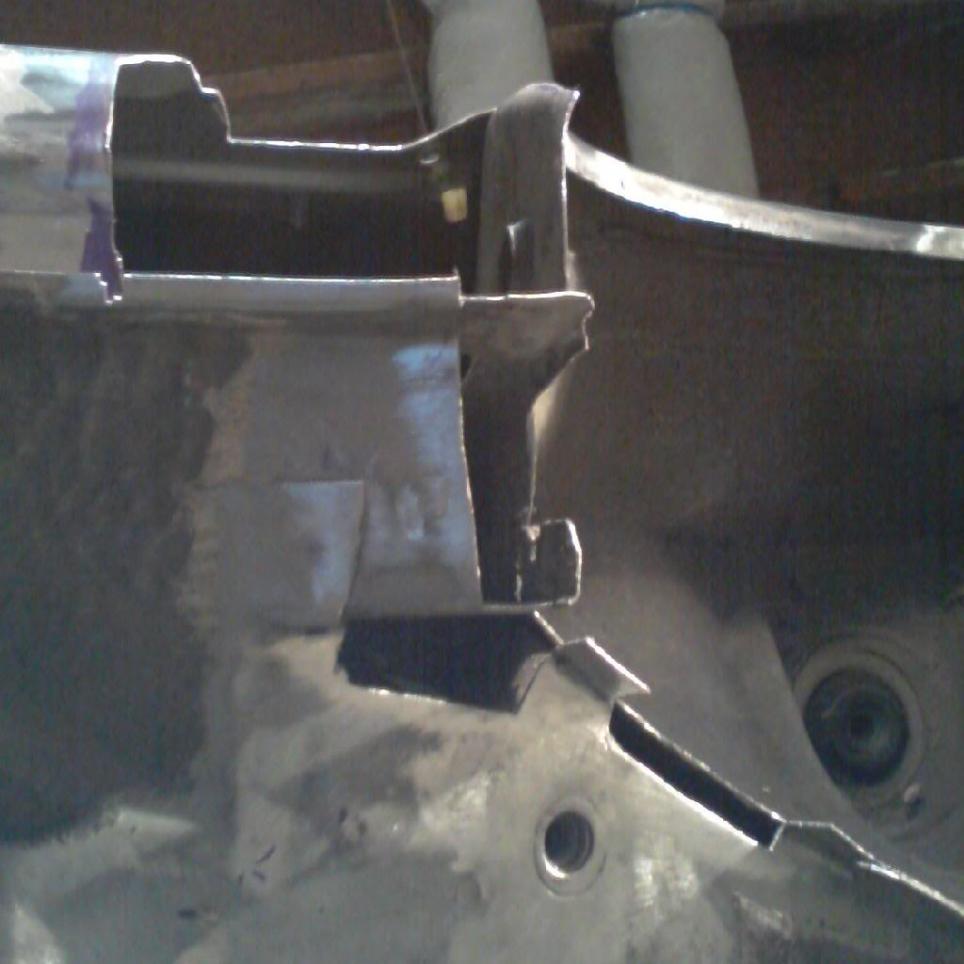
Onto the rear arches, RHS, front. Stripped the paint, cut out an appropriate section from the repair piece and traced. I chose not to replace the entire arch, as that would have meant a heap of body work, and it really wasn't warranted give how confined the rust damage was on the arch.
here's that same spot from underneath, this is actually where the bottom clip of the arch trim is meant to go. It's because of the arch trims that this area held so much dirt and crud, and why it was so rusty, compared to the rest of the car.
I chose to replace such a "large" section because a) I wasn't entirely sure how much rust damage was underneather the outer skin and b) i wanted try and avoid as many of the intricate stamped details (trim line, clip holes etc) when it came to welding and grinding and c) I want to give myself as large and flat of an area as possible when it came time to do bodywork.
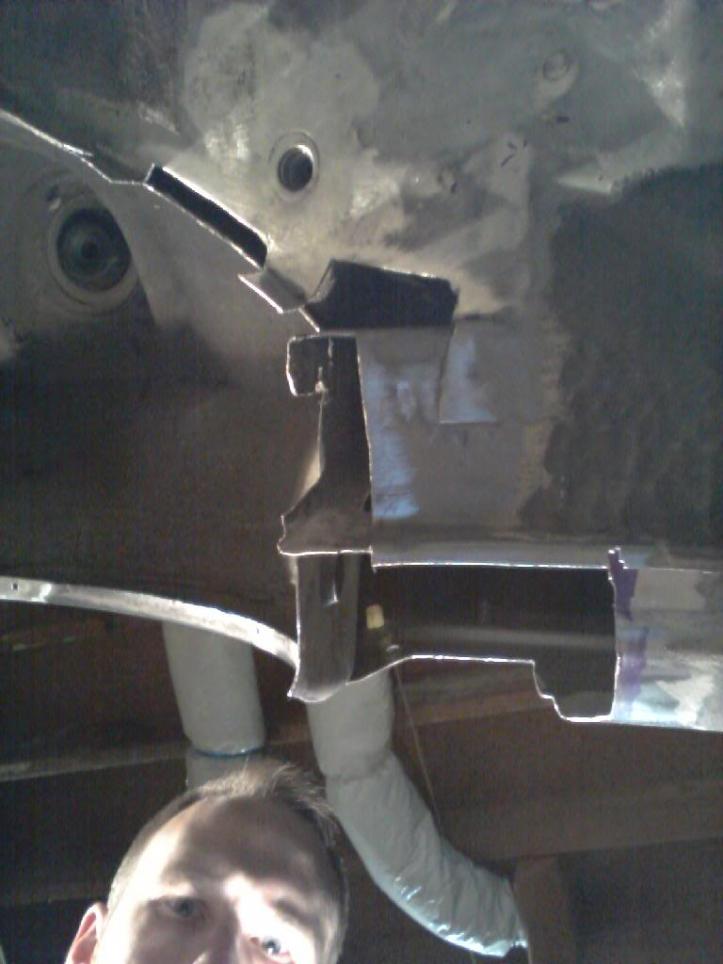
Spotted in place. Here you can see where I stuffed up and cut on the wrong side of my line. rookie mistake! Nothing the MIG couldn't fix, eventually.
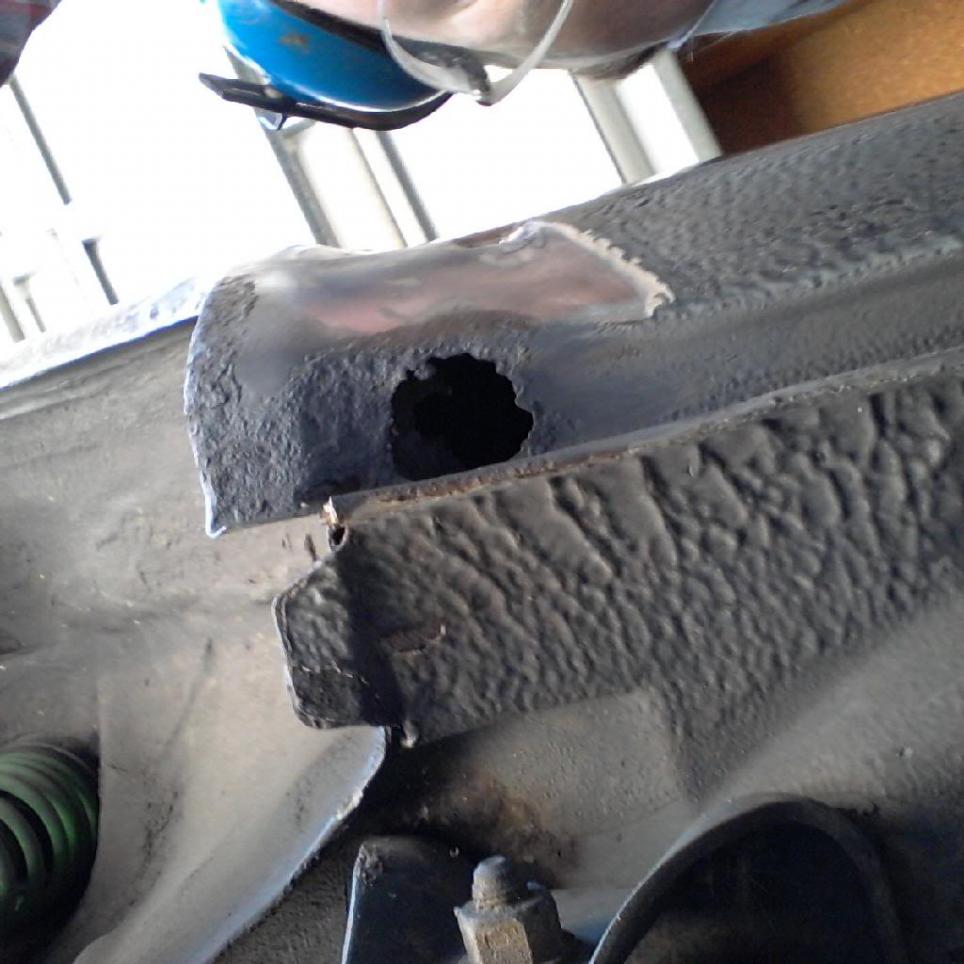
Here's the rear RHS arch rear
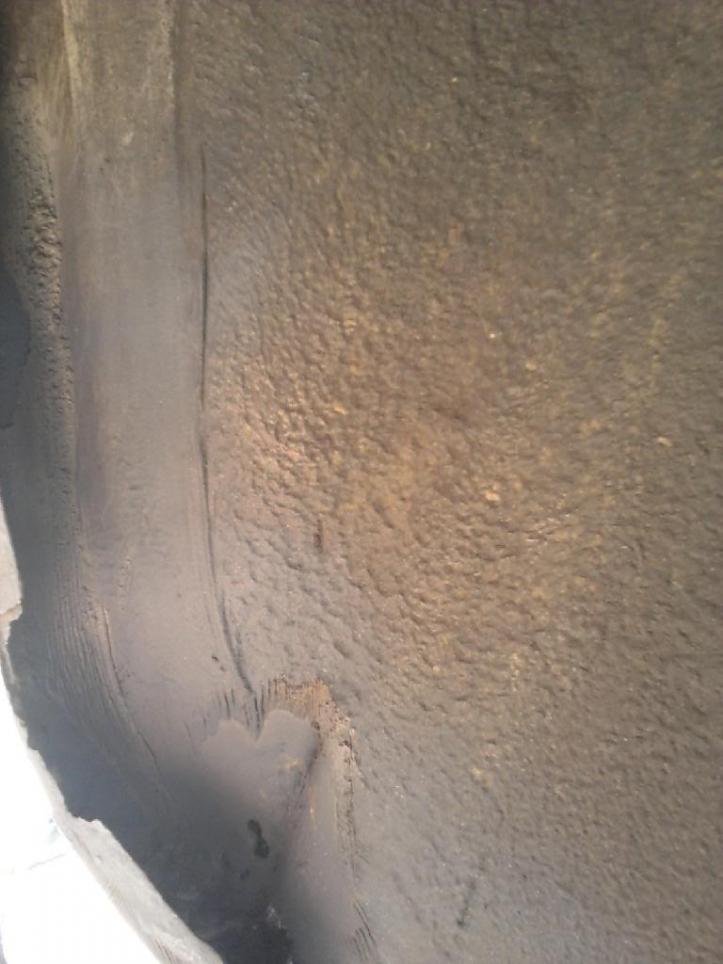
You can see where the rust has gone through
with the outer skin removed and a quick wire brush you can see the damage a bit better
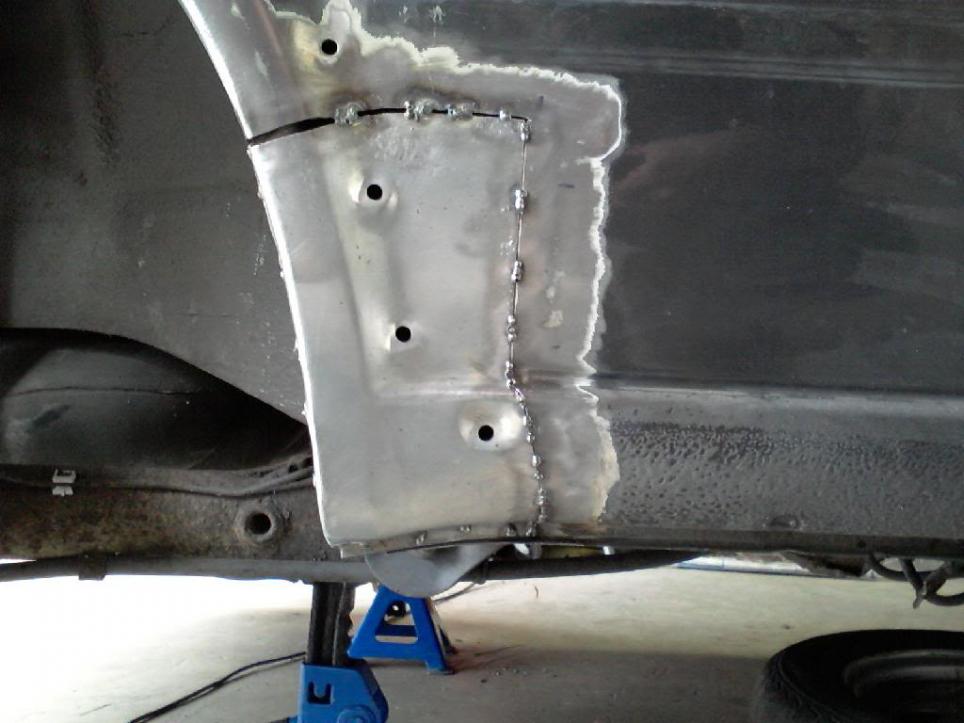
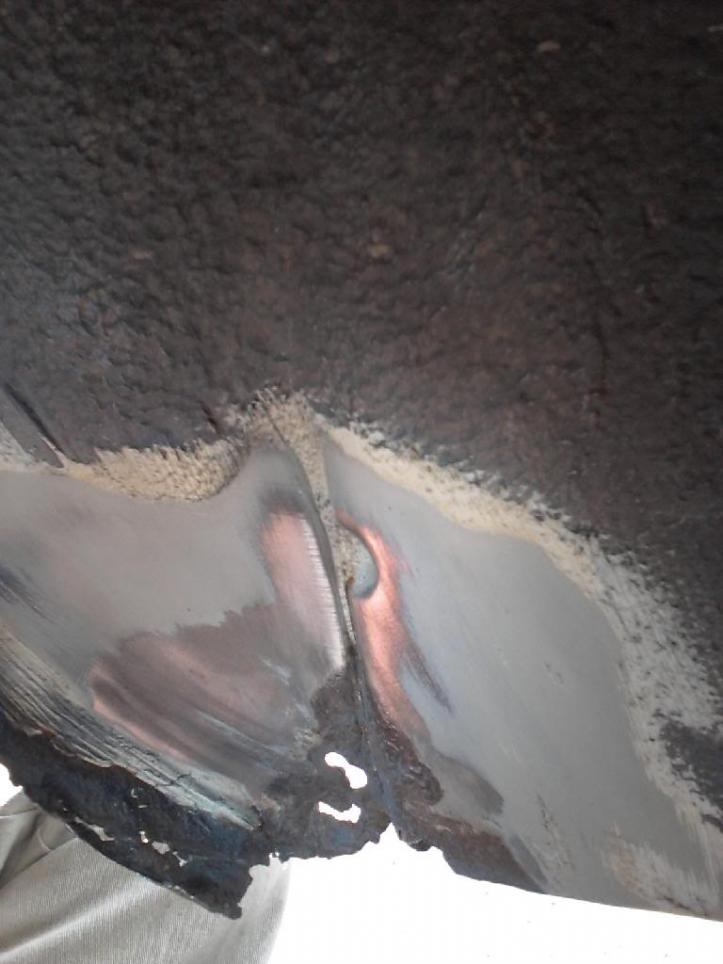
here the inner section of the arch lip (the entire length of the repair section) aswell as the inner section are repaired and etch primed, ready for the outer section to go on.
tacked
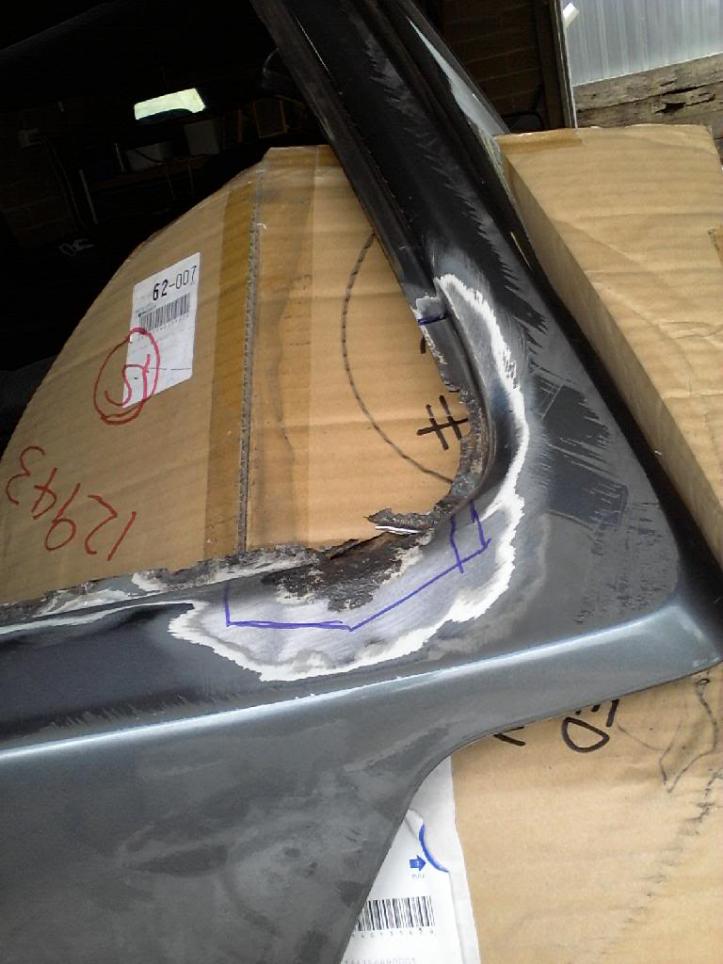
Moving onto the rear LHS arch, front. Here's the damage:
You can see the rust also on the triple thick folded section of the back of the sill
Here's the outer section removed, you can see the rust on the inner skin of the lip
to give you an idea of how extensive the rust was in this section
I made 7 different patches for this section, trying to maintain as much of the original steel as possible. this was probably one of the more daunghting moments (apart from cutting into the car for the first time). luckily it all went back together like a jigsaw.
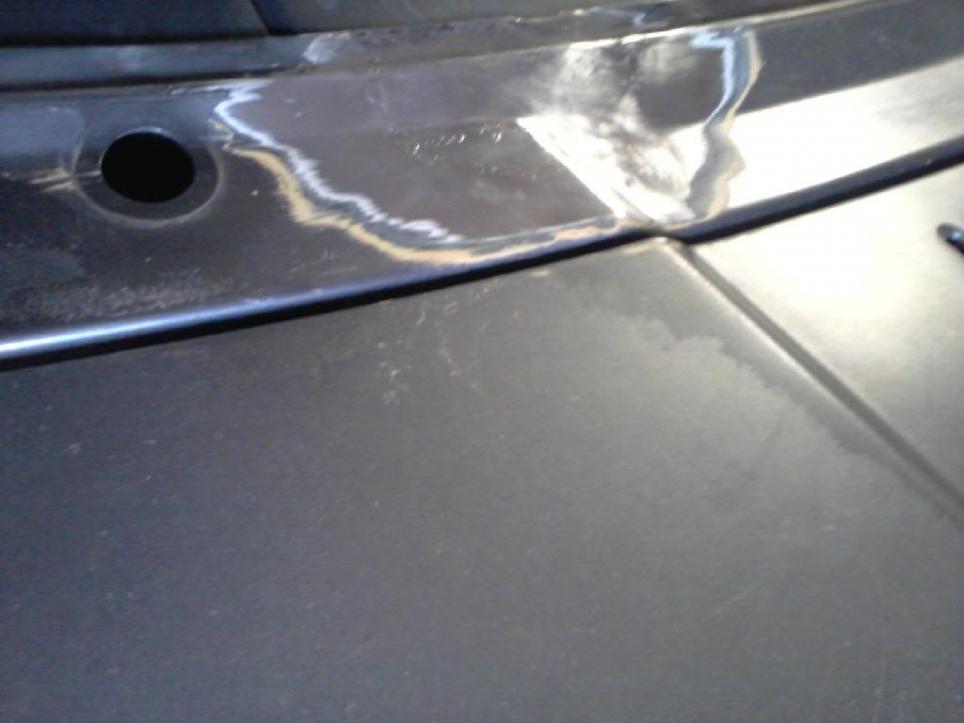
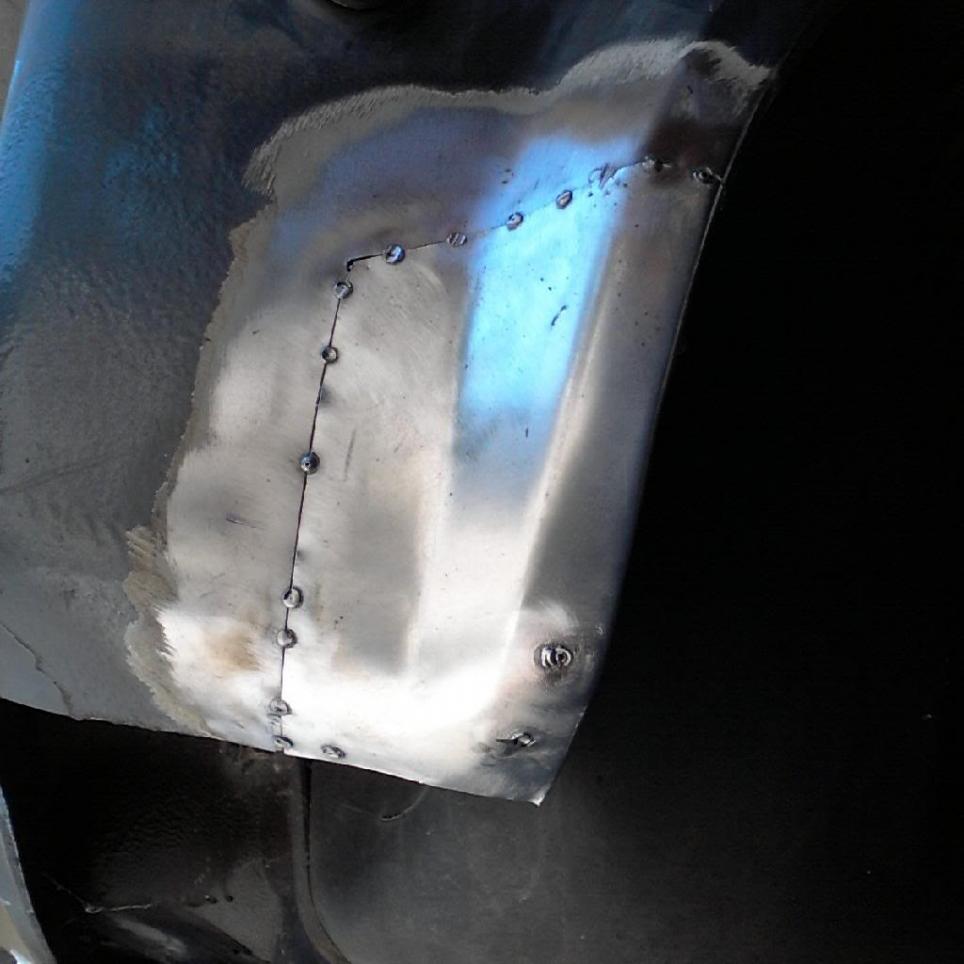
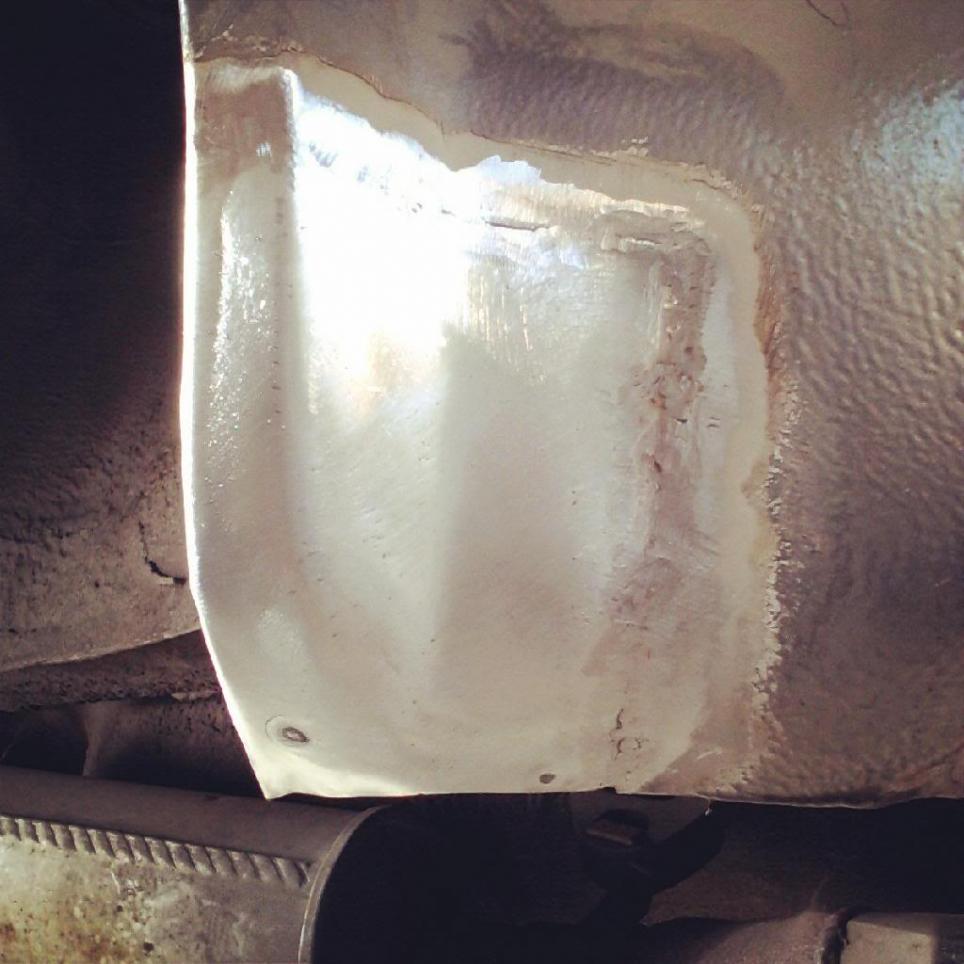
It was a similar story on the rear of the arch, just not as severe, here's the finished product
At the end of the rust repairs this is what I was left with;
Short of working some filler and spraying some pressure pack paint over the repairs, this is what I was left with. I guess you can understand what I did next...
I'm guessing you bought a mountain bike? (because every photo of a MK2 being worked on in a garage has a bike in the background)
What you are doing is pretty amazing considering you sound like you've got the same machanical knowledge as me (amateur with stuff all bodywork experience) and I'm older, wiser and got more hair than you. I'd think twice before tackling the stuff you've done on the body but you've done it and it looks like a top job. Well done Jarred.
Last edited by sports racer; 14-03-2014, 05:23 PM.
I've had a little bit of experience with bodywork/rust repair. I watch a lot of youtube stuff (V8TV have a great channel for those who havn't seen it) which gives me a lot more confidence in tackling this sort of stuff.
I have a bike already. I don't think I've ridden since I turned 18! haha
 Tweet
Tweet


Comment