Above Forum Ad

Collapse

Announcement

Collapse
No announcement yet.

Mk 1 Diesel Project

Collapse
X
 
  • Filter
  • Time
  • Show
Clear All
new posts

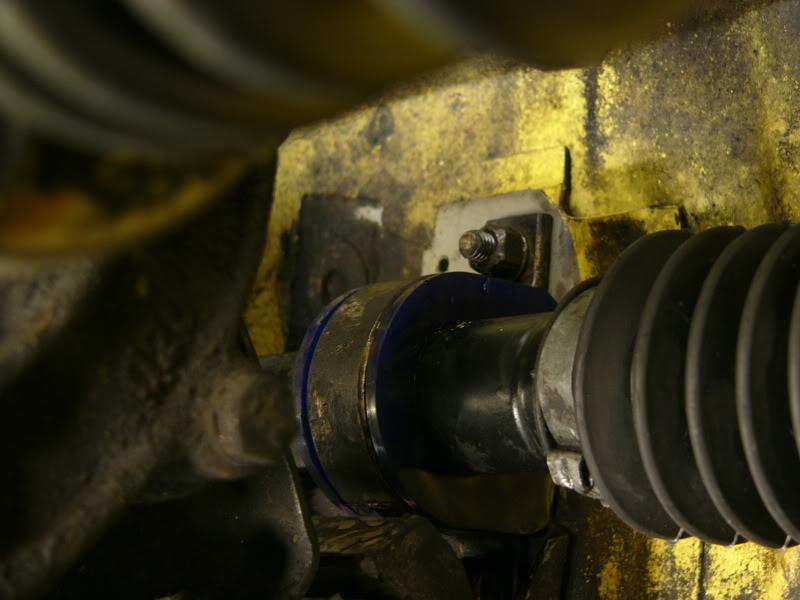
  • You might need a hand with those urethane mounts, it took me a bit to figure out how to press them in. Let me know if you get stuck.

    Are you doing ball joints too?

    Pete
    79 MK1 Golf Wreck to Race / 79 MK1 Golf The Red Thread / 76 MK1 Golf Kamei Race Car
    7? MK1 Caddy
    79 B1 Passat Dasher Project
    12 Amarok

    Comment


    • oh dude! so lucky they didnt get the wheels!
      sigpic

      Comment


      • Jarred,

        Is there any structural damage? my blue one had a similar hit before i got it, lucky no structural damage.

        But, it looks like a nasty hit. But as lawny said, lucky they didn't get the wheels.

        Good luck mate.
        Audi S3 8L - Stroker GTX3582 700bhp+
        Golf GTI 1980
        Golf GLS 1979
        www.facebook.com/etunersmotorsportau

        Comment


        • Did you track down the prick who hit you? I'd be furious if happened to me!
          '76 Mk1 Golf - Gone!
          '05 Mk5 2.0 FSI Sportline
          sigpic

          Comment


          • Originally posted by Peter Jones View Post
            Are you doing ball joints too?
            Not quite yet. I'm going to be looking into the extended ball joints, so until I decide what I'll do, I'll leave them alone for now. But yes in some degree they'll be replaced sooner or later.

            Hopefully I'll stop by sunday early arvo, and have a chat.

            re: the damage. Yes lucky it was only the panel that was damaged, nothing structural, and not the wheel either. Had to have been a tray or bull bar etc. No note or anything, so no culprit unfortunately.


            i like volkswagens
            My blog: http://garagefiftythree.blogspot.com.au/

            Comment


            • Originally posted by Jarred View Post
              re: the damage. Yes lucky it was only the panel that was damaged, nothing structural, and not the wheel either. Had to have been a tray or bull bar etc. No note or anything, so no culprit unfortunately.
              b*stards.....you have my sympathy Jared, my 1st Bug needed another m'guard in similar c'stances.....
              Last edited by dubai gti; 11-12-2009, 11:53 PM. Reason: Bug
              Children(VW) who have left home, among others:1966 VW 1300 Deluxe Bug(Harbour Blue)1966 VW 1300 Steel Sunroof Bug(Ruby Red), 1971 VW 1600 S Bug(White) 1972 VW 25th Ann. Bug(Avocado) 2000 VW Golf Mk IV GTI 3 door(Metallic Black Magic), 1985 VW Golf Mk 1 GLS Cabriolet (Metallic Gun Metal) Current: 1985 Mercedes Benz 280CE Coupe(Midnight Blue)

              Comment


              • Gutted to see that happened. After allthat work aswell Hoepfully its just the wing thats damaged

                Comment


                • Been busy in the garage of late. Had a few teething issues which took up some time, but over all, went pretty smooth.

                  I'm always on the look out for ways to mod & improve my car, and I love retro fitting stuff from newer cars into old cars, hence todays fun: Brake Booster and Master Cylinder upgrade!

                  First off I'd like to thanks Pete Jones for this thread which was an incredible help during the upgrade as well as modding the mk 3 booster for me! His other threads on brakes also came in handy! As normal all the answers were aready in brake threads, I just had to come back inside to figure out where I was wrong before I set off again in the shed.

                  I took a few pics for reference & hopefully to help out others who're looking to do this upgrade. I've only had it a couple days and I love it already, it makes a massive difference & is defiantly worth the effort!

                  A quick overview of what my braking setup is currently comprised of:
                  -Bigger Brake Booster
                  -22mm Master Cylinder (4 port, off and '86 Audi 80 in this case)
                  -GTI fronts ( vented discs, larger caliper/pad)
                  -Standard rear drums with new rear wheel cylinders & fresh linings.
                  -Standard vaccum pump (rebuilt a while back)

                  Pretty good combo, and stops great. There's less pedal feel, but you don't have to stomp as hard to get her to pull up. (Feels similar to and generic mid early 90's hatchback, although pulls up better )

                  Forgot a proper 'before' pic:


                  Don't forget to empty the brake reserviour first!

                  Lines off (11mm spanner)


                  MC off (13mm)


                  Holding bracket bolts under the dash: (13mm, forgot theses were here, had me stumped for a couple mins)


                  Old booster, bracket & linkage removed:


                  What's left behind:


                  New rear wheel cylinders. (boring pic, but what the hey. Easy to replace, just don't forget to 'reset' the self adjuster on the drum otherwise you wont be able to get the drum back on. Had my stumped for ages, But PJ's threads came to the rescue)


                  Removing the yoke from the back of the old booster: (a quick blast with the heat gun a must)


                  Mk 3 Booster and 22mm MC:
                  Last edited by Jarred; 21-12-2009, 02:43 PM.


                  i like volkswagens
                  My blog: http://garagefiftythree.blogspot.com.au/

                  Comment


                  • detail of 22mm MC:


                    Pete Jone's handy work:


                    New setup in the car:


                    With nissan N13 brake fluid reserviour: (Some dill forgot to keep the one off the audi)


                    Had a few issues with the setting up the switch. (electrics aren't my forte`)
                    I had originally planned to use a Normally Closed Reed switch, but the current (~3A) through the brake light wires kept melting the contacts of the switch, so I ducked off to Volkspower and pulled a brake light pedal switch from a wrecked mk 2. I'm guessing ones off Mk 3's, cordy's etc etc etc, could all be made to work as well.

                    Switch:


                    Bracket for brake light switch:


                    Because the bracket is offset from the line of the brake pedal, I had to make up a little metal tab to act as a 'reference' to turn the switch on or off, & weld that on. I'm sure there would be a couple other ways to rig up a switch though. The mk 2 switch even had the same colour wires as the original hydraulic mk 1 set up! (note: there are 3 wires on the original setup, cross two of them, and the lights work!, red w yellow, and red w black in this case)


                    all nice and hidden away:


                    i like volkswagens
                    My blog: http://garagefiftythree.blogspot.com.au/

                    Comment


                    • and all is covered by the dash mats! (well, nearly everything)


                      Thats it for todays updates, hopefully this'll help a few people that might be looking at doing this sort of upgrade!

                      And just because I can:


                      i like volkswagens
                      My blog: http://garagefiftythree.blogspot.com.au/

                      Comment


                      • Good stuff Jarred.

                        Your getting closer & closer to the elusive power upgrade I reckon!

                        You seem to be doing everything else.

                        The best bit about fitting a on/off brake light switch instead of the crappy old pressure style switch's?

                        1 - They don't leak

                        2 - You don't have to worry about them not working when you lightly press on the brake & wonder if someone is going to run into the back of you cause your lights aren't on!

                        Comment


                        • Originally posted by golfworx View Post
                          Good stuff Jarred.

                          Your getting closer & closer to the elusive power upgrade I reckon!

                          You seem to be doing everything else.

                          The best bit about fitting a on/off brake light switch instead of the crappy old pressure style switch's?

                          1 - They don't leak

                          2 - You don't have to worry about them not working when you lightly press on the brake & wonder if someone is going to run into the back of you cause your lights aren't on!
                          Thanks Tim, and you're right, I think it'll be ready for a 1.6D now! hahah

                          You're 100% right about the standard hydraulic setup, especially given the age of the cars. I'm much happier with this set up, much more reliable & consistant. I've adjusted it so basically as soon the the pedal moves about 2-3mm, the lights come on. Better to be safe than sorry!

                          I've been driving it around my area for a bit this aftenoon, and now I need to adjust all the braking points for all the corners! I seem to be carrying alot less speed into the corners now! lol!


                          i like volkswagens
                          My blog: http://garagefiftythree.blogspot.com.au/

                          Comment


                          • good stuff Jarred!
                            Audi S3 8L - Stroker GTX3582 700bhp+
                            Golf GTI 1980
                            Golf GLS 1979
                            www.facebook.com/etunersmotorsportau

                            Comment


                            • Good work Jarred, glad to see you got it all sorted.

                              Pete
                              79 MK1 Golf Wreck to Race / 79 MK1 Golf The Red Thread / 76 MK1 Golf Kamei Race Car
                              7? MK1 Caddy
                              79 B1 Passat Dasher Project
                              12 Amarok

                              Comment


                              • New complete Tie rod assemblies went on today. now adjustable on both sides, with new steering rack boots, and new poly steering rack bushes.


                                i like volkswagens
                                My blog: http://garagefiftythree.blogspot.com.au/

                                Comment

                                Working...
                                X