 Tweet
Tweet
Ok, so here’s the deal. I’ve red all sorts of thing on the net about Yeti Tow bars and wiring them. Most people in the UK seem to get the dealer to fit it because their dealers charge reasonable fee. Here in Australia however, dealers seem to think they have sold us an Audi and charge accordingly. My quote was $1700. So I decided to fit mine myself as I’m reasonably handy at these kinds of thing.
I have to say with all I’d red, the task seemed quite daunting Turns out that once I had the right information and parts, it couldn’t have been easier.
My first issue was getting the right parts. I ordered everything from PF Jones in the UK. PF Jones have been fantastic to deal with and it was with their help I managed to sort out the only problem I had.
These are the initial parts I ordered. The wiring kit is wrong as it’s for a Yeti without “Tow Prep”. There are a couple of different types of detachable tow bars. I went with the Witter Flange type but I believe the Westfalia or Witter standard type would be equally as good.
NOT FOR TOW PREP Superb Yeti 7 Pin Dedicated Wiring Kit 2009 on 19220508RC
Skoda Yeti 2009 on Detachable Flange tow bar
3.5t 1" Jaw, Pin & Ball
Stainless Steel Bumper Protector
I have never heard of a Australian delivered Yeti not having “Tow Prep”. Amongst other things, “Tow Prep” provides a connector in the back of the vehicle for the trailer wiring harness to connect to.
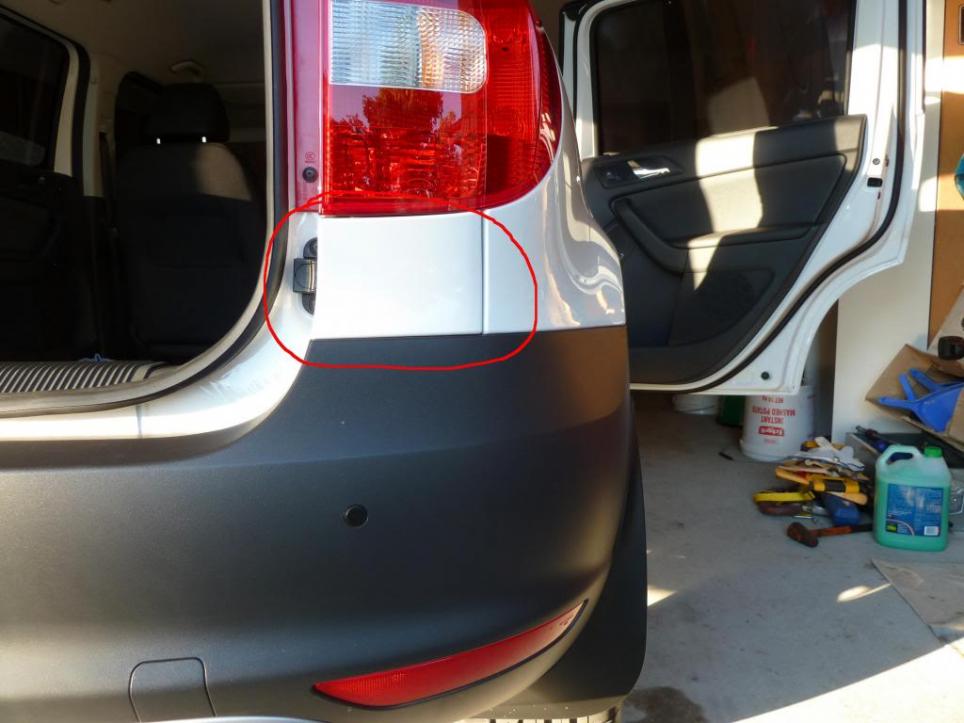
I was aware the connector for the tow wiring was behind the plastic panel on the left hand side of the vehicle. I had received everything from PF Jones prior to my Yeti being delivered but once I had my Yeti and the panel off I could not work out how the PF Jones wiring harness connected so I called them. Their tech department was great and quickly worked out the kit was for a vehicle without “Tow Prep” they couldn’t provide me with the correct wiring kit but were happy for me to send the kit back for a refund.
I called around a couple of dealers here in Australia for the genuine Skoda part “EEA 630 002 E4”. I was quoted $730 from Canberra and $530 from Nowra. My Yeti was in pieces and I didn’t want to put it back together to have to pull it apart again so I wanted to get the wiring kit ASAP. With some help from a member from Briskoda Forum, I was put in contact with a dealer in the UK. Royal Mail freight for 5 days deliver and 1kg was only 22 pound. The price from the UK with freight ended up being $265. Take that Australian Dealers.
So this is what arrived: (Sorry about rubbish photo)
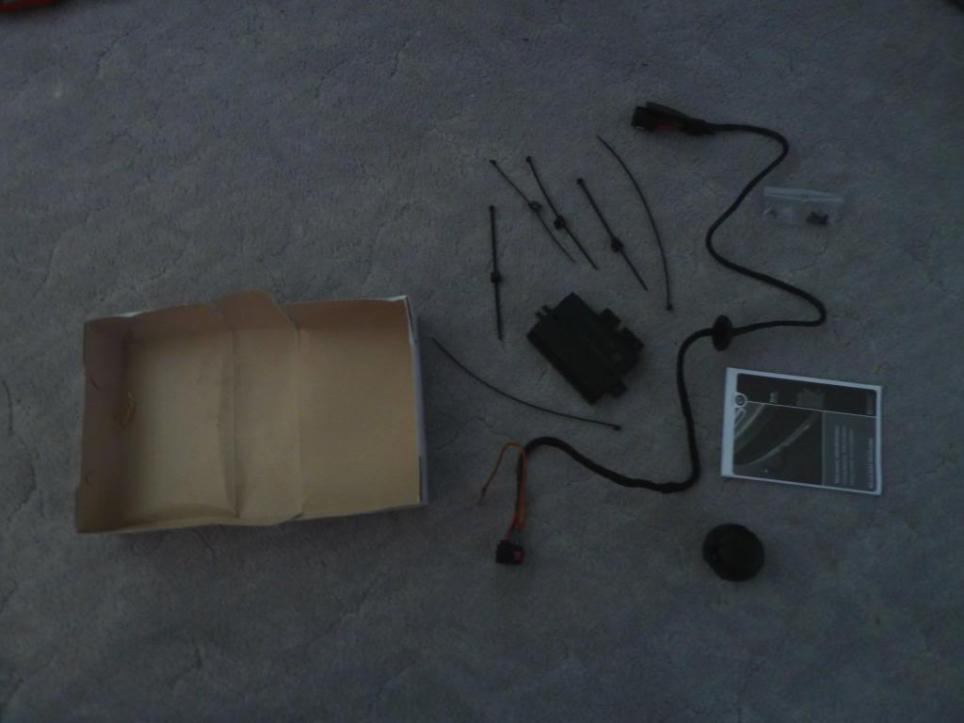
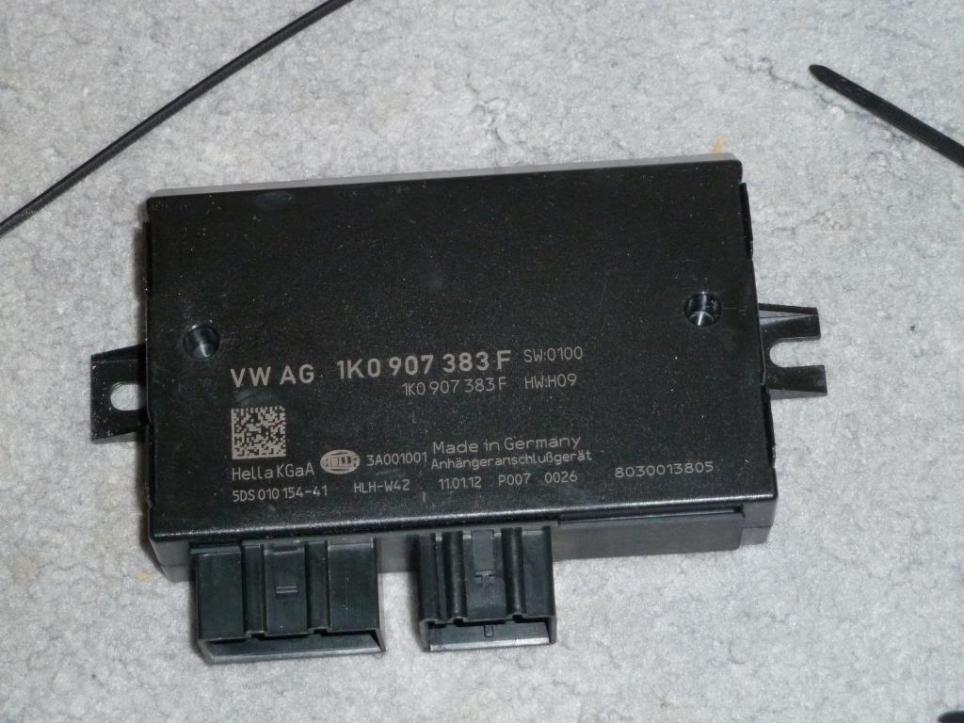
With this control Unit:
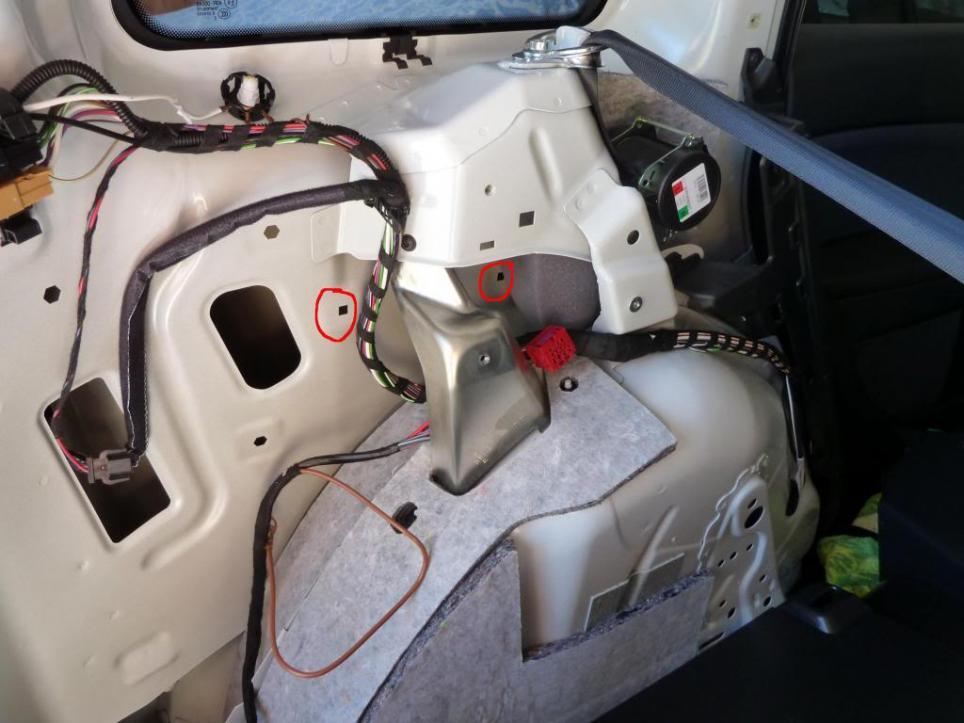
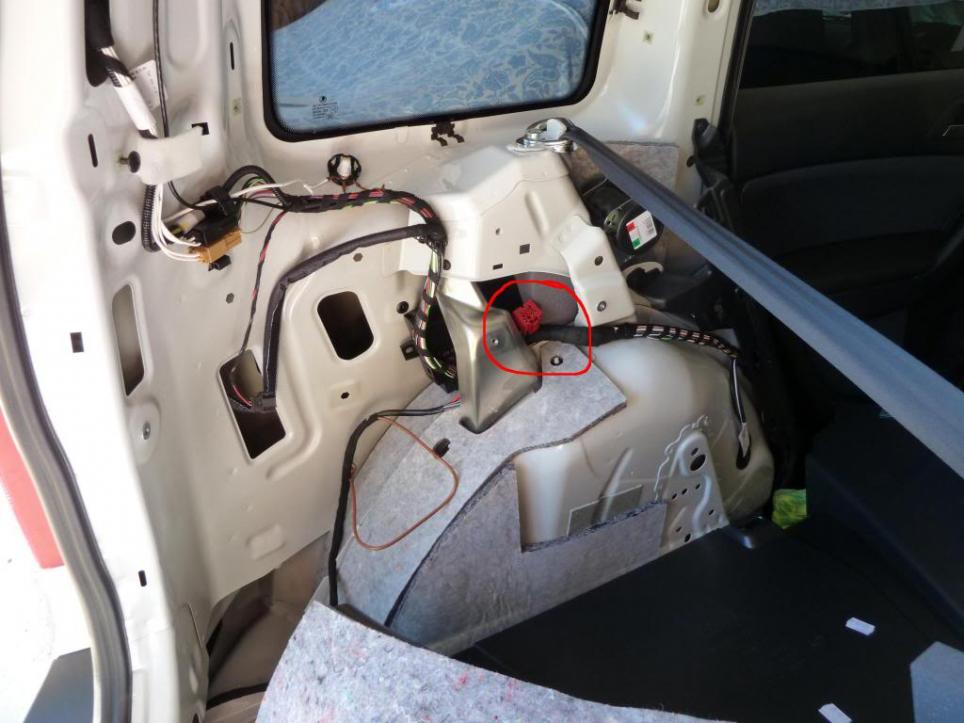
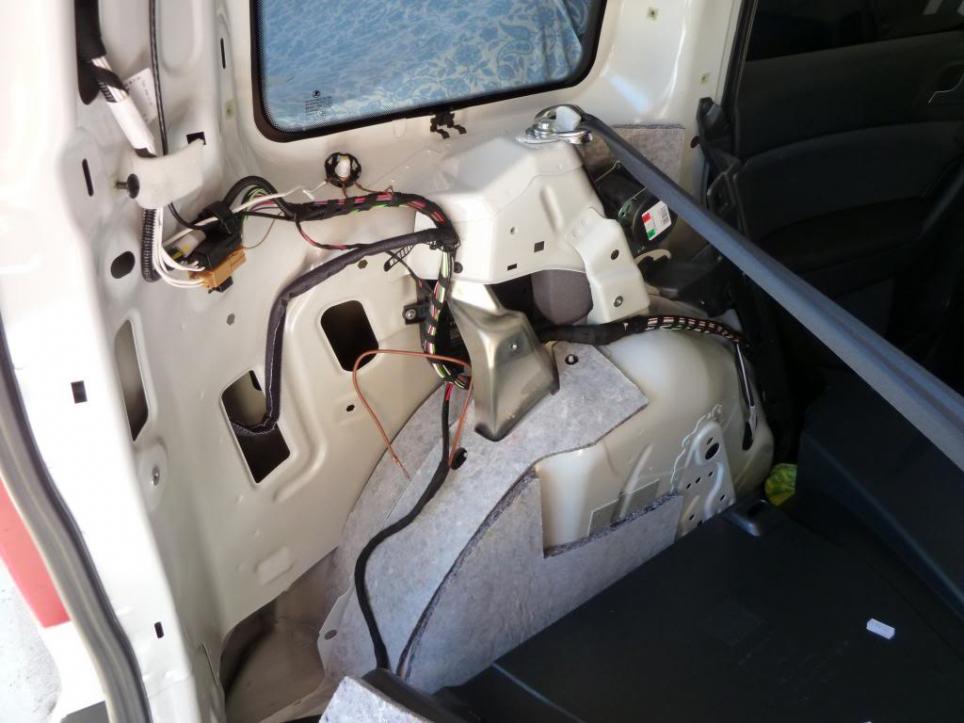
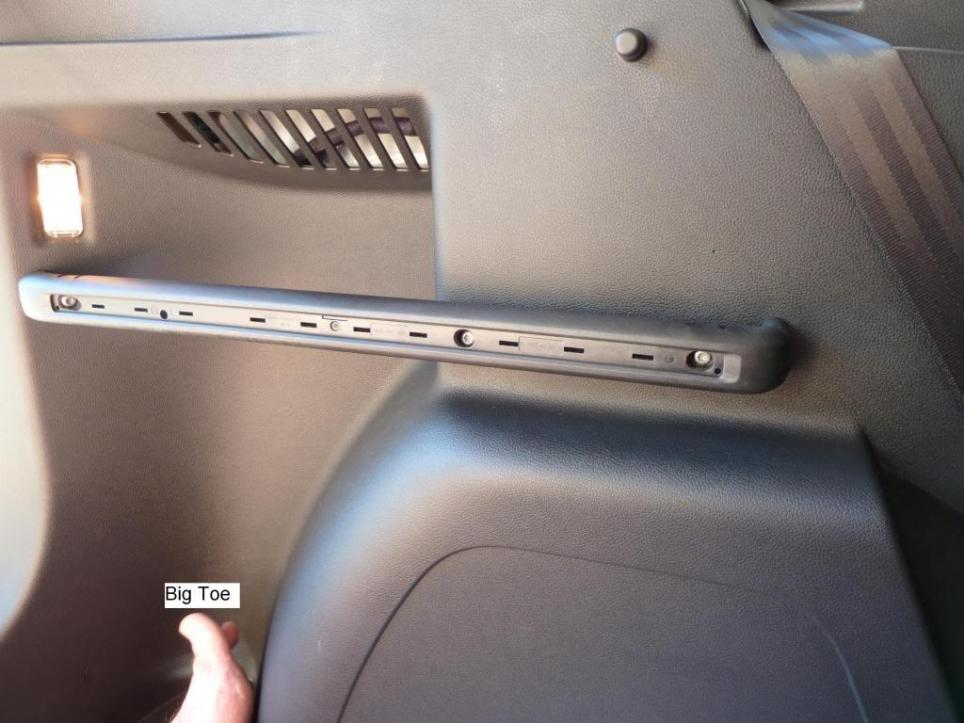
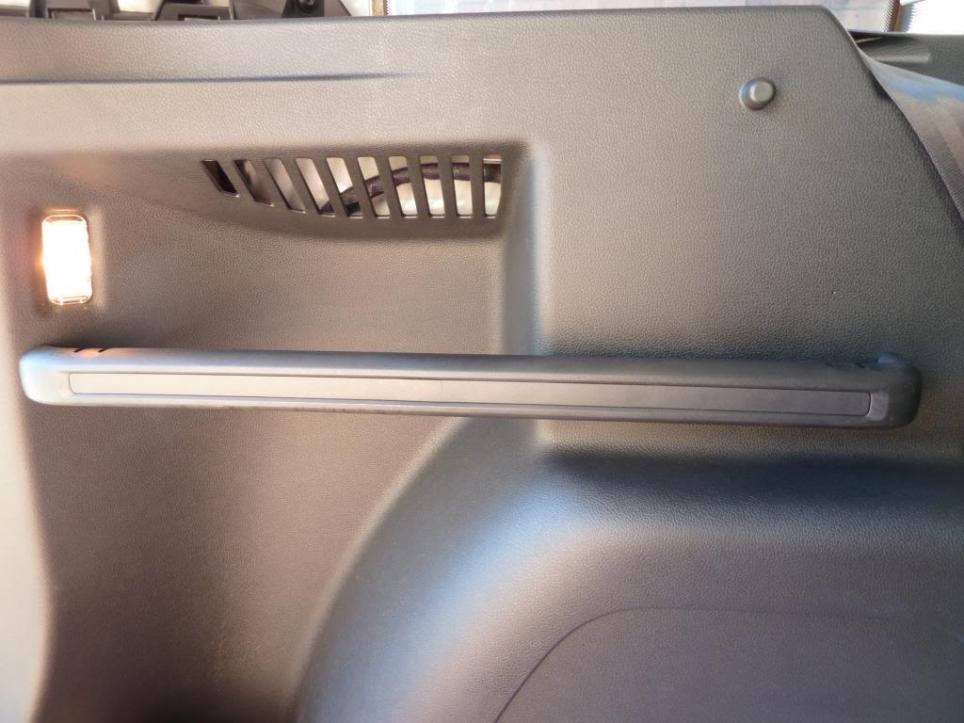
Here is where the control unit gets fitted.
Yep Here:
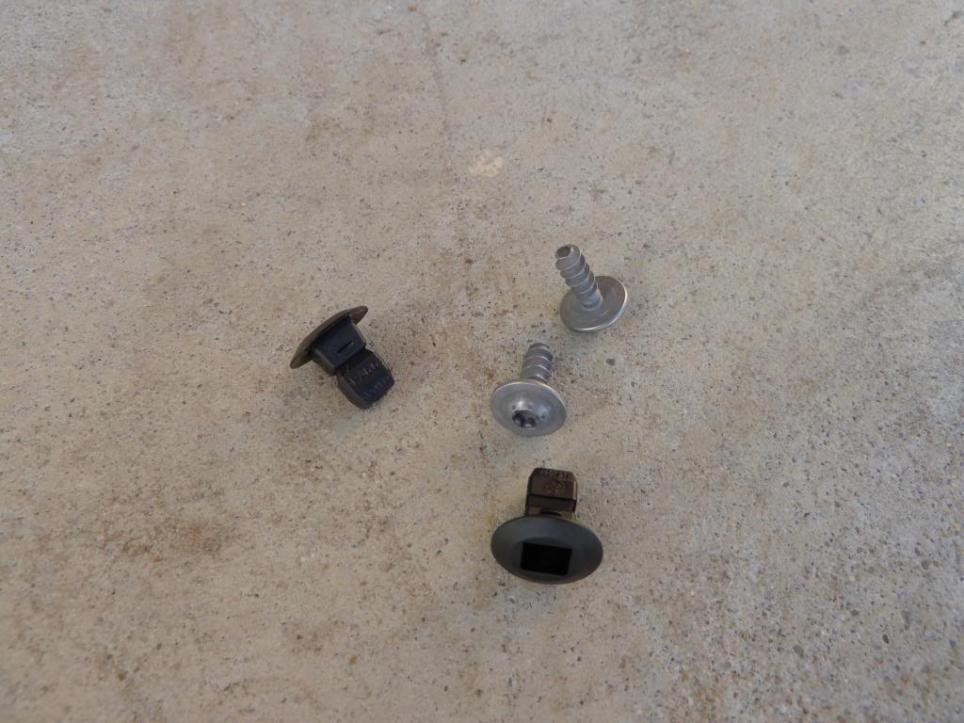
The kit comes with these plugs and screws:
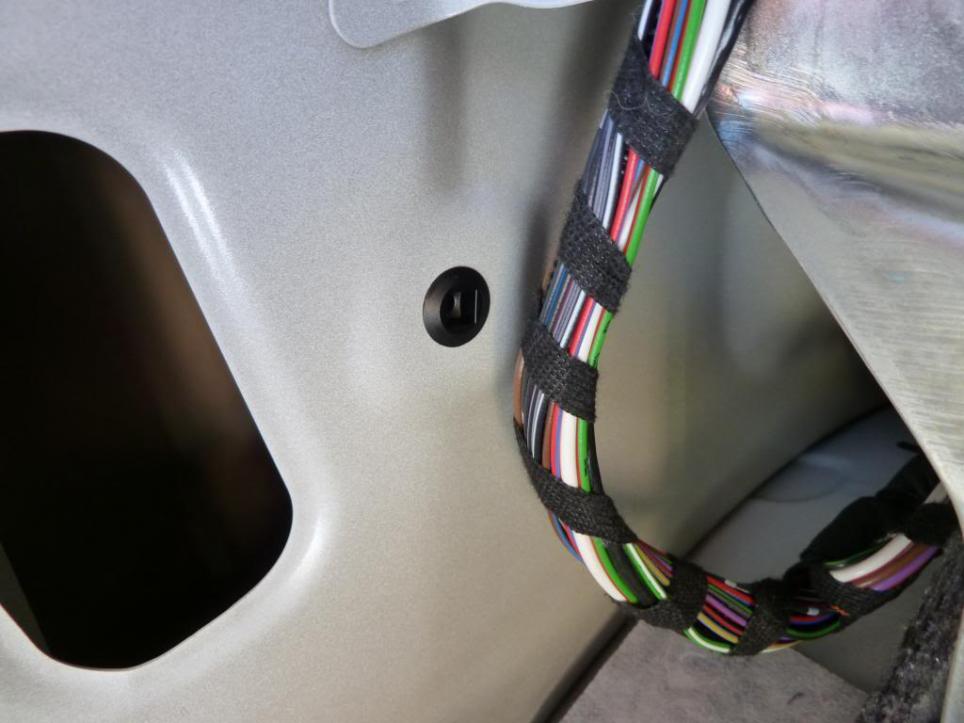
And they get fitted here:
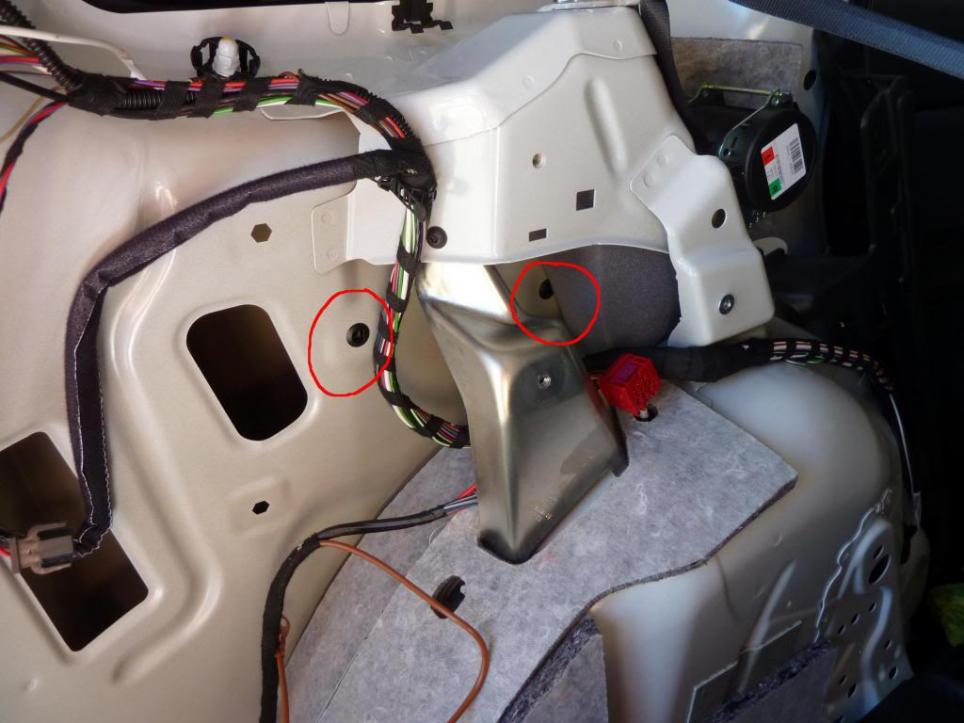
Like this:
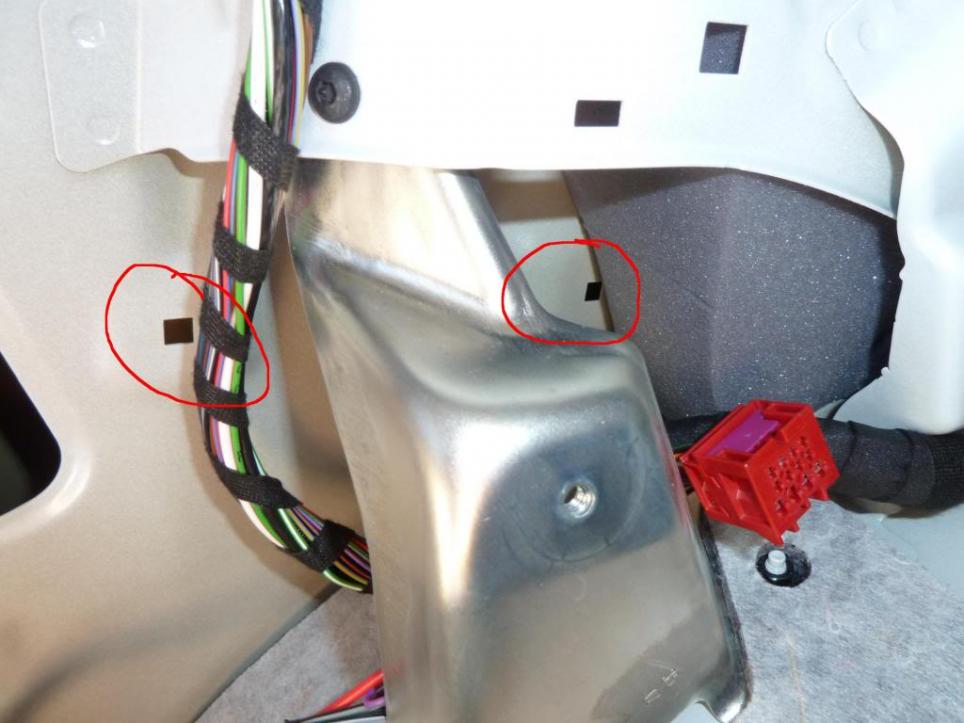
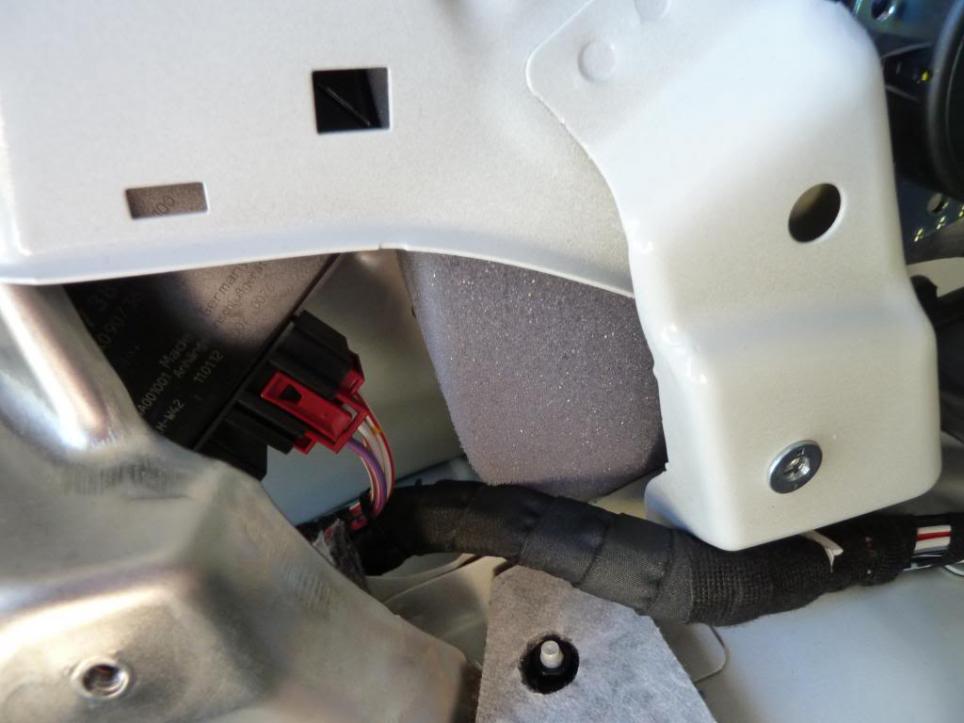
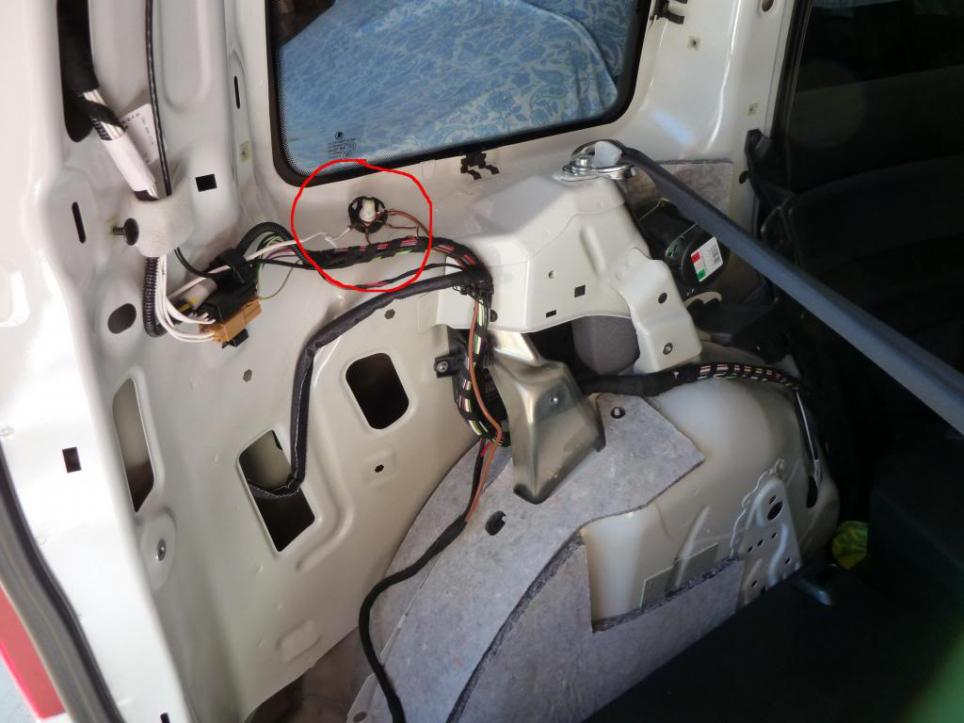
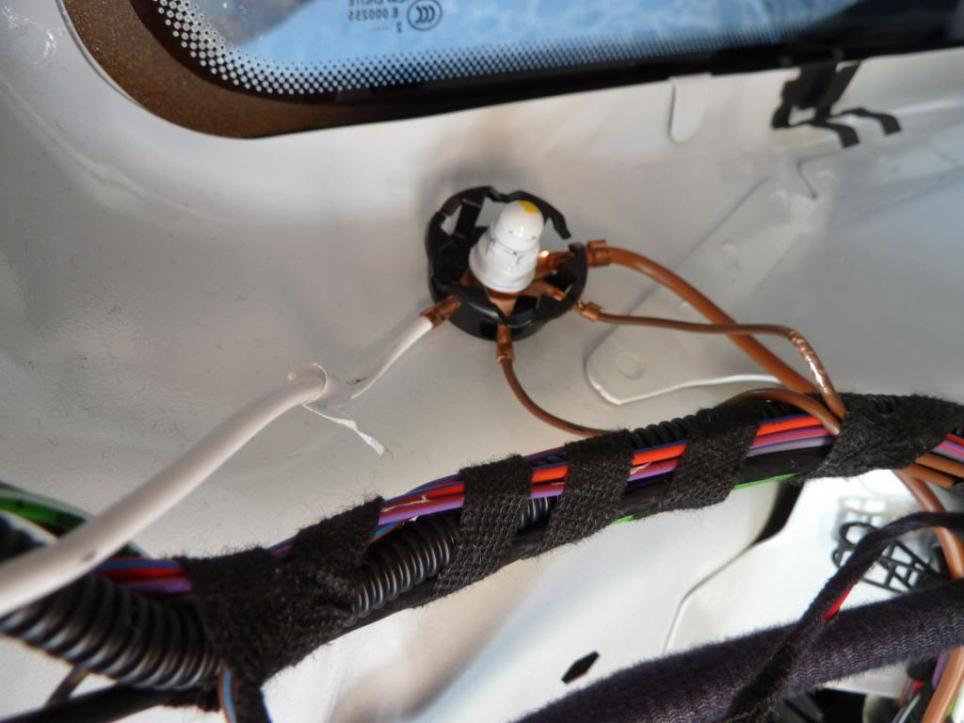
Then this red plug:
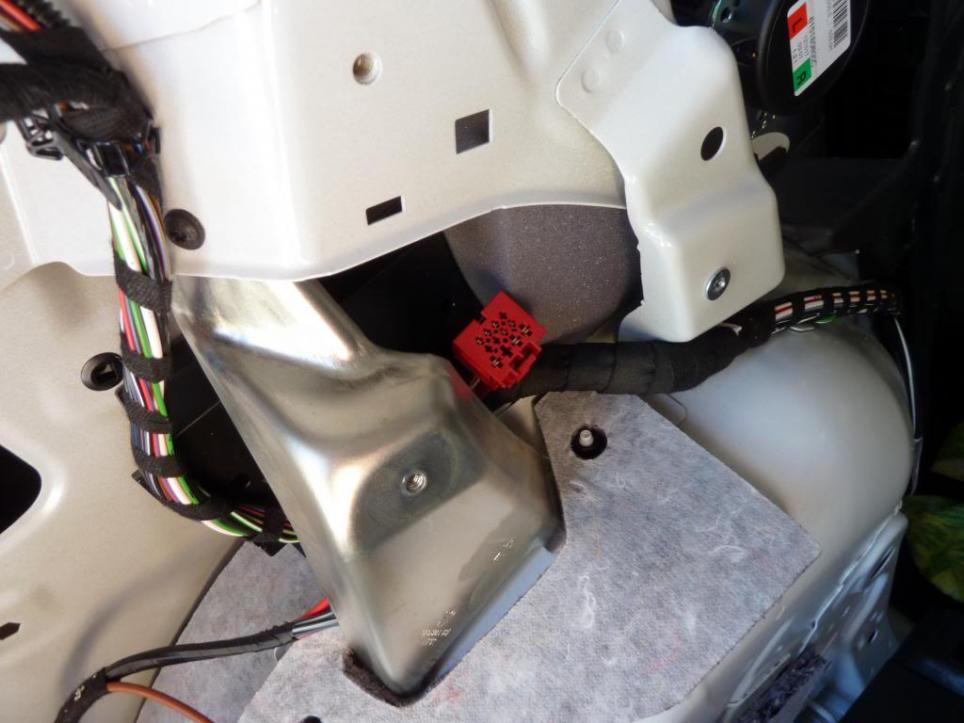
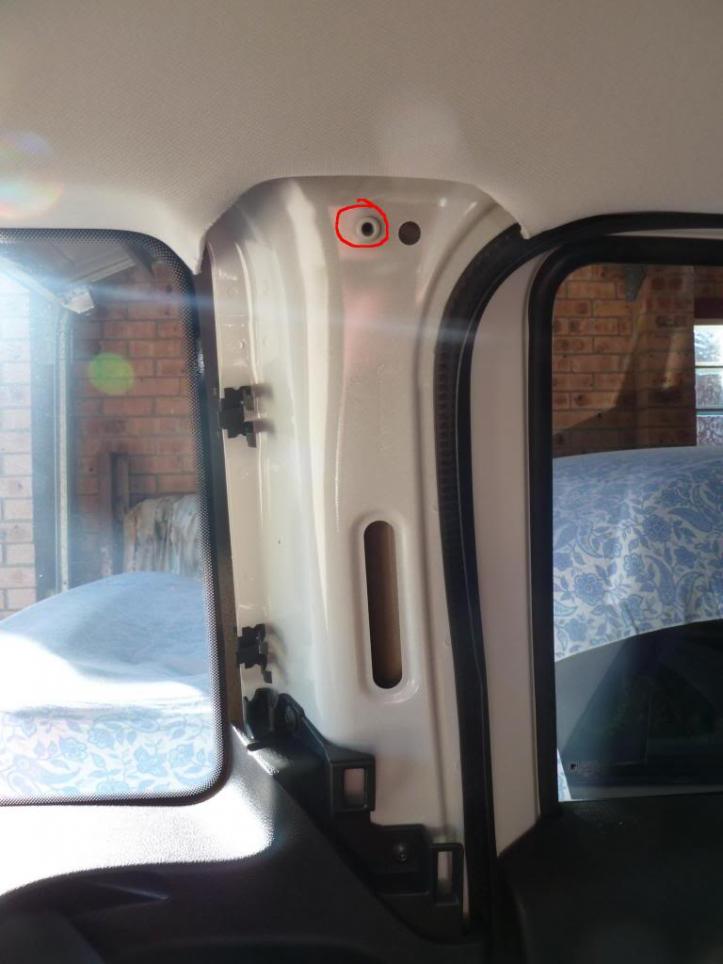
Found here:
Goes into the control unit like this:
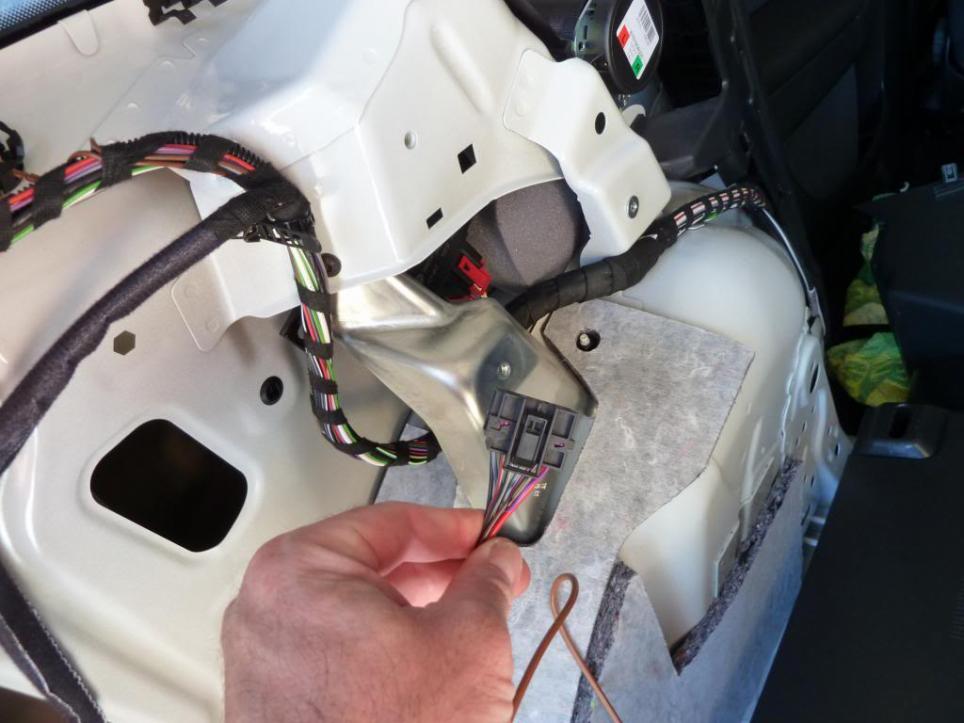
And this plug from the harness goes into the other socket on the control unit:
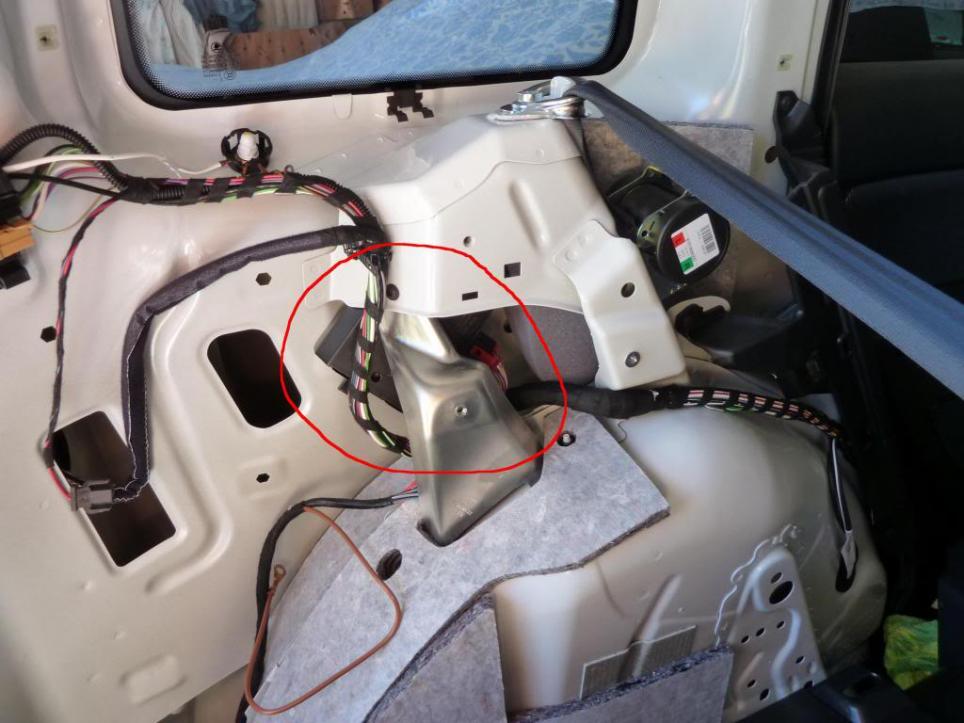
Then the control unit goes here:
And the screws go in. The control unit has a slot in one end and a hole in the other so you can put the first screw in and then just slot the control unit behind the screw and tighten it after the second screw is in:
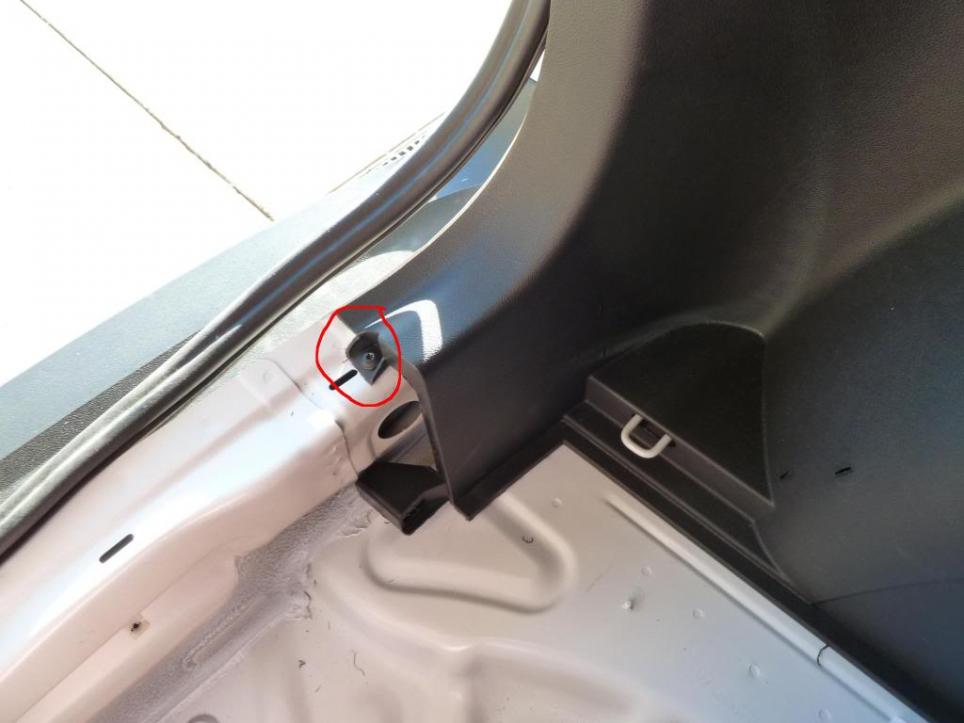
Take the earth wire and put it under this bolt:
Like this:
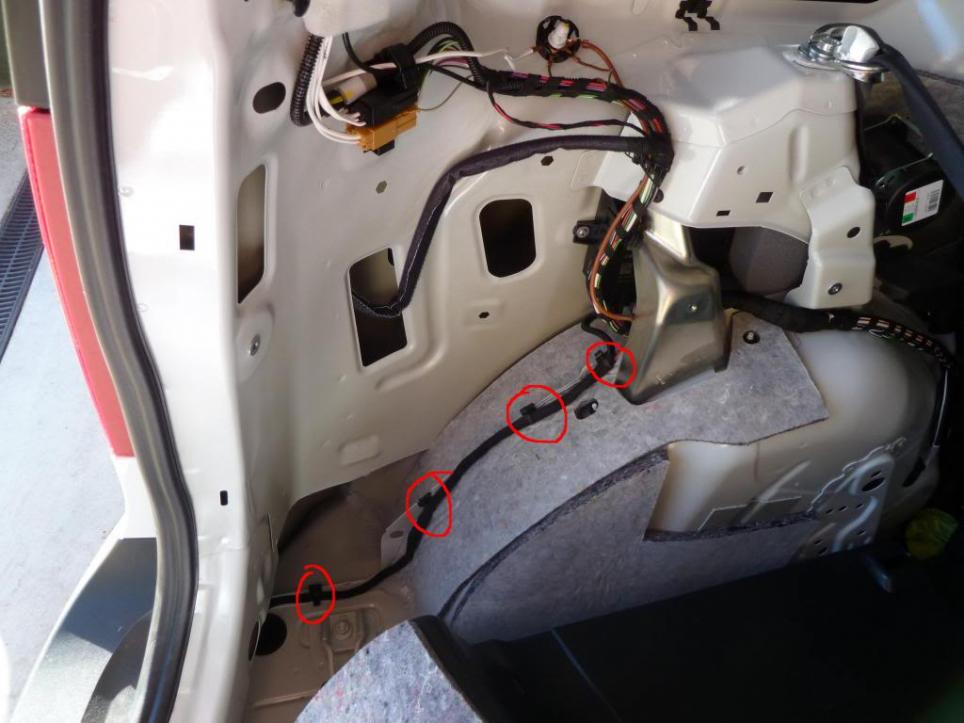
Then take these cable ties (supplied in the kit):
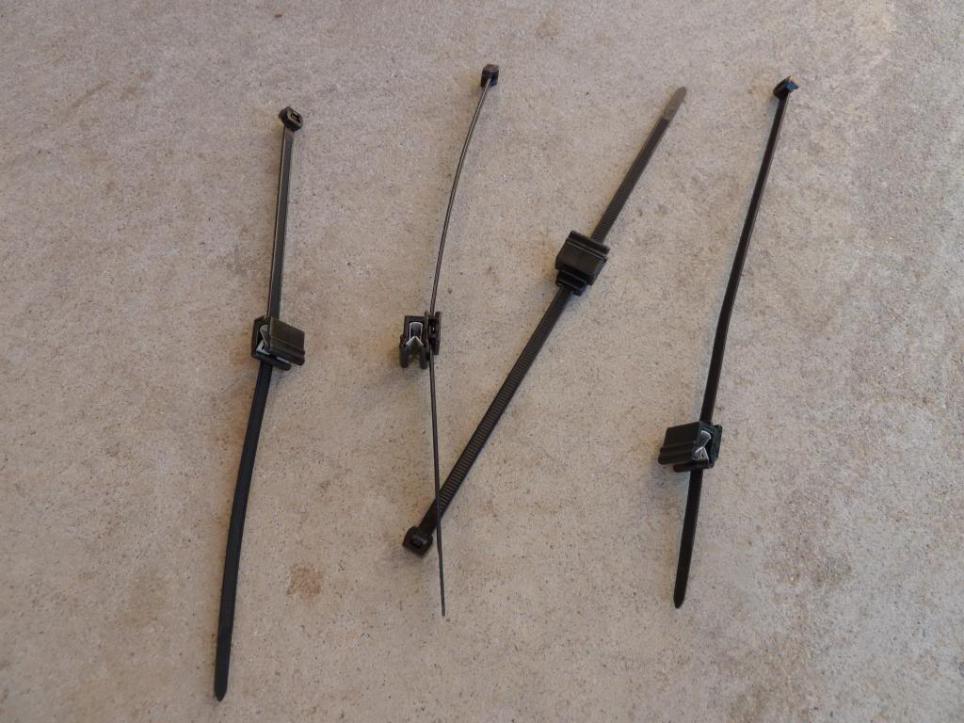
and push them over the panel seem. Here:
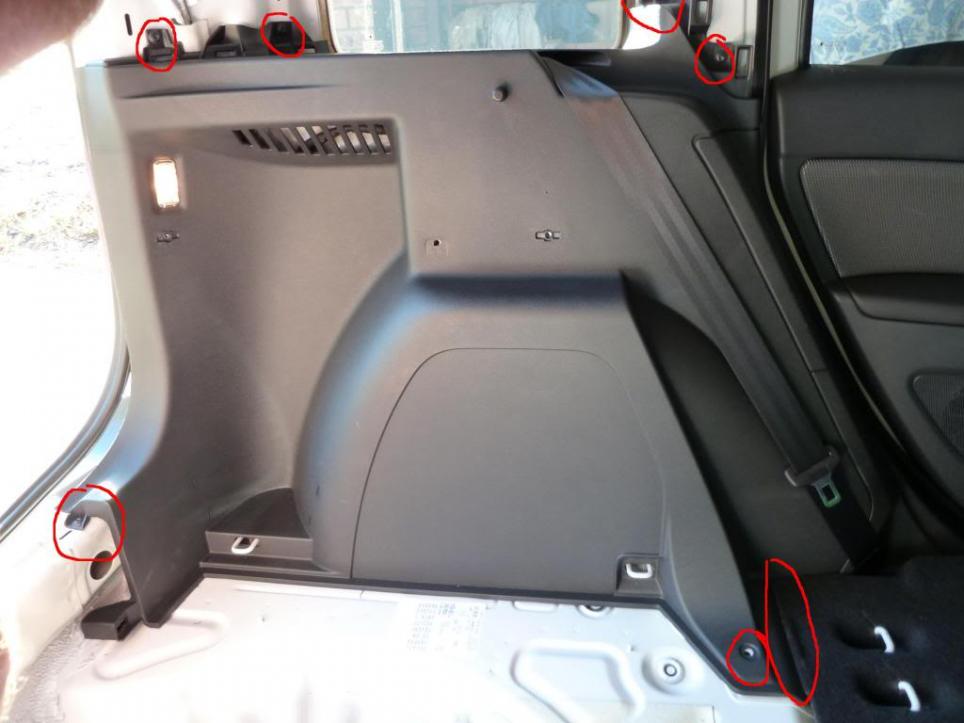
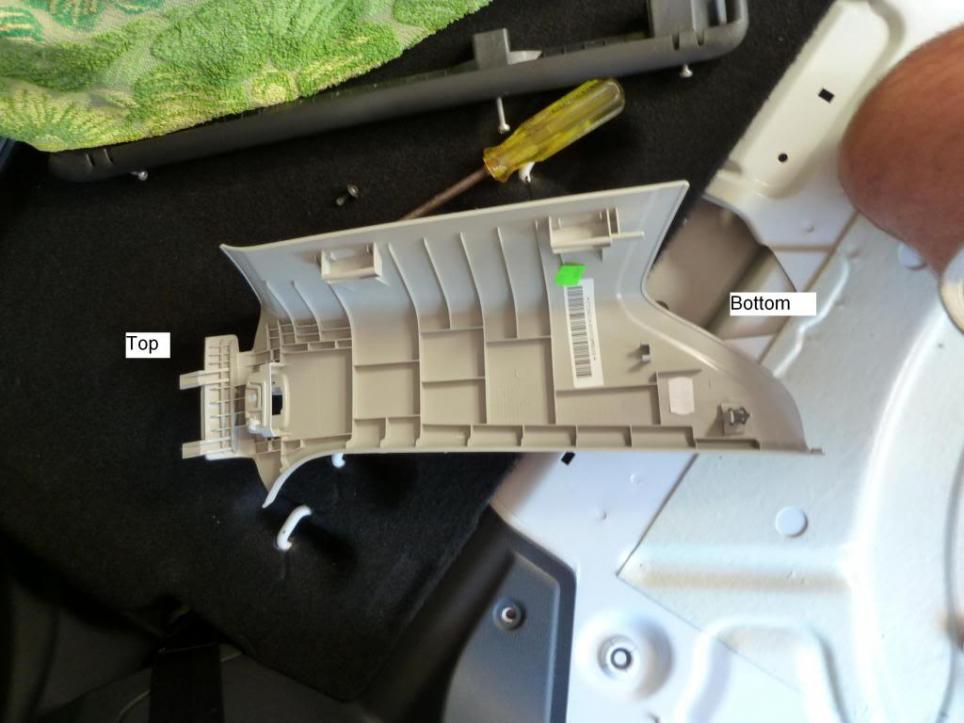
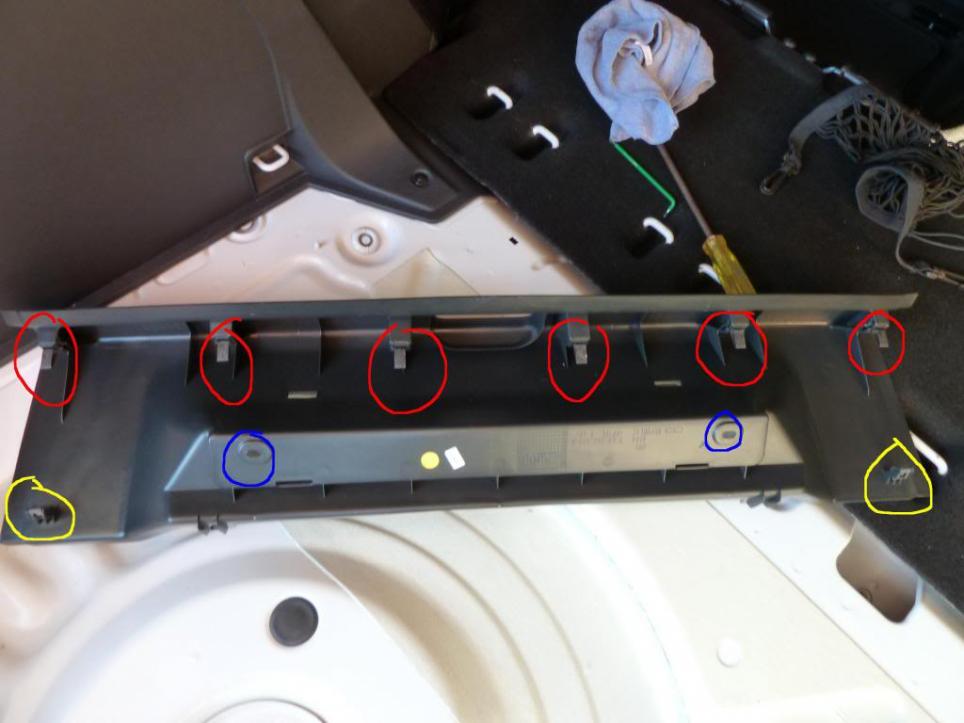
Ok from here on is how to reassemble the panels. You can just reverse for the removal procedure. I was too busy being careful not to break the clips when I was dismantling. Turned out I didn’t need to worry. This clips are well designed and never looked like breaking. There are some tricks though to pull the panels in the right directions.
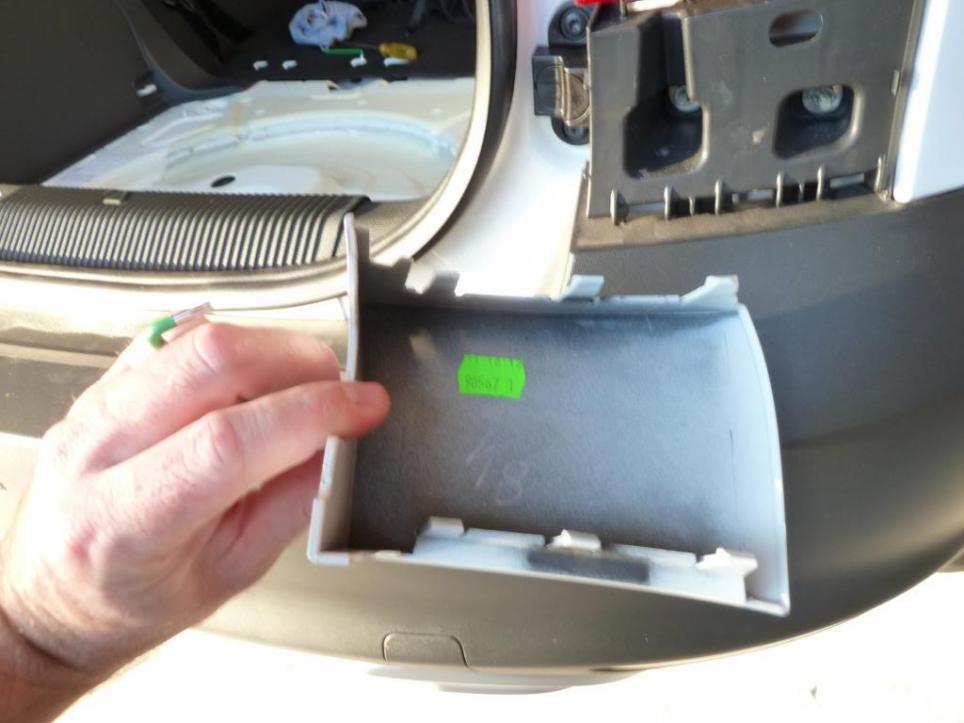
The main big panel has a clip here:, Just be sure to get the edge of the panel under the carpet.
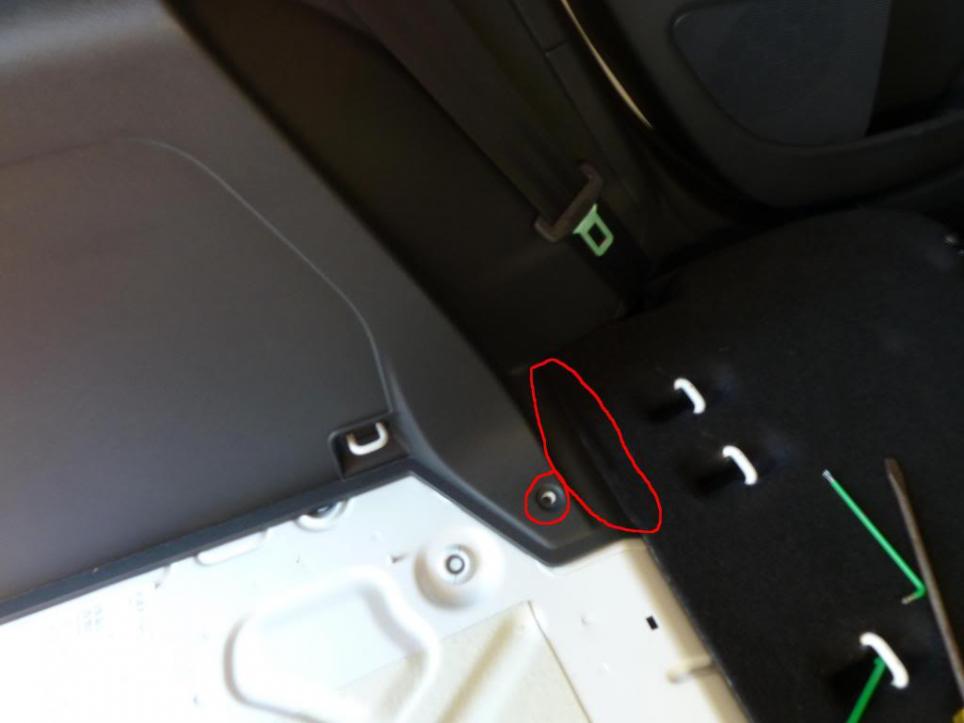
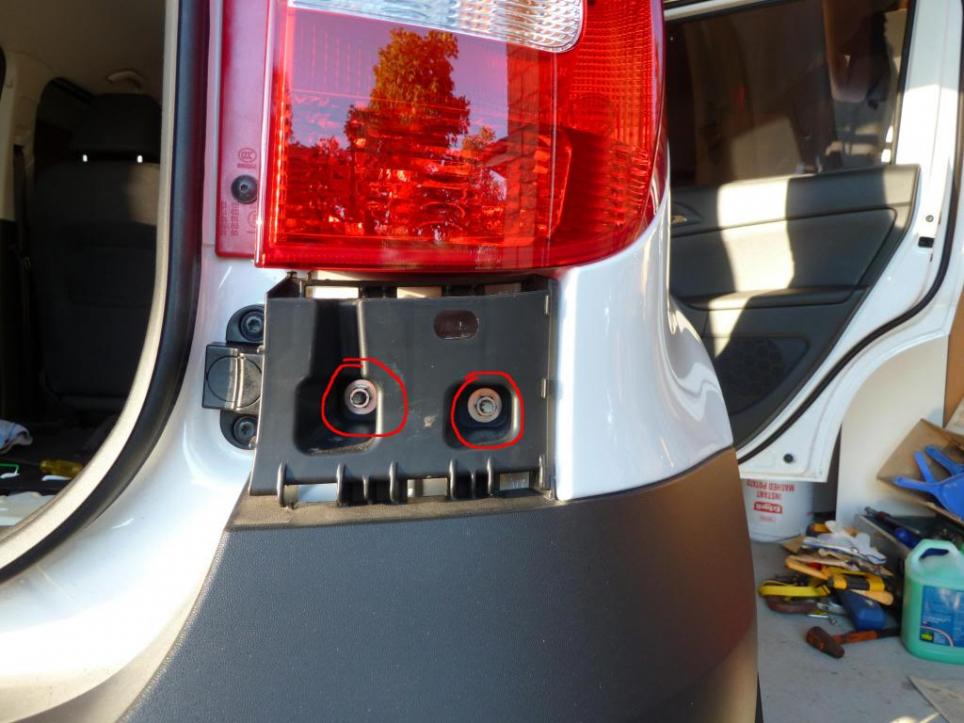
2 screws here:
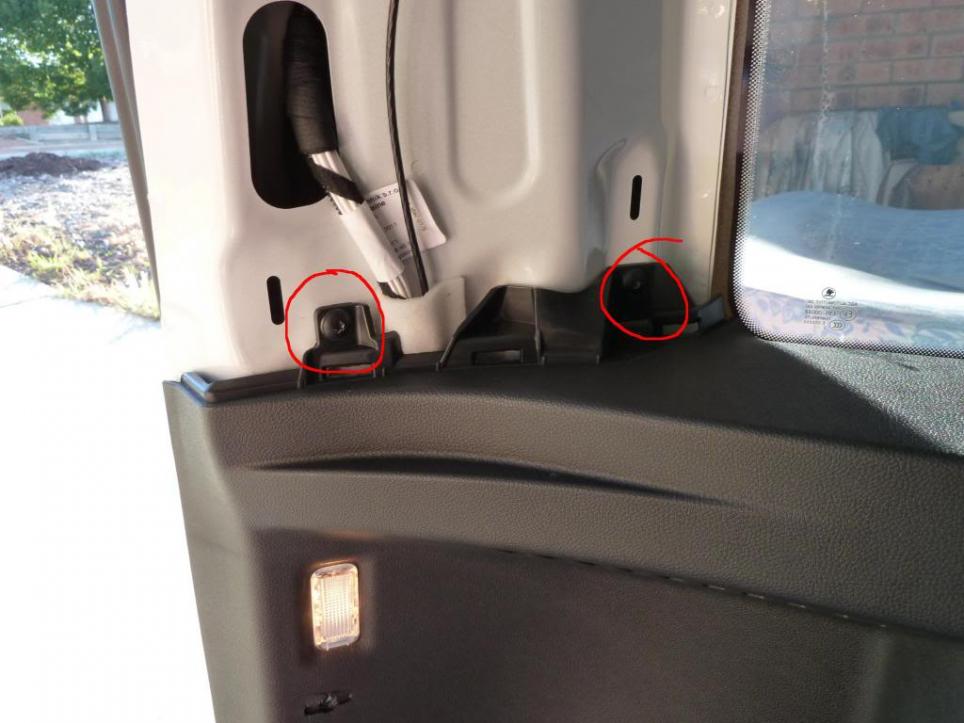
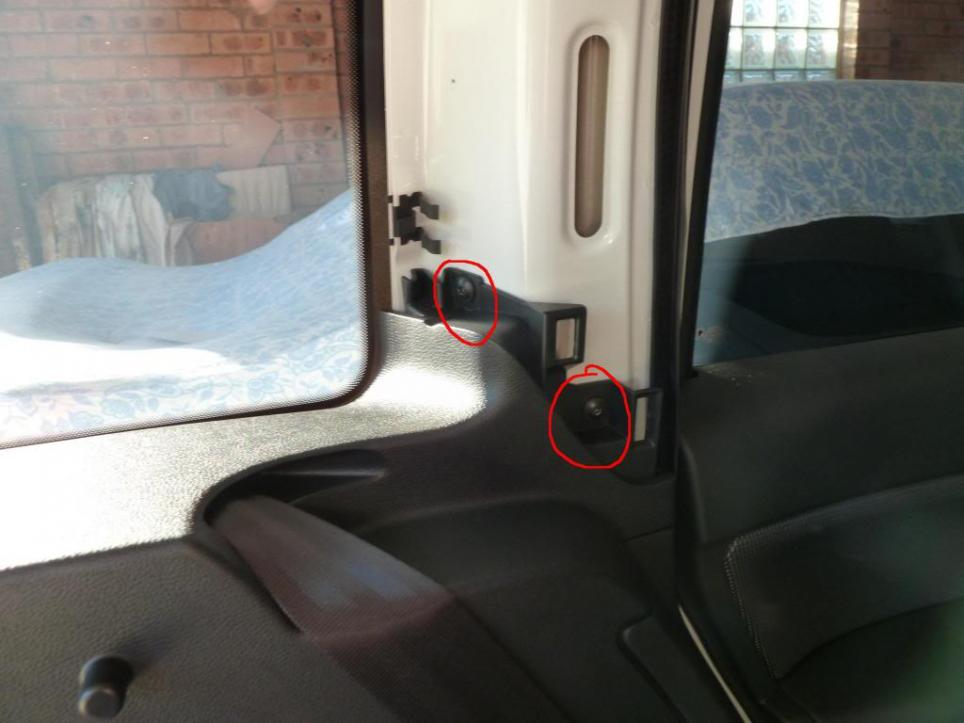
2 here:
I have to say with all I’d red, the task seemed quite daunting Turns out that once I had the right information and parts, it couldn’t have been easier.
My first issue was getting the right parts. I ordered everything from PF Jones in the UK. PF Jones have been fantastic to deal with and it was with their help I managed to sort out the only problem I had.
These are the initial parts I ordered. The wiring kit is wrong as it’s for a Yeti without “Tow Prep”. There are a couple of different types of detachable tow bars. I went with the Witter Flange type but I believe the Westfalia or Witter standard type would be equally as good.
NOT FOR TOW PREP Superb Yeti 7 Pin Dedicated Wiring Kit 2009 on 19220508RC
Skoda Yeti 2009 on Detachable Flange tow bar
3.5t 1" Jaw, Pin & Ball
Stainless Steel Bumper Protector
I have never heard of a Australian delivered Yeti not having “Tow Prep”. Amongst other things, “Tow Prep” provides a connector in the back of the vehicle for the trailer wiring harness to connect to.
I was aware the connector for the tow wiring was behind the plastic panel on the left hand side of the vehicle. I had received everything from PF Jones prior to my Yeti being delivered but once I had my Yeti and the panel off I could not work out how the PF Jones wiring harness connected so I called them. Their tech department was great and quickly worked out the kit was for a vehicle without “Tow Prep” they couldn’t provide me with the correct wiring kit but were happy for me to send the kit back for a refund.
I called around a couple of dealers here in Australia for the genuine Skoda part “EEA 630 002 E4”. I was quoted $730 from Canberra and $530 from Nowra. My Yeti was in pieces and I didn’t want to put it back together to have to pull it apart again so I wanted to get the wiring kit ASAP. With some help from a member from Briskoda Forum, I was put in contact with a dealer in the UK. Royal Mail freight for 5 days deliver and 1kg was only 22 pound. The price from the UK with freight ended up being $265. Take that Australian Dealers.
So this is what arrived: (Sorry about rubbish photo)
With this control Unit:
Here is where the control unit gets fitted.
Yep Here:
The kit comes with these plugs and screws:
And they get fitted here:
Like this:
Then this red plug:
Found here:
Goes into the control unit like this:
And this plug from the harness goes into the other socket on the control unit:
Then the control unit goes here:
And the screws go in. The control unit has a slot in one end and a hole in the other so you can put the first screw in and then just slot the control unit behind the screw and tighten it after the second screw is in:
Take the earth wire and put it under this bolt:
Like this:
Then take these cable ties (supplied in the kit):
and push them over the panel seem. Here:
Ok from here on is how to reassemble the panels. You can just reverse for the removal procedure. I was too busy being careful not to break the clips when I was dismantling. Turned out I didn’t need to worry. This clips are well designed and never looked like breaking. There are some tricks though to pull the panels in the right directions.
The main big panel has a clip here:, Just be sure to get the edge of the panel under the carpet.
2 screws here:
2 here:


Comment