Above Forum Ad

Collapse

Announcement

Collapse
No announcement yet.

Photos of Superb Bluetooth install?

Collapse
X
 
  • Filter
  • Time
  • Show
Clear All
new posts

  • Photos of Superb Bluetooth install?

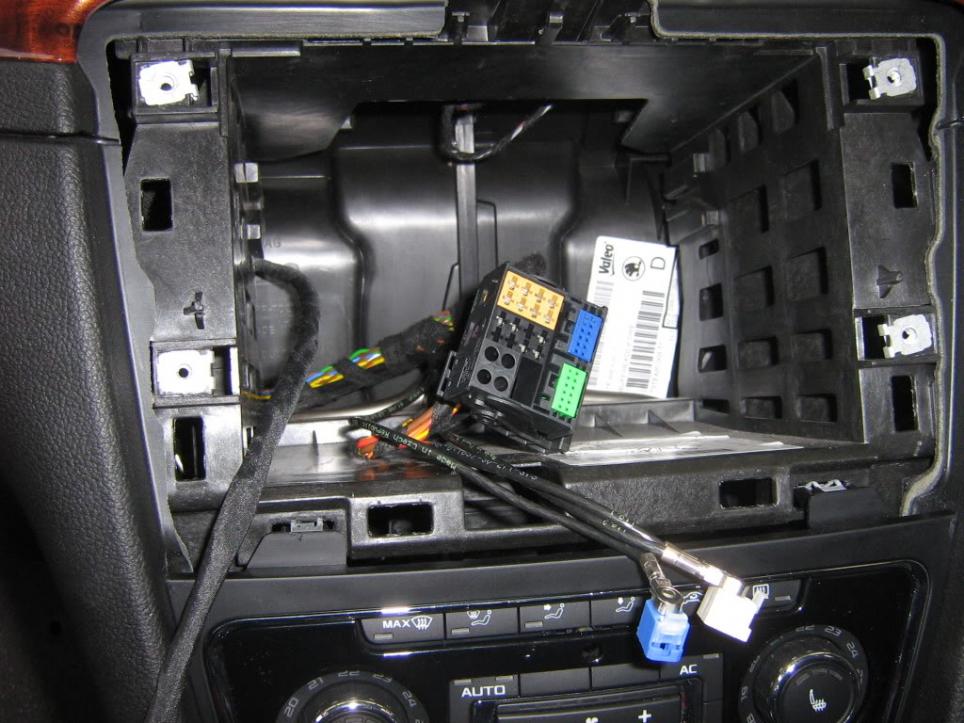
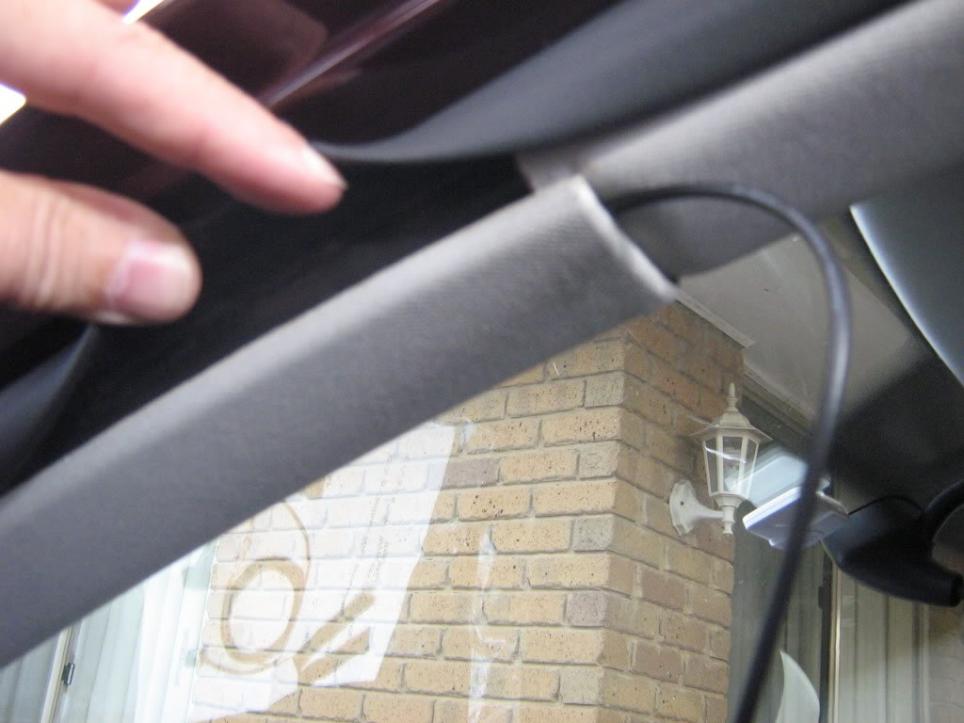
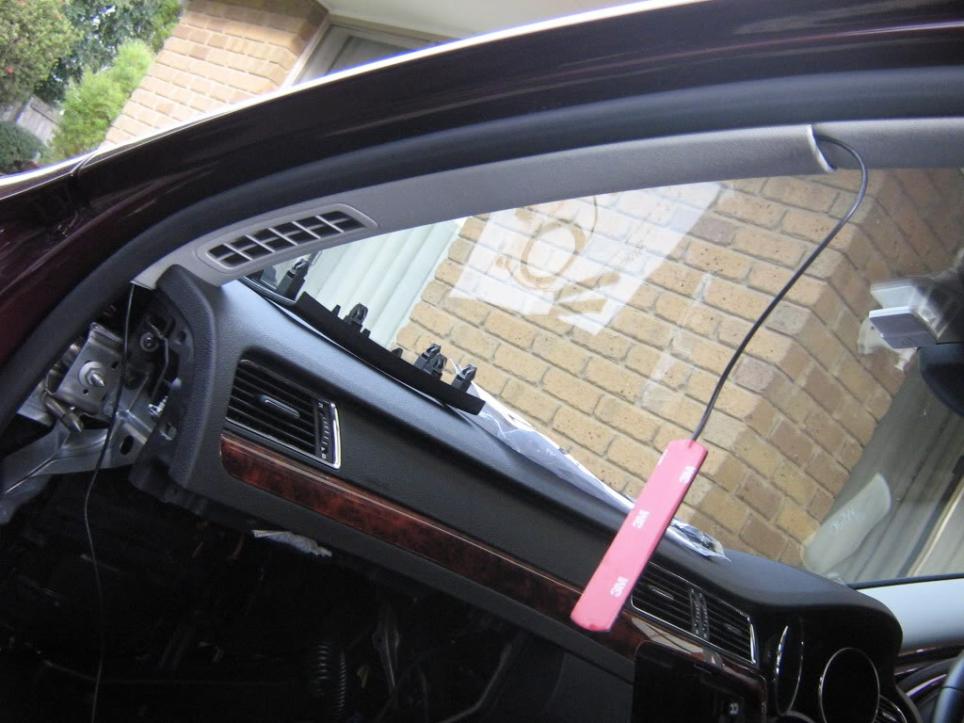
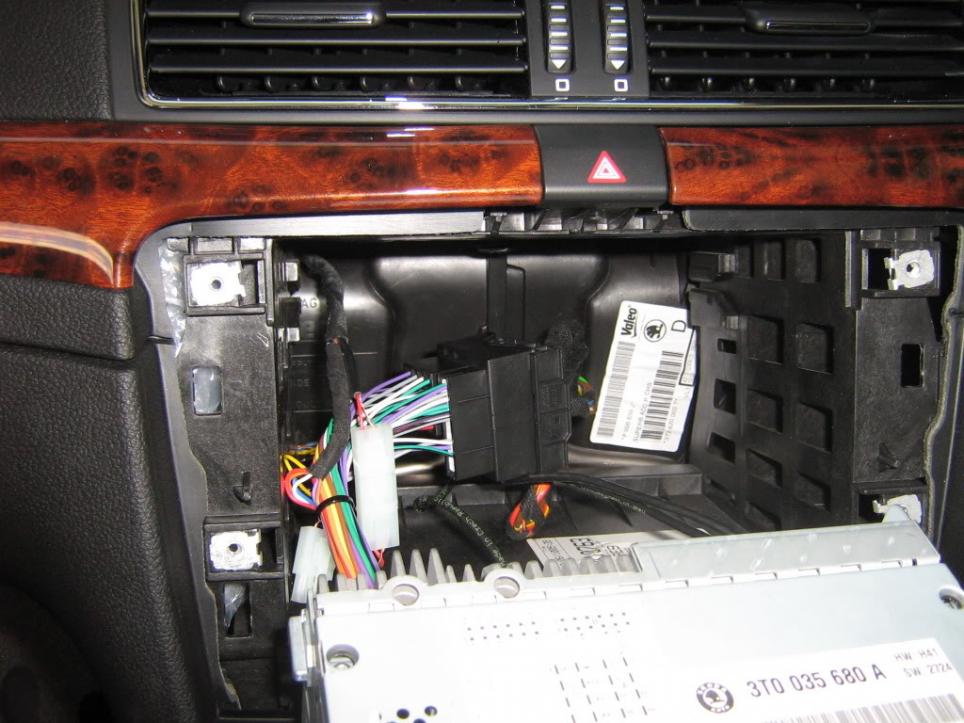
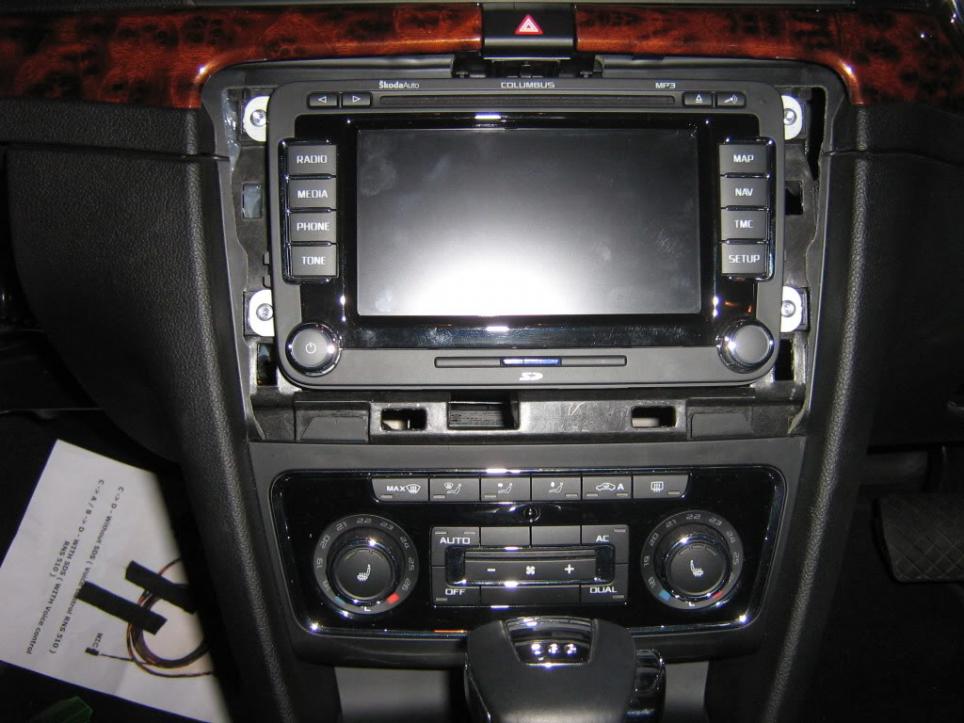
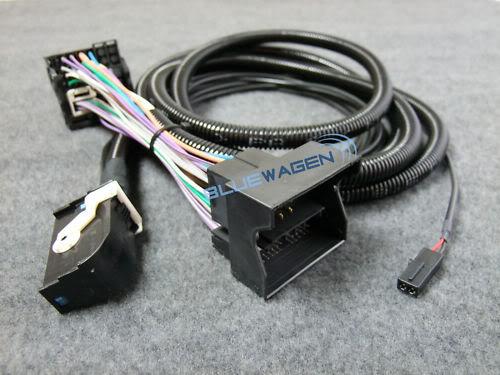
    Has anyone posted photos of a 'how to' install bluetooth in 2010 Superb Elegance. Simple and basic things like how to remove fascia etc etc. Just bought 3C8 035 730 B kit from Bluemotion in Spain. It's probably been done to death so where do I find it on forum? All help appreciated.
    Phillip in Roxburgh Park, Melbourne

  • #2
    There's a few guides for the Golf, etc - I can't imagine there being too many major differences that would leave you stumped (in case there are no Skoda-specific guides).

    Complete Installation Guide
    Some say he was the Stig... all we know is that he drives a VW Transporter.
    Audi A3

    Comment


    • #3
      thanks for help

      Originally posted by Ryan_R View Post
      There's a few guides for the Golf, etc - I can't imagine there being too many major differences that would leave you stumped (in case there are no Skoda-specific guides).

      Complete Installation Guide
      Thats gr8 exactly what I wanted. As you say same but different. I won't have the hassle of running microphone as I understand mine will connect to existing 'voice control' mic already installed where your new one is. I will I believe have to get dealer to set ECU after install but thats ok. Thanks again, will let you know how I go. Phillip, Roxburgh Park, Melbourne

      Comment


      • #4
        i installed the same bt kit - but version A, with my rns510 (columbus) unit.
        u can read more here. lots of pics.
        hopefully this helps.

        as for your mic, as long as u get the right bt wiring harness, u won't need to do anything - it will use the factory fitted voice-control mic, which is already connected to the rns510.

        u don't need to do anything to the "ecu". just get someone with vcds to activate the "telephone" module for u. dealer will charge u $$$$. a friendly forum member will do it for a 6-pack.
        Last edited by dArK5HaD0w; 20-03-2012, 08:30 PM.
        MY17 Superb 162TSI, Business Grey, Tech+Comfort Pack, APR ECU+TCU Stg 1, SLA, Rieger Splitter + Side Skirts, Eibach Pro-Kit Springs, Hardrace Swaybar, TPMS
        sigpic

        Comment


        • #5
          Fantastic. Congratulations on job well done. Well the ball is firmly back in my court now and must extract the digit and emulate your success. Thanks again. Oh and 6-pack is definitely in my vocabulary whereas $$$$ is foreign to me. lol. Phillip, Roxburgh Park, Melbourne.
          (Is there anyone near me with the VCDS equipment?)

          Comment


          • #6
            Ask/check in here:
            VCDS Technical Resources
            Some say he was the Stig... all we know is that he drives a VW Transporter.
            Audi A3

            Comment


            • #7
              Well digit extracted and unit fitted. SOS calling only operates b4 I find someone to program things.
              Reasonably easy really armed with advice and confidence from you guys. Thanks again.
              Have pictures and will write full story soon. Phillip, Roxburgh Park, Melbourne

              Comment


              • #8
                Originally posted by phillawed View Post
                Well digit extracted and unit fitted. SOS calling only operates b4 I find someone to program things.
                Reasonably easy really armed with advice and confidence from you guys. Thanks again.
                Have pictures and will write full story soon. Phillip, Roxburgh Park, Melbourne


                Typical I guess I was hesitant about tearing the dashboard of my new Skoda apart!
                Took a little time just to get Columbus surround off, not wanting to scratch or break anything. I found that levering under bottom corner was less effective than attacking from top corner as that is how I got mine off. Someone suggested plastic spatula but not having one I used a plastic ruler which did the job without marking anything.

                Having a little kit of special hex bits I was then able to easily remove Columbus unit (4 screws) and it just slides forward and out with oodles of wire enough to get at and remove loom plugs at the back. The plug on the back of this is huge and the female on the new loom is even bigger. More on this later.

                Having read quite a few posts and eyeing off the dash board I then removed the glove box hoping to fit new module in the dash between Columbus and glove box. Turns out there is plenty of room there and that is what I eventually did.

                I then turned my attention to the new aerial. I liked what another member did of going up A pillar and sticking it to top of windscreen. Routing wire was easy without even taking trim off but Muggins (me)had put rego sticker too close to corner of screen to fit new aerial. I have left it tucked inside A pillar trim to see if reception is ok or until I get rego renewal.


                Ok all is in readiness to put it all together … but!
                Connecting in the new harness to rear of Columbus was easy with plenty of room to work. The unit slips back in easily and I am home free … but!

                There is simply not enough room behind the Columbus to fit these 2 huge conjoined plugs AND get the unit back in position. If you are a little squeamish don’t read the next bit. I cut a section of the left wall of the radio bay out, joined up the huge harness plugs in the section between the radio bay and the glove box and poked the new connector back through my new ‘hole’ and into the Columbus. This had to fit because it was effectively the same as it came out. And it did! The section I cut was plastic and it took all of 30 seconds with a piece of hacksaw blade. Rough maybe but effective definitely and I don’t think I’ve compromised the integrity of anything.

                With the new unit I wrapped it in bubble wrap and cable tied it in the gap between the radio bay and the glove box. Maybe too much bubble wrap? Upon refitting the glove box I found the r/h hinge fouling against the new appendage. Hmmm, less bubble wrap and thoughts of ‘do these things heat up with use?’ and I decided that if I cable tie securely very little if any bubble wrap is required. Job done.

                I tidied up all excess wiring and neatly cable tied away. Refitted glove box (easy once you know how) and refitted the button on the catch which you must remove to get at top right screw. Don’t forget cable connectors.

                It only works on ‘emergency call’ presumably until I get someone to program things. ANY TAKERS? It works through front right speaker and does mute the radio. ‘Emergency’ etc shows on screen but I didn’t think to look at MFD between the dials.
                All up about 3hrs with time off for dinner in the middle. Not helped by paranoia of marking something, not being able to see with glasses off or on and a big ugly torch for light! It could be done in 1 hr or less. That’s how clever I am … after the fact. Lol
                Would appreciate contact from anyone who can program, or knows someone who can program, as keen to finish.
                Phillip, Roxburgh Park, Melbourne, 0417573540, 0393051421

                ---------- Post added at 09:59 AM ---------- Previous post was at 09:58 AM ----------

                tried to put pics as well but still not allowed?

                Comment


                • #9
                  • I admire the valuable information you offer in your post, thanks a lot
                  AV Receivers

                  Comment


                  • #10
                    Originally posted by phillawed View Post
                    Typical I guess I was hesitant about tearing the dashboard of my new Skoda apart!
                    Took a little time just to get Columbus surround off, not wanting to scratch or break anything. I found that levering under bottom corner was less effective than attacking from top corner as that is how I got mine off. Someone suggested plastic spatula but not having one I used a plastic ruler which did the job without marking anything.

                    Having a little kit of special hex bits I was then able to easily remove Columbus unit (4 screws) and it just slides forward and out with oodles of wire enough to get at and remove loom plugs at the back. The plug on the back of this is huge and the female on the new loom is even bigger. More on this later.

                    Having read quite a few posts and eyeing off the dash board I then removed the glove box hoping to fit new module in the dash between Columbus and glove box. Turns out there is plenty of room there and that is what I eventually did.

                    I then turned my attention to the new aerial. I liked what another member did of going up A pillar and sticking it to top of windscreen. Routing wire was easy without even taking trim off but Muggins (me)had put rego sticker too close to corner of screen to fit new aerial. I have left it tucked inside A pillar trim to see if reception is ok or until I get rego renewal.


                    Ok all is in readiness to put it all together … but!
                    Connecting in the new harness to rear of Columbus was easy with plenty of room to work. The unit slips back in easily and I am home free … but!

                    There is simply not enough room behind the Columbus to fit these 2 huge conjoined plugs AND get the unit back in position. If you are a little squeamish don’t read the next bit. I cut a section of the left wall of the radio bay out, joined up the huge harness plugs in the section between the radio bay and the glove box and poked the new connector back through my new ‘hole’ and into the Columbus. This had to fit because it was effectively the same as it came out. And it did! The section I cut was plastic and it took all of 30 seconds with a piece of hacksaw blade. Rough maybe but effective definitely and I don’t think I’ve compromised the integrity of anything.

                    With the new unit I wrapped it in bubble wrap and cable tied it in the gap between the radio bay and the glove box. Maybe too much bubble wrap? Upon refitting the glove box I found the r/h hinge fouling against the new appendage. Hmmm, less bubble wrap and thoughts of ‘do these things heat up with use?’ and I decided that if I cable tie securely very little if any bubble wrap is required. Job done.

                    I tidied up all excess wiring and neatly cable tied away. Refitted glove box (easy once you know how) and refitted the button on the catch which you must remove to get at top right screw. Don’t forget cable connectors.

                    It only works on ‘emergency call’ presumably until I get someone to program things. ANY TAKERS? It works through front right speaker and does mute the radio. ‘Emergency’ etc shows on screen but I didn’t think to look at MFD between the dials.
                    All up about 3hrs with time off for dinner in the middle. Not helped by paranoia of marking something, not being able to see with glasses off or on and a big ugly torch for light! It could be done in 1 hr or less. That’s how clever I am … after the fact. Lol
                    Would appreciate contact from anyone who can program, or knows someone who can program, as keen to finish.
                    Phillip, Roxburgh Park, Melbourne, 0417573540, 0393051421

                    ---------- Post added at 09:59 AM ---------- Previous post was at 09:58 AM ----------

                    tried to put pics as well but still not allowed?
                    You need to host the pictures. Places like Picasa, Flikr or Photobucket and then insert the link in your post using the window's you're typing in top bar icon (3rd from the right).
                    Performance Tunes from $850
                    Wrecking RS OCTAVIA 2 Link

                    Comment


                    • #11
                      hope this works (Superb bluetooth photos)

                      Originally posted by Transporter View Post
                      You need to host the pictures. Places like Picasa, Flikr or Photobucket and then insert the link in your post using the window's you're typing in top bar icon (3rd from the right).


                      Comment


                      • #12
                        Originally posted by phillawed View Post
                        Connecting in the new harness to rear of Columbus was easy with plenty of room to work. The unit slips back in easily and I am home free … but!

                        There is simply not enough room behind the Columbus to fit these 2 huge conjoined plugs AND get the unit back in position. If you are a little squeamish don’t read the next bit. I cut a section of the left wall of the radio bay out, joined up the huge harness plugs in the section between the radio bay and the glove box and poked the new connector back through my new ‘hole’ and into the Columbus. This had to fit because it was effectively the same as it came out. And it did! The section I cut was plastic and it took all of 30 seconds with a piece of hacksaw blade. Rough maybe but effective definitely and I don’t think I’ve compromised the integrity of anything.
                        i did the exact same thing too to get all the quad lock connectors in place.

                        i had no room anywhere near the glovebox, hence i placed it behind the climatronic controls. plus the 9wz is a much bigger bt unit.

                        good to hear that ur install went well. now just for the coding.
                        once u have 'telephone' activated via VCDS coding, you should get the 'phone' menu in ur mfd, from which u can then setup/connect to a phone.
                        Last edited by dArK5HaD0w; 03-04-2012, 01:30 PM.
                        MY17 Superb 162TSI, Business Grey, Tech+Comfort Pack, APR ECU+TCU Stg 1, SLA, Rieger Splitter + Side Skirts, Eibach Pro-Kit Springs, Hardrace Swaybar, TPMS
                        sigpic

                        Comment


                        • #13
                          Noting the lack of space behind the radio unit for the large plugs, how does Skoda do it without cutting out the radio surround? I have the BT unit but am yet to fit it.

                          Comment


                          • #14
                            Originally posted by Ozsko View Post
                            Noting the lack of space behind the radio unit for the large plugs, how does Skoda do it without cutting out the radio surround? I have the BT unit but am yet to fit it.
                            when its factory fitted, there is no "piggy back" as such. the factory wiring will already have the bluetooth wiring incorporated, hence there is no need for an additional quad-lock connector.

                            in a retrofit situation, the quad-lock connector that normally goes to the back the rns510, is "intercepted" by a piggy back quad-lock connector. this connector then feeds the rns510 & the bluetooth wiring.

                            so effectively, u have 3 quad-locks when retrofitted, as opposed to just the 1 when its factory fitted.
                            MY17 Superb 162TSI, Business Grey, Tech+Comfort Pack, APR ECU+TCU Stg 1, SLA, Rieger Splitter + Side Skirts, Eibach Pro-Kit Springs, Hardrace Swaybar, TPMS
                            sigpic

                            Comment


                            • #15
                              fitting quad lock plugs

                              Originally posted by dArK5HaD0w View Post
                              when its factory fitted, there is no "piggy back" as such. the factory wiring will already have the bluetooth wiring incorporated, hence there is no need for an additional quad-lock connector.

                              in a retrofit situation, the quad-lock connector that normally goes to the back the rns510, is "intercepted" by a piggy back quad-lock connector. this connector then feeds the rns510 & the bluetooth wiring.

                              so effectively, u have 3 quad-locks when retrofitted, as opposed to just the 1 when its factory fitted.
                              Not to disagree with previous post but the other possibility is that with the dash being wired (from behind) prior to fitting in the car, even mutiple quad lock plugs could be fitted and located before dash goes into the fire wall? It is the proximaty to the fire wall or the heater/demister ducts I think that causes the problem. Phillip in Melbourne
                              Last edited by phillawed; 09-04-2012, 12:57 PM. Reason: sorry didn't sign

                              Comment

                              Working...
                              X