 Tweet
Tweet
Why was it that my Polo lacked an ilumination point around the key barrel, when more basic cars had it? Dunno. But I do know it bugged me having to fiddle around in the dark trying to place the key in the barrel without scraping the surrounding trim. So I resolved to change it this weekend...Timed in sync with overhead lighting upon door opening;
One 22c Jay Car clear LED (it emits a red light but is clear in colour - two benefits; 1. translucent when not on, so blends in with black trim. 2, it has a wider light dispersement when on, so gives greater warm glow, as apposed to over bright spot light focus). One $1.00 bag of Jay Car 470 Ohm resister - you'll just need one. One last Jay Car thing - 4 meters of their thinest figure of 8 cable. it needs to be thin so you can 'hide' it in the pillar and rooflining trim.
Oh and for safety - 5cm or so of heat shrink (covers the exposed metal of the led - so no short to car)
Following the instructions for running in-roof OEM mic for bluetooth cable (see elsewhere on forum) - in brief;
1. pop top half of steering column trim - it pops up easily
2. gently twist a small (3-4mm) hole into the rubber boot around the key barrel. This is the critical part in terms of getting the lighting effect correct. See my photos. The LED placement should be such that the lighting shines down. I found placing it under the wiper stalk worked best.
3. solder up your LED, resistor, and fine wire. Check the polarity of your wiring at this stage. LEDs have a flat edge - thats the -ve side. Solder it to the cable's black lead. Ensure you heat shrink each LED leg individually so neither leg shorts to each other, or the car body.
4. poke (read - wiggle and gentrly coerce) the LED head through the hole in the rubber boot - from within the steering column plastic trim)
5. run the cable down the inside of the body of the steering trim - ensure it is clear of the wiper stalk.
6. run it up and past the fuse box slot.
7. run it towards the driver door - up the rubber trim, until you reach the removable trim at window height. I found no need to remove the trim as the wire was so fine - it poked into the gap between trim and body and hid itself.
8. run the wire under the headlining along the front top of the windscreen - again easily done.
9. remove the front plastic trim beside the over head lighting / individual reading light trim piece.
10. gently pull down / remove reading lighting trim piece. The wire has about 10cm of spare length within the roof lining.
Now your ready to test then afix your two wires. The connector bringing power to the lighting module has 3 cables. the two outer ones are switched negative (ground) and the central one is switched positive (12v). Your LED wiring earlier is now important - your cable black lead is your ground, and the other remaining lead will be your 12v.
Bare 3-5mm of wire and insert black into either outside pin of the 3 pin connector, and the other wire into the middle (positive) pin of the three pin connector. (if you've got the wrong polarity - dont worry - you wont damage anything).
Key in ignition, or open a door, or press the middle lighting button (interior on) - your little red LED should light up.
If not - check your polarity / ensure you've got a decent connection.
Once I'd tested mine - I made a permenant connection for the leads by prizing them under the metal connector strip running around the lighting module.
I popped the lighting module back in place, popped the steering column trim back, and then took these shots;
(total instal time - circa 3 hours)
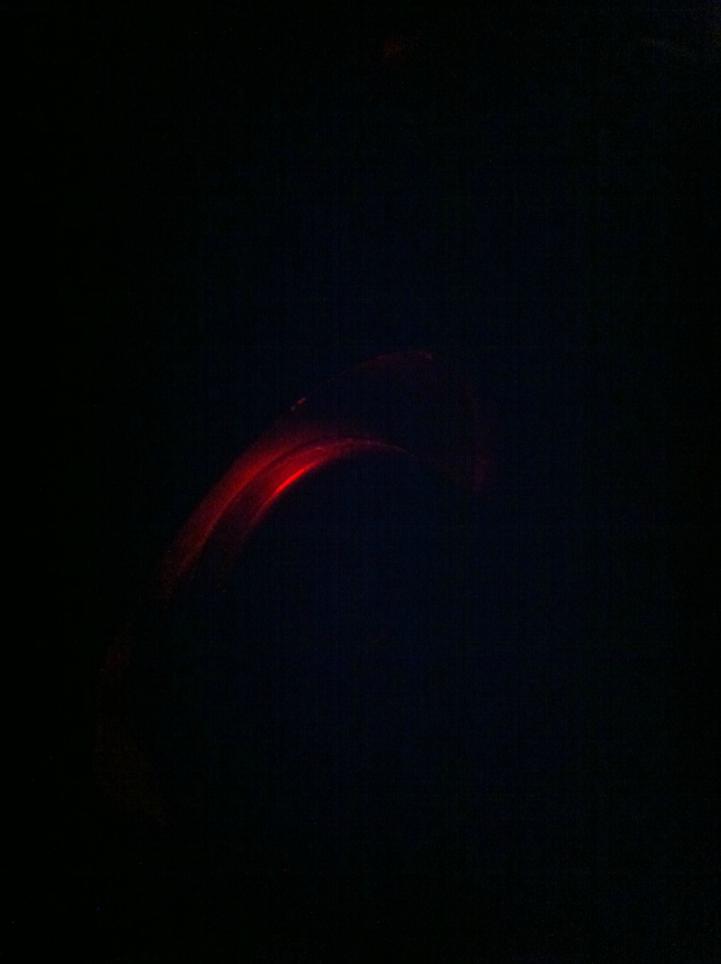
with door open;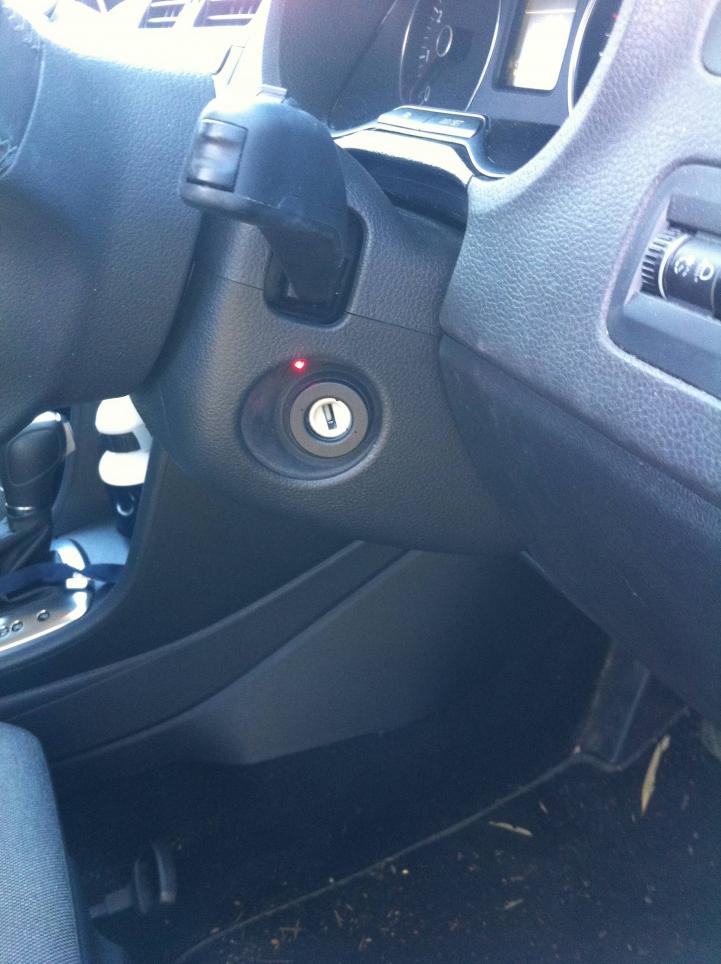
key approaching barrel;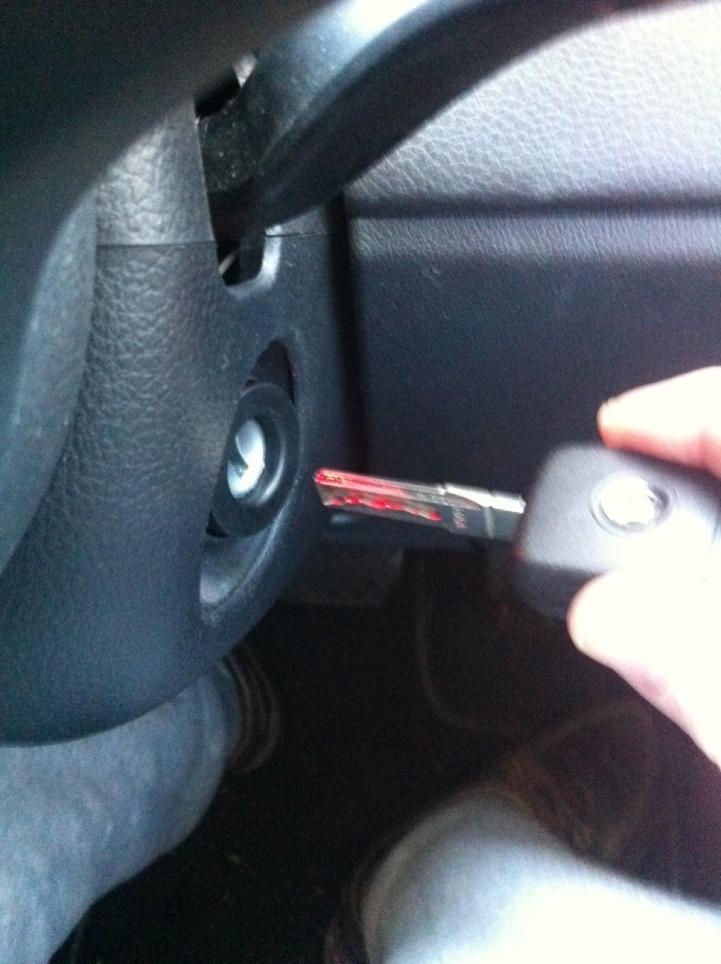
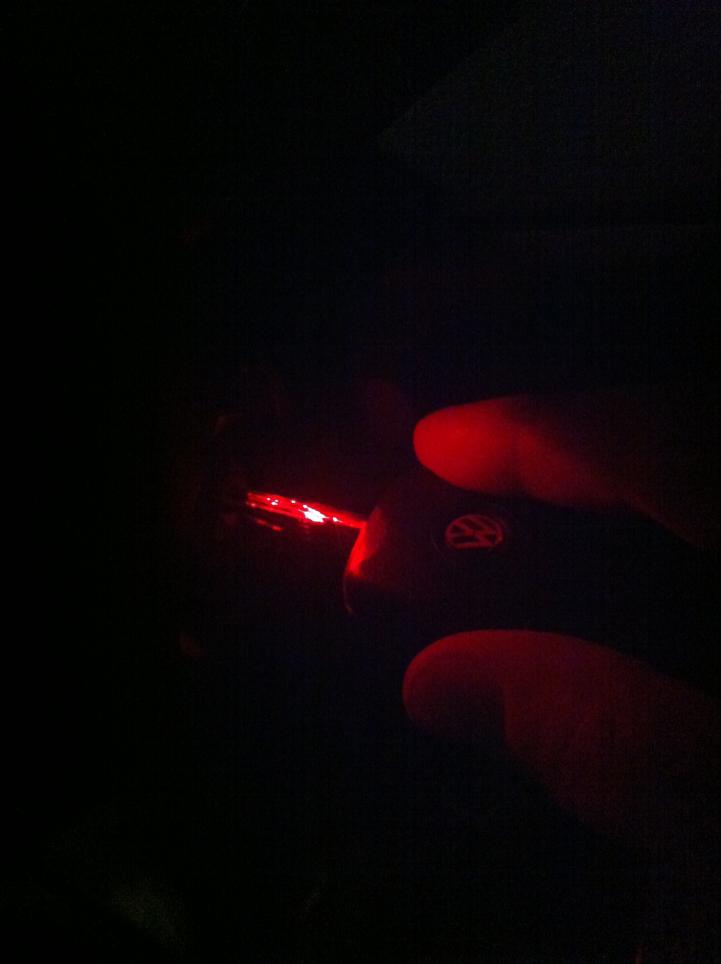
key in barrel;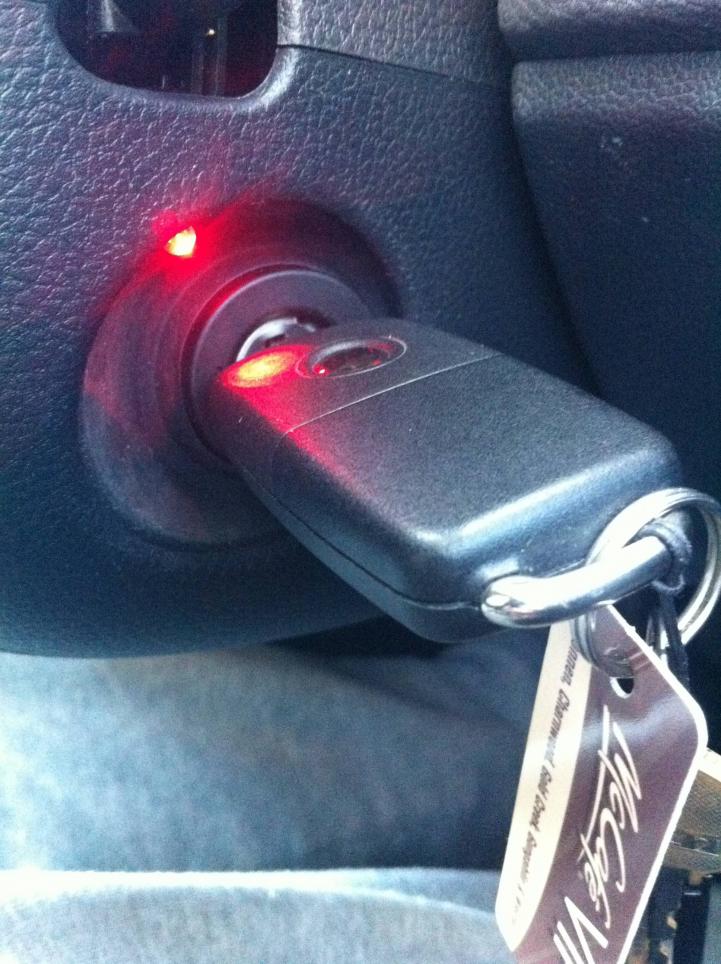
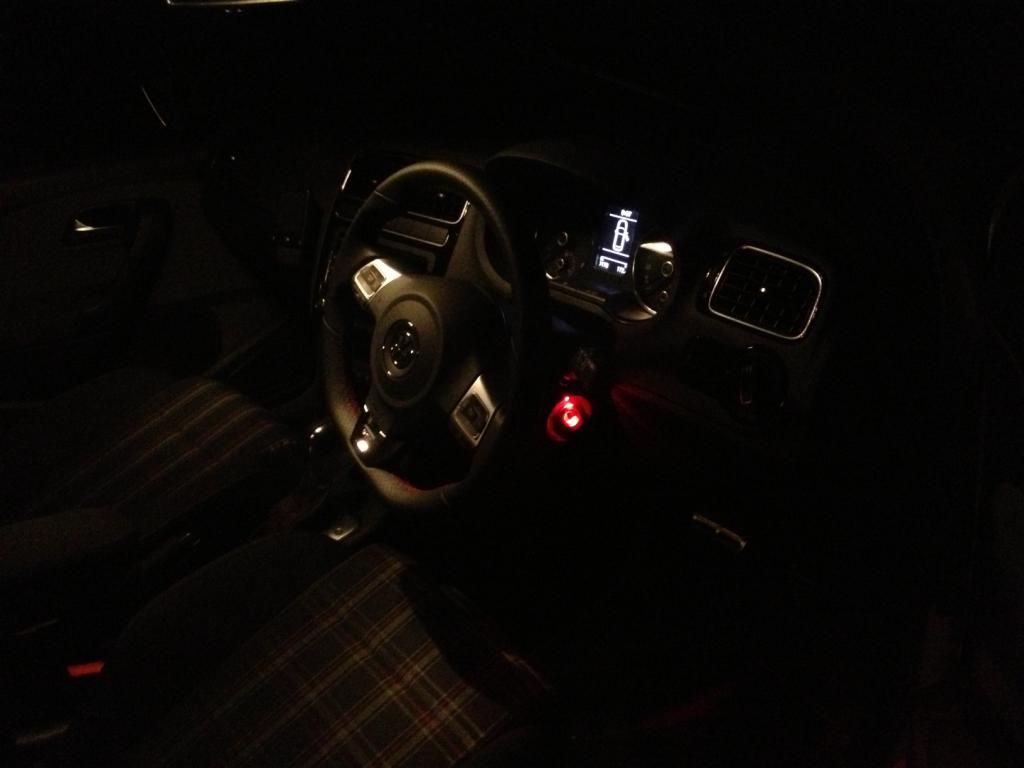
key turned, lighting goes out;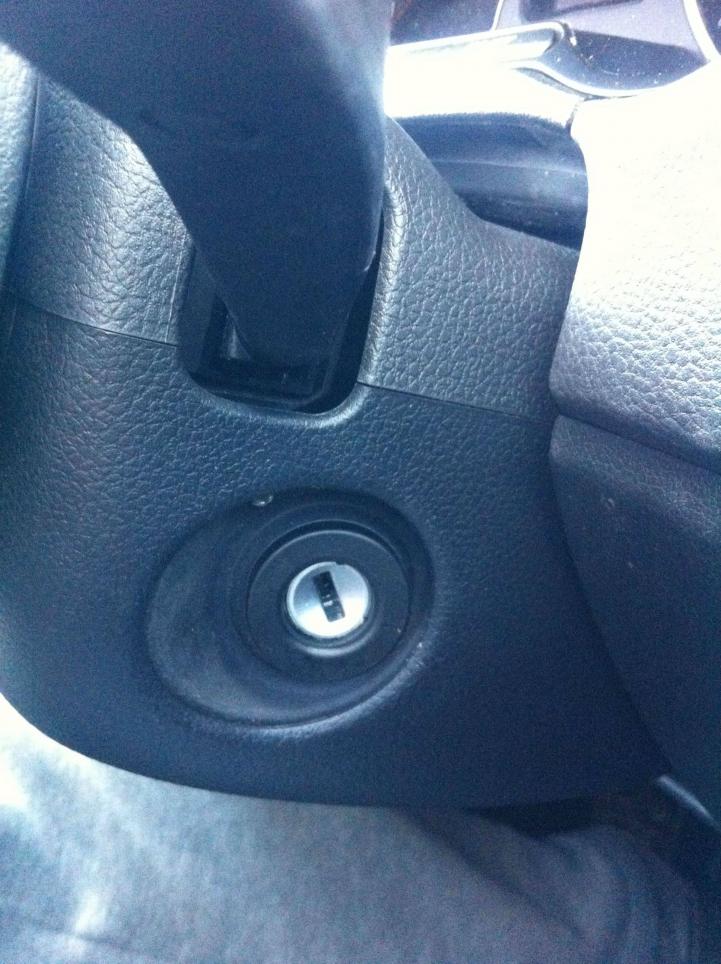
JAYCAR Part No:
Heathshrink WH5562
Cable Bell Fig8 WB1700
Resistor 470R RR0564
LED 5mm clear red ZD0152
total cost $3.76
One 22c Jay Car clear LED (it emits a red light but is clear in colour - two benefits; 1. translucent when not on, so blends in with black trim. 2, it has a wider light dispersement when on, so gives greater warm glow, as apposed to over bright spot light focus). One $1.00 bag of Jay Car 470 Ohm resister - you'll just need one. One last Jay Car thing - 4 meters of their thinest figure of 8 cable. it needs to be thin so you can 'hide' it in the pillar and rooflining trim.
Oh and for safety - 5cm or so of heat shrink (covers the exposed metal of the led - so no short to car)
Following the instructions for running in-roof OEM mic for bluetooth cable (see elsewhere on forum) - in brief;
1. pop top half of steering column trim - it pops up easily
2. gently twist a small (3-4mm) hole into the rubber boot around the key barrel. This is the critical part in terms of getting the lighting effect correct. See my photos. The LED placement should be such that the lighting shines down. I found placing it under the wiper stalk worked best.
3. solder up your LED, resistor, and fine wire. Check the polarity of your wiring at this stage. LEDs have a flat edge - thats the -ve side. Solder it to the cable's black lead. Ensure you heat shrink each LED leg individually so neither leg shorts to each other, or the car body.
4. poke (read - wiggle and gentrly coerce) the LED head through the hole in the rubber boot - from within the steering column plastic trim)
5. run the cable down the inside of the body of the steering trim - ensure it is clear of the wiper stalk.
6. run it up and past the fuse box slot.
7. run it towards the driver door - up the rubber trim, until you reach the removable trim at window height. I found no need to remove the trim as the wire was so fine - it poked into the gap between trim and body and hid itself.
8. run the wire under the headlining along the front top of the windscreen - again easily done.
9. remove the front plastic trim beside the over head lighting / individual reading light trim piece.
10. gently pull down / remove reading lighting trim piece. The wire has about 10cm of spare length within the roof lining.
Now your ready to test then afix your two wires. The connector bringing power to the lighting module has 3 cables. the two outer ones are switched negative (ground) and the central one is switched positive (12v). Your LED wiring earlier is now important - your cable black lead is your ground, and the other remaining lead will be your 12v.
Bare 3-5mm of wire and insert black into either outside pin of the 3 pin connector, and the other wire into the middle (positive) pin of the three pin connector. (if you've got the wrong polarity - dont worry - you wont damage anything).
Key in ignition, or open a door, or press the middle lighting button (interior on) - your little red LED should light up.
If not - check your polarity / ensure you've got a decent connection.
Once I'd tested mine - I made a permenant connection for the leads by prizing them under the metal connector strip running around the lighting module.
I popped the lighting module back in place, popped the steering column trim back, and then took these shots;
(total instal time - circa 3 hours)
with door open;

key approaching barrel;

key in barrel;

key turned, lighting goes out;

JAYCAR Part No:
Heathshrink WH5562
Cable Bell Fig8 WB1700
Resistor 470R RR0564
LED 5mm clear red ZD0152
total cost $3.76
 [/IMG]
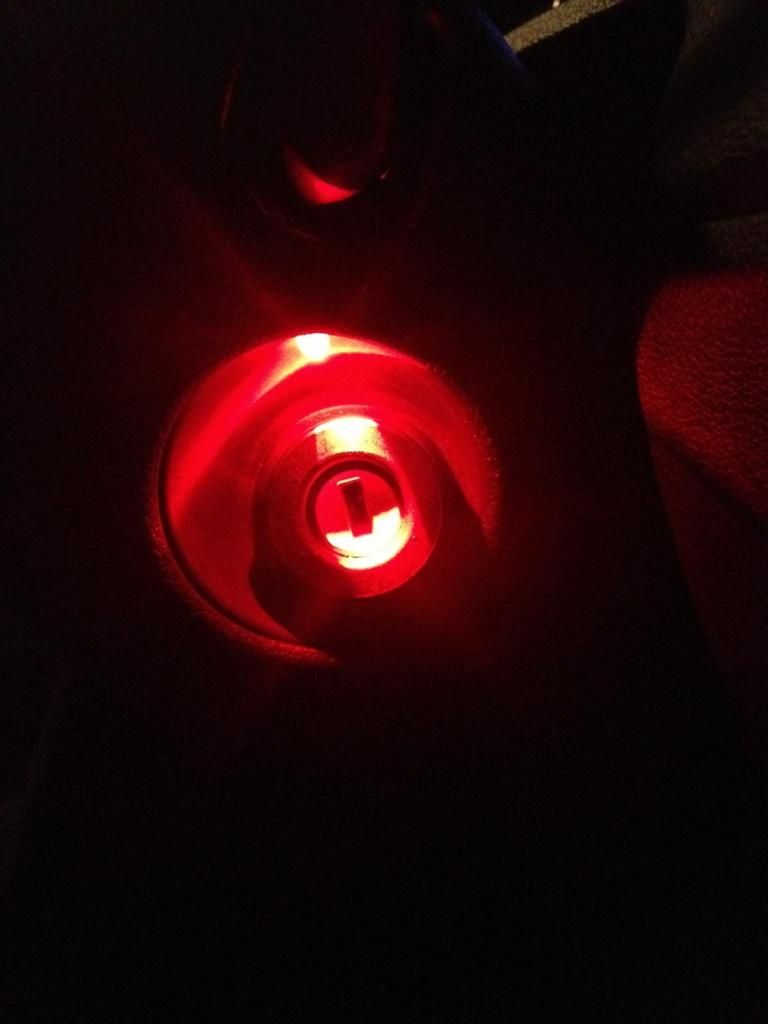 [/IMG]
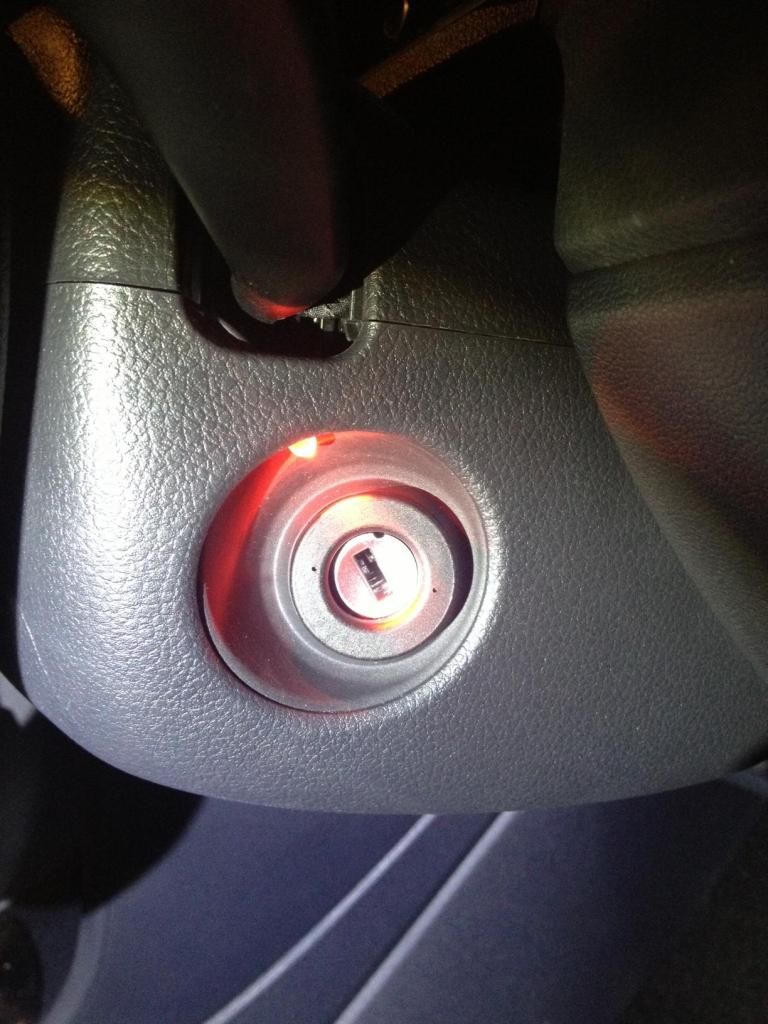 [/IMG]
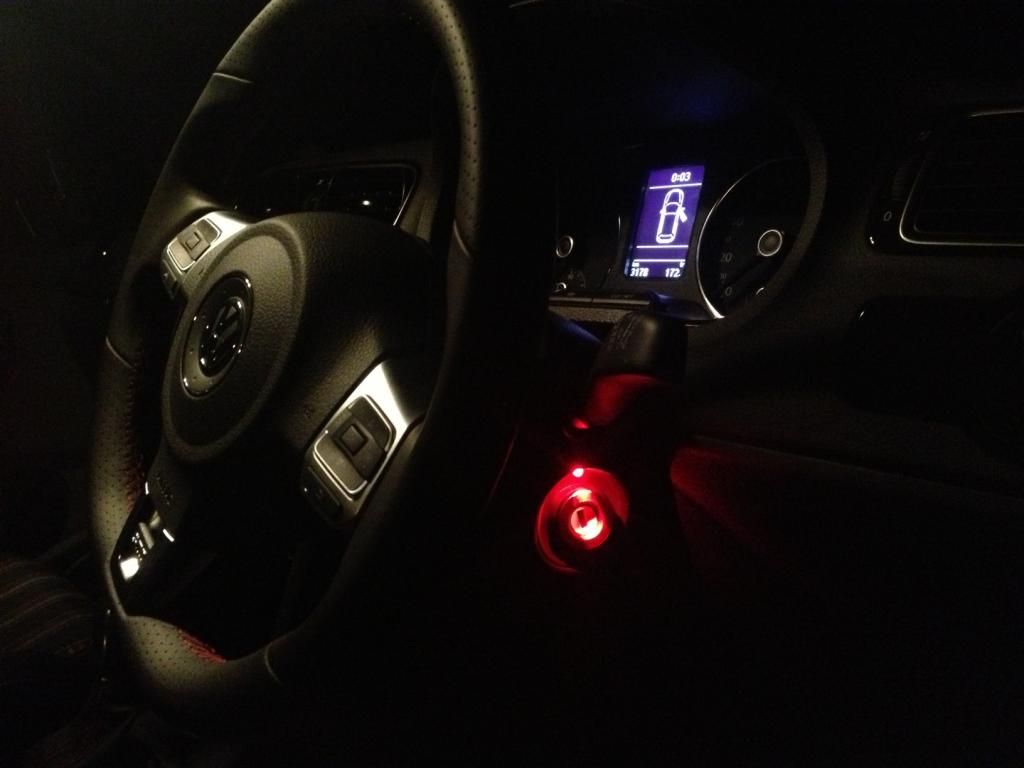 [/IMG]

Comment