 Tweet
Tweet
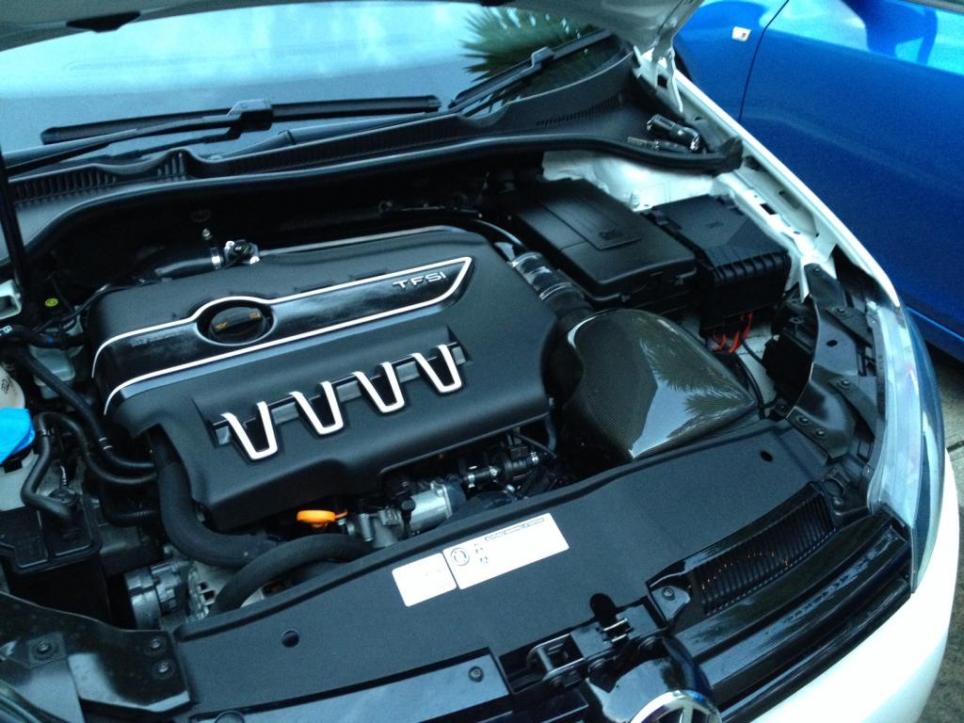
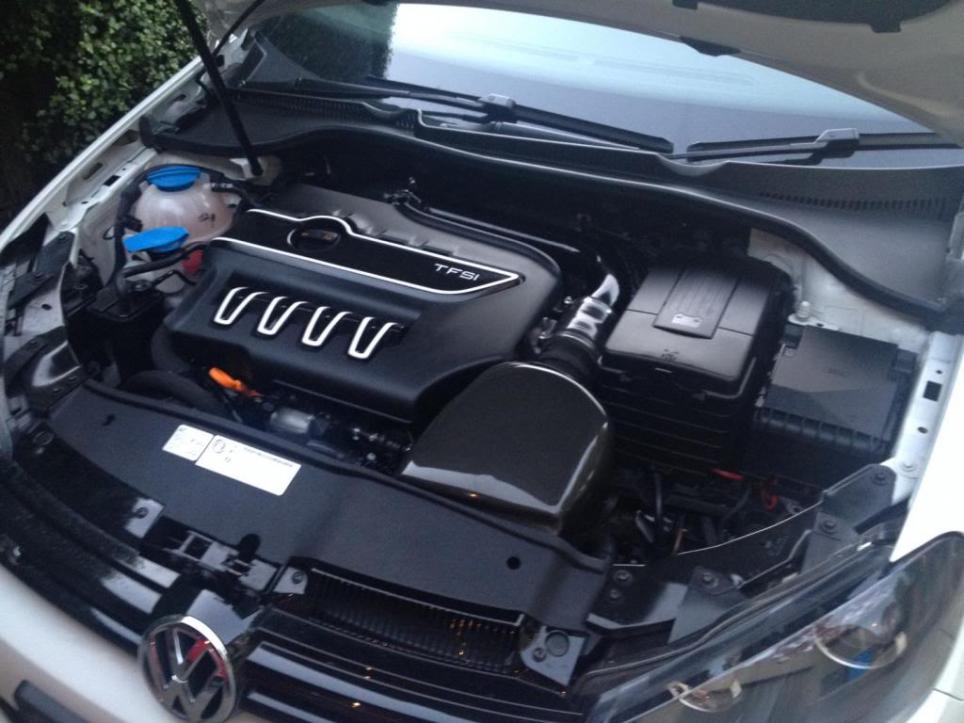
Seems I'm the Goldilocks of intakes. Well not as bad as Lucas_R but getting there  I wasn't happy with anything off the shelf and had an idea in mind to make a hybrid intake that gave me both good fuel trims, neat factory-esque looks, and finally an enclosed pod airbox to keep sound down and also feed cold air to the filter while shielding it from engine bay heat. Carbon fibre is very good at this but options are limited unless you make your own and lets be honest, ain't nobody got time to make a carbon fibre airbox. So I made one using the 2 intakes I thought best suited to this task and happened to be able to pick up used by chance - the original VWR intake (pre-fuel trim issues, straight from VWR in the UK not the US market) and the TSI 'Stage 1' Carbonio (which consists of the carbon fibre airbox with a pod inside).
Fitment on both of these intakes is well known to be not 'plug and play' with the VWR needing some trimming and moving of a couple lines (I played around with different piping configs and couldn't get this to fit nice at all, maybe it's just me) and the TSI was apparently even worse and I'm not sure anyones still using one on an R that isn't running APR Stage 3.
Below are a few pics of the process I went through today on my day off making it all fit. When I say fit I mean factory, nothing rubbing on anything, nothing jammed up against anything else, just sitting and looking nice.
First thing you'll notice about the TSI carbonio is some notches and depressions in its surface. These are designed for the TSI engine but that said, some things are pretty damn close and with some tweaks you can make it work.
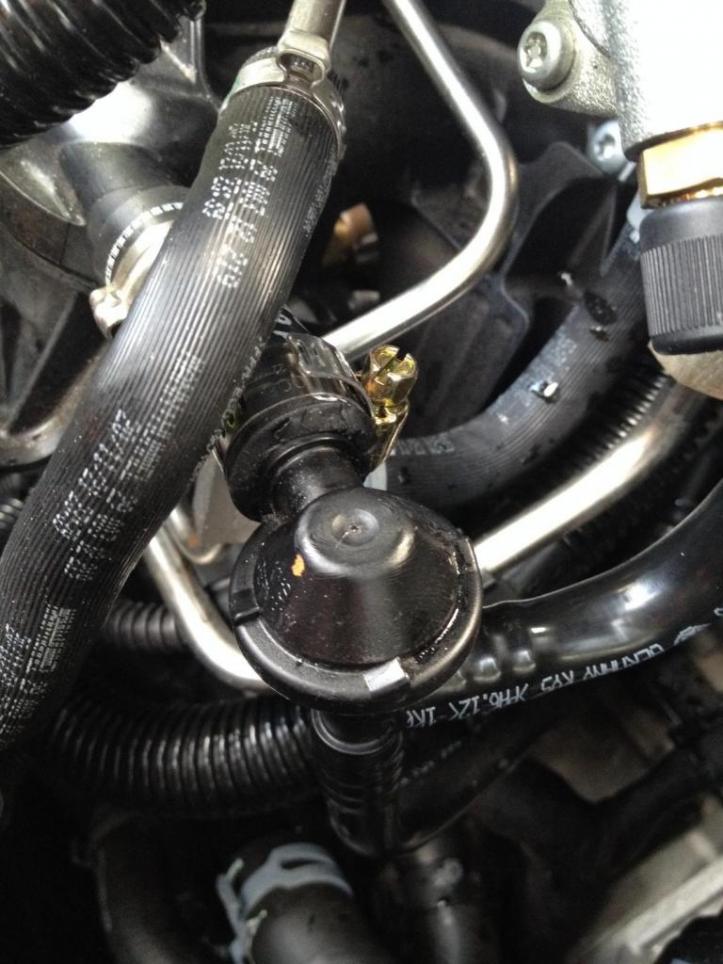
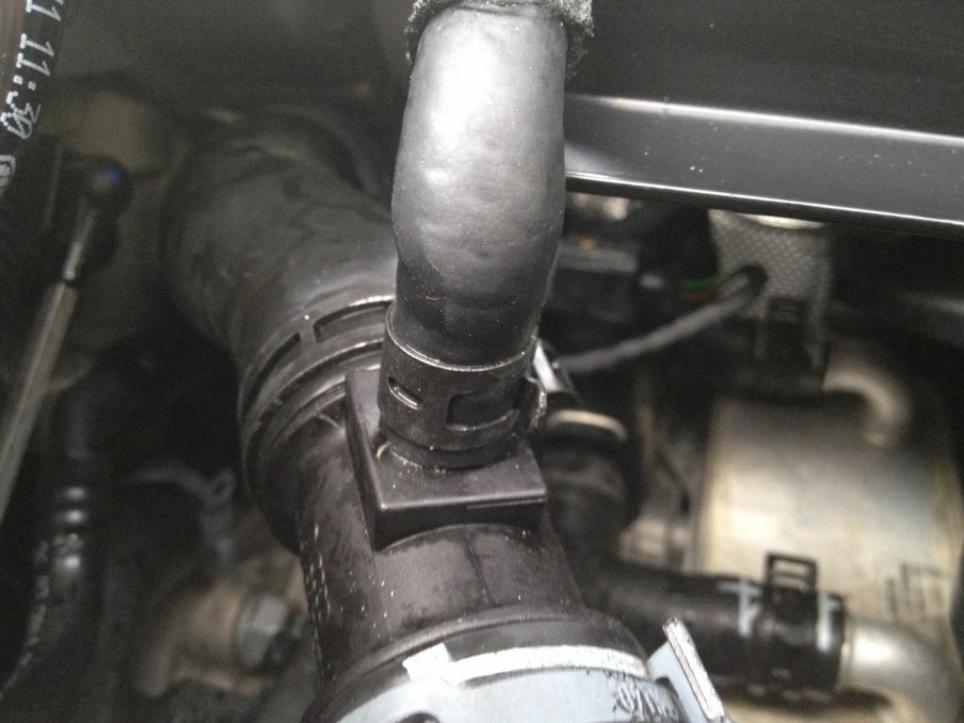
First, pop the clamp off and remove this valve, then cut about 8 mm off the hose (keep this, it's recycled later) and remount the valve. I tried initially re-compressing the original clamp but I wasn't happy with the seal and doubted it'd hold 20-25psi and without a boost leak tester made for this car (the one I made for my evo won't fit) I opted for a small worm drive clamp to ensure a good seal.
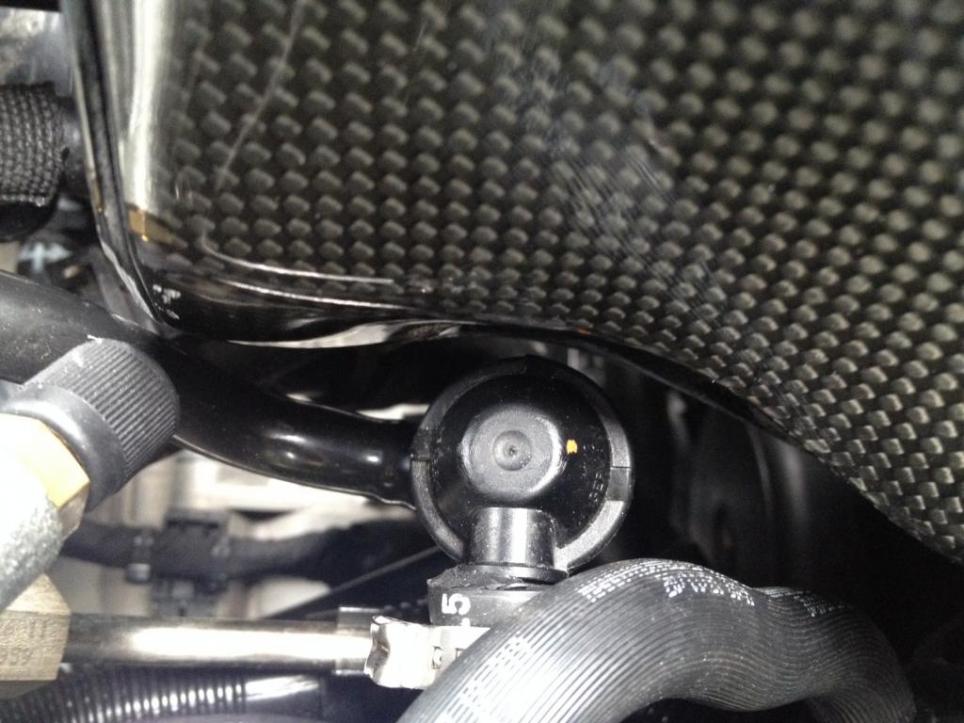
The result is it sits in the depression of the box with plenty of clearance
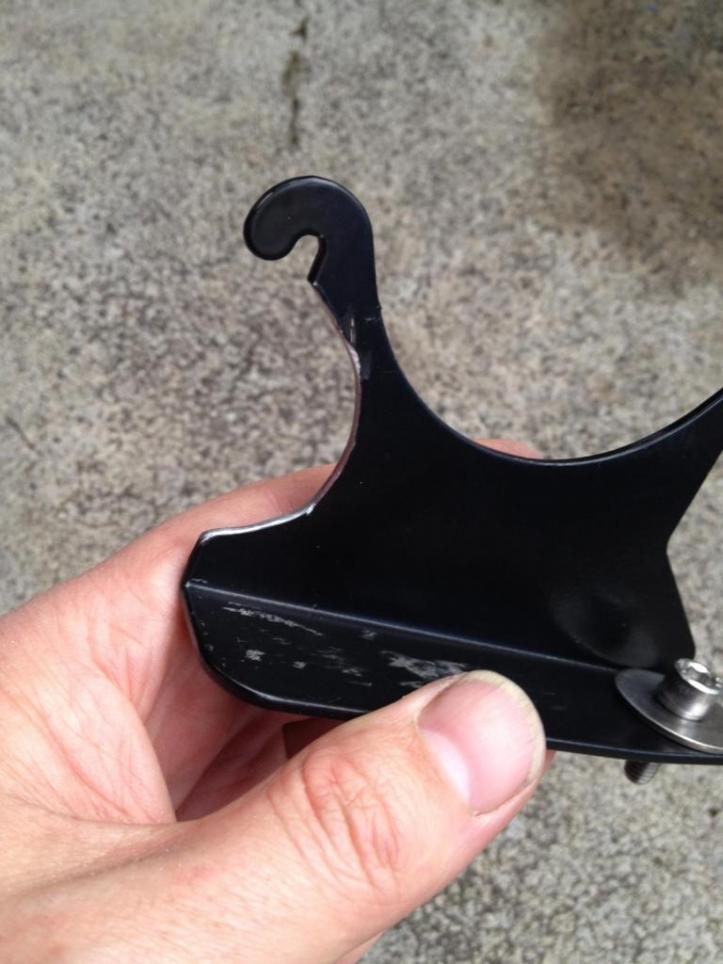
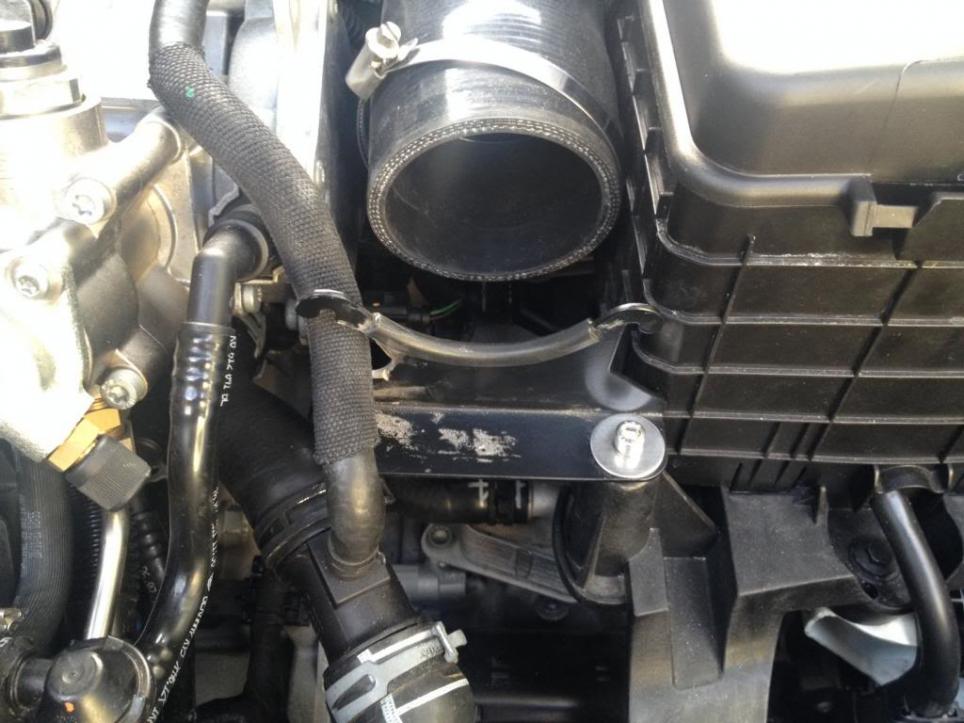
Next up, after lots of back and forth twisting and playing with different configurations, I decided to use the VWR mount to support the carbonio as without it the whole intake is unsupported and not firm. Where the carbonio mounts behind the grill is just carbon and if the mounting bolts are nipped up tight repeated flexing could stress it to the point of cracking. Different intakes use different support solutions, but the VWR uses a plate with a semicircle cut from it with some u-channel to protect the hard edge and stop it damaging the piping. Thing is, once you mount this a coolant line is right in the way. Seriously I have no idea what they expect you to do with it to get it out of the way while not allowing the line to rub the engine or piping and there's a notch in the carbonio to allow this line to run vertically... So I got creative and broke out the dremel. It's just a plate to hold the upper pipe in place it's not load bearing so I decided it could stand to have some material removed while still doing it's job.
Much better. Now the coolant line can run up through the notch in the carbonio, then up cleanly through the gap and come up beside the intake piping.
This shows it clearly
Took a bit more out of it to give it more lower clearance
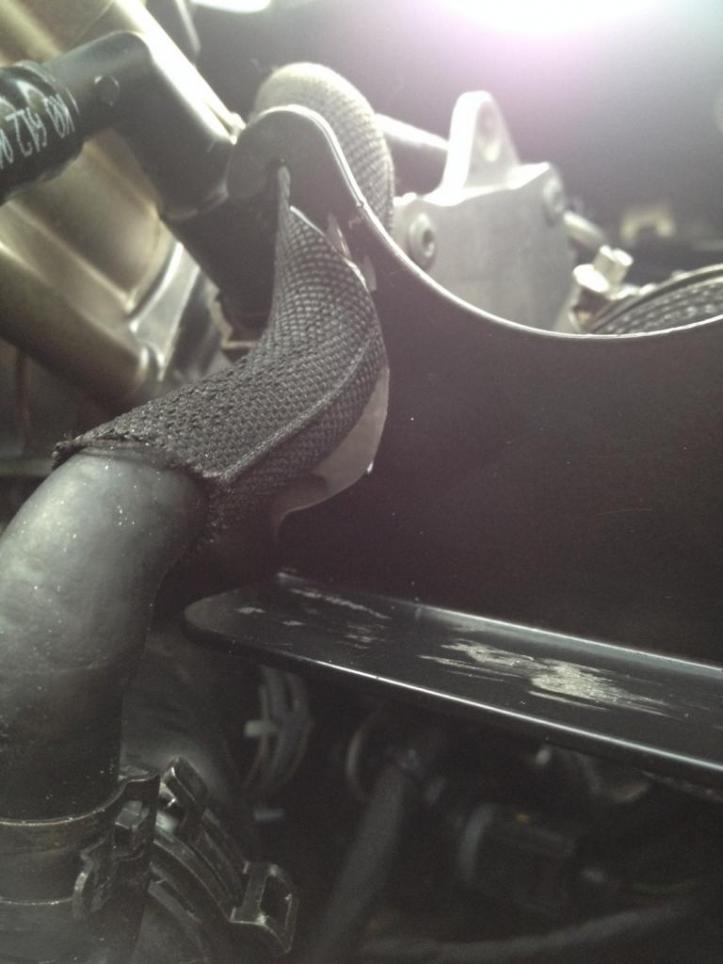
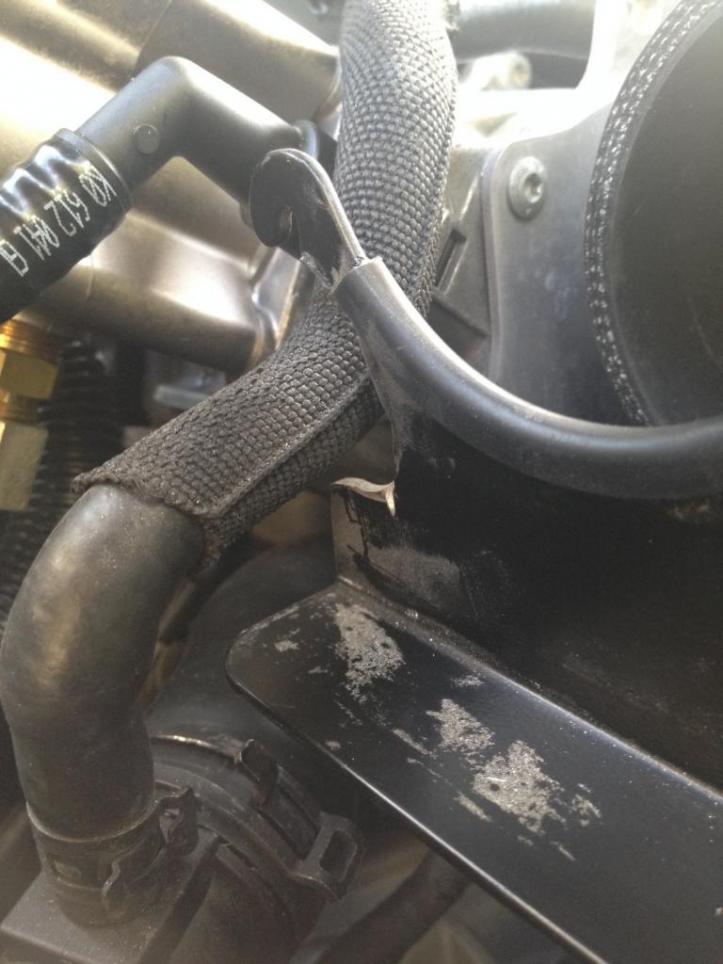
Action shot (may have had a sneaky beer at this point )
)
Sits nicely with the retainer in place

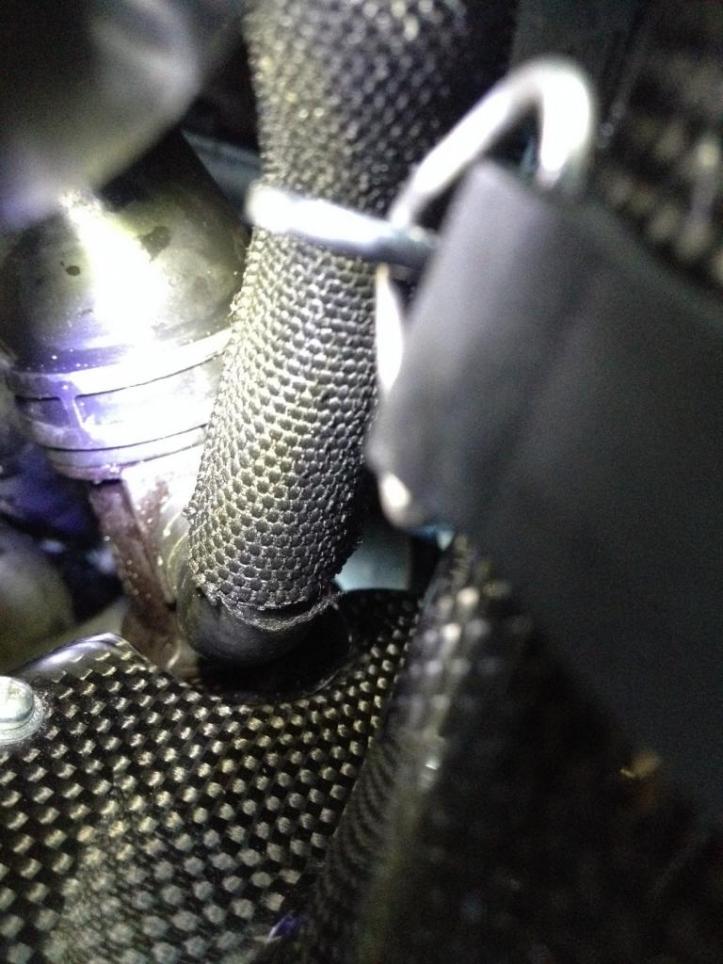
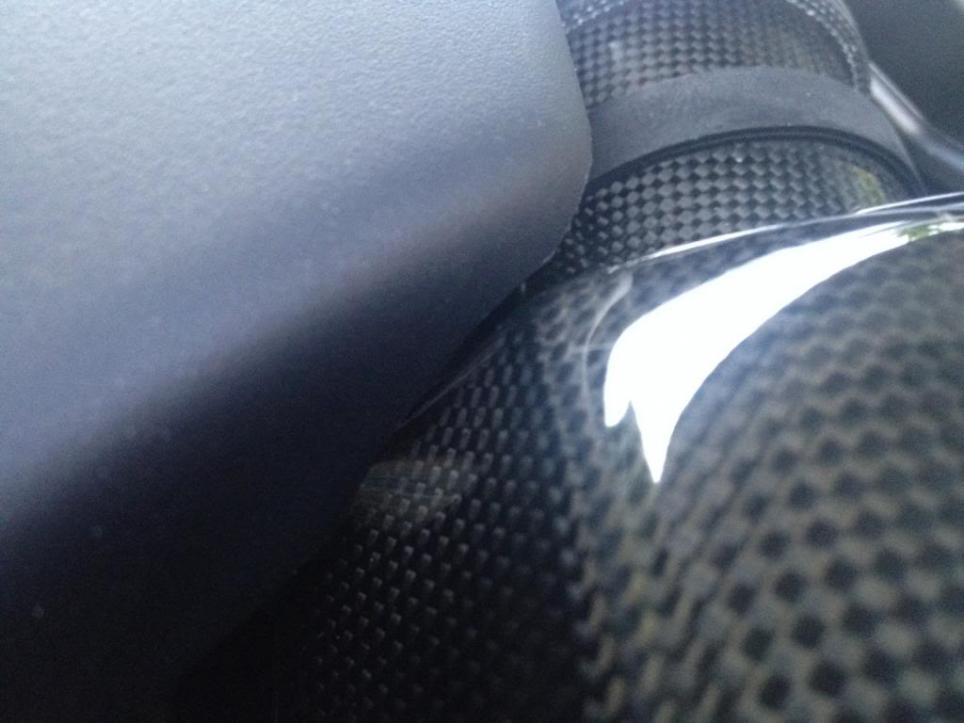
During test fitting the airbox I could see the small coolant line making light contact with the box despite sitting in the carbon fibre notch (close but not quite made for the TFSI...)

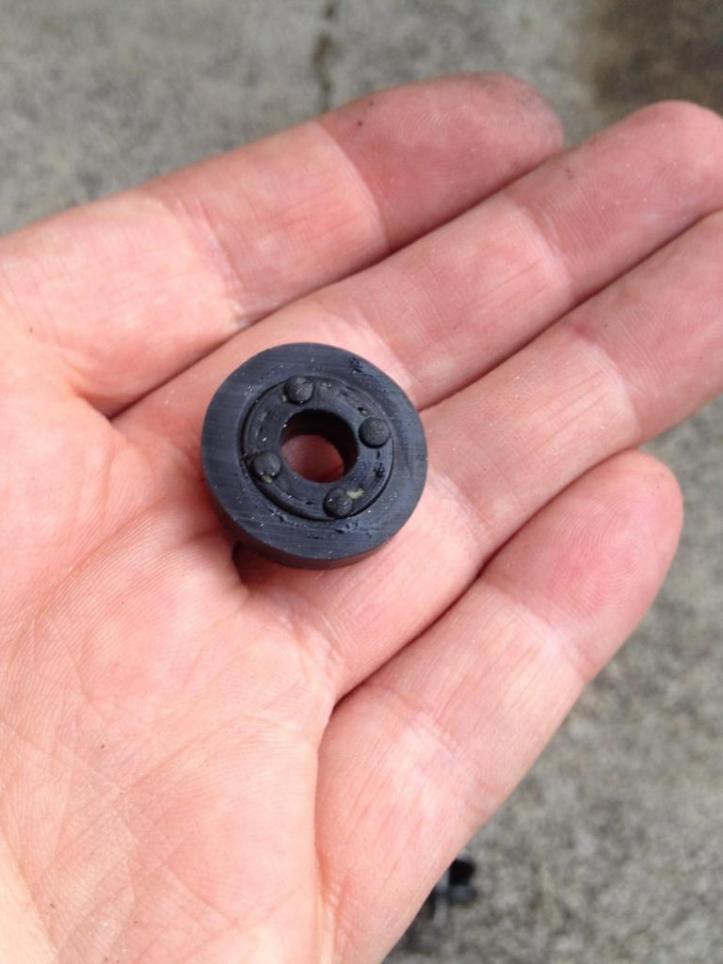
So to position that small diameter coolant line just right, I needed to shorten it to get the bend lower by 8mm or so. Popped the line off and trimmed off the lower ~8mm (keep this, recycled later) then refitted it.
Perfect.
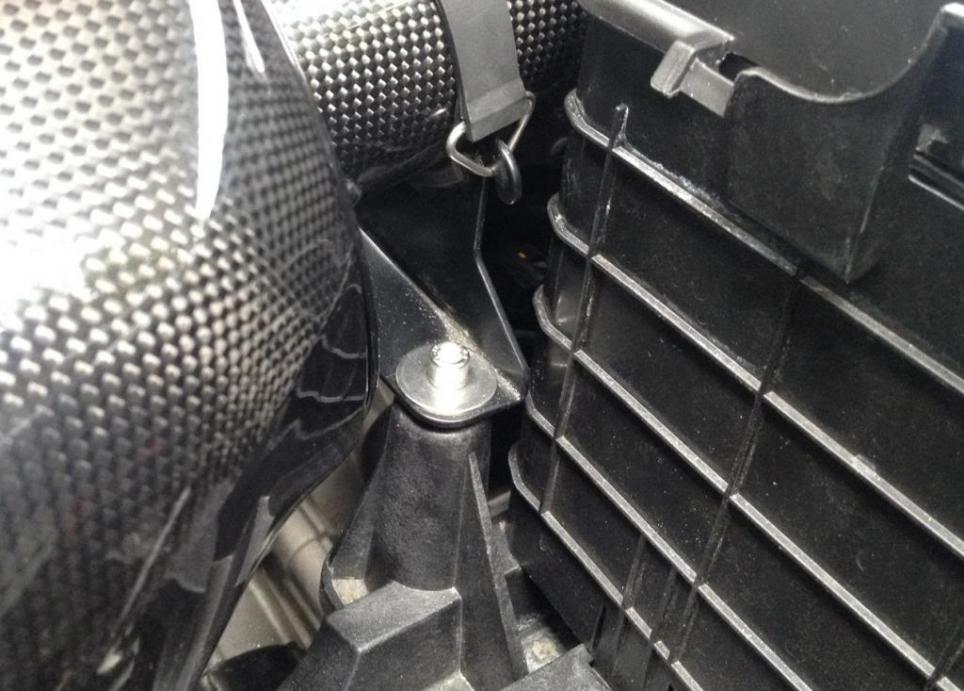
To decouple the VWR support bracket I slipped the small coolant line 8mm offcut into the centre of the 8mm valve offcut to make a rubber pad. Place this under the plate then screwed it down as per normal. It lifts the plate slightly creating a slightly better angle to support the intake airbox and also buffers any shocks so that the carbon is less stressed.
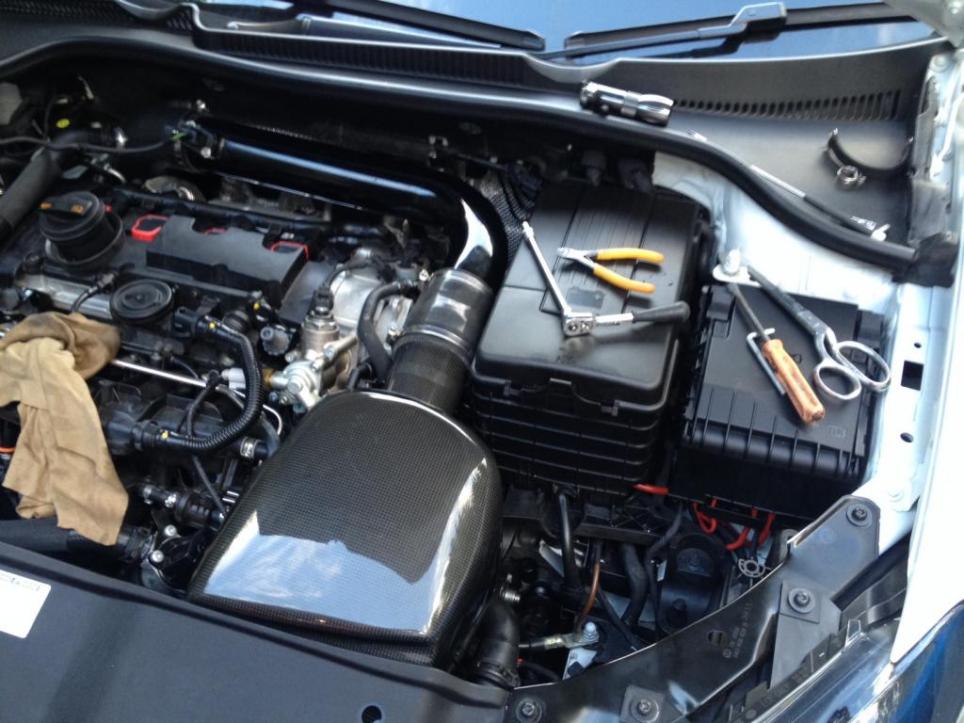
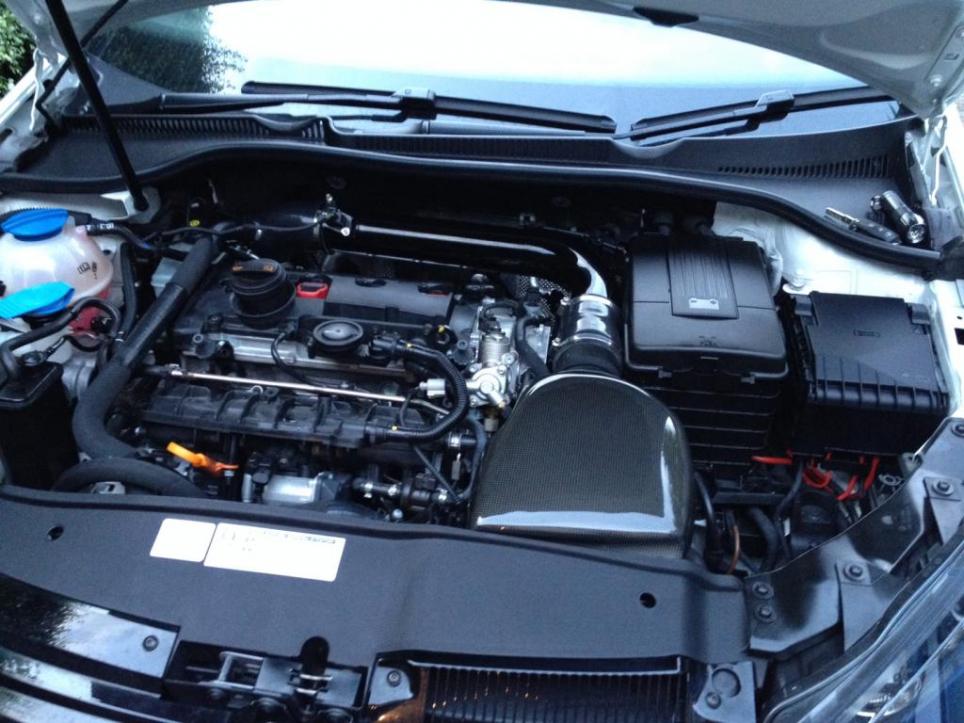
So all done, it sits perfectly and doesn't make contact with anything. All lines run without rubbing and the whole area looks unmolested. Still have room for a catch can too.
Sat my TTS engine cover in place to see how it'll look (this will need slight trimming to clear the box but that's a job for another day)
Fitment on both of these intakes is well known to be not 'plug and play' with the VWR needing some trimming and moving of a couple lines (I played around with different piping configs and couldn't get this to fit nice at all, maybe it's just me) and the TSI was apparently even worse and I'm not sure anyones still using one on an R that isn't running APR Stage 3.
Below are a few pics of the process I went through today on my day off making it all fit. When I say fit I mean factory, nothing rubbing on anything, nothing jammed up against anything else, just sitting and looking nice.
First thing you'll notice about the TSI carbonio is some notches and depressions in its surface. These are designed for the TSI engine but that said, some things are pretty damn close and with some tweaks you can make it work.
First, pop the clamp off and remove this valve, then cut about 8 mm off the hose (keep this, it's recycled later) and remount the valve. I tried initially re-compressing the original clamp but I wasn't happy with the seal and doubted it'd hold 20-25psi and without a boost leak tester made for this car (the one I made for my evo won't fit) I opted for a small worm drive clamp to ensure a good seal.

The result is it sits in the depression of the box with plenty of clearance

Next up, after lots of back and forth twisting and playing with different configurations, I decided to use the VWR mount to support the carbonio as without it the whole intake is unsupported and not firm. Where the carbonio mounts behind the grill is just carbon and if the mounting bolts are nipped up tight repeated flexing could stress it to the point of cracking. Different intakes use different support solutions, but the VWR uses a plate with a semicircle cut from it with some u-channel to protect the hard edge and stop it damaging the piping. Thing is, once you mount this a coolant line is right in the way. Seriously I have no idea what they expect you to do with it to get it out of the way while not allowing the line to rub the engine or piping and there's a notch in the carbonio to allow this line to run vertically... So I got creative and broke out the dremel. It's just a plate to hold the upper pipe in place it's not load bearing so I decided it could stand to have some material removed while still doing it's job.

Much better. Now the coolant line can run up through the notch in the carbonio, then up cleanly through the gap and come up beside the intake piping.

This shows it clearly

Took a bit more out of it to give it more lower clearance

Action shot (may have had a sneaky beer at this point

Sits nicely with the retainer in place


During test fitting the airbox I could see the small coolant line making light contact with the box despite sitting in the carbon fibre notch (close but not quite made for the TFSI...)

So to position that small diameter coolant line just right, I needed to shorten it to get the bend lower by 8mm or so. Popped the line off and trimmed off the lower ~8mm (keep this, recycled later) then refitted it.

Perfect.

To decouple the VWR support bracket I slipped the small coolant line 8mm offcut into the centre of the 8mm valve offcut to make a rubber pad. Place this under the plate then screwed it down as per normal. It lifts the plate slightly creating a slightly better angle to support the intake airbox and also buffers any shocks so that the carbon is less stressed.

So all done, it sits perfectly and doesn't make contact with anything. All lines run without rubbing and the whole area looks unmolested. Still have room for a catch can too.

Sat my TTS engine cover in place to see how it'll look (this will need slight trimming to clear the box but that's a job for another day)


Comment