 Tweet
Tweet
CREDITS
First of all, I read this excellent write up & full credit goes to this fine individual.
BMWTips wheel-scuff repair
I’m posting this as a useful “how to guide” to give back to the VW community & anyone else out there who is frustrated that they’ve kerbed their alloys.
TIPS
Read the BMW tips carefully. Definitely do this on a hot summer day. Check the weather forecast to ensure there's no late rain/cool change. That can ruin the finish.
Drying times are so quick and the faster curing allows for a stronger, lasting finish in hot weather. Slow drying times can cause problems and a lumpy / damage prone finish.
I am an IT manager by trade and not a handyman by any means. I can fix taps, change an oil leak and install a light fitting... But i classify myself as an amateur. So this shows how straight forawrdish this type of project can be.
As BMW tips said... Clean clean.... And lots of patience.
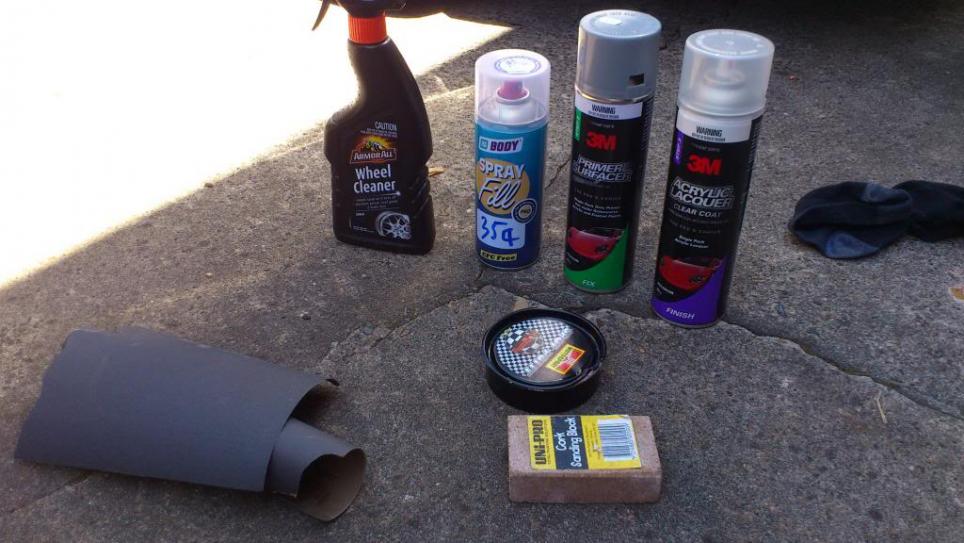
EQUIPMENT
Please ensure you have all these before your start your project. Or you will be like me & waste time driving around on a spare tyre. Australian prices as at 2013 shown
Consumables:
1. Wheel cleaner $8
2. Putty $12
3. Primer paint $17
4. Silver BMW Paint code 354 (more on this in a moment) $29
5. Clear Coat $17
6. Sandpaper: 180 grit ($1.75). I also had 320 grit ($1.75) and 60 grit ($1.75) for the really lumpy dings.
I have posted a separate pic so you can see what these look like.
Tools:
1. Masking tape
2. Putty knife (I used a non-serated plastic knife)
3. P1 dust mask or better
4. Goggles
5. Old newspaper
6. Old rags
This looks like a scary list. The other guy didn’t quite list all these – so please don’t feel overwhelmed. I just want you to be prepared and not waste time while you’re waiting for things to cure.
PAINT
A few forums mentioned using Wurth paint. Another mentioned BMW Paint Code 354. Admittedly the lack of retail availability of Wurth paint was the reason I kept procrastinating.
So I bit the bullet and went to SuperCheap Auto. There I learned that Autobarn can mix aerosol paints!! I asked for BMW Paint Code 354 and they mixed it for me in 5 mins including gassing the can. Good news for us Aussie veedubbers. Good value for only $29.
Is it worth getting Wurth? i suspect the metallic "grain" or flecks will be closer to VW spec than the paint I used. I feel the colour from Autobarn was right but the grain a touch too coarse.
STEPS
Here are the steps without the pics. Scroll down to see the pics & commentary.
Step 1: Clean the wheels. This is where the wheel cleaner comes in. I used Armorall Wheel Cleaner.
Step 2: Use putty knife and trowel on the putty perpendicular to the scratch. Leave the wheel on the car for now.
Step 3: Sand down putty. Use a cork sanding block if possible. Again, do this with the wheel on the car.
Step 4: Remove the wheel from the vehicle. The BMWtips guy said to cover the vehicle in case of loose spray... I say remove the wheel & continue the project in another location. Position the wheel so the work area is at the bottom.
Step 5: Mask all exposed areas of the wheel and use newspaper to cover items such as valve, VW emblem, tyre.
Step 6: Spray on primer. This is iterative & you may need to sand again if you find defects not seen in the original sanding.
Step 7: Spray on paint. I recommend overspraying a little to blend in with the rest of the wheel. Even the pros do this.
Step 8: Spray on clear coat. I recommend overspraying just so that you seal in all exposed paint.
STEPS WITH PICS
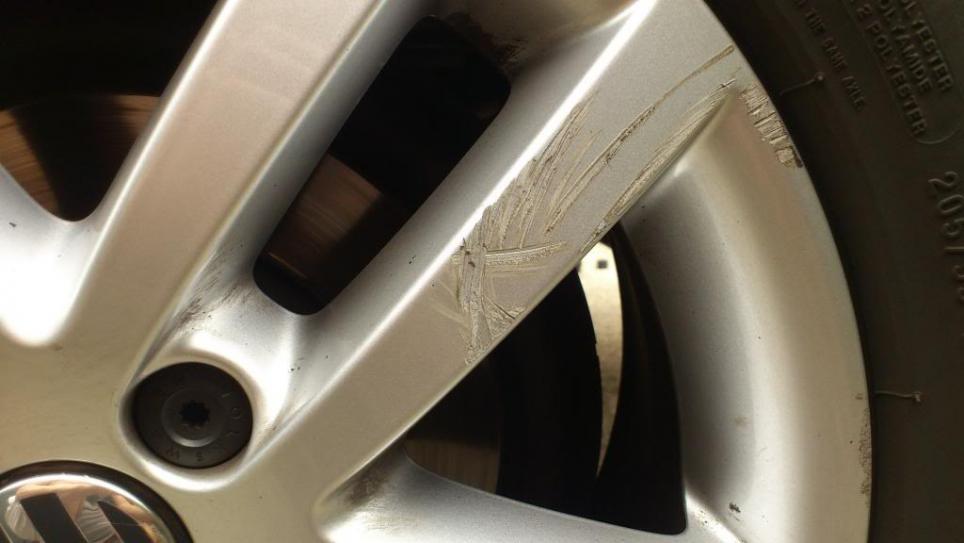
Step 1: Clean the wheels. This is where the wheel cleaner comes in. I used Armorall Wheel Cleaner.
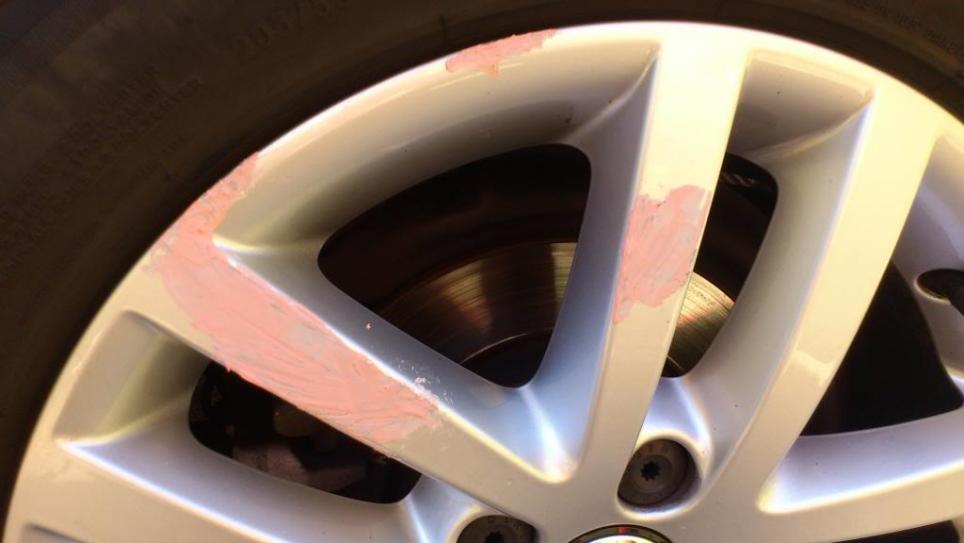
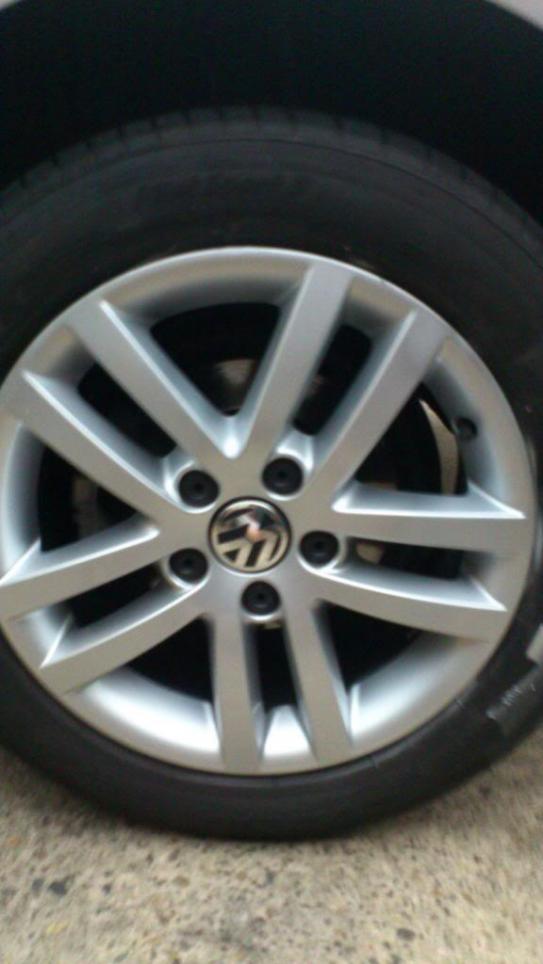
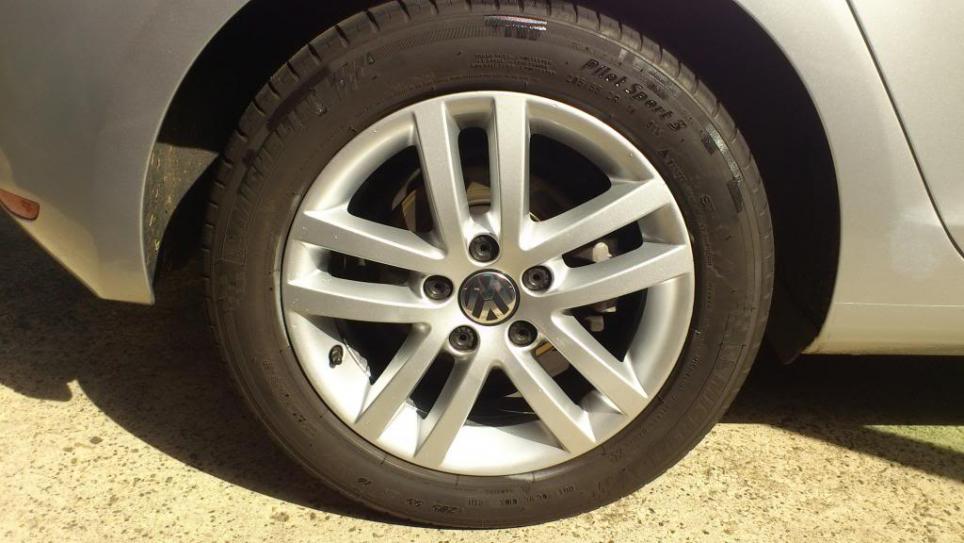
This is the scratch I am going to repair on my project.
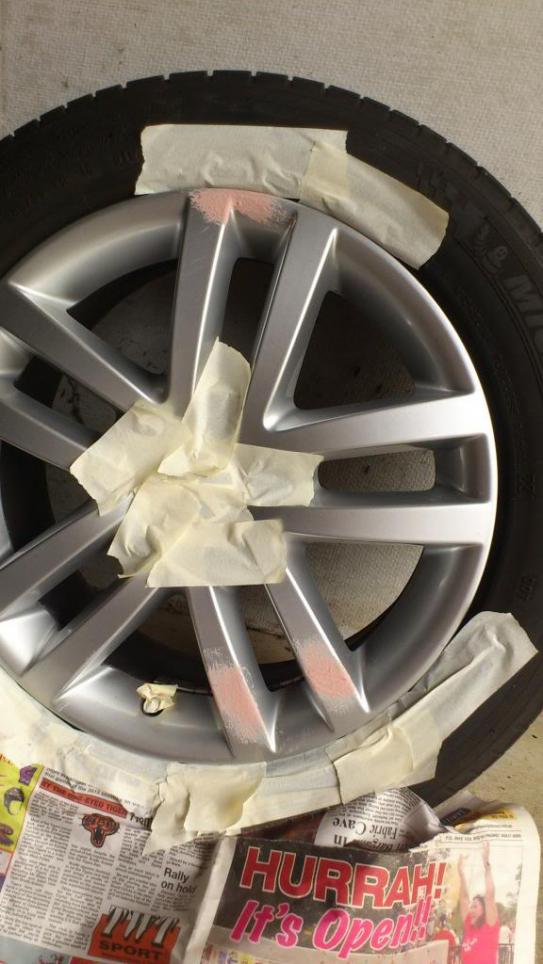
Step 2: Use putty knife and trowel on the putty perpendicular to the scratch.
When you sand down the putty, a lot of dust is generated that goes everywhere. As BMWtips says, constantly wipe down the area. This will become important later on when it comes to spray time
This is how the putty looks like
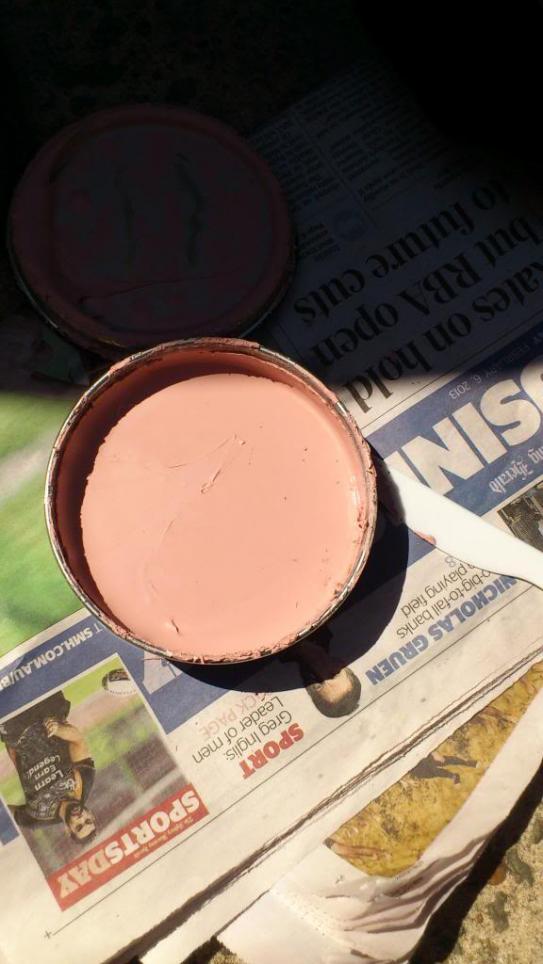
This is the putty applied to the wheel
Do all of the puttying while the wheel is still on the vehicle.
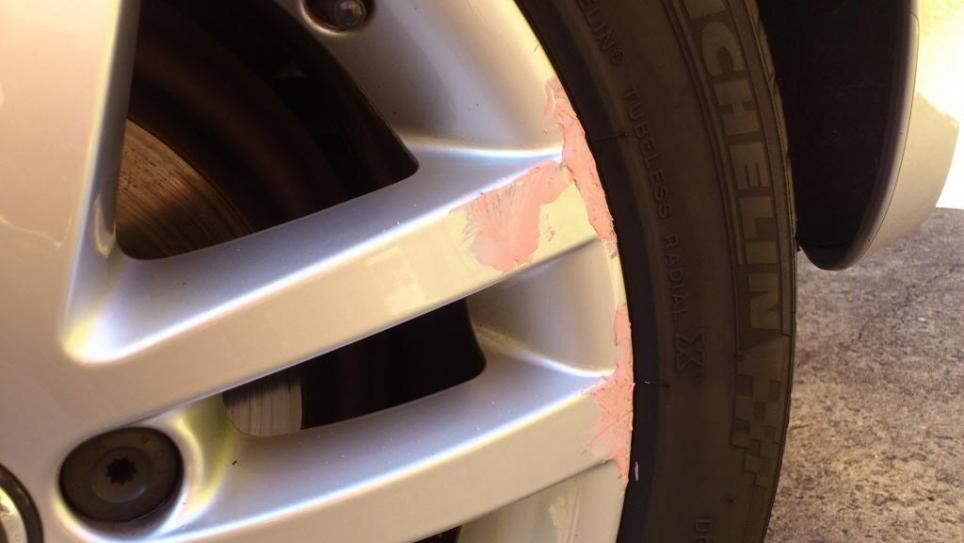
Step 3: Sand down putty. Use a cork sanding block if possible. Also sand perpendicular to the scratch
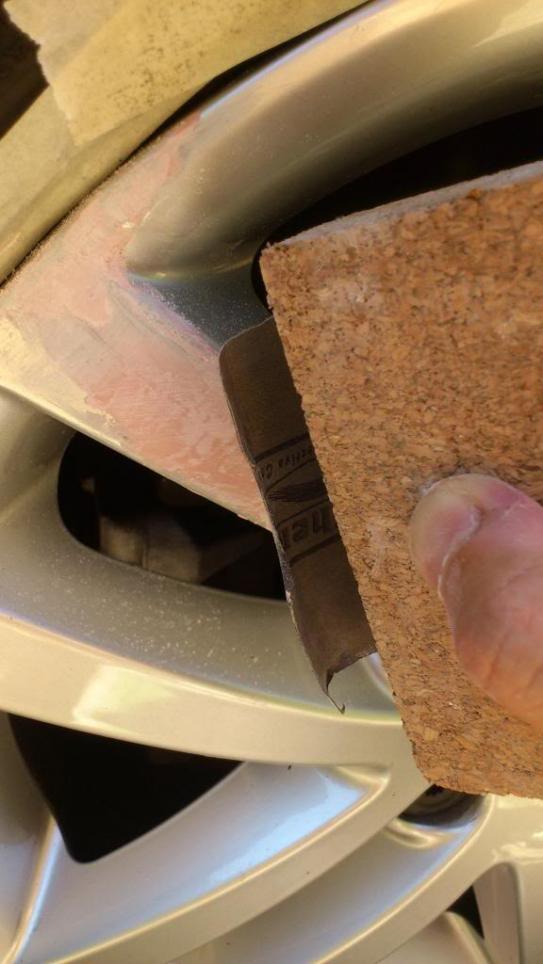
This is the end result
Do all of the sanding while the wheel is still on the vehicle.
Step 4: Remove the wheel from the vehicle. The BMWtips guy said to cover the vehicle in case of loose spray... I say remove the wheel & continue the project in another location.
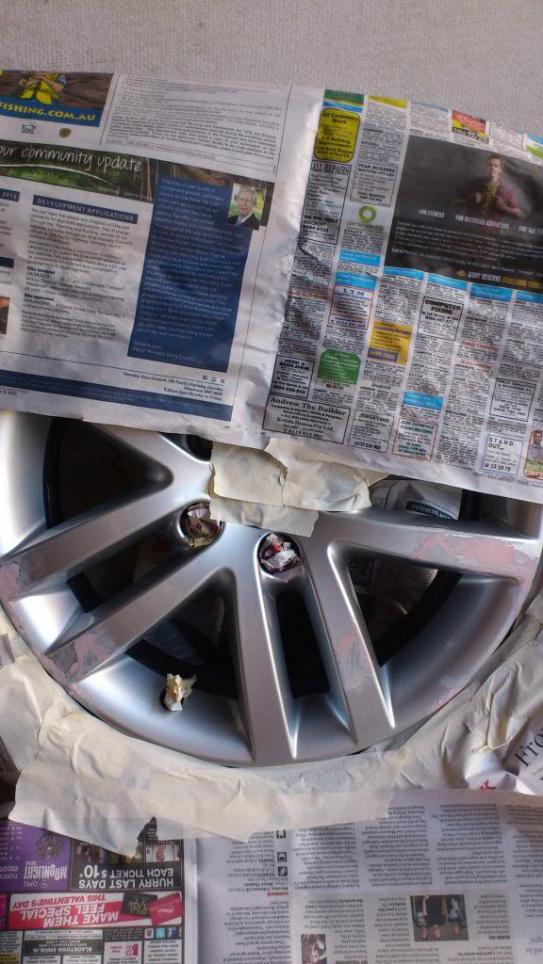
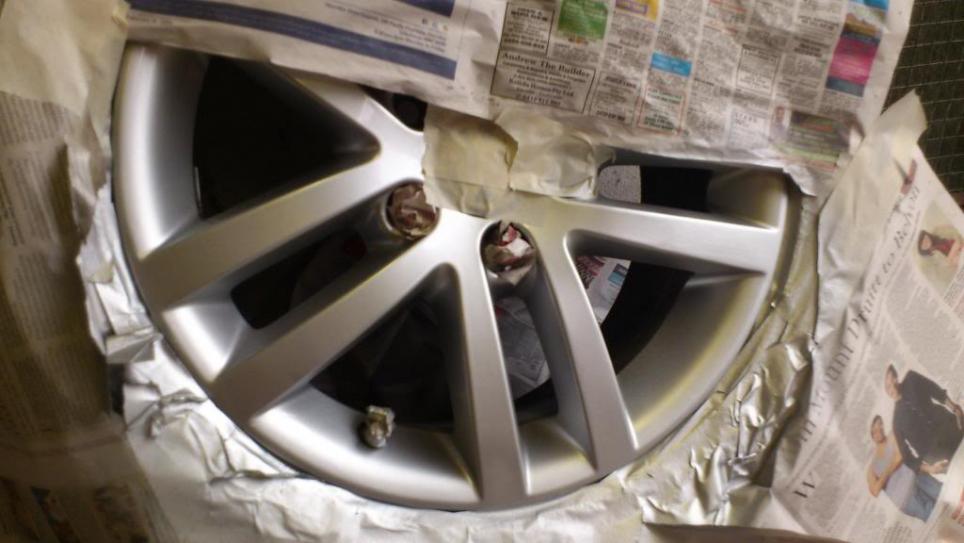
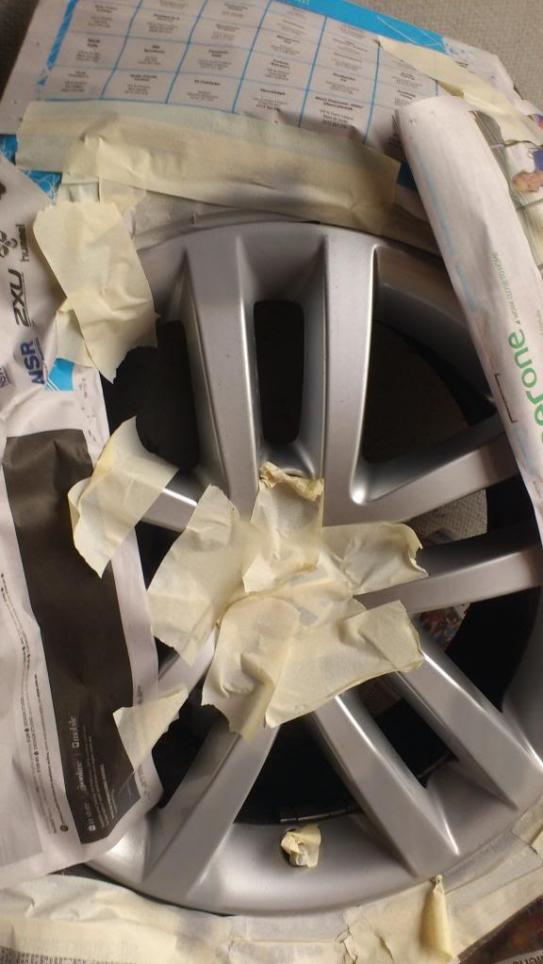
Step 5: Mask all exposed areas and use newspaper
Use masking tape and newspaper to cover items such as valve, VW emblem, tyre.
Tip: put the affected areas on the bottom so that after you have sanded, there is less cleaning (since the grit falls downwards).
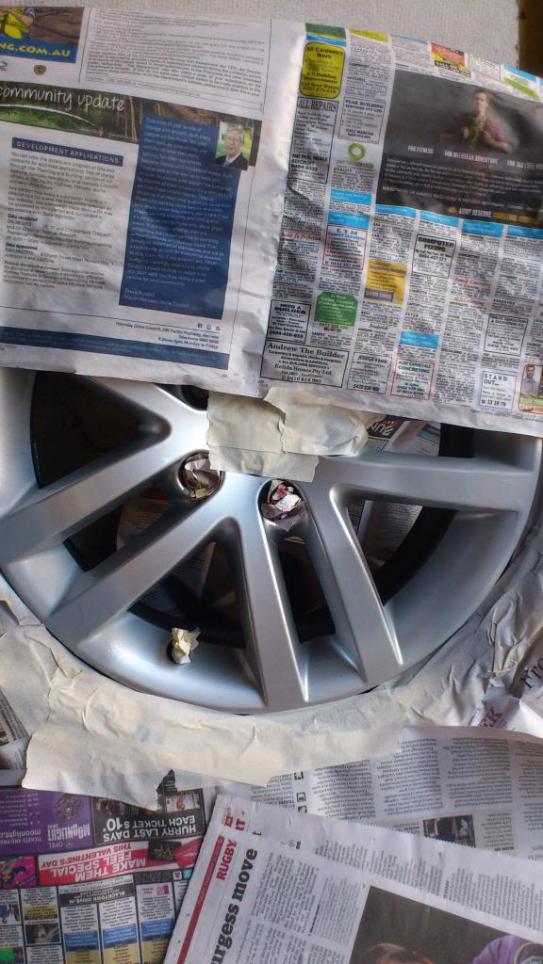
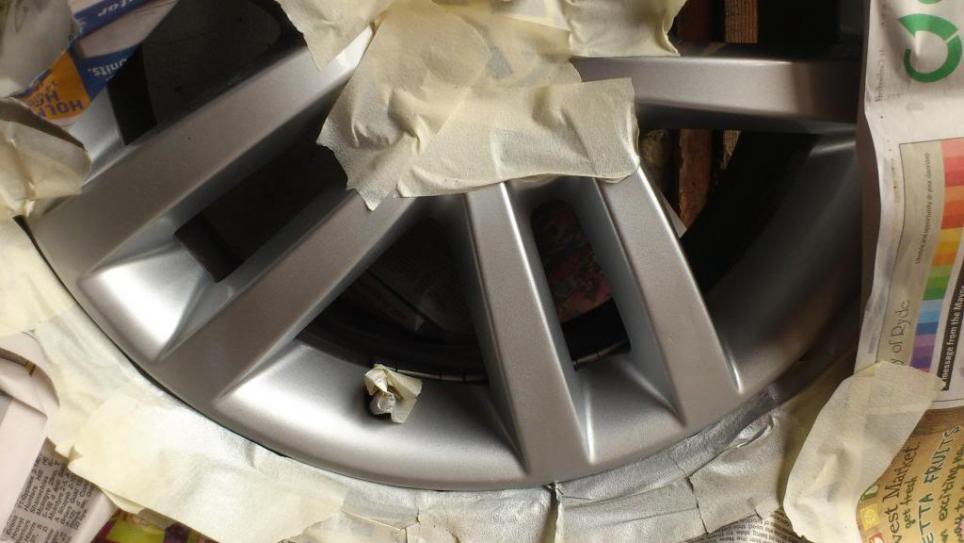
You can see at this point i have done a lot more sanding with the fine grit and it is smoother. Hoever, i was to discover after applying the primer that it wasnt quite as smooth as one would like.
Step 6: Spray on primer
While you're waiting for the primer to dry, update vwwatercooled.
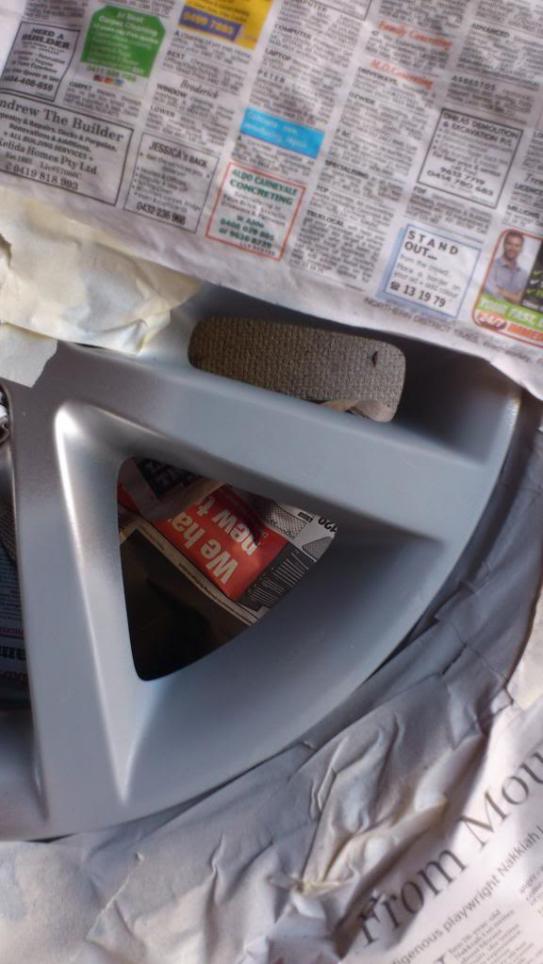
In this photo, the right most spoke under the newspaper has a defect.... use the fine grit to sand down, then respray the primer. Patience here is a virtue. Repeat as much as your patience will allow :p
This is the result after sanding again with the fine grit.

After respraying the primer, the patience has paid off and it's smoother.
Step 7: Spray on paint
So I found that taking photos of the job was useful. This is after 2 sprays. I couldn't actually recall where the damage was !

So I've had a bit of a side-track. That defect on the right most spoke wasn't gone after all. When I sprayed the silver it actually showed up again! So I sanded it all back and have re-applied it.
Good news... success!!! This is more like it.
Now just need to wait for it to cure, then onto the clear coat. Unfortunately the weather has become cooler, so drying times are extended and the paint layers don't feel as "stuck".
Step 8: Spray on clear coat
Sorry for the dodgy pic, but the weather took a turn for the worse and thunder clouds rolled in. I will see if I can get a better photo in the coming days of the finished product, but it looked decent to me and a darn sight better than the gutter rash everywhere!
First of all, I read this excellent write up & full credit goes to this fine individual.
BMWTips wheel-scuff repair
I’m posting this as a useful “how to guide” to give back to the VW community & anyone else out there who is frustrated that they’ve kerbed their alloys.
TIPS
Read the BMW tips carefully. Definitely do this on a hot summer day. Check the weather forecast to ensure there's no late rain/cool change. That can ruin the finish.
Drying times are so quick and the faster curing allows for a stronger, lasting finish in hot weather. Slow drying times can cause problems and a lumpy / damage prone finish.
I am an IT manager by trade and not a handyman by any means. I can fix taps, change an oil leak and install a light fitting... But i classify myself as an amateur. So this shows how straight forawrdish this type of project can be.
As BMW tips said... Clean clean.... And lots of patience.
EQUIPMENT
Please ensure you have all these before your start your project. Or you will be like me & waste time driving around on a spare tyre. Australian prices as at 2013 shown
Consumables:
1. Wheel cleaner $8
2. Putty $12
3. Primer paint $17
4. Silver BMW Paint code 354 (more on this in a moment) $29
5. Clear Coat $17
6. Sandpaper: 180 grit ($1.75). I also had 320 grit ($1.75) and 60 grit ($1.75) for the really lumpy dings.
I have posted a separate pic so you can see what these look like.
Tools:
1. Masking tape
2. Putty knife (I used a non-serated plastic knife)
3. P1 dust mask or better
4. Goggles
5. Old newspaper
6. Old rags
This looks like a scary list. The other guy didn’t quite list all these – so please don’t feel overwhelmed. I just want you to be prepared and not waste time while you’re waiting for things to cure.
PAINT
A few forums mentioned using Wurth paint. Another mentioned BMW Paint Code 354. Admittedly the lack of retail availability of Wurth paint was the reason I kept procrastinating.
So I bit the bullet and went to SuperCheap Auto. There I learned that Autobarn can mix aerosol paints!! I asked for BMW Paint Code 354 and they mixed it for me in 5 mins including gassing the can. Good news for us Aussie veedubbers. Good value for only $29.
Is it worth getting Wurth? i suspect the metallic "grain" or flecks will be closer to VW spec than the paint I used. I feel the colour from Autobarn was right but the grain a touch too coarse.
STEPS
Here are the steps without the pics. Scroll down to see the pics & commentary.
Step 1: Clean the wheels. This is where the wheel cleaner comes in. I used Armorall Wheel Cleaner.
Step 2: Use putty knife and trowel on the putty perpendicular to the scratch. Leave the wheel on the car for now.
Step 3: Sand down putty. Use a cork sanding block if possible. Again, do this with the wheel on the car.
Step 4: Remove the wheel from the vehicle. The BMWtips guy said to cover the vehicle in case of loose spray... I say remove the wheel & continue the project in another location. Position the wheel so the work area is at the bottom.
Step 5: Mask all exposed areas of the wheel and use newspaper to cover items such as valve, VW emblem, tyre.
Step 6: Spray on primer. This is iterative & you may need to sand again if you find defects not seen in the original sanding.
Step 7: Spray on paint. I recommend overspraying a little to blend in with the rest of the wheel. Even the pros do this.
Step 8: Spray on clear coat. I recommend overspraying just so that you seal in all exposed paint.
STEPS WITH PICS
Step 1: Clean the wheels. This is where the wheel cleaner comes in. I used Armorall Wheel Cleaner.
This is the scratch I am going to repair on my project.
Step 2: Use putty knife and trowel on the putty perpendicular to the scratch.
When you sand down the putty, a lot of dust is generated that goes everywhere. As BMWtips says, constantly wipe down the area. This will become important later on when it comes to spray time
This is how the putty looks like
This is the putty applied to the wheel
Do all of the puttying while the wheel is still on the vehicle.
Step 3: Sand down putty. Use a cork sanding block if possible. Also sand perpendicular to the scratch
This is the end result
Do all of the sanding while the wheel is still on the vehicle.
Step 4: Remove the wheel from the vehicle. The BMWtips guy said to cover the vehicle in case of loose spray... I say remove the wheel & continue the project in another location.
Step 5: Mask all exposed areas and use newspaper
Use masking tape and newspaper to cover items such as valve, VW emblem, tyre.
Tip: put the affected areas on the bottom so that after you have sanded, there is less cleaning (since the grit falls downwards).
You can see at this point i have done a lot more sanding with the fine grit and it is smoother. Hoever, i was to discover after applying the primer that it wasnt quite as smooth as one would like.
Step 6: Spray on primer
While you're waiting for the primer to dry, update vwwatercooled.
In this photo, the right most spoke under the newspaper has a defect.... use the fine grit to sand down, then respray the primer. Patience here is a virtue. Repeat as much as your patience will allow :p
This is the result after sanding again with the fine grit.
After respraying the primer, the patience has paid off and it's smoother.
Step 7: Spray on paint
So I found that taking photos of the job was useful. This is after 2 sprays. I couldn't actually recall where the damage was !
So I've had a bit of a side-track. That defect on the right most spoke wasn't gone after all. When I sprayed the silver it actually showed up again!
Good news... success!!! This is more like it.
Now just need to wait for it to cure, then onto the clear coat. Unfortunately the weather has become cooler, so drying times are extended and the paint layers don't feel as "stuck".
Step 8: Spray on clear coat
Sorry for the dodgy pic, but the weather took a turn for the worse and thunder clouds rolled in. I will see if I can get a better photo in the coming days of the finished product, but it looked decent to me and a darn sight better than the gutter rash everywhere!

Comment