 Tweet
Tweet
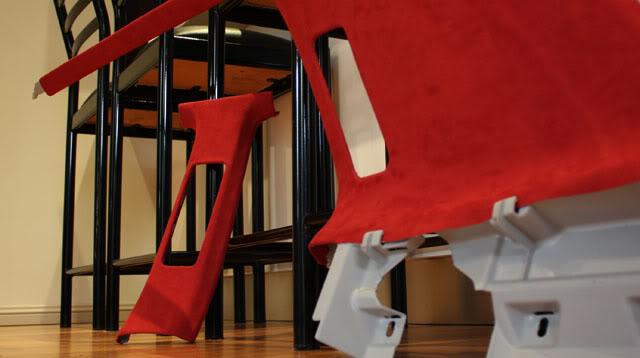
Wrote this up in another forum, thought I'd put it in here too. Basically this is a DIY for those that need to tend to their roof headlining fabric, either to get it to stick on again or totally replace it with another. Also have a write-up for pillars and other plastic trim inside the car. This DIY was based on a Mk3 Golf but should be the same for all else.
Materials:
Notes/tips:
Step 1:
Remove headliner. Depending on your car, you may have to remove some interior trim bits in order to release the headliner.
Step 2:
Remove existing material off headliner. If there is a foam backing that's still stuck on to the headliner, remove using a flapper wheel bit on a drill, Scotch-brite or sandpaper. It must be free of any old material/foam/glue.
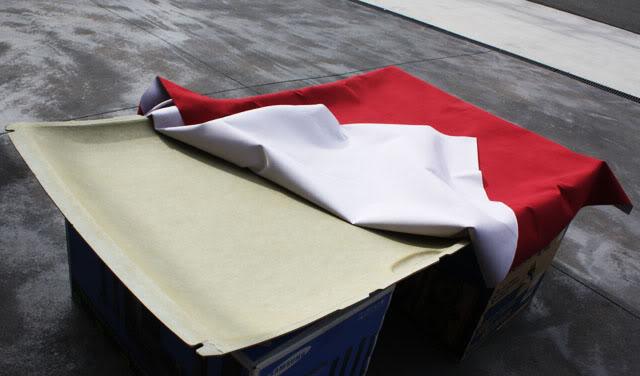
Step 3:
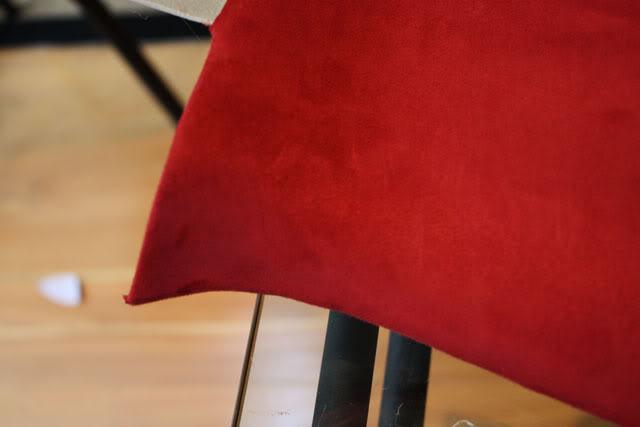
Lay on the new fabric. Ensure you have at least 2 inches of overlap on all edges.
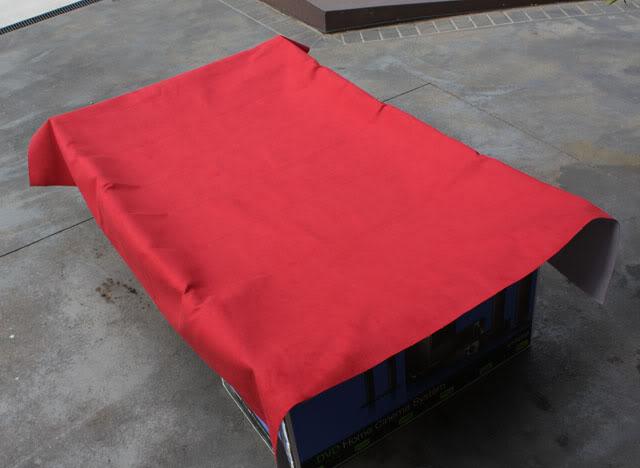
Step 4a:
This is totally dependent on you, but I've found that it's easier working from the rear-end of the headliner to the front. I usually split the headliner into sections.
Always follow instructions given by whatever product you're using. Based on the instructions on the Permatex (orange can) spray adhesive, spray from about 8" away (a little below knee height if your headliner's on the ground). Be thorough with the application, and go over it twice. Let it sit for at least 2 minutes.
Repeat this until at least the entire centre section of the headliner board is very well covered.
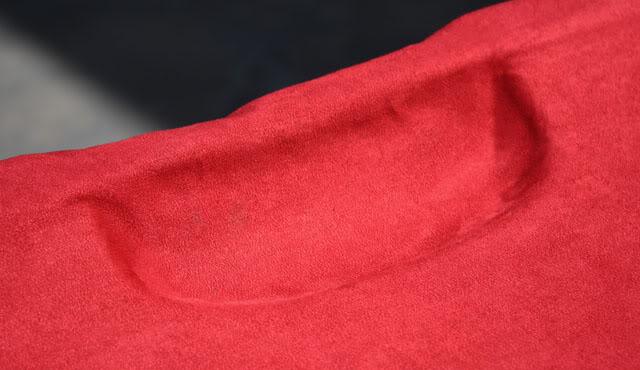
Step 4b:
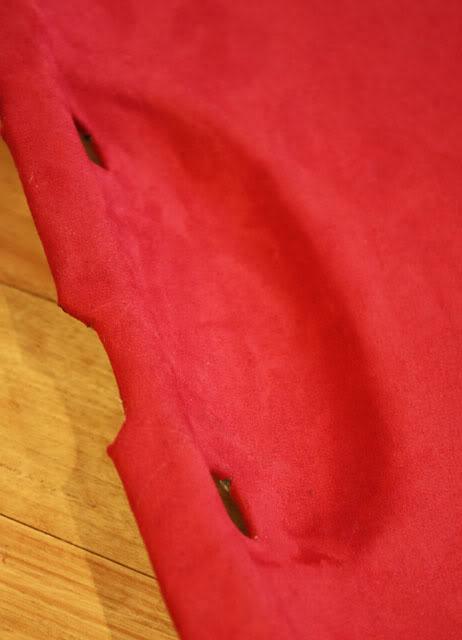
More than likely the edges won't stick very well. That's fine - peel it off with a little force and respray these sections liberally. Also, this is your chance to carefully sculpt the grab handle crevices. Spray adhesive very liberally in these sections. Using your hair-dryer, heat the section of fabric that will cover the grab handle crevice. If the glue hasn't dried, help out with the hair-dryer.
Work from the inside of the crevice, towards the side, then out onto the edges. I've found this method works quite well to keep the fabric in contour with the curves, even when I was working with the suede. If you feel air bubbles, peel it back and repeat the above. It's totally up to you whether or not to re-do it, but I can say it's well worth it once you get it right.
Step 5a:
There are two things you can do now. For the lazy, just cut off the excess fabric that is overhanging. For the fussy people, do the following instead.
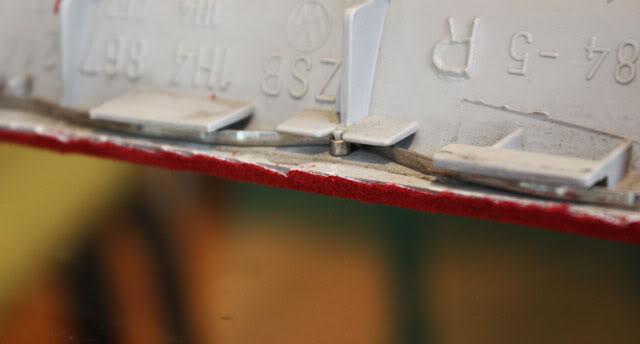
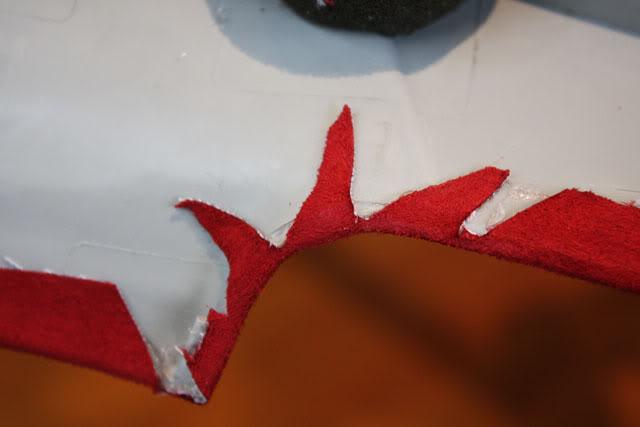
Trim off excess fabric on the edges, leaving 1-2" of overlap. Along these overlaps, cut tabs of trapezoids about 2.5" long. Those who used to cover their homework books in primary school will know what I mean Sorry I didn't take a pic of this, but the following is similar:
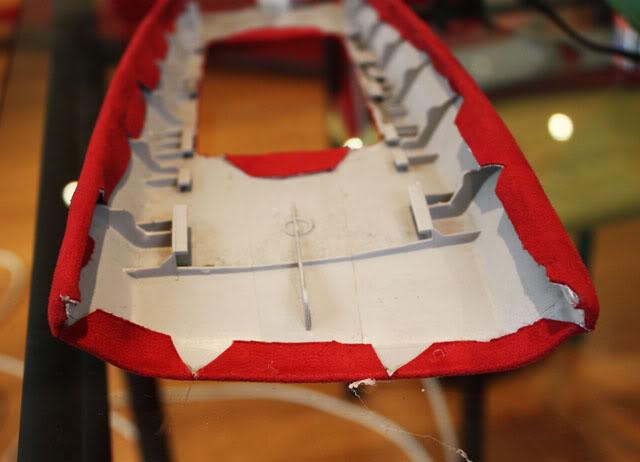
For every uneven section, cut a new tab out. You need to maintain the original outline of the headliner board as close as you can so as to ensure all the clips/bolts will fit in place without obstruction. Reason for cutting the tabs only 2.5" long is because the hot-glue will end up hardening very quickly, so there's not a lot of working time.
Make sure these tabs are long for grabbing on to.
Step 5b:
Time for hot-gluing. What I do is squirt a line of hot-glue along the edge of a tab where it meets the headliner, then pull the tab over and pinch in place. Then when the hot-glue has hardened, paste the entire tab onto the headliner board. Repeat for all the cute little tabs you cut out.
We're getting pretty ****ing close to finishing now. Have a quick beer.
Step 6:
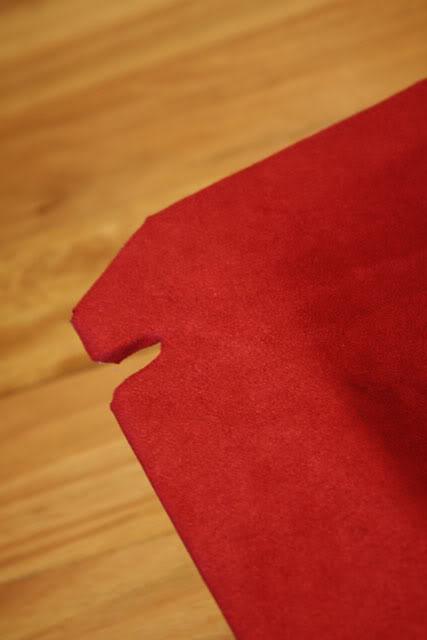
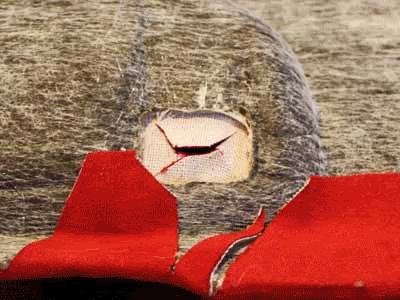
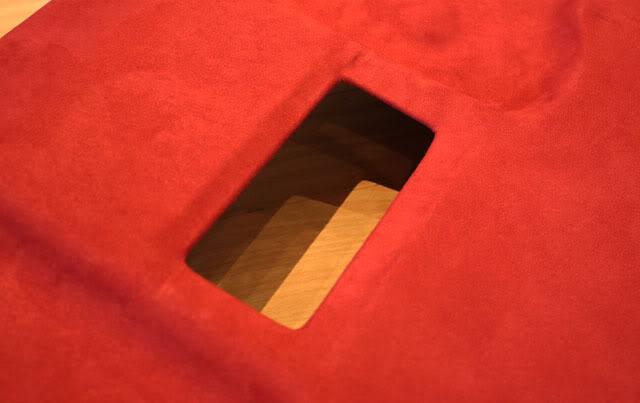
Cut holes where the grab handles, visors and interior light attaches on/threads through to the roof. Cut little tabs like in step 5a, and glue them on like in step 5b:
You shouldn't be able to feel your fingers now.
Step 7:
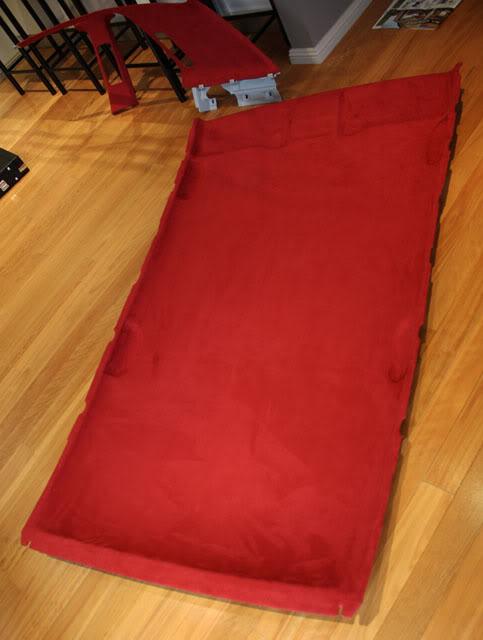
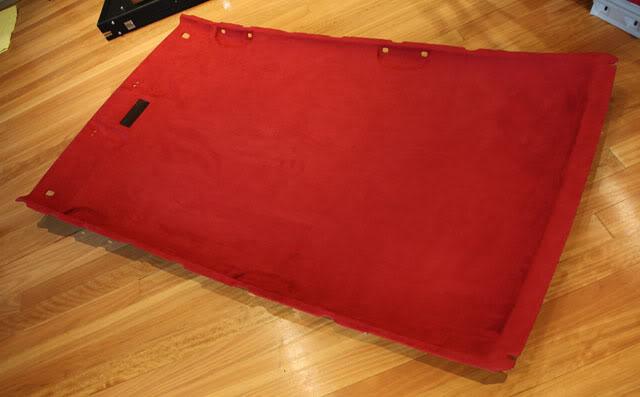
To finish up, brush off any dirty bits and pieces that had worked it's way onto your new headliner. Now go and attach it back on to the car!
Here's some finishing pics:
Materials:
- Flapper wheel/Scotch-Brite/~180 grit sand paper
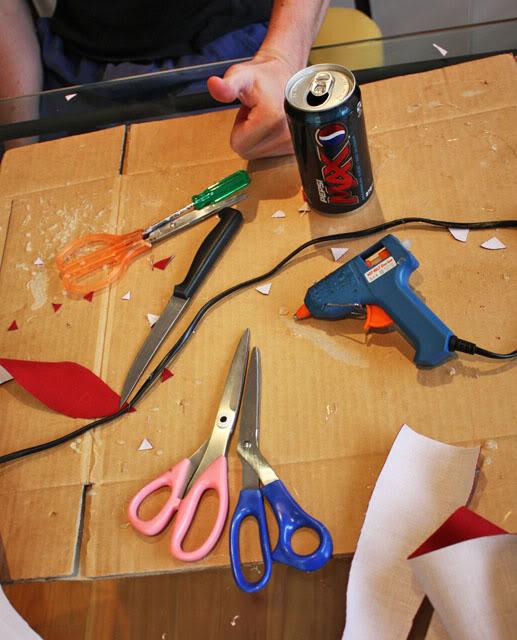
- Dustpan brush
- Sharp pair of scissors
- Fabric of your choice (4x1.5m was enough to cover the headliner + A/B/C pillars of a Golf)
- Hair-dryer
- Spray adhesive
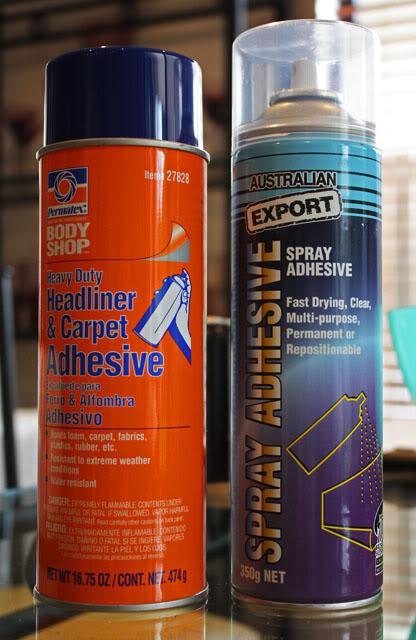
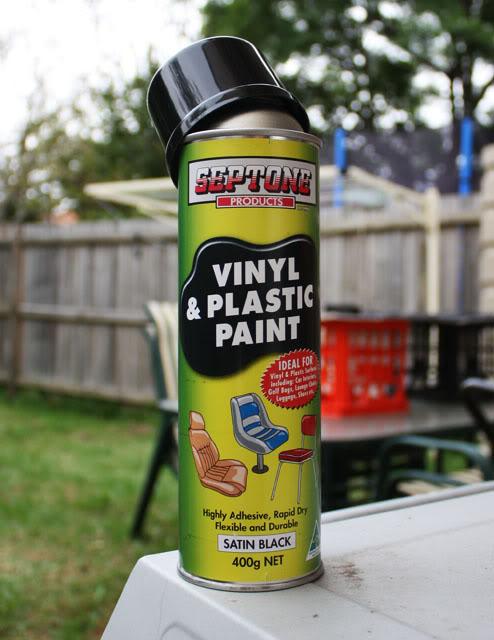
One on the left is the one to get. $22.99/can @ Autobarn, was enough to do a complete Golf headliner with leftover. If you can find it, 3M Super90 or Super74 is also recommended (found Super74 @ Clark Rubber before). - Hot-glue gun (Spotlight sells a cheap one with 100 refills for cheap)
- Patience, tolerance to finger-tip burns and beer (or Pepsi Max).
Notes/tips:
- Work in an open area. You'll have adhesive being sprayed everywhere and strands of hardened hot-glue all around, and the last thing you want is wrecking your new headliner with glue residue.
- Work comfortably. This can take a whole day if it's your first time and while the job isn't hard, it can be a burden on your back.
- Don't skimp on equipment. A decent pair of scissors would make life a lot easier. Same with the spray adhesives i.e. in the above pic, don't go with the one on the right. It may be half the price but it also means you get a lot less out of it and worse yet, your new headliner may end up falling sooner than you hoped.
- When choosing your fabric, there are a few points to consider other than the design/colour.
- Ideally the fabric should be fire-retardant due to safety concerns, but we all know safe = boring.
- Thick fabric versus thin would hide imperfections more easily.
- Stretchable/elastic fabric will be more easily shaped around contours and crevices, but if you're using a patterned fabric, this could create unwanted distortions.
- If you're using thick fabric (e.g. backed micro-suede) you can also apply the adhesive on the fabric itself. DO NOT do this on thin fabrics though (like the ones used for clothes), as it can seep through and cause dark blotches.
Step 1:
Remove headliner. Depending on your car, you may have to remove some interior trim bits in order to release the headliner.
Step 2:
Remove existing material off headliner. If there is a foam backing that's still stuck on to the headliner, remove using a flapper wheel bit on a drill, Scotch-brite or sandpaper. It must be free of any old material/foam/glue.
Step 3:
Lay on the new fabric. Ensure you have at least 2 inches of overlap on all edges.
Step 4a:
This is totally dependent on you, but I've found that it's easier working from the rear-end of the headliner to the front. I usually split the headliner into sections.
Always follow instructions given by whatever product you're using. Based on the instructions on the Permatex (orange can) spray adhesive, spray from about 8" away (a little below knee height if your headliner's on the ground). Be thorough with the application, and go over it twice. Let it sit for at least 2 minutes.
Repeat this until at least the entire centre section of the headliner board is very well covered.
Step 4b:
More than likely the edges won't stick very well. That's fine - peel it off with a little force and respray these sections liberally. Also, this is your chance to carefully sculpt the grab handle crevices. Spray adhesive very liberally in these sections. Using your hair-dryer, heat the section of fabric that will cover the grab handle crevice. If the glue hasn't dried, help out with the hair-dryer.
Work from the inside of the crevice, towards the side, then out onto the edges. I've found this method works quite well to keep the fabric in contour with the curves, even when I was working with the suede. If you feel air bubbles, peel it back and repeat the above. It's totally up to you whether or not to re-do it, but I can say it's well worth it once you get it right.
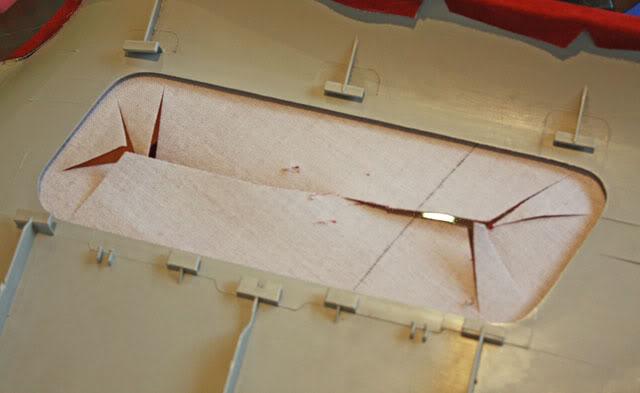
Step 5a:
There are two things you can do now. For the lazy, just cut off the excess fabric that is overhanging. For the fussy people, do the following instead.
Trim off excess fabric on the edges, leaving 1-2" of overlap. Along these overlaps, cut tabs of trapezoids about 2.5" long. Those who used to cover their homework books in primary school will know what I mean
Sorry I didn't take a pic of this, but the following is similar:For every uneven section, cut a new tab out. You need to maintain the original outline of the headliner board as close as you can so as to ensure all the clips/bolts will fit in place without obstruction. Reason for cutting the tabs only 2.5" long is because the hot-glue will end up hardening very quickly, so there's not a lot of working time.
Make sure these tabs are long for grabbing on to.
Step 5b:
Time for hot-gluing. What I do is squirt a line of hot-glue along the edge of a tab where it meets the headliner, then pull the tab over and pinch in place. Then when the hot-glue has hardened, paste the entire tab onto the headliner board. Repeat for all the cute little tabs you cut out.
We're getting pretty ****ing close to finishing now. Have a quick beer.
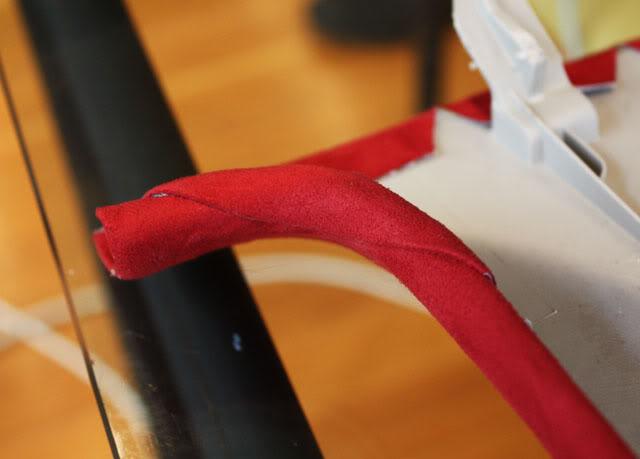
Step 6:
Cut holes where the grab handles, visors and interior light attaches on/threads through to the roof. Cut little tabs like in step 5a, and glue them on like in step 5b:
You shouldn't be able to feel your fingers now.
Step 7:
To finish up, brush off any dirty bits and pieces that had worked it's way onto your new headliner. Now go and attach it back on to the car!
Here's some finishing pics:


Comment